- VMware
- 03 April 2020 at 13:20 UTC
-

- 1/2

As you already know, you can easily create copies of VMware virtual machines using the VMware Workstation cloning wizard, as well as by duplicating the desired virtual machine folder from the file explorer.
Even if the cloned virtual machines will seem to be working properly, you may encounter a problem one day if you didn't make them unique after cloning.
And this is especially true if you want to connect to an Active Directory domain, share files between them, ...
Note that VMware recommends changing the SID of your Windows virtual machines to make them truly unique across the network : Windows SID needs to be changed after copying a virtual machine directory (1000528)
- Cloning a virtual machine with a client version of Windows as a guest OS
- Cloning a virtual machine with a server version of Windows as a guest OS
- Manually copy the folder of a virtual machine
1. Cloning a virtual machine with a client version of Windows as a guest OS
To begin, we will clone a Windows 10 x64 virtual machine.
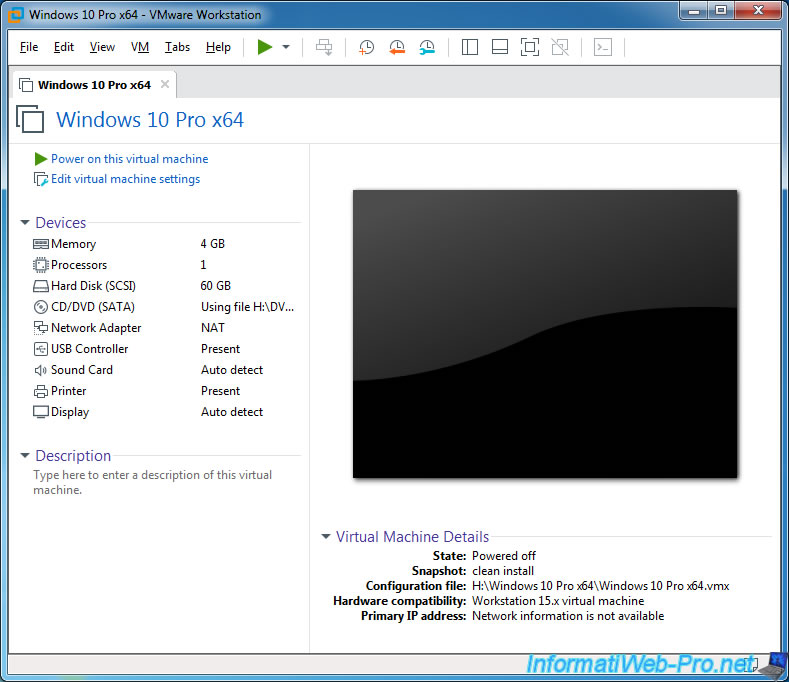
As you can see, the network card of this virtual machine has this MAC address : 00:0C:29:8A:DD:54
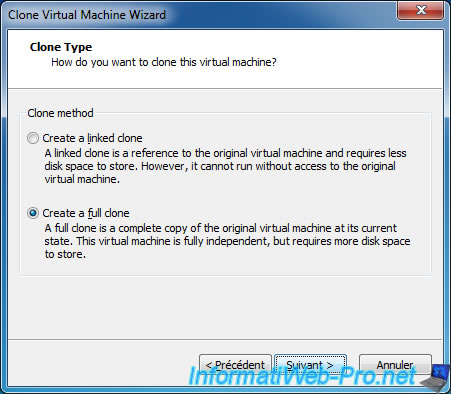
We create a full clone of this virtual machine.
Now we have 2 identical virtual machines.
The problem is that they will not be unique on the network, which may be problematic for different features.

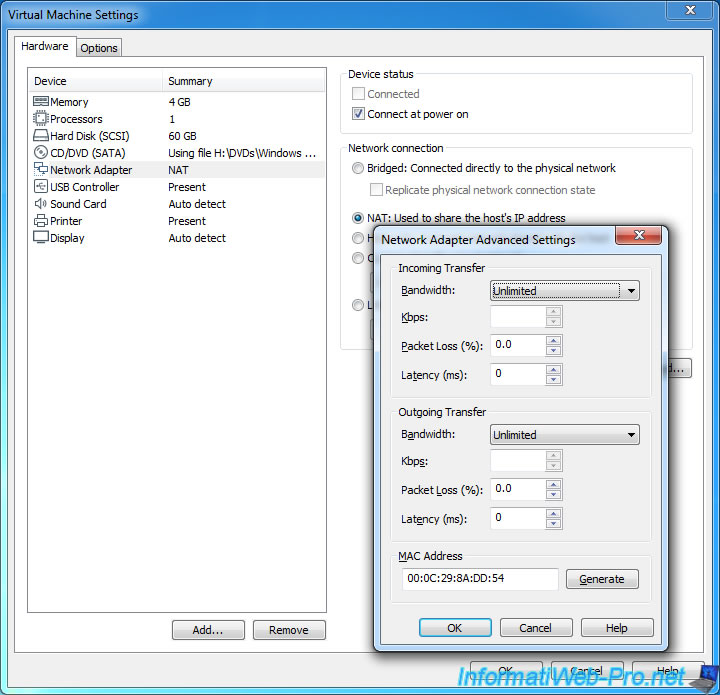
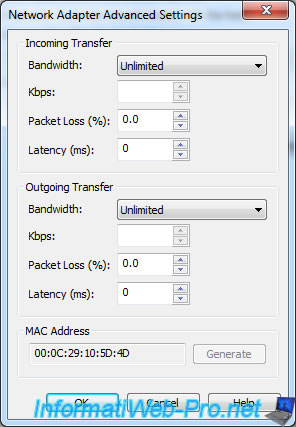
As you can see, the cloned virtual machine has, by default, the same MAC address : 00:0C:29:8A:DD:54.
But the MAC address is a physical address that is supposed to be unique by network card (even if you buy several network cards of the same model at the same time).
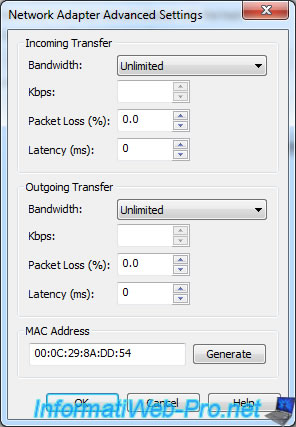
However, when you start the cloned VM for the first time, VMware Workstation will fix this problem by associating a new unique MAC address to this virtual machine.
Another problem that will occur if you launch the source VM and its clone at the same time is the NETBIOS name conflict.
By default, each Windows computer must have an unique NETBIOS name so that it can be uniquely identified on the network.
If you don't change the NETBIOS name on the cloned virtual machine, you will not be able to access shared folders of the other virtual machine with the same name as you.
Indeed, Windows will not know which machine hosts which network share.
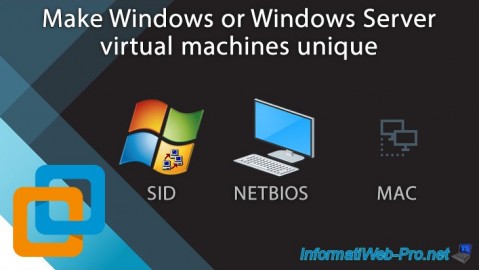
The latest information that individuals typically don't know is that each machine running Windows or Windows Server has an unique identifier called SID.
This is also the case for each user and group of users (if it's a security group).
To know the SID of your computer, simply download the Windows Sysinternals PsGetSid program on the Microsoft site.
![]()
Then, start a command prompt, move to the "PSTools" folder and type this command : PsGetSid.exe
As you can see, your 2 virtual machines have the same name and SID.
![]()
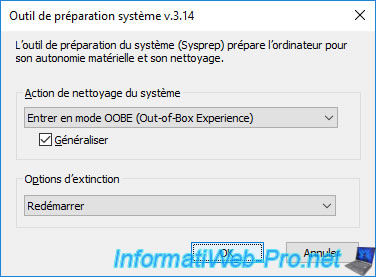
To change this SID, you will need to use the sysprep program that is installed with Windows from Windows Vista and its server equivalent : Windows Server 2008.
Pour les autres versions de Windows, vous devrez télécharger cet utilitaire depuis le site de Microsoft :
- Windows 2000
- Windows Server 2003 : SP1, SP2, x64
- Windows Server 2003 R2
Note that the sysprep tool for Windows XP is available on your Windows XP installation CD in this compressed file : SUPPORT\TOOLS\DEPLOY.CAB
Check the "Generalize" box and click OK.
Note that this action must be performed before you install programs.
Share this tutorial
To see also
-

VMware 3/16/2013
VMware Workstation - Boot a VM on the BIOS / EFI firmware
-

VMware 2/7/2020
VMware Workstation 15 - Installation on Linux
-

VMware 12/24/2021
VMware Workstation 15 - Slice the virtual hard disk of a VM
-

VMware 12/10/2021
VMware Workstation 15.5 - Convert a Virtual PC virtual machine to a VMware VM
You must be logged in to post a comment