- VMware
- 10 July 2020 at 08:27 UTC
-

- 1/2

VMware Workstation is a professional virtualization solution and offers many settings for your virtual machines.
The purpose of this article is to introduce you to all the settings available for VMware virtual machines and what these options are for.
To get started, open the settings of your virtual machine by clicking on : Edit virtual machine settings.
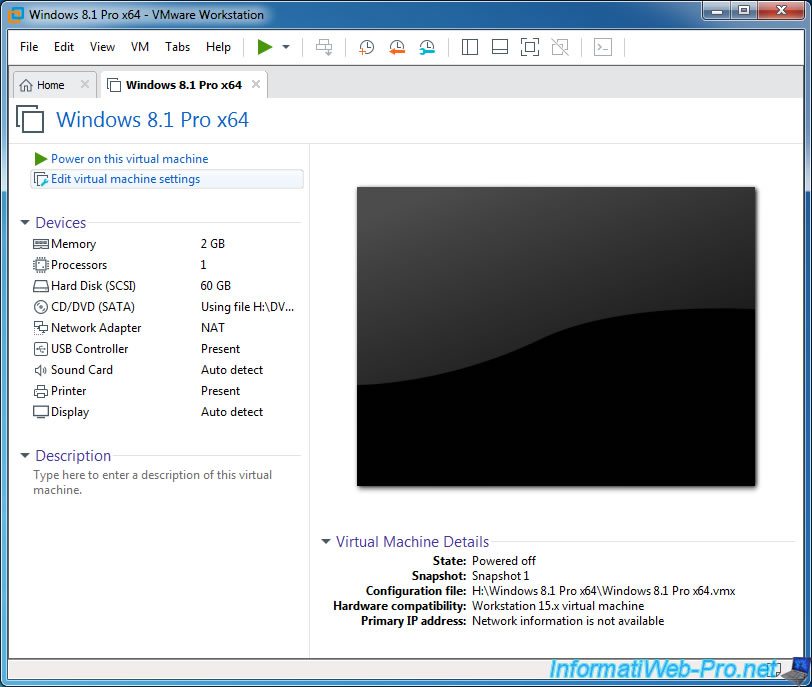
1. Hardware (virtual hardware)
Depending on the guest OS installed, more or less devices will be available.
Nevertheless, you will most certainly find these :
- Memory : RAM
- Processors : processor(s) and virtualization technologies
- Hard Disk (...) : virtual hard disk and tools
- CD/DVD (...) : virtual CD/DVD drive
- Network Adapter : network adapter and network access mode (NAT, bridged, ...)
- USB Controller : USB controller, USB version to use, ...
- Sound Card
- Printer : allows you to use to the physical PC printer from the virtual machine (disabled by default on recent versions of VMware Workstation)
- Display : display settings and 3D acceleration
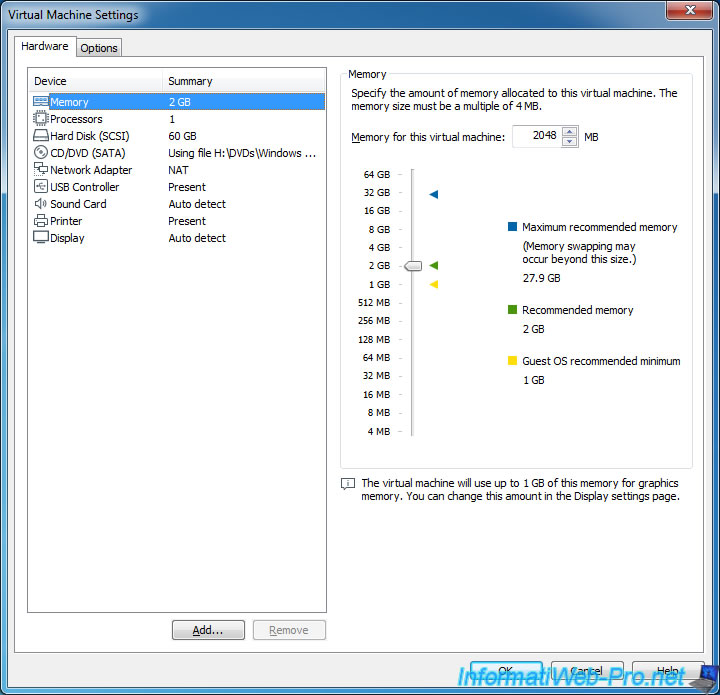
1.1. Memory (RAM)
Allows you to set the amount of RAM to allocate to the virtual machine.
The amount of RAM to allocate to your virtual machine will depend on :
- guest OS installed : for example, Windows uses a lot more RAM than Linux
- the amount of RAM available on the host PC (physical PC)
Allocating more RAM can enable a virtual machine to be smoother and more efficient.
But, if you allocate too much RAM, the host OS may not have enough RAM to function properly.
In this case, the host PC will slow down and the virtual machine will finally slow down and maybe even crash.
If you don't have a lot of RAM, you will have to find a happy medium. And preferably, put less RAM for the virtual machine to prevent your host PC to slow down.
Note that VMware always tells you :
- the maximum amount of RAM that you can allocate to this virtual machine
- the amount of RAM recommended
- the minimum amount of RAM to allocate for the guest OS to work
Note that a part of this RAM will be used as video memory (VRAM - Video Random Access Memory).
This amount of video memory is defined in : Display.
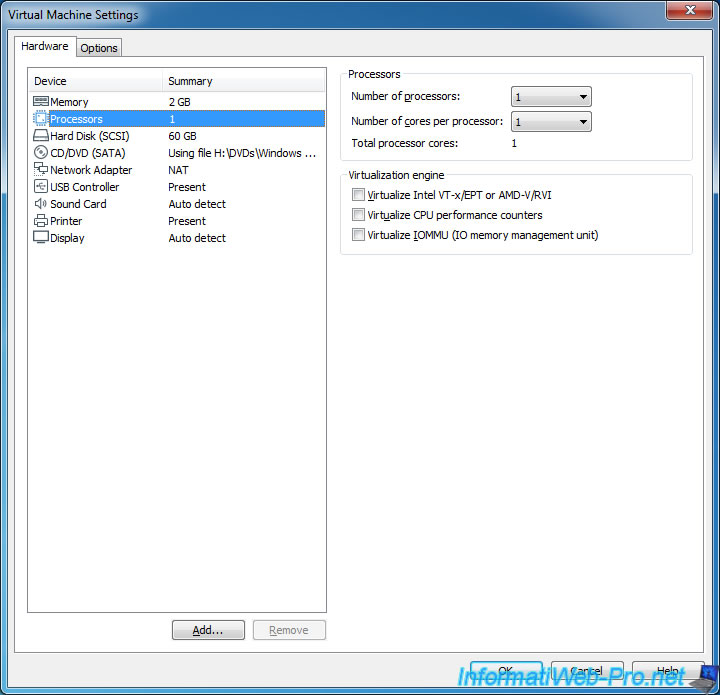
1.2. Processors (CPUs)
For each virtual machine, you will be able to define how many processors and cores you want to allocate to this virtual machine.
This is useful for increasing the performance of a virtual machine, but also for the virtual machine to meet the requirements of some operating systems or virtualization servers (such as VMware ESXi for example).
Also, note that you can allocate 2 cores of your physical processor so that they are visible to the guest OS as 2 separate processors.
For this, you will need to select :
- Number of processors : 2
- Number of cores per processor : 1
Finally, the virtual machine will see 2 separate processors with 1 heart each.
For virtualization options, you will be able to :
- Virtualize Intel VT-x/EPT or AMD-V/RVI : virtualize the Intel VT-x/EPT or AMD-V/RVI virtualization instructions of the host PC processor so that they can also be available in the virtual machine.
This will only be necessary in rare cases : when you want to install VirtualBox in a VMware virtual machine, virtualize a virtualization server (as VMware ESXi or Citrix XenServer), ... - Virtualize CPU performance counters : virtualize CPU performance counters to monitor CPU usage with applications running in the virtual machine, using OProfile (on Linux) or VTune (on Windows).
- Virtualize IOMMU (IO memory management unit) : allows you to virtualize the IOMMU (of AMD) or Intel VT-d and thus block the direct access to the memory from the virtual machine.
This feature is required by the Citrix XenServer virtualization server when you want to test PCI passthrough with a Citrix VM on Windows.
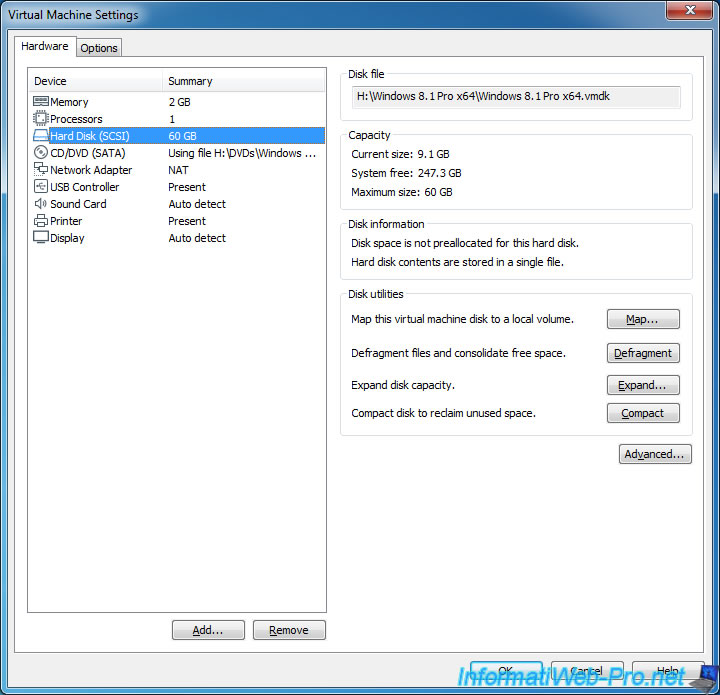
1.3. Hard Disk (virtual hard disk)
Allows you to know the location of the virtual hard disk on the host PC.
To know its current size, its maximum size, to map it on the host PC, ...
For more information about these options, see our tutorial : Manage virtual hard disks (map, defragment, expand, clean up, ...).
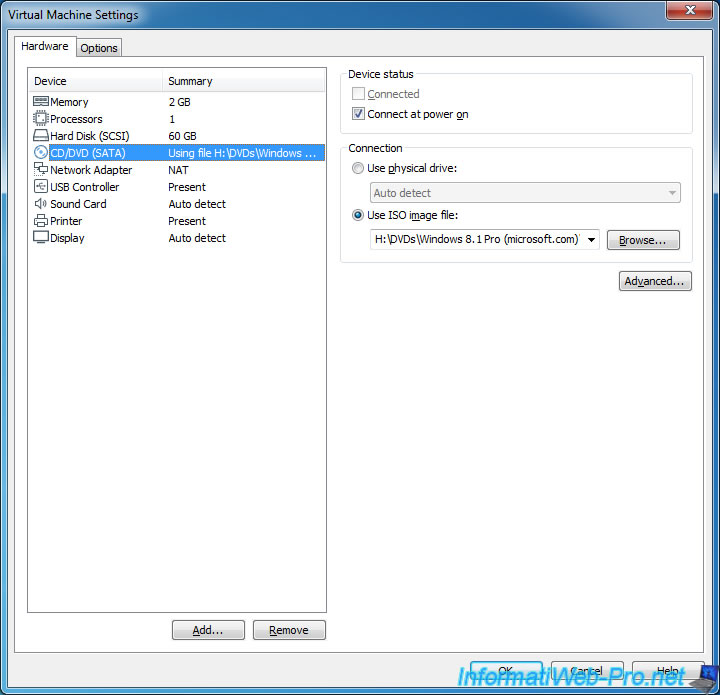
1.4. CD/DVD (virtual CD/DVD drive)
For the virtual CD/DVD drive, you will be able to choose :
- Connected : to insert the CD/DVD in the virtual CD/DVD drive
- Connect at power on : to insert the CD/DVD each time the virtual machine starts
In addition, you will be able to choose :
- to redirect the CD/DVD from the host PC's physical CD/DVD drive to the virtual CD/DVD drive
- or insert an iso file into this one
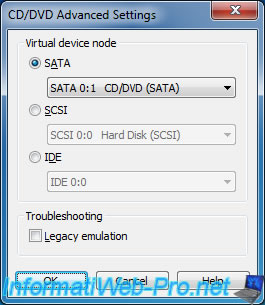
By clicking Advanced, you can also choose the type of connection to use (SATA, SCSI or IDE), as well as its position.
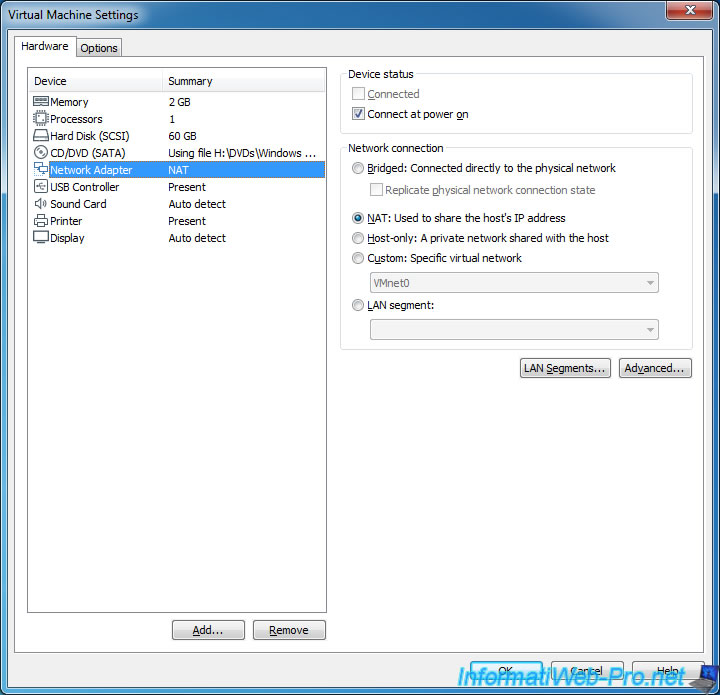
1.5. Network Adapter (NIC)
For the settings of the virtual network cards, you will first find the connection mode (Network connection):
- Bridged : connects the virtual machine to the physical network as if it were a real machine
- NAT : connects the virtual machine to a subnet virtualized by VMware Workstation
- Host-only : connects the host PC and the virtual machine to the same virtual network so that they can communicate with each other. However, the virtual machine will not be able to access the Internet.
- Custom : connects the virtual machine to a virtual network created via Virtual Network Editor
- LAN segment : allows you to use the notion of VLAN to isolate some virtual machines
Note that the "LAN Segments" button is simply used to add and manage different segments (or VLANs).
To learn more about network access modes and "LAN Segments", refer to our tutorial : Network access modes presentation and create custom virtual networks
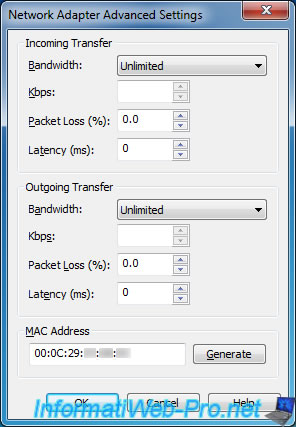
By clicking on the Advanced button, you will be able to manage :
- the MAC address of the virtual machine. Note that all virtual machines will have a different MAC address always starting with "00:0C:29".
- the bandwidth of your virtual machine with a predefined bit rate (like : 56 Kbps modem, 10 Mbps cable, ...). This may be useful for some tests or when you share the virtual machine with others using VMware Workstation.
- limit bandwidth with a specific bit rate in Kbps
- the number of lost packets allowed
- the latency you want to simulate (from 0 to 2,000 ms)
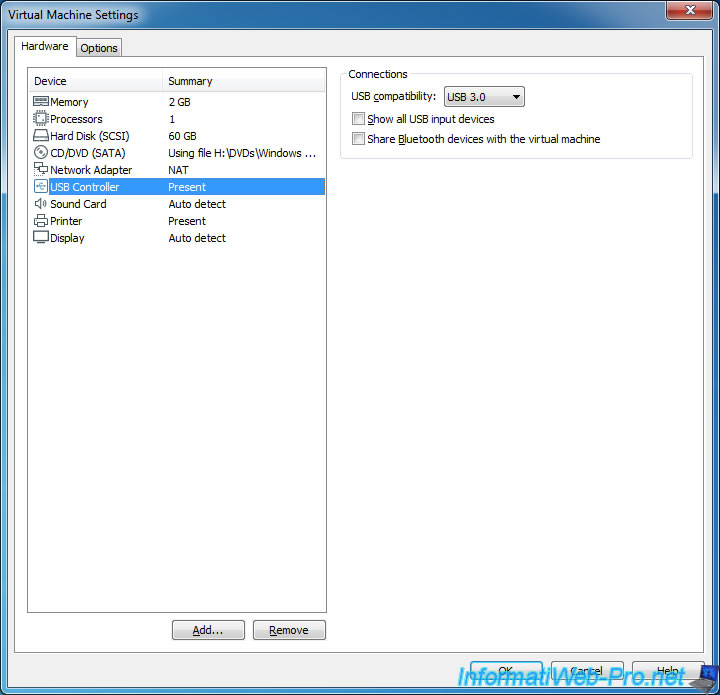
1.6. USB Controller
To begin, you can choose the version of the USB controller to virtualize : 1.1, 2.0 or 3.0 (or 3.1 since version 15.5.6 of VMware Workstation).
Info : USB 3.0 and 3.1 are faster than USB 2.0, and USB 2.0 is faster than USB 1.1.
However, depending on the OS you want to virtualize, VMware will default to the best version supported by the guest OS by default.
For example, if you are installing Windows XP or Windows 7, VMware will default use an USB 2.0 controller, because USB 3.0/3.1 is not supported natively by these versions of Windows.
However, starting with Windows 8, VMware will choose USB 3.0/3.1 by default.
That said, although VMware uses an USB 2.0 controller by default for Windows 7 as guest, it's still possible to use an USB 3.0 or 3.1 controller by following this tutorial : Use an USB 3.0/3.1 controller in a Windows 7 virtual machine
You will also find these 2 options :
- Show all USB input devices : to also display HID (Human Interface Device) devices such as USB 1.1 or 2.0 mice and keyboards in addition to other removable devices (such as USB keys and other) in the status bar of the virtual machine.
- Share Bluetooth devices with the virtual machine : to virtualize the host PC's Bluethooth adapter (if available) to connect Bluetooth devices to the guest OS.
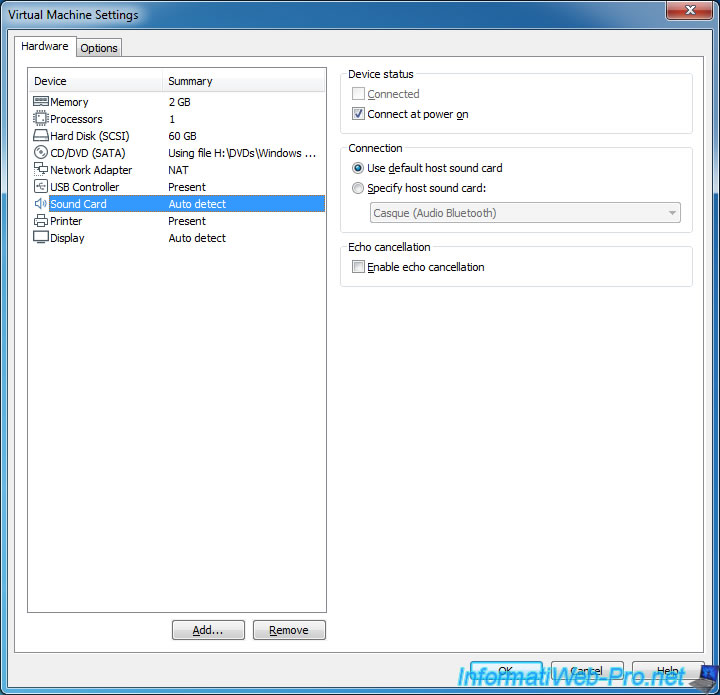
1.7. Sound Card
For the virtual sound card, you can choose on which sound card you want to redirect the sound of the desired virtual machine.
This can allow you for example to redirect the sound of a virtual machine on the speakers of your host PC and the sound of another virtual machine on your headphones.
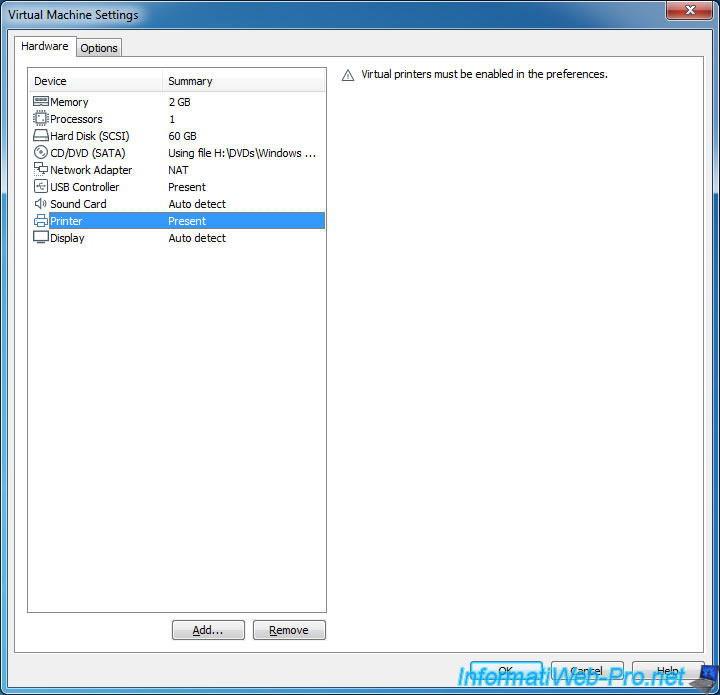
1.8. Printer (printer redirection)
When you enable this feature (Virtual printers), VMware will allow the guest OS to print to any printer available on the host PC.
However, note that in recent versions of VMware Workstation, this feature is disabled by default.
In addition, once you enable this feature, you will need to install VMware Virtual Printer from the "VM -> Install Virtual Printer" menu.
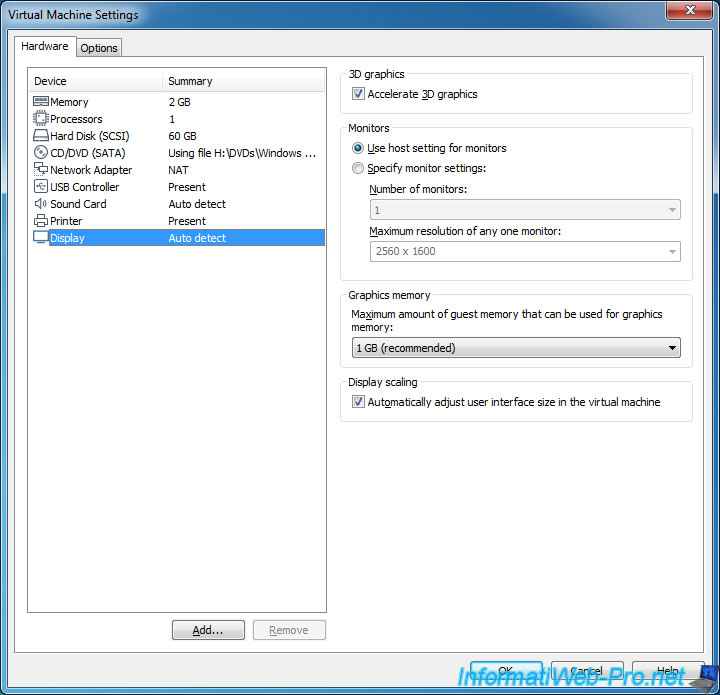
1.9. Display
To finish with the default hardware used by the majority of virtual machines created with VMware Workstation, you will find the Display component that will allow you to :
- enable or disable 3D acceleration (Accelerate 3D graphics) : required especially for Windows 7 Aero window transparency
- the ability to use the physical monitor (screen) settings or use multiple monitors with a VMware Workstation virtual machine (this will need to be full screen for this to work)
- to define the amount of graphics memory (video memory) to allocate to this virtual machine.
Warning : the amount of graphic memory specified here will be deducted from the RAM allocated to your virtual machine.
In other words, if you allocate 4 GB of RAM and 1 GB of graphics memory (VRAM) to your virtual machine, your virtual machine will only have 3 GB of RAM and 1 GB of VRAM. - automatically adjust the window size of your virtual machine according to the resolution used by the guest OS.
Share this tutorial
To see also
-

VMware 3/16/2013
VMware Workstation - Boot a VM on the BIOS / EFI firmware
-

VMware 2/7/2020
VMware Workstation 15 - Installation on Linux
-

VMware 12/24/2021
VMware Workstation 15 - Slice the virtual hard disk of a VM
-

VMware 12/10/2021
VMware Workstation 15.5 - Convert a Virtual PC virtual machine to a VMware VM
You must be logged in to post a comment