Virtualize Unraid 6.9.2 with VMware ESXi 6.7
- VMware
- VMware ESXi
- 17 December 2025 at 14:08 UTC
-

- 3/4

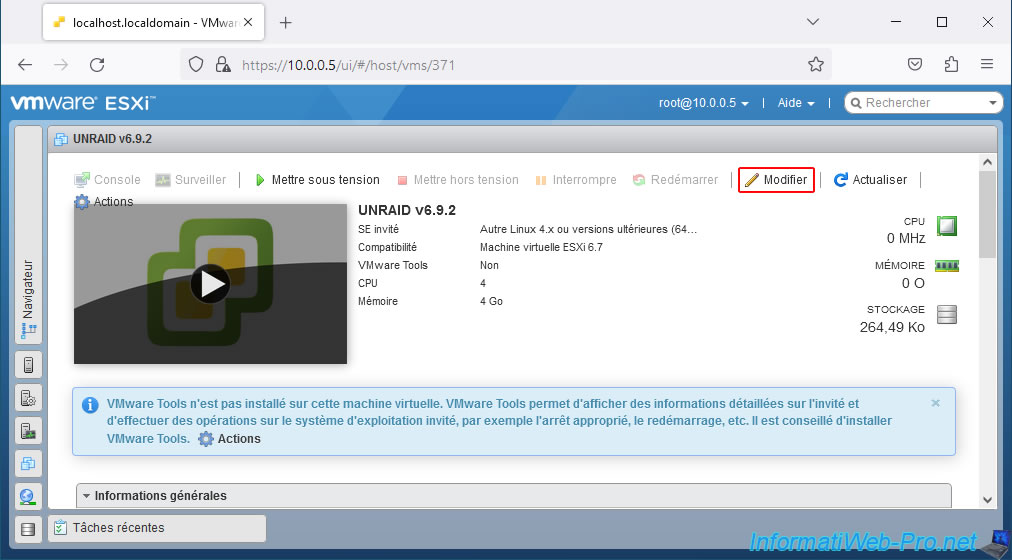
5. Change the USB controller version of your Unraid virtual machine
If your VMware ESXi server only has USB 3.0 ports, and you've plugged your Unraid USB key into a USB 3.0 port on your server, you'll need to change the USB controller used by your Unraid virtual machine.
To do this, while the virtual machine is powered off, click Change.
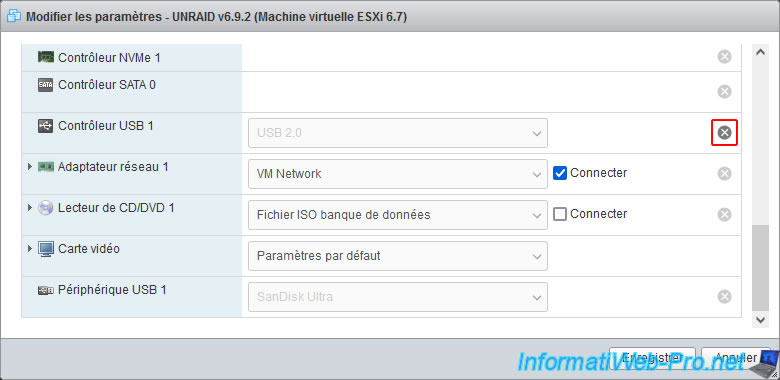
As you can see, you can't directly change the version of the USB controller you're using.
So, you must first delete the existing one by clicking the cross to its right.
Then, click on: Add another device -> USB Controller.
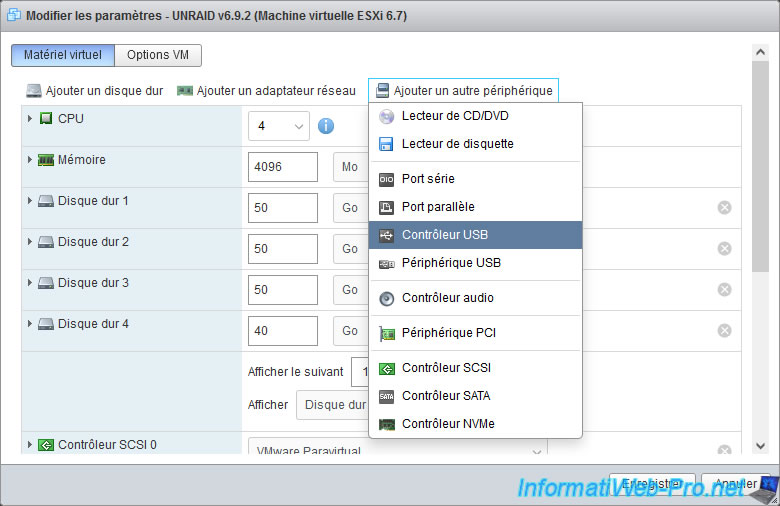
Ignore the warning at the top of the window stating that this virtual machine only supports one USB 2.0 device.
This warning only means that you can only use one USB controller in this virtual machine, and this message appears only because VMware ESXi counts the newly added USB controller as the old one you just removed.
Note: if you attempt to remove the old USB controller, then save the change and then add the new USB controller, you will see that this warning will not appear.
Plain Text
This virtual machine configuration only supports 1 USB 2.0 device(s).
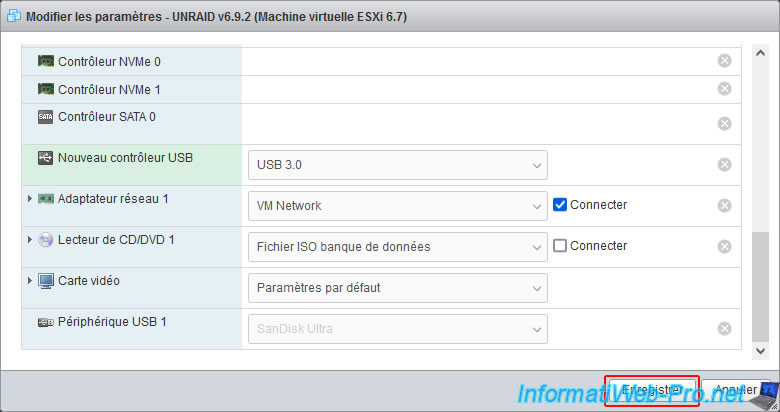
In the "New USB Controller" line, select "USB 3.0".

The new USB controller being used is now a "USB 3.0" version.
Click Save.
As expected, the changes were saved without issue.
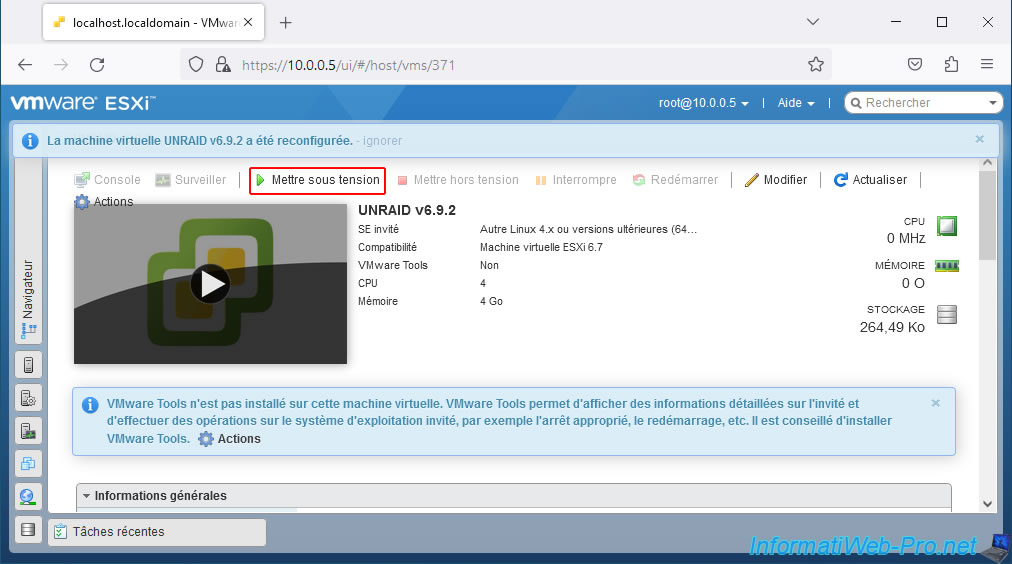
Click "Power On" to restart your virtual machine.
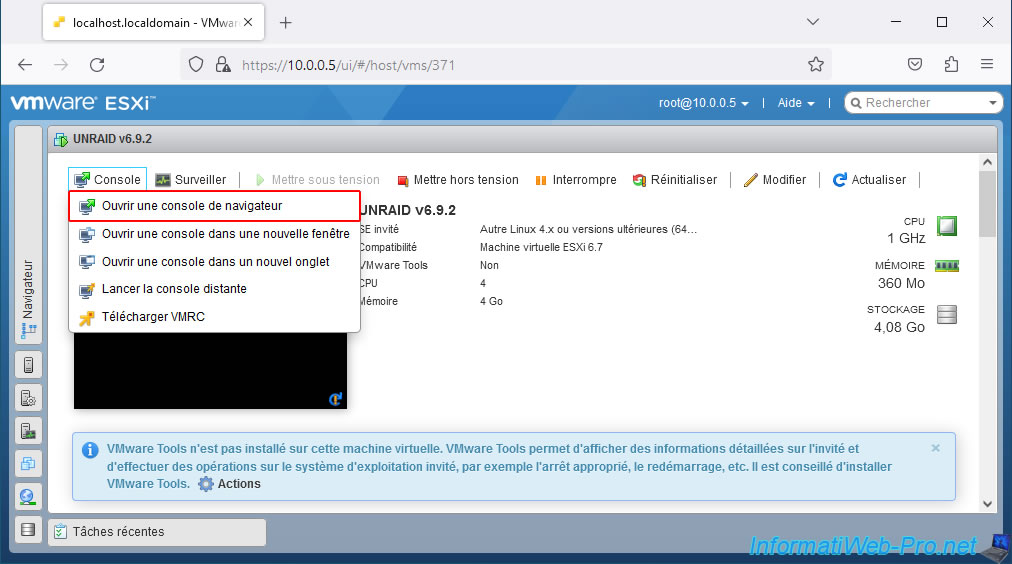
Open your Unraid virtual machine console again.
The "PlopKexec" tool appears.
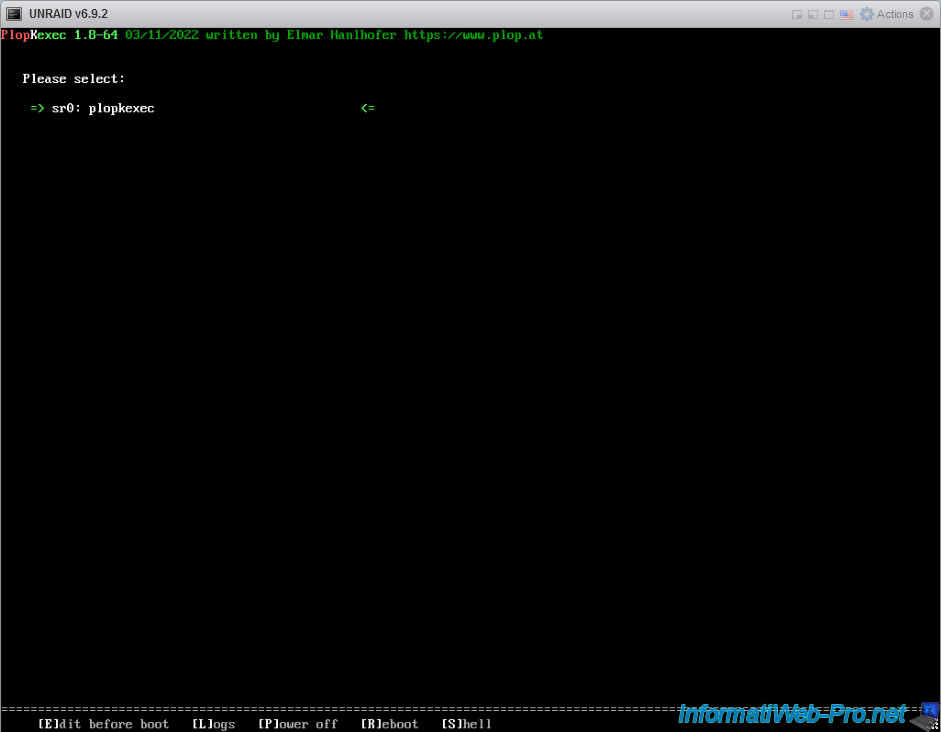
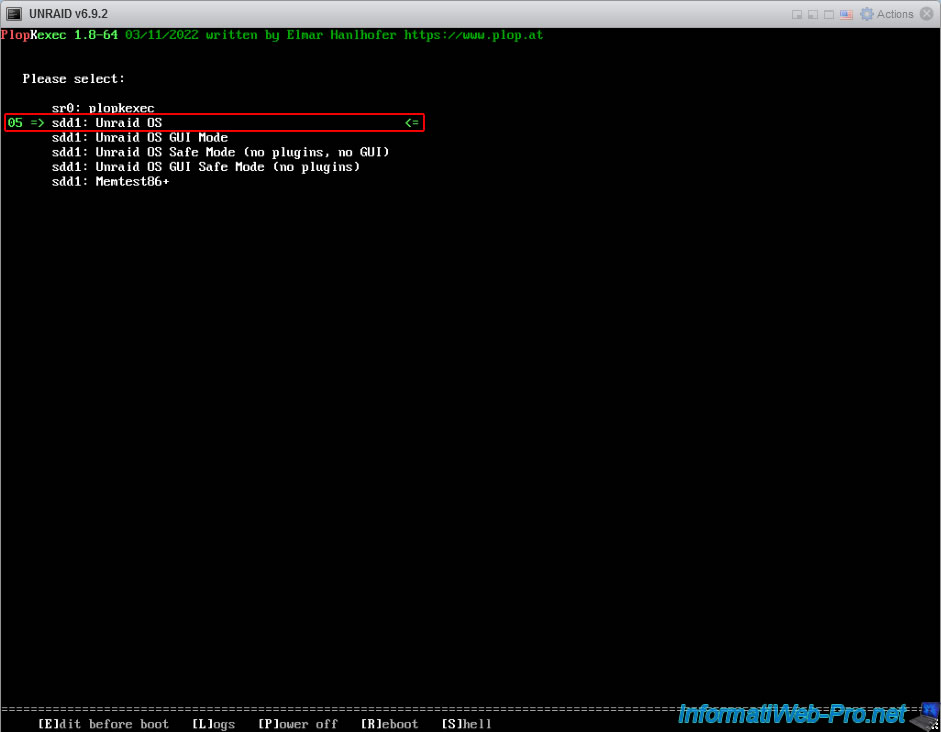
A few seconds later, you will see the Unraid boot options appear.
Plain Text
sr0: plopkexec
sdd1: Unraid OS
...
Wait while PlopKexec loads the Unraid kernel.
Plain Text
Selected: Unraid OS

Loading kernel...

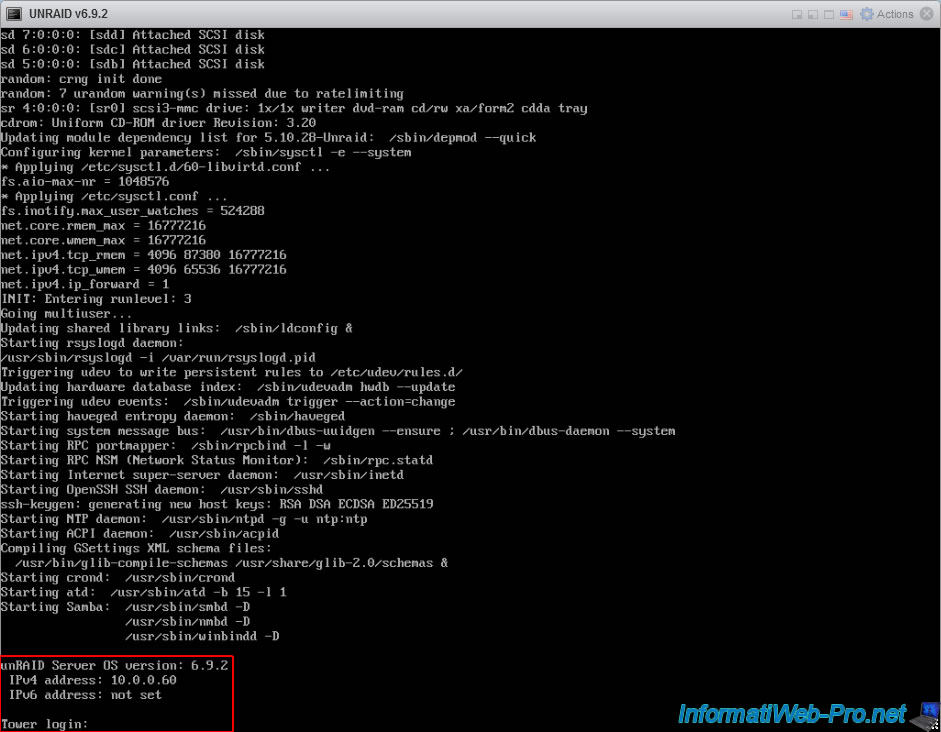
As expected, Unraid starts and this is displayed when it finishes loading.
Plain Text
unRAID Server OS version: 6.9.2
IPv4 address: 10.0.0.60
IPv6 address: not set

Tower login:
6. Start Unraid evaluation period
Once Unraid has finished loading, type its IP address into your web browser's address bar.
You will be automatically redirected to the Unraid registration page.
Click the "Get trial key" button to obtain a trial license that will be linked to your USB drive's unique identifier (Flash GUID).
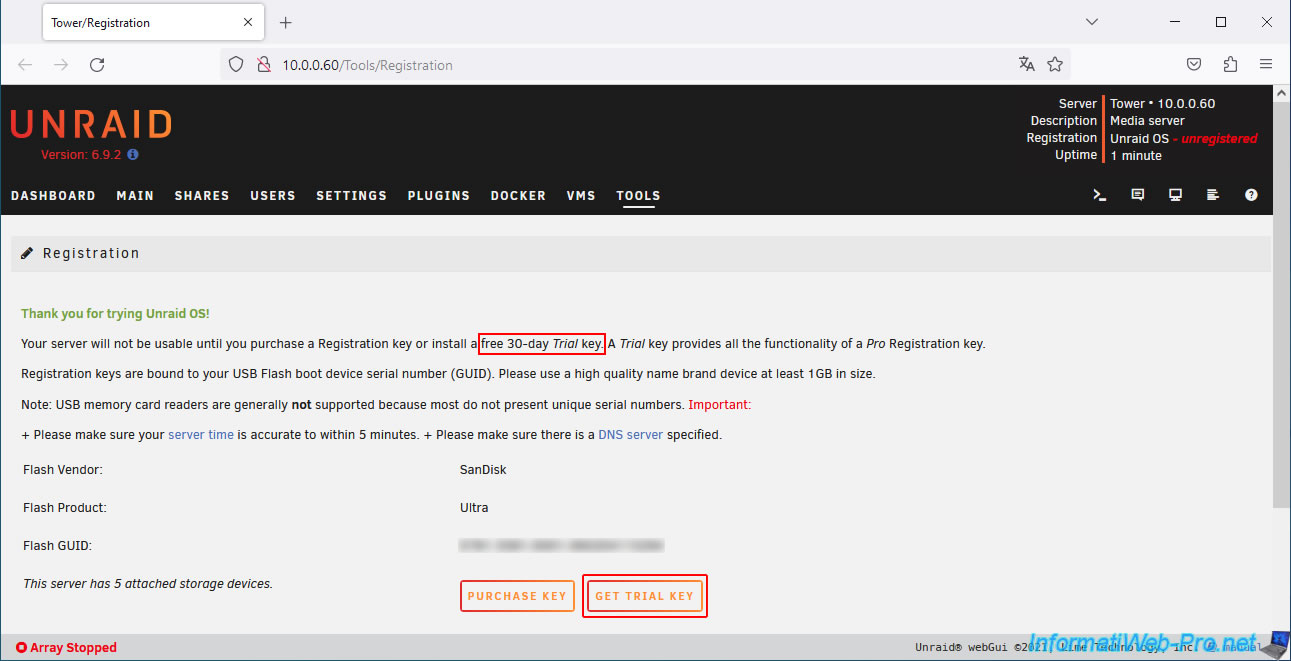
Please note that the evaluation period is 30 days.
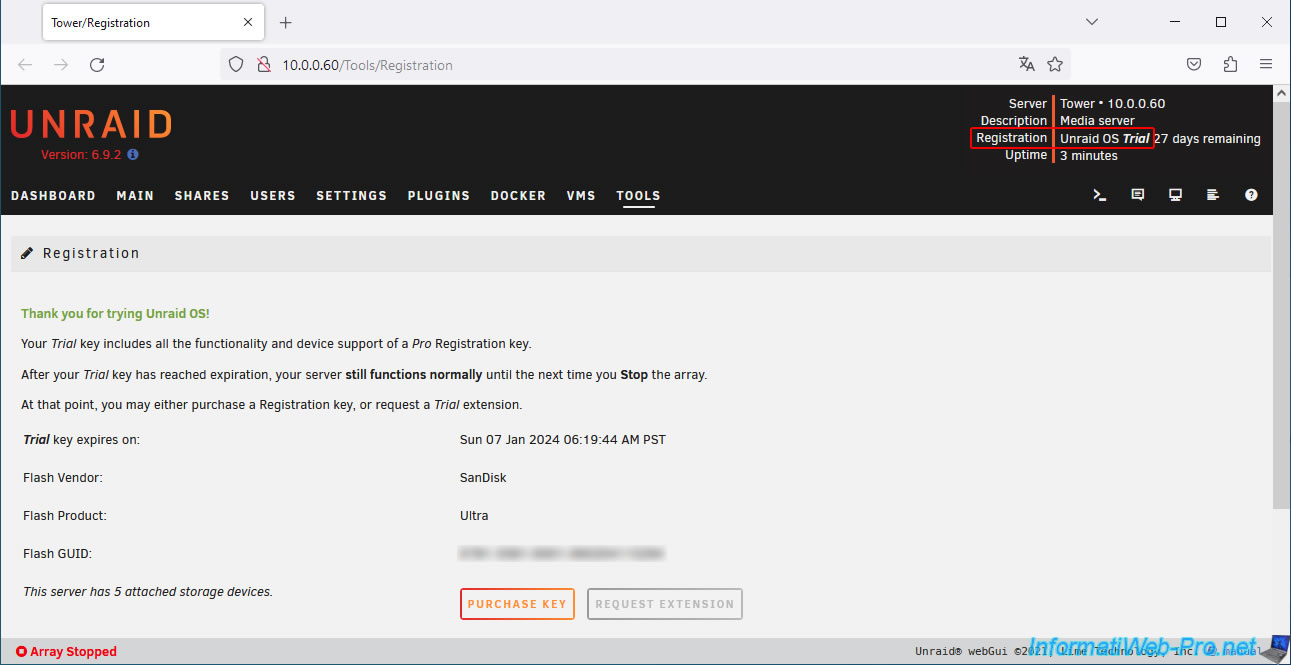
Note: in our case, we had already used the same USB drive for our tutorial to virtualize Unraid on VMware Workstation Pro.
It is therefore normal that the remaining period is 27 days instead of 30, given that the license granted is the same.
7. Configure Unraid array
To configure the Unraid array, the steps are identical to those in our tutorial: Virtualize Unraid 6.9.2 with VMware Workstation 17.5.1.
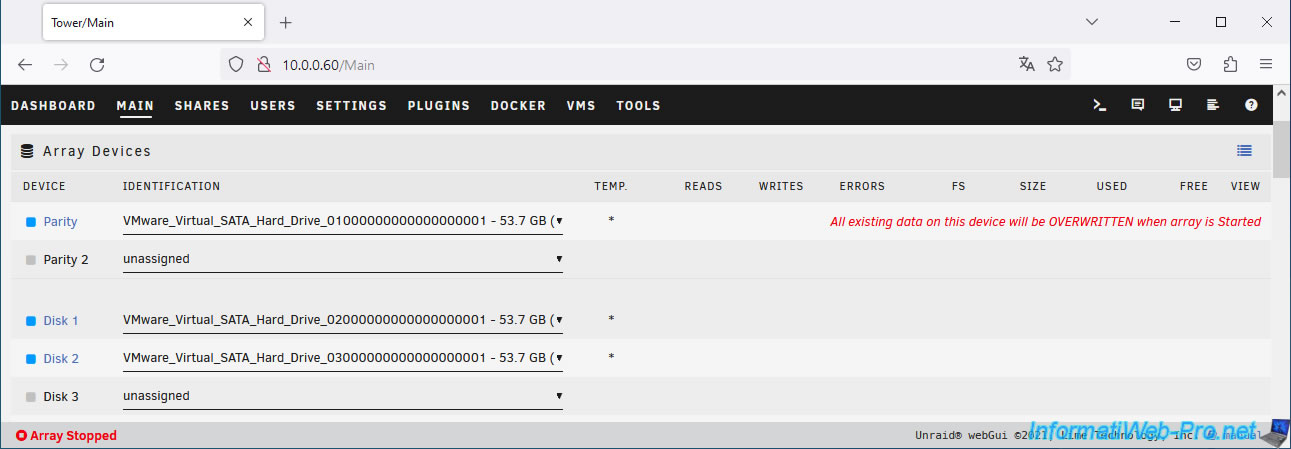
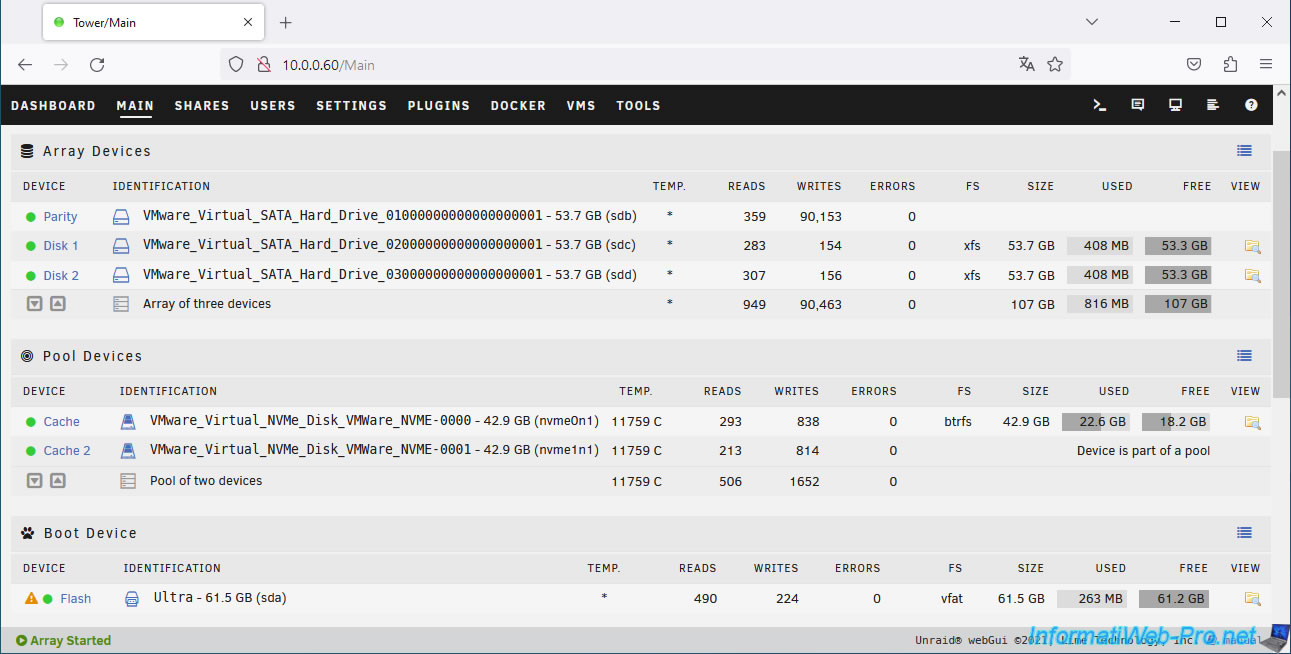
In the "Main" tab, assign the three virtual SATA hard drives (VMware_Virtual_SATA_Hard_Drive) to the following devices: "Parity", "Disk 1", and "Disk 2".
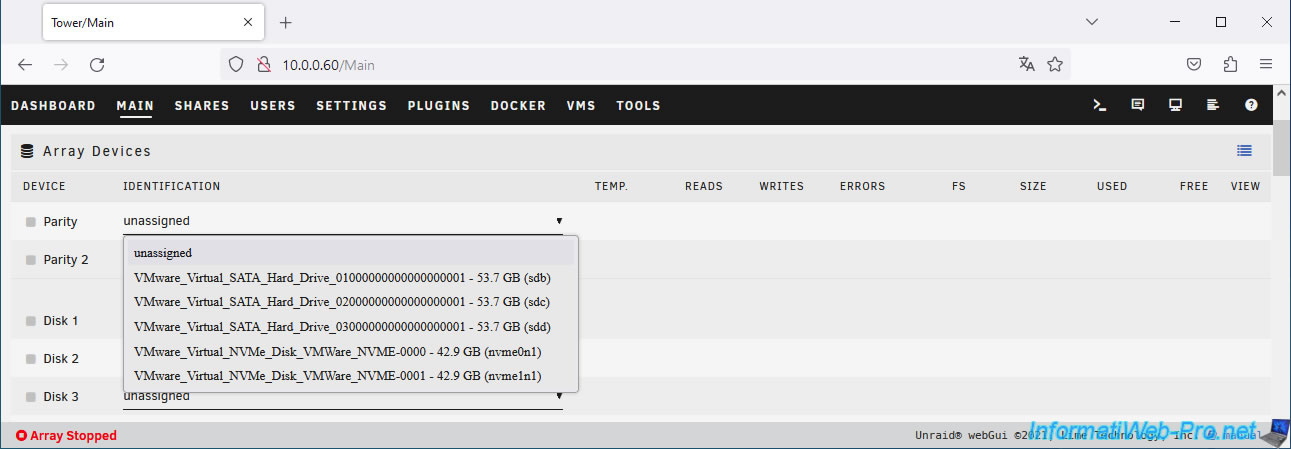
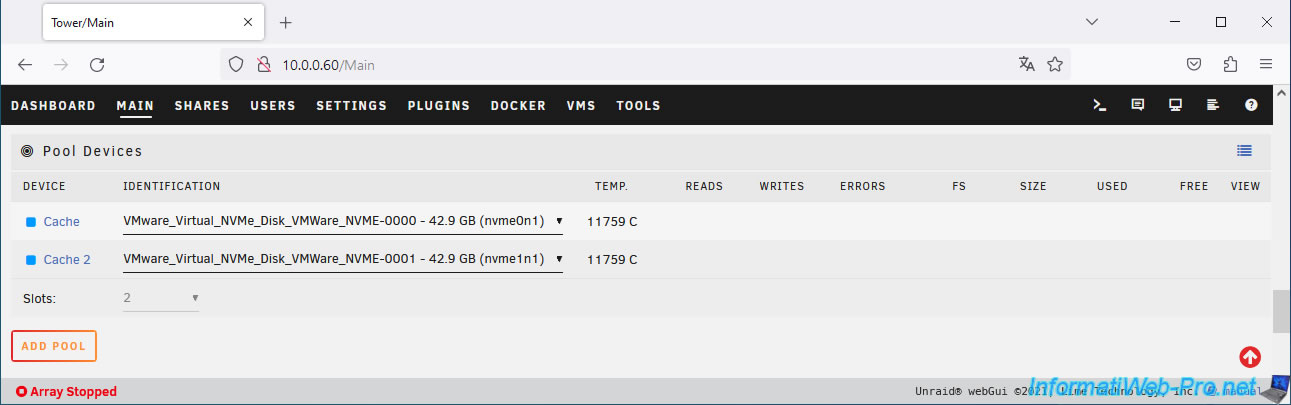
Then, in the "Pool Devices" section, click on: Add pool.
Assign the 2 virtual NVMe SSDs (VMware_Virtual_NVMe_Disk) to the devices: "Cache" and "Cache 2".
At the bottom of the page, click "Start" to start the parity disk calculation.
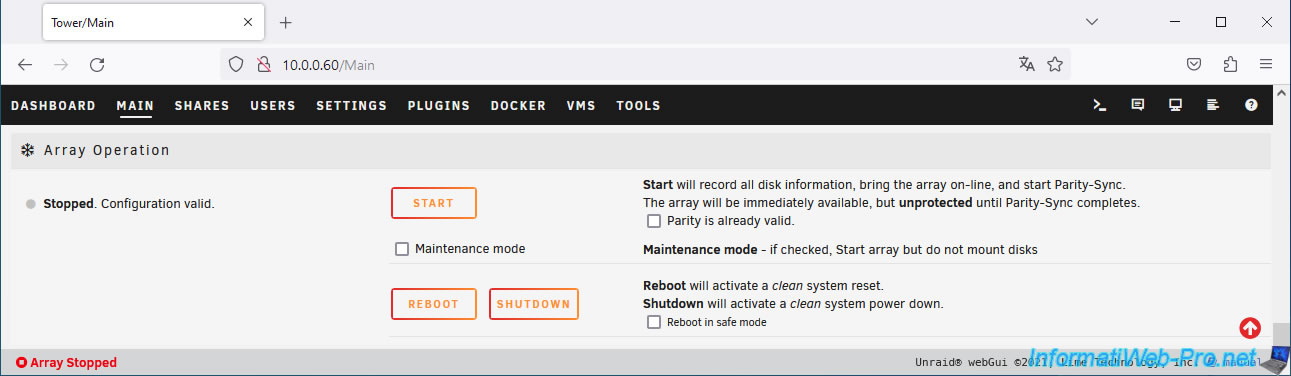
Please wait while the parity disk is calculated.
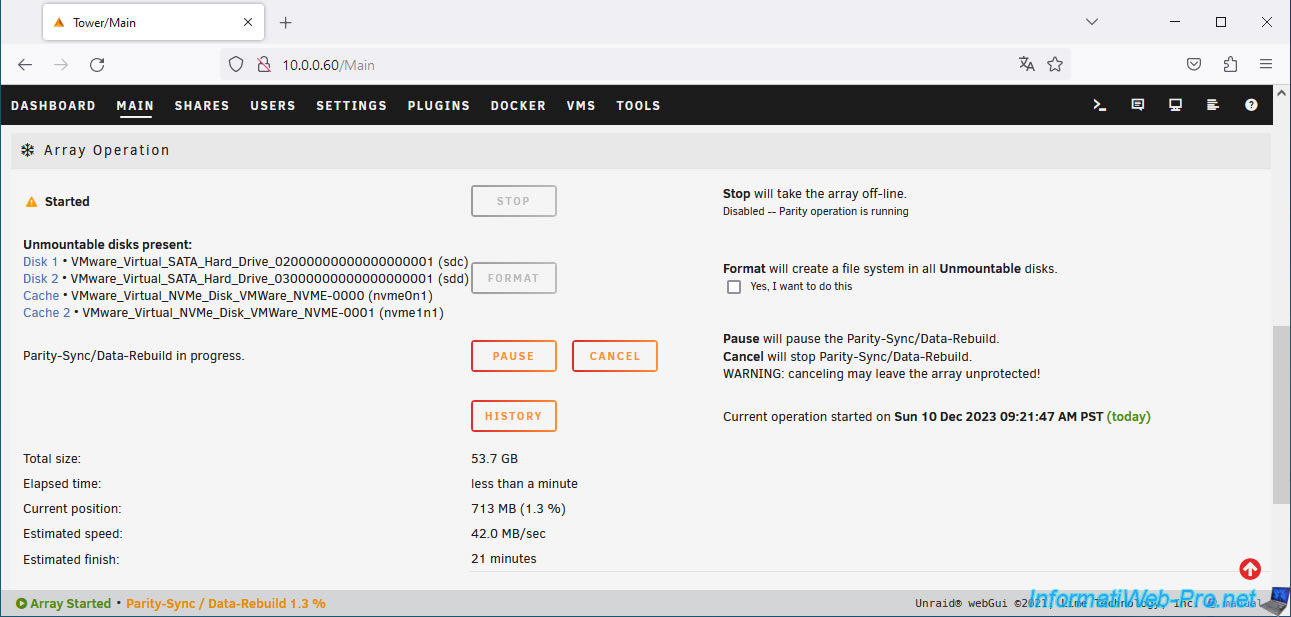
Once the parity disk is calculated, format your disks by checking the "Yes, I want to do this" box (to the right of the "Format" button), then click the "Format" button.
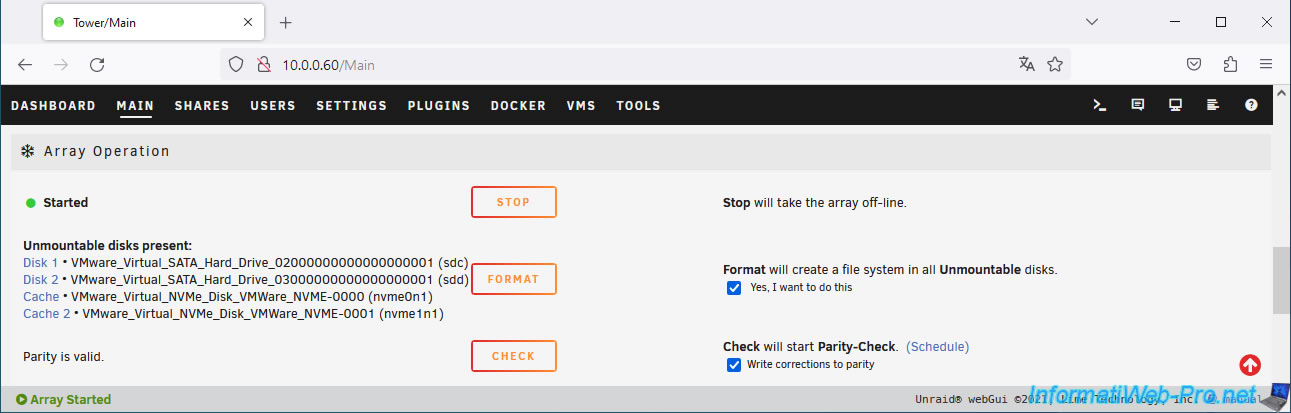
Your array is configured, as well as the Unraid cache.
Share this tutorial
To see also
-
VMware 11/11/2011
VMware ESXi 5 - Installation
-
VMware 10/5/2022
VMware ESXi 6.7 - Update VMware ESXi from the command line (CLI)
-
VMware 10/14/2022
VMware ESXi 6.7 - Virtualize a physical computer (P2V)
-
VMware 9/14/2022
VMware ESXi 7.0 / 6.7 - Install VMware PowerCli (with or without Internet)
No comment