- VMware
- 20 May 2024 at 16:40 UTC
-


To avoid using an internal hard drive or SSD to install the VMware ESXi hypervisor on it, you can install VMware ESXi quite easily on a simple USB key.
However, VMware ESXi 6.7 takes up less space (around 4.4 GB) than VMware ESXi 7 (minimum 32 GB because of the new "ESX-OSData" partition).
So, since VMware ESXi 7, preferably use a USB key with a capacity of at least 64 GB. Indeed, the 32 GB one may be slightly too small.
Important : the only important thing is that the installation of VMware ESXi has a much better chance of success if you plug your USB key into the back of your computer, rather than into an USB port on the front of the case.
In our case, we used a "Kingston DT Elite 3.0" USB 3.0 key plugged into a USB 3.0 port on the back of our computer.
Note that by plugging the same USB key into the front of our computer, the installation of VMware ESXi failed. While the installation was carried out without problem when it was on the back of our computer.
- Install VMware ESXi on an USB key
- Datastores detected during VMware ESXi installation
- VMware ESXi installed on the USB key
- Erase the USB key
1. Install VMware ESXi on an USB key
For VMware ESXi 6.7, just boot your computer / server from the VMware ESXi installation CD.
Important : since VMware ESXi 7, a new partition "ESX-OSData" will be created on the disk selected during the installation of VMware ESXi 7.
This partition usually takes up 120 GB of disk space on this disk. Which is obviously problematic for installing VMware ESXi 7 on a USB key in the case of a lab.
However, it's possible to reduce the size of this partition to 33 GB (theoretical) or 24 GB (in practice in our case).
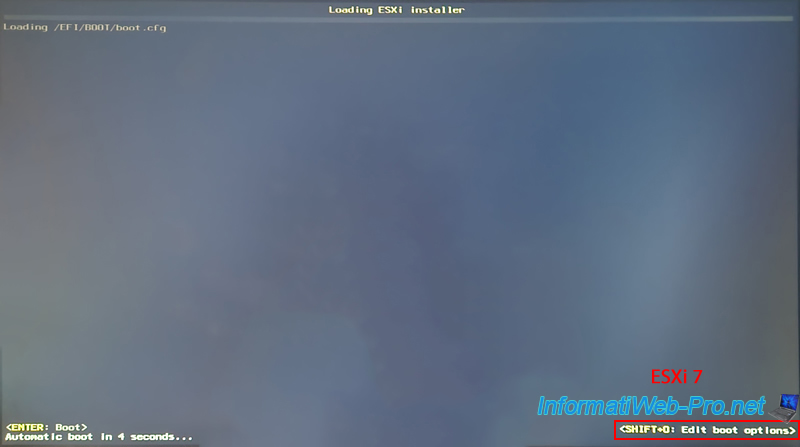
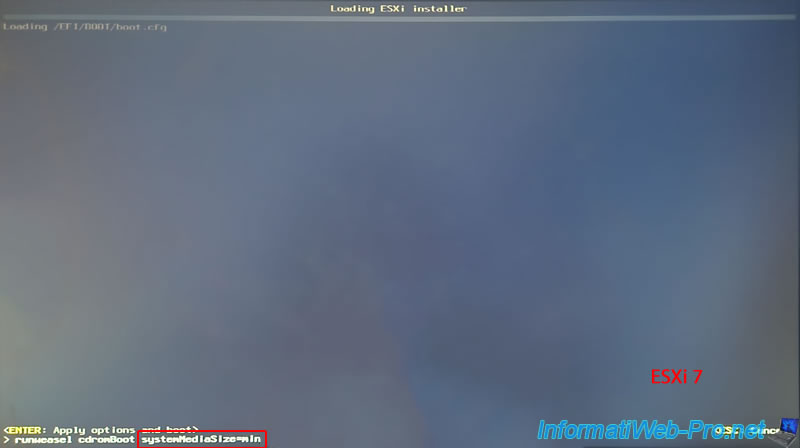
To do this, when you boot from the VMware ESXi 7 installation CD, press the "SHIFT + O" keys to change the installer startup options.
Then, add the "systemMediaSize=min" option to the end of the list of options already shown to get this.
Then, press Enter to launch the VMware ESXi 7 installer.
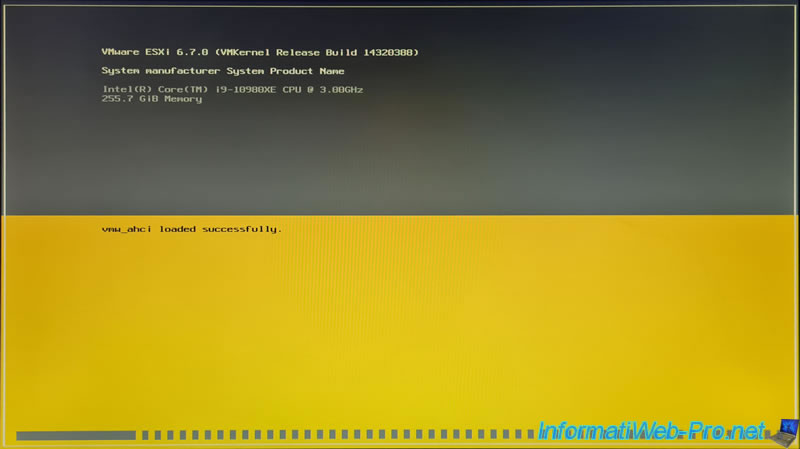
Once the VMware ESXi 6.7.0 installer appears, press Enter.

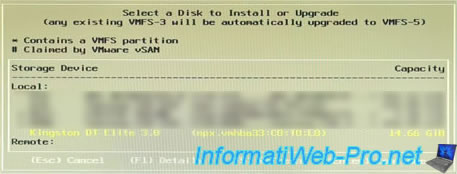
The VMware ESXi installer will scan your computer for storage devices (hard drives, SSDs and USB supports).
![]()
As expected, the VMware ESXi 6.7.0 installer detects our 16 GB "Kingston DT Elite 3.0" USB 3.0 key plugged into the back of our computer on a USB 3.0 port.
We select it and press Enter.
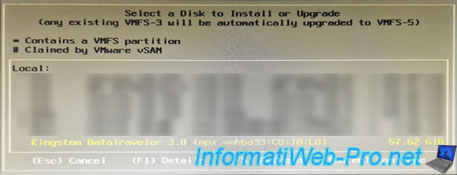
For VMware ESXi 7, we used a 64 GB "Kingston DataTraveler 3.0" USB key (for the reason explained at the beginning of the tutorial).
VMware ESXi scans your computer again to verify that your system requirements match those required for its installation.

Confirm the selection of the disk (USB key) by pressing Enter again.

Continue configuring the VMware ESXi installation normally.

Then, confirm the installation of VMware ESXi on your USB key by pressing F11.

The installation of VMware ESXi begins.
![]()
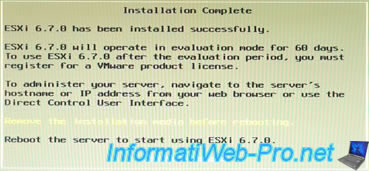
If the installation is successful, you will see the "Installation Complete" message appear.
Remove the VMware ESXi 6.7 installation CD from your computer's CD/DVD drive and press Enter to restart your computer.
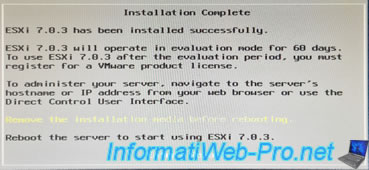
As expected, this also works with VMware ESXi 7.0.3.
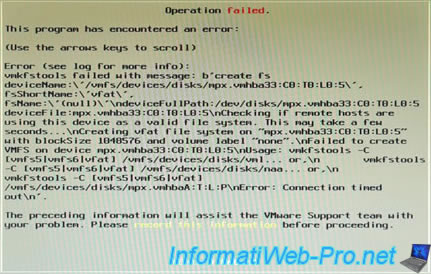
Note that if your USB key is plugged into the front of your computer, you may see this error :
Plain Text
Operation failed.

This program has encountered an error :
...
Error (see log for more info):
vmkfstools failed with message: b'create fs deviceName:'vmfs/devices/disks/mpx.vmhba...
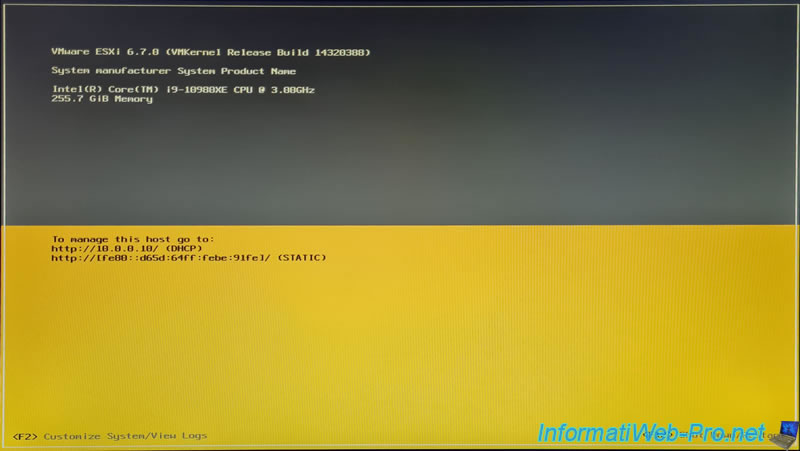
Upon restart, if your computer's boot order is configured correctly, your computer will boot to your VMware ESXi USB key.

And VMware ESXi will run smoothly.
2. Datastores detected during VMware ESXi installation
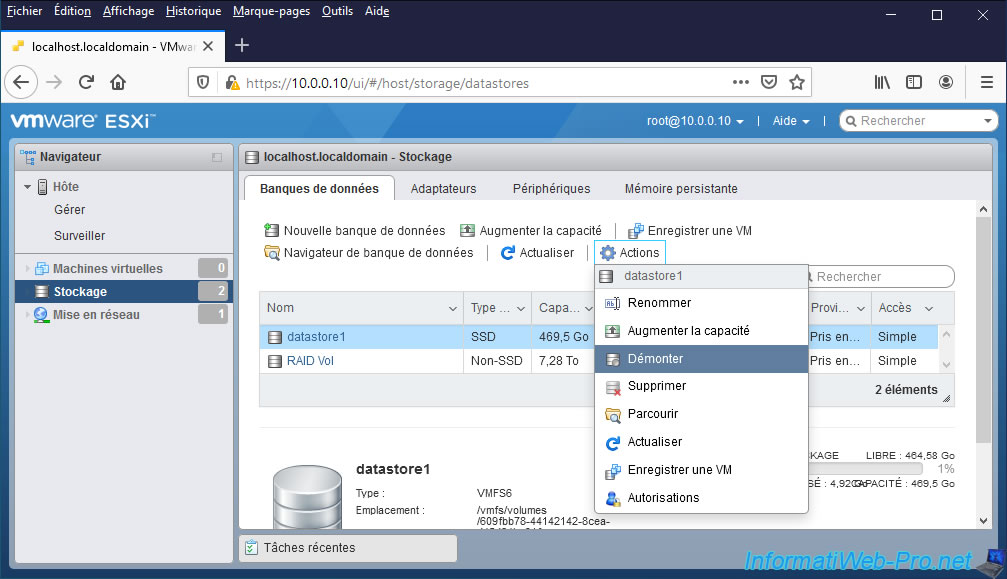
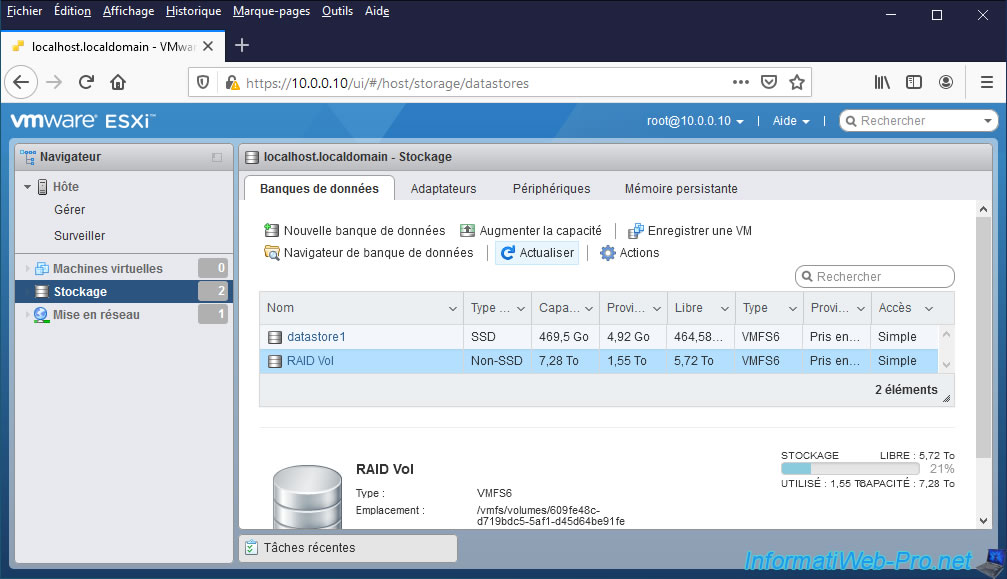
Note that when you install VMware ESXi (whether on a hard drive, SSD or USB key), the datastores present on the various storage devices on your computer will be automatically mounted on your new installation of VMware ESXi.
It's therefore normal that several datastores already appear in the web interface of your new VMware ESXi server if you had previously created one on your computer.
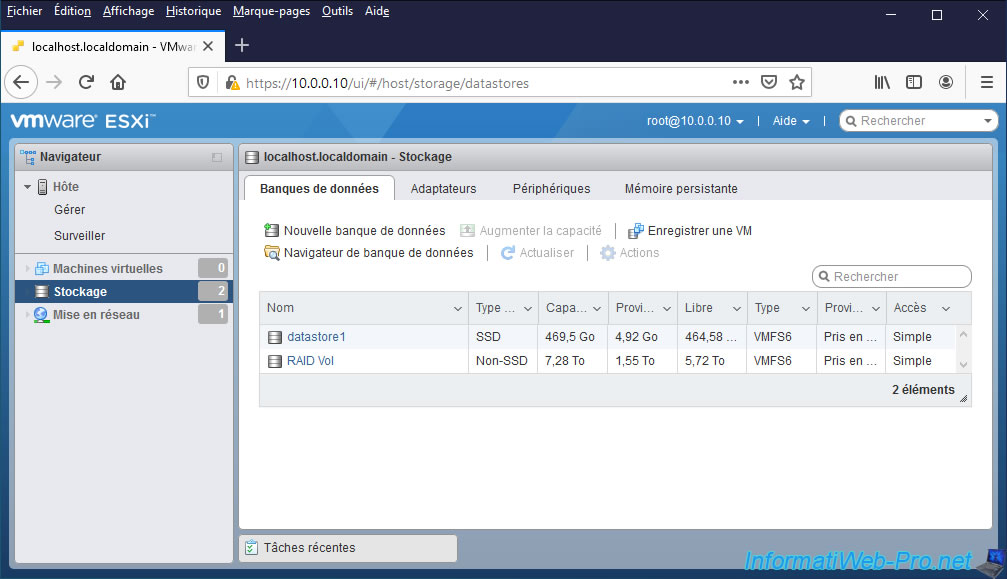
However, if you don't want to use them from this installation of VMware ESXi, you can unmount them to "hide" them without deleting them on the affected hard disks.
To do this, select a datastore and click on : Actions -> Unmount.
Then, do the same for the other databstores that you don't want to use.
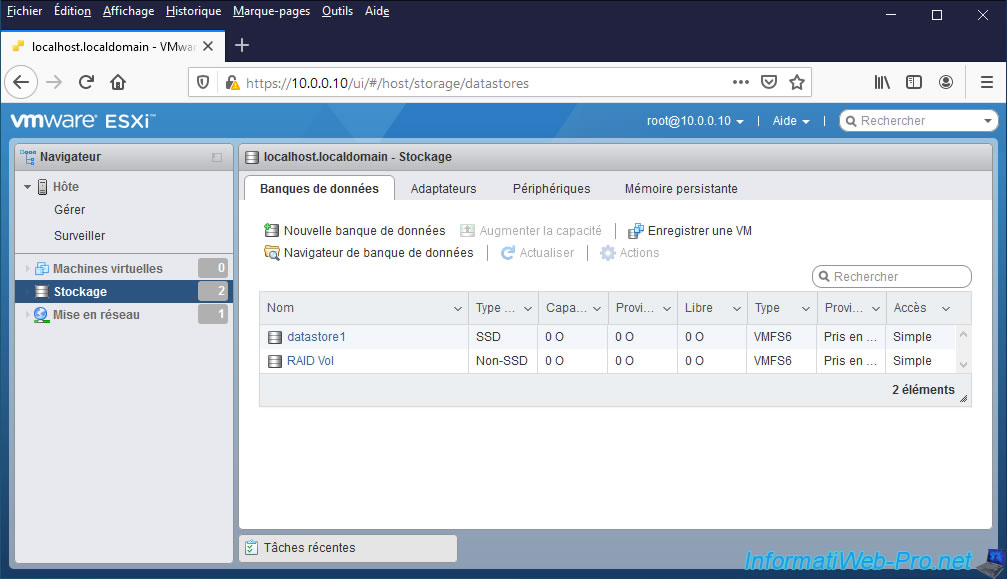
Note: on VMware ESXi 7.0.3, the result will be the same and the option to unmount existing datastores is still available.
Once the datastores have been dismounted, click on "Refresh".
As you can see, unmounted datastores still appear in the list, but 3 columns indicate "0 B" (for "0 Bytes").
Which means VMware ESXi no longer uses them.
3. VMware ESXi installed on the USB key
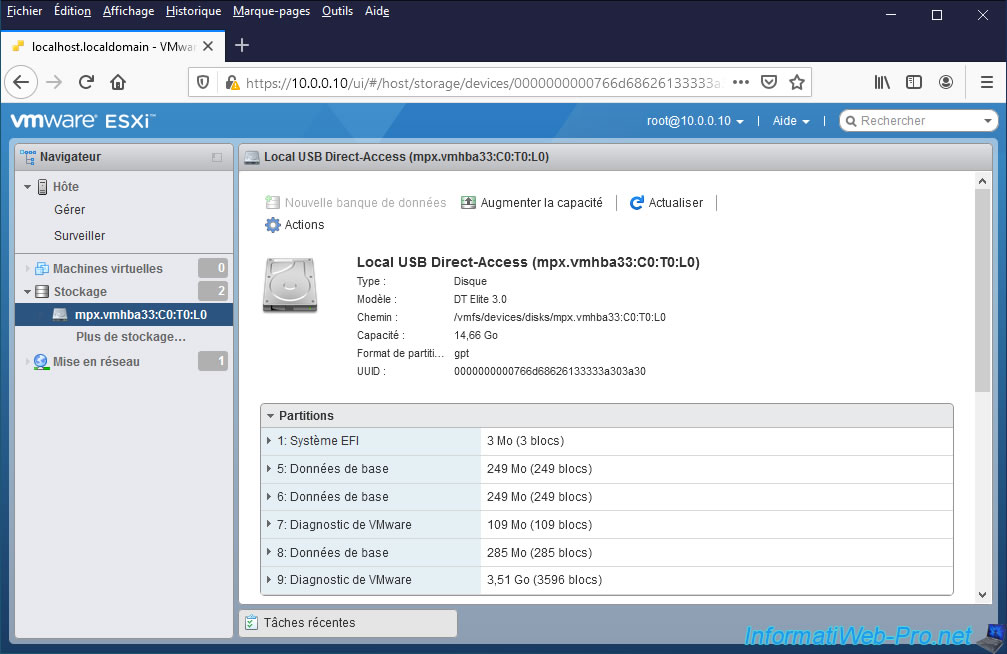
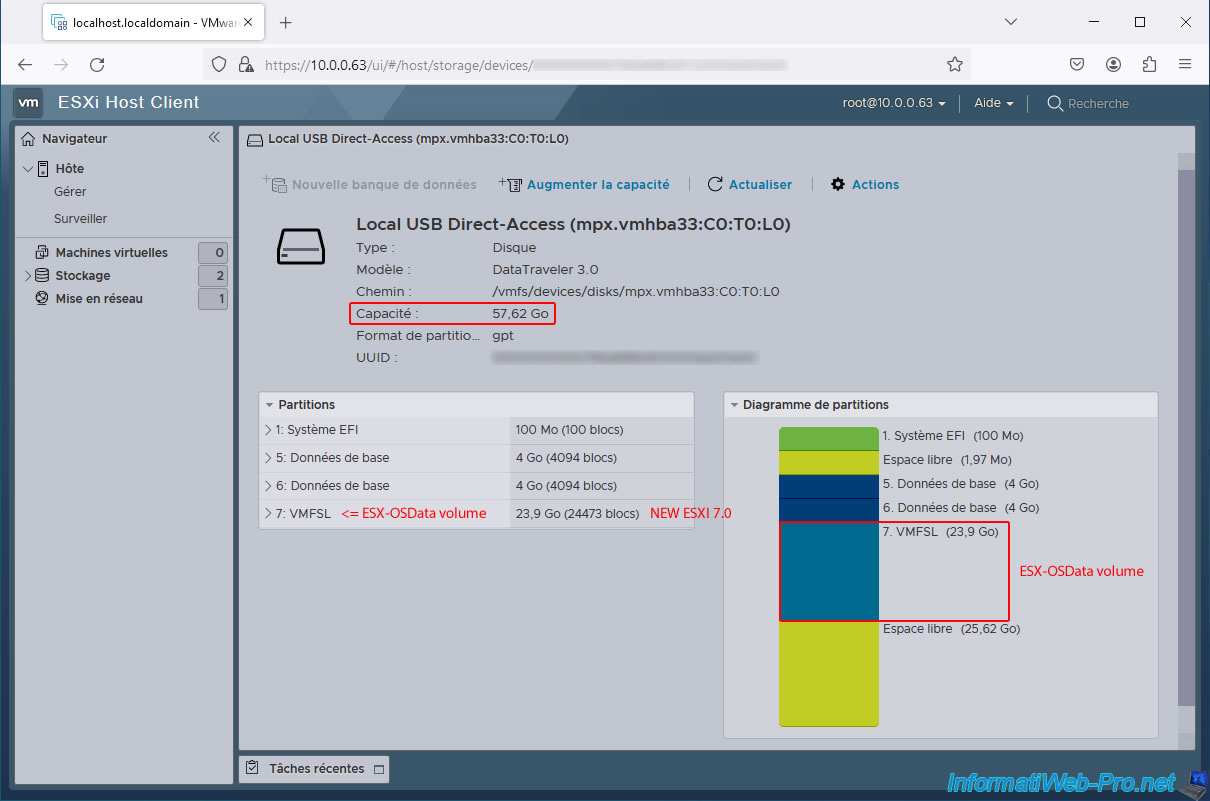
If you go to "Storage -> Devices", you will find your USB key (Local USB Direct-Access) in the list.
By clicking on its name, you will be able to see :
- his type
- his model : DT Elite 3.0
- his path : /vmfs/devices/disks/mpx.vmhba...
- its capacity (size)
- its partition format : gpt indicates that your computer boots in EFI mode on VMware ESXi
- its identifier (UUID)
You will also be able to see the list of partitions created by VMware ESXi 6.7 on it :
- EFI System
- Basic Data
- Basic Data
- VMware Diagnostic
- Basic Data
- VMware Diagnostic
A little further down, you will have a graphical version of the partitions present on your VMware ESXi USB key.
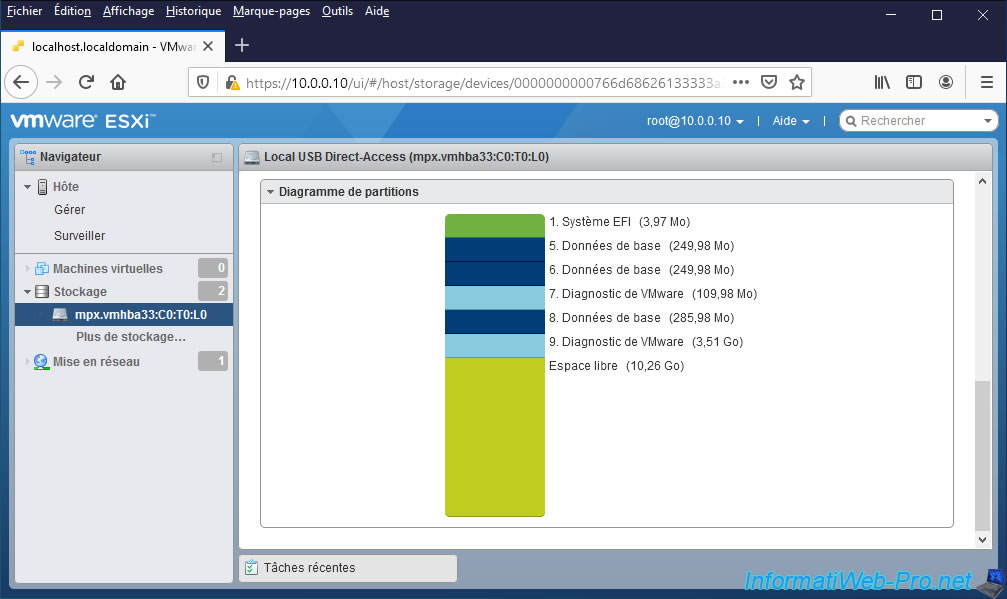
On VMware ESXi 7, you will see that the partitions created are slightly different and you will find in particular the new "ESX-OSData" partition of around 24 GB (in our case).
Although according to Broadcom's documentation, this should be 33 GB in size with the boot option used previously.
4. Erase the USB key
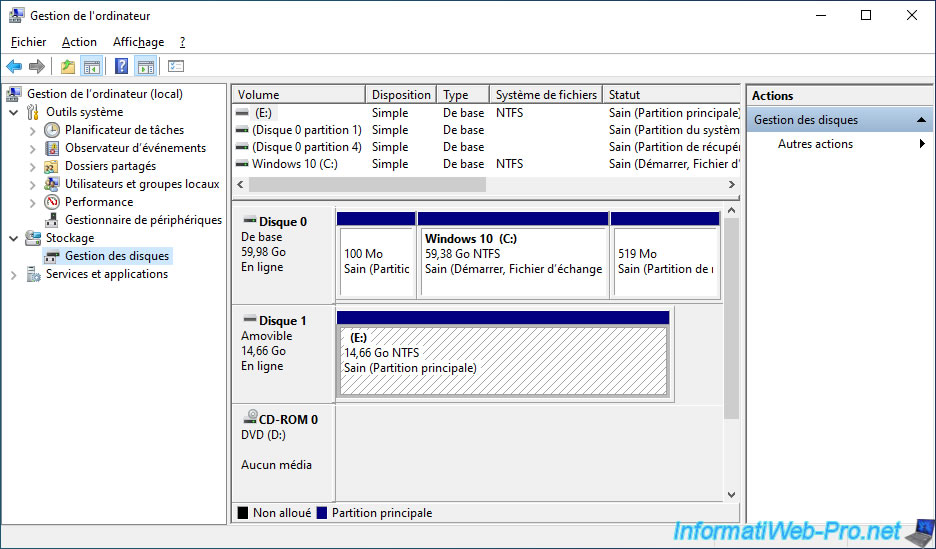
If you ever want to reuse your USB key just to store data on it, you will encounter a problem on Windows.
Indeed, given that this one has several partitions, you will not be able to simply right-click "Format" on it from the file explorer.
If you go through the disk management available on Windows, it's also possible that Windows doesn't allow you to delete all the partitions present on it to recreate one on your entire USB key.
This is particularly the case on versions prior to Windows 10.
To reset it easily, you will have to use the "diskpart" program present in all versions of Windows.
Accept the displayed User Account Control (UAC), and then type the following commands.
List the disks of your computer using the command below and locate the disk number corresponding to your USB key.
Batch
LIST DISK
In our case, we can see that disk 1 is our USB key.
Plain Text
  Disk ###  Status         Size     Free     Dyn  Gpt
  --------  -------------  -------  -------  ---  ---
  Disk 0    Online           60 GB      0 B
  Disk 1    Online           14 GB    11 GB        *
Select the disk corresponding to your USB key by indicating its number at the end of the command.
Which gives this, in our case.
Batch
SELECT DISK 1
Completely erase your USB drive by typing the command below.
This will delete all partitions (volumes) present on it.
Batch
CLEAN
Create a new primary partition on your USB drive by typing :
Batch
CREATE PARTITION PRIMARY
Format this partition in NTFS (for example) to be able to store files larger than 4 GB.
Batch
FORMAT FS=NTFS QUICK
Plain Text
 0 percent completed
...
 100 percent completed

DiskPart successfully formatted the volume.
Assign a letter to this partition so that it's visible from the file explorer.
Batch
ASSIGN
Close diskpart by typing :
Batch
EXIT
If you right click "Manage" on "This PC" (or "Computer") and go to "Disk Management", you will see that your USB key has been properly reformatted.
Share this tutorial
To see also
-

VMware 5/25/2022
VMware ESXi 6.0 - Install the VMware Host Client web client
-

VMware 5/27/2022
VMware ESXi 6.5 - Add a network driver in the installation ISO
-

VMware 1/27/2023
VMware ESXi 6.7 - Enable virtualization-based security (VBS)
-

VMware 12/2/2022
VMware ESXi 6.7 - Install and use the VMRC console on Linux
You must be logged in to post a comment