- VMware
- 17 March 2023 at 12:55 UTC
-

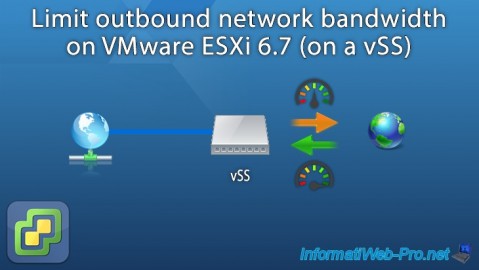
With port groups and virtual switches (vSwitches) available in VMware ESXi, you can throttle outbound traffic to limit network bandwidth usage.
This is very useful in business, to prevent a single virtual machine from saturating the bandwidth of your physical network. This prevents your various services from becoming inaccessible.
Note that on VMware ESXi, you will only be able to throttle outbound traffic as you can only create standard virtual switches (vSS).
- Download iPerf3 (to test network bandwidth)
- Test your network bandwidth with iPerf
- Limit network bandwidth (outgoing traffic only)
- Test bandwidth throttling
1. Download iPerf3 (to test network bandwidth)
To test the network bandwidth, you can use the "iPerf" utility.
This utility has the advantage of being free, very light and available on all platforms (Windows, Linux, Android, ...).
Additionally, it's referenced in a VMware KB for diagnosing network latency issues.
Note that to test the network bandwidth, you will need 2 virtual machines on which you will launch this utility (as a server on the 1st VM and as a client on the 2nd VM).
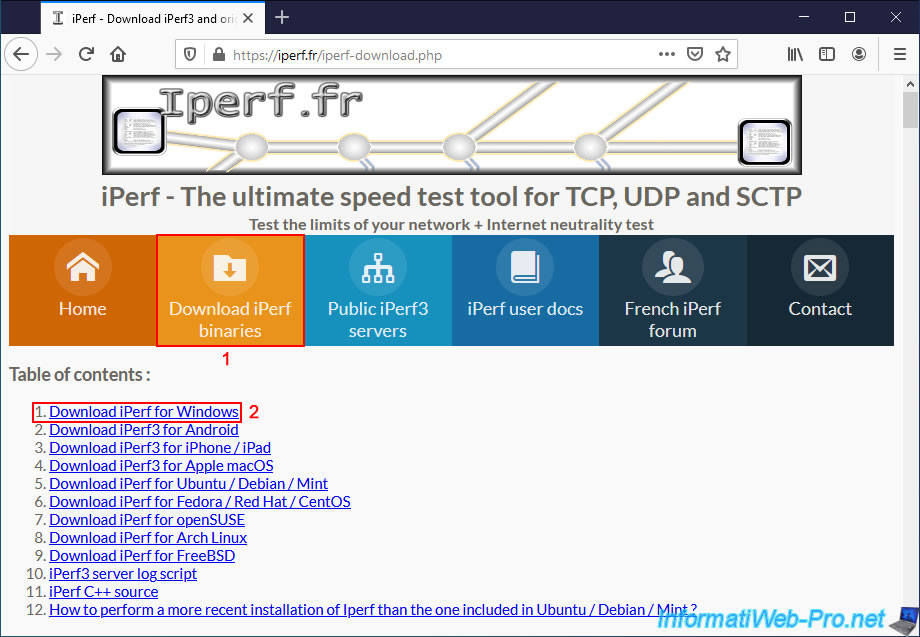
On the download page of the iPerf site, download the latest version available for your architecture (32 bits / 64 bits) of Windows.
Note : you must click on the desired version to download it.
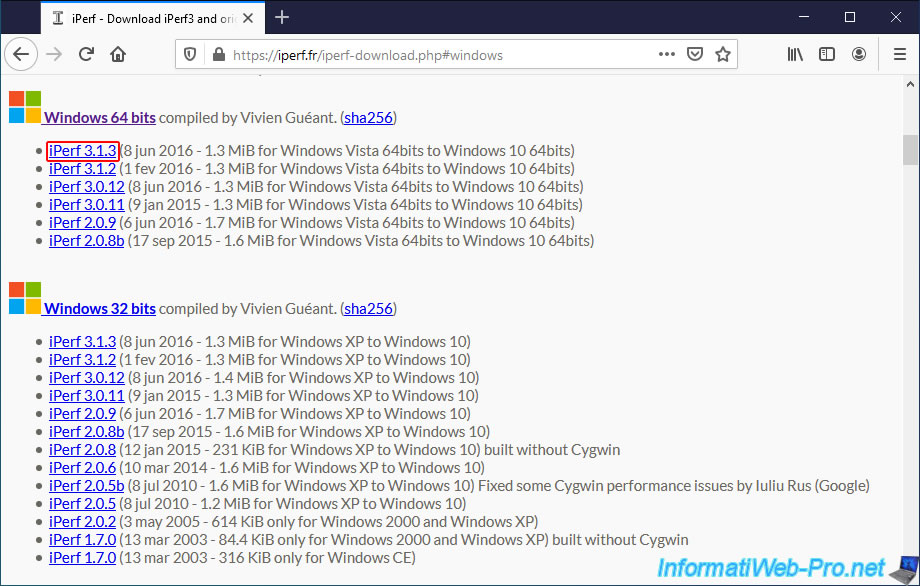
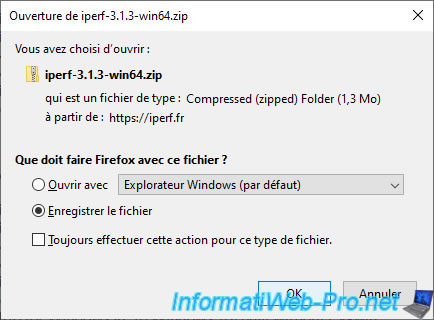
In our case, it's the 3.1.3-win64 version of iPerf.
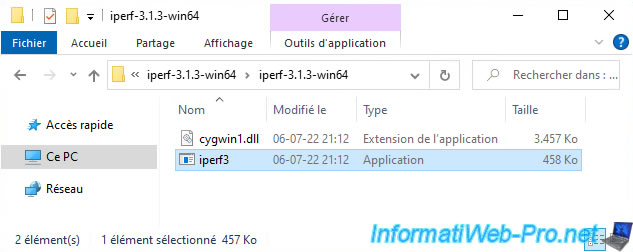
Unzip the downloaded file and you will see that there is simply the program (iperf3.exe) and a "cygwin1.dll" file.
2. Test your network bandwidth with iPerf
For this test, we used 2 VMware ESXi hosts with a virtual machine running Windows 10.
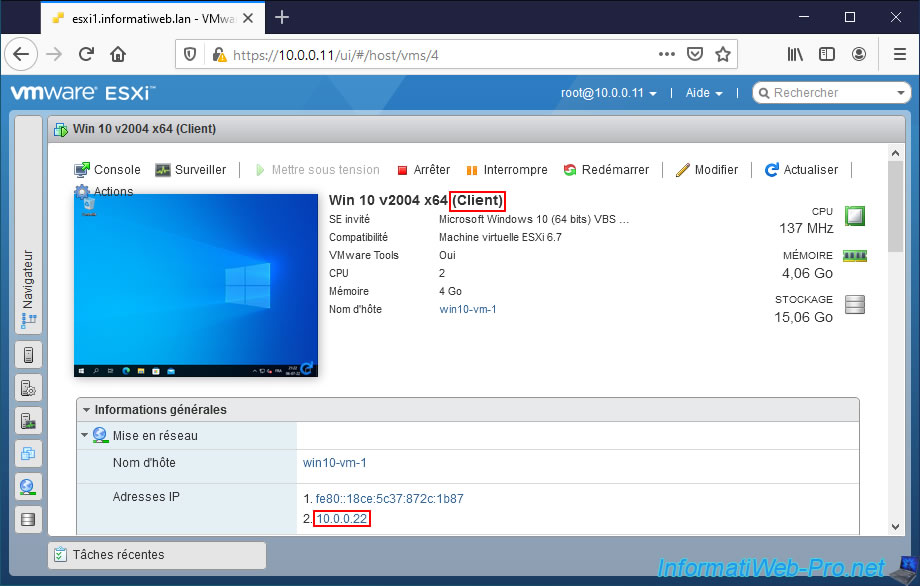
On our 1st hypervisor (esxi1), we have a "Win 10 v2004 x64 (Client)" virtual machine which has the IP address 10.0.0.22.
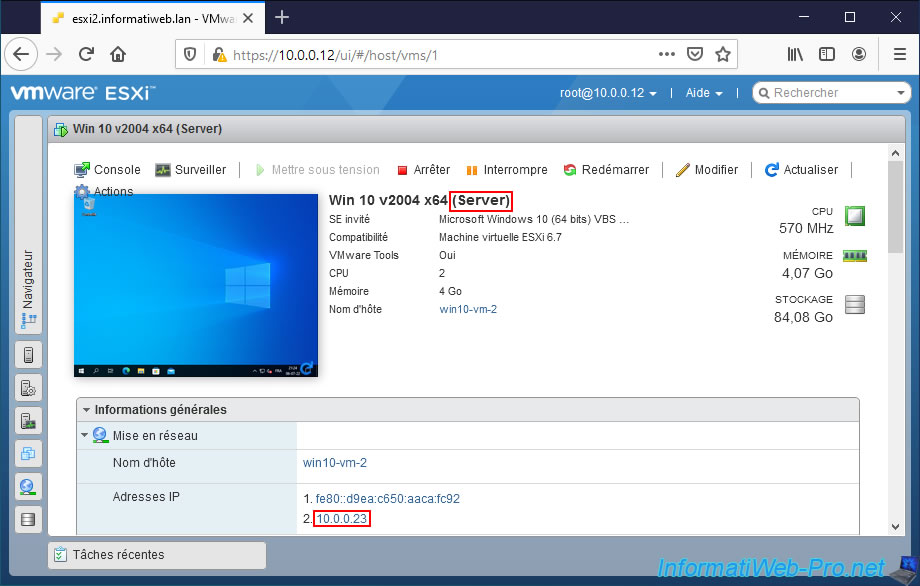
On our 2nd hypervisor (esxi2), we have a virtual machine "Win 10 v2004 x64 (Server)" which has the IP address 10.0.0.23.
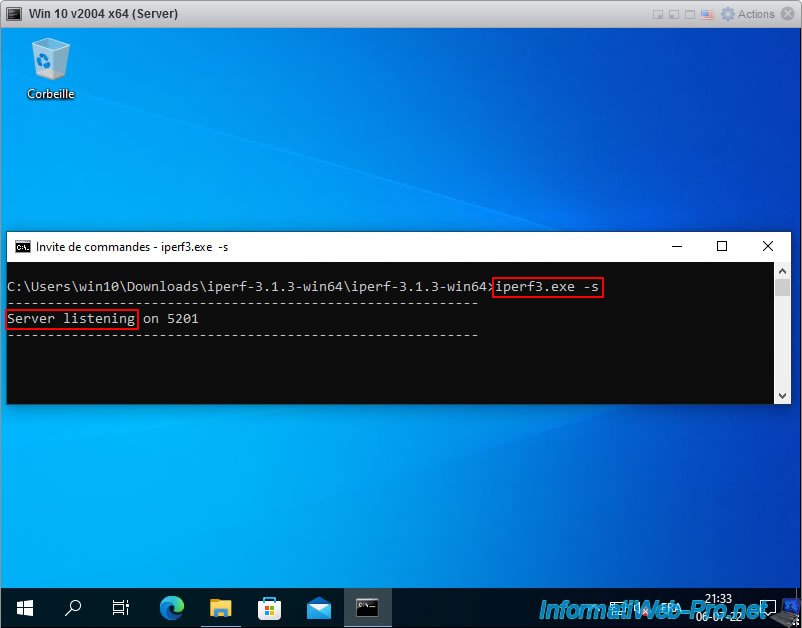
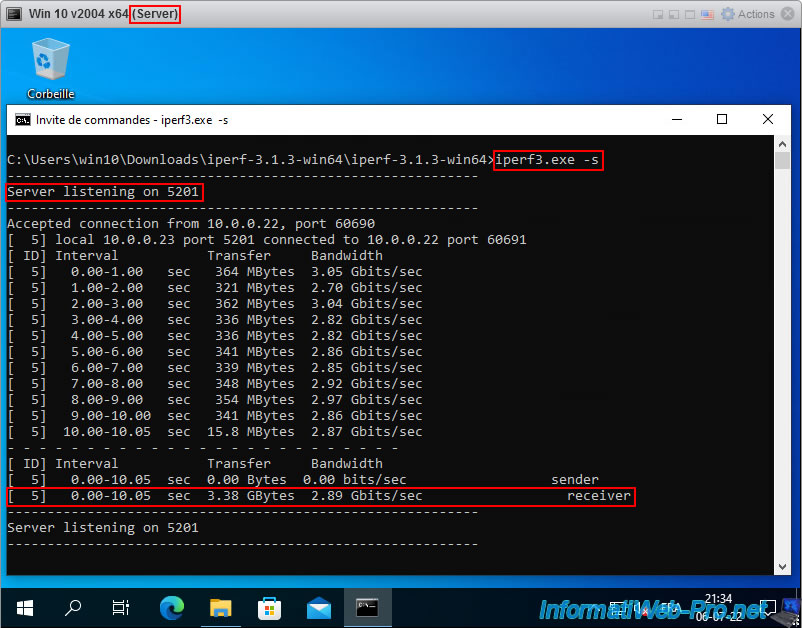
On the "Win 10 v2004 x64 (Server)" virtual machine, we run the "iPerf3" utility as a server using the command :
Batch
iperf3.exe -s
Plain Text
Server listening on 5201
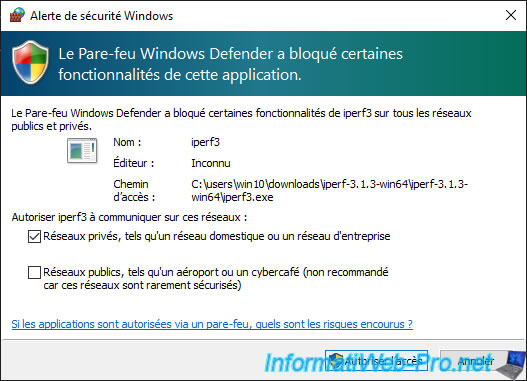
The first time you launch "iPerf3" as a server, a Windows security alert will appear.
Click on "Allow access" to make this iPerf3 server accessible via the network.
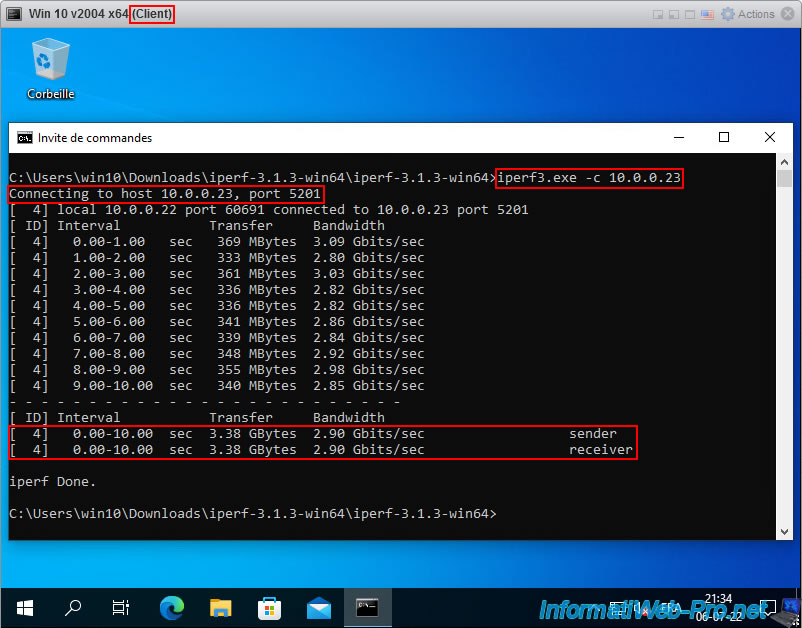
On the "Win 10 v2004 x64 (Client)" virtual machine, we run the "iPerf3" utility as a client using the command below to test the bandwidth between this virtual machine and the one acting as than server.
In the command below, the IP address "10.0.0.23" corresponds to our virtual machine "Win 10 v2004 x64 (Server)".
Batch
iperf3.exe -c 10.0.0.23
As you can see, in our case, the average network bandwidth is 2.90 Gbits/sec.
This very high speed is due to the fact that we use virtualized VMware ESXi hypervisors. The entire network path is therefore virtual and there is therefore no real latency.
Plain Text
Connecting to host 10.0.0.23, port 5201
[  4] local 10.0.0.22 port 60691 connected to 10.0.0.23 port 5201
[ ID] Interval           Transfer      Bandwidth
[  4]   0.00-1.00   sec   369 MBytes   3.09 Gbits/sec
...
- - - - - - - - - - - - - - - - - - - - - - - - -
[ ID] Interval           Transfer      Bandwidth
[  4]   0.00-10.00  sec   3.38 GBytes  2.90 Gbits/sec           sender
[  4]   0.00-10.00  sec   3.38 GBytes  2.90 Gbits/sec           receiver

iperf Done.
On the server side, you will find almost the same thing except that the server accepts the connection from your client (iperf3).
Plain Text
-----------------------------------------------------------
Server listening on 5201
-----------------------------------------------------------
Accepted connection from 10.0.0.22, port 60690
[  5] local 10.0.0.23 port 5201 connected to 10.0.0.22 port 60691
...
[  5] 0.00-10.05  sec  3.38 GBytes  2.89 Gbits/sec           receiver
3. Limit network bandwidth (outgoing traffic only)
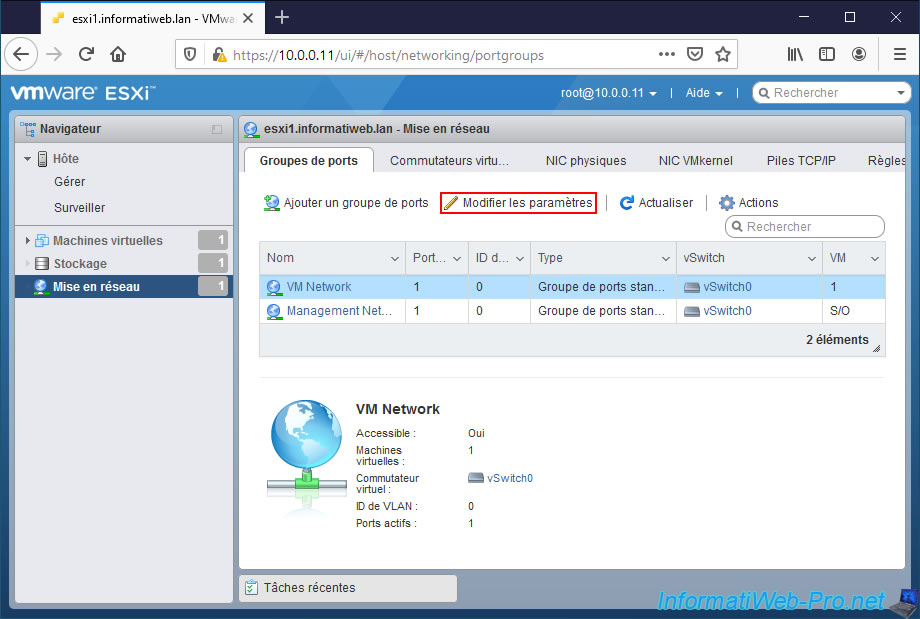
To limit the network bandwidth of your virtual machines, go to the "Networking" section of the web interface of your VMware ESXi hypervisor.
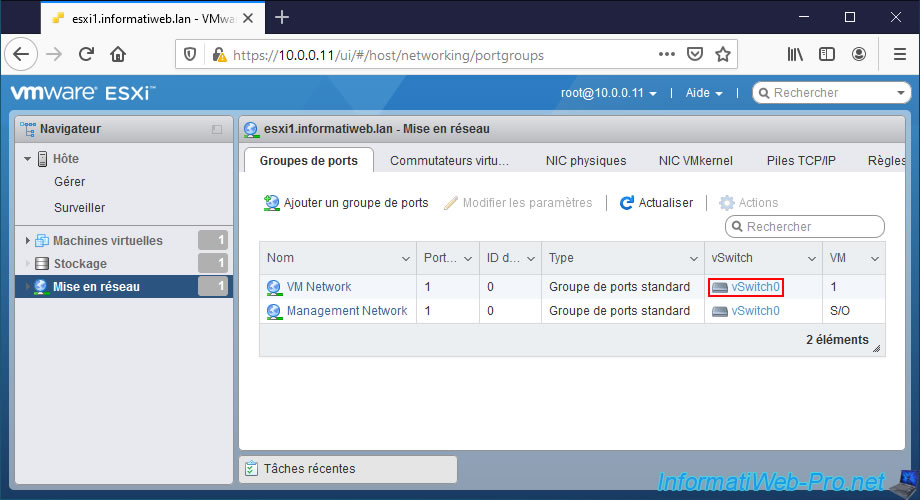
In the "Port groups" tab, select the port group to which the virtual machine is connected where you are launching iPerf3 as a client, then click on : Edit settings.
In our case, it's the "VM Network" port group (existing by default) of our "esxi1" hypervisor.
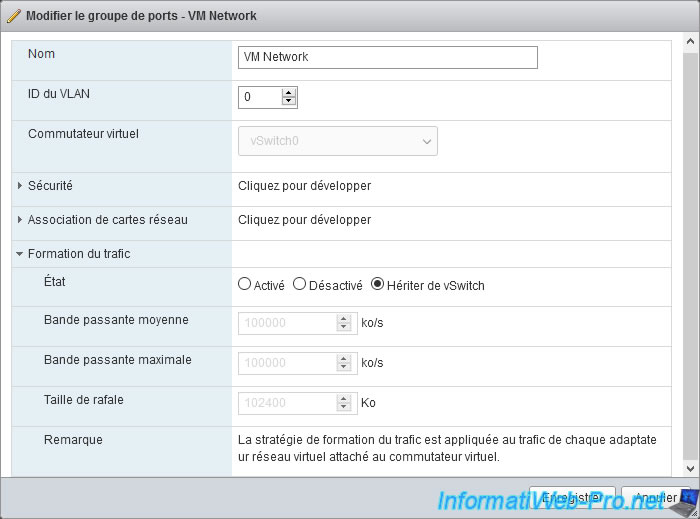
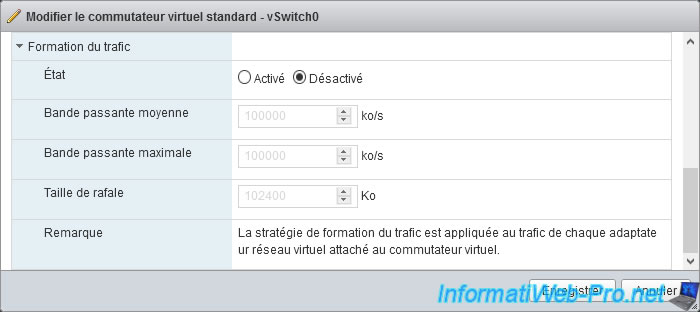
In the "Traffic shaping" section of the settings for this port group, you will find several settings to limit the network bandwidth on it.
However, as you can see, by default, the state of the "Traffic shaping" setting is inherited from the virtual switch concerned.
If you enable this setting on the port group, bandwidth throttling will be applied only on that port group.
Note that bandwidth throttling can also be applied on a virtual switch (vSwitch) rather than on a specific port group.
To do this, click on the name of the desired vSwitch to the right of the port group concerned or go to the "Virtual switches" tab to see the list of virtual switches (vSwitch) available on your VMware ESXi hypervisor.
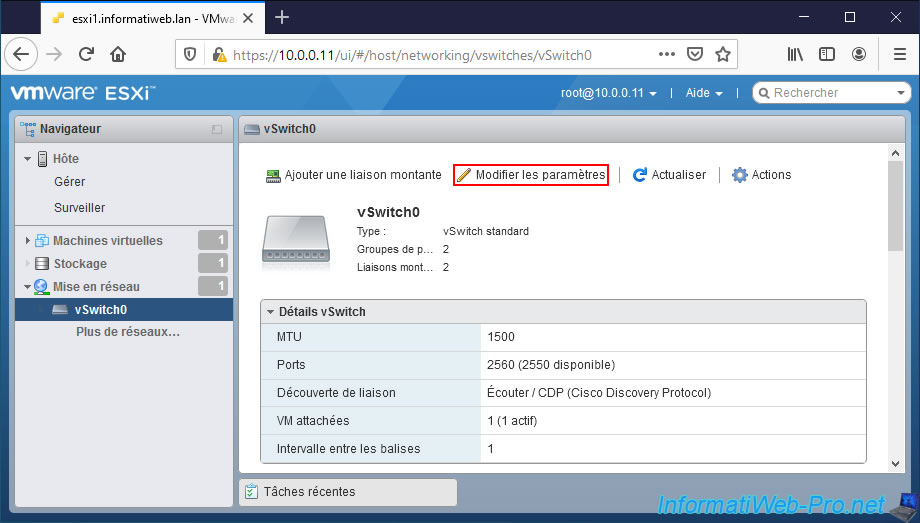
Then, click on "Edit settings".
As you can see, the same "Traffic shaping" settings are available on virtual switches (vSwitch).
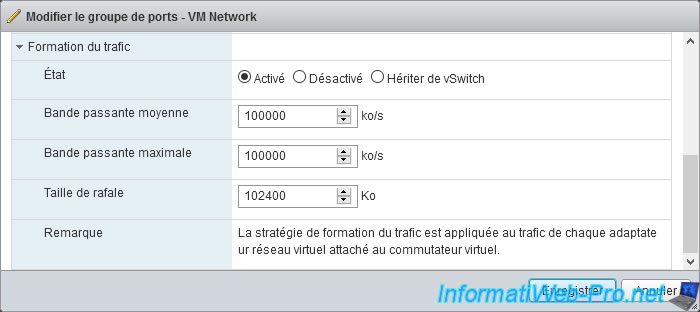
For this tutorial, we enabled bandwidth throttling on the "VM Network" port group of our "esxi1" hypervisor.
To do this, configure the "Traffic Shaping" settings like this :
- Status : Enabled. To enable bandwidth throttling on this port group.
- Average bandwidth : allows you to limit the sending of data in kb/s.
- Peak bandwidth : same as the setting above, but when a burst occurs.
- Burst size : allows you to limit the amount of data that can be sent temporarily in a burst.
Source : Edit Virtual Switch Settings in the VMware Host Client - VMware Docs.
Note that on VMware ESXi, you can only create standard virtual switches (vSS).
Which means you can only limit outbound traffic.
In our case, we left the values defined by default.
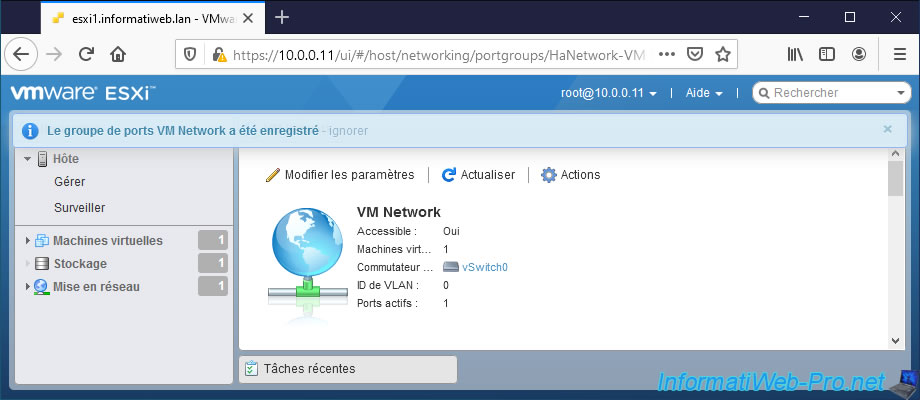
Click on : Save.
The "Port group VM Network was successfully saved" message appears.
4. Test bandwidth throttling
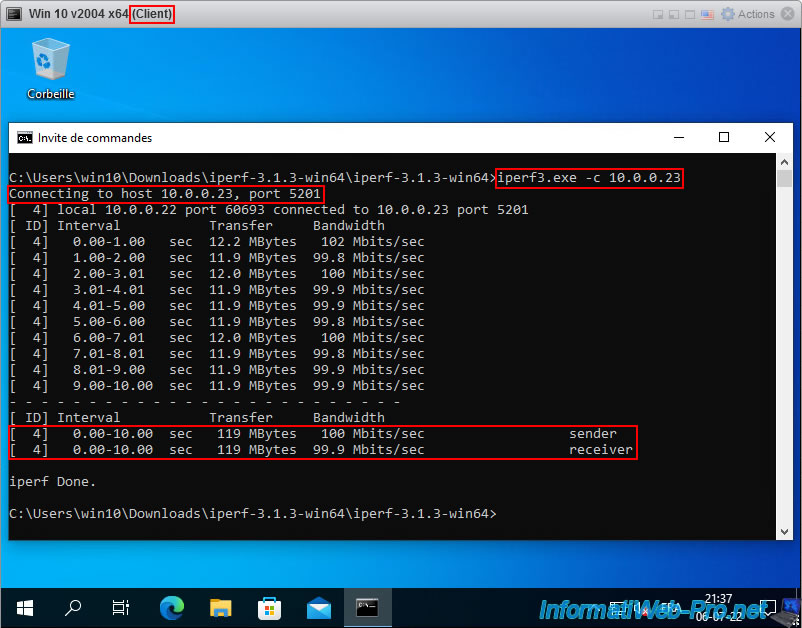
Now that you have enabled bandwidth throttling, test the network bandwidth again using iPerf.
As you can see, this is now limited to around 100 Mbits/sec (if you used the default values in the "Traffic Shaping" section mentioned earlier).
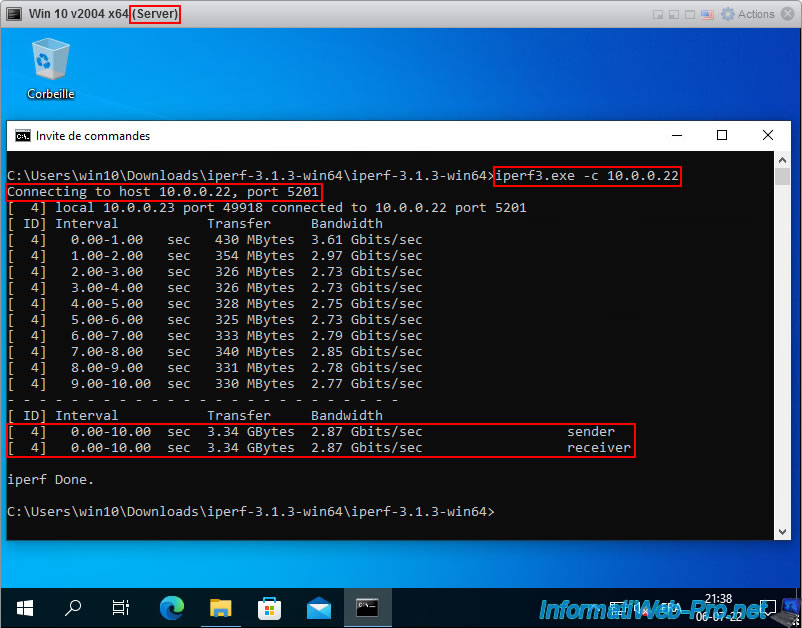
Note that with a Virtual Standard Switch (vSS), you can only limit outbound traffic.
If you test the network bandwidth in the other direction, by reversing the iPerf3 server and client, you will see that the limitation is no longer applied.
Indeed, in this case, it's incoming traffic instead of outgoing traffic.
Share this tutorial
To see also
-
VMware 3/3/2023
VMware ESXi 6.7 - Add a VMkernel interface
-
VMware 2/24/2023
VMware ESXi 6.7 - Create a new virtual network
-
VMware 3/24/2023
VMware ESXi 6.7 - Enable Jumbo frame support
-
VMware 3/10/2023
VMware ESXi 6.7 - TCP/IP stacks

You must be logged in to post a comment