- VMware
- 09 December 2022 at 12:14 UTC
-


To be able to manage the settings and use the different features about the virtual hard disk of your virtual machines, you need the "VMRC (VMware Remote Console)" program.
For more information about this program, refer to our tutorial : VMware ESXi 6.7 - VMRC console (VMware Remote Console) presentation.
- Access your virtual machine settings
- Impossible to map remote virtual hard disk
- Defragment your virtual machine's virtual hard disk
- Expand (increase) the capacity of the virtual hard disk
- Compact a virtual hard drive (to reclaim unused space)
- Advanced settings
1. Access your virtual machine settings
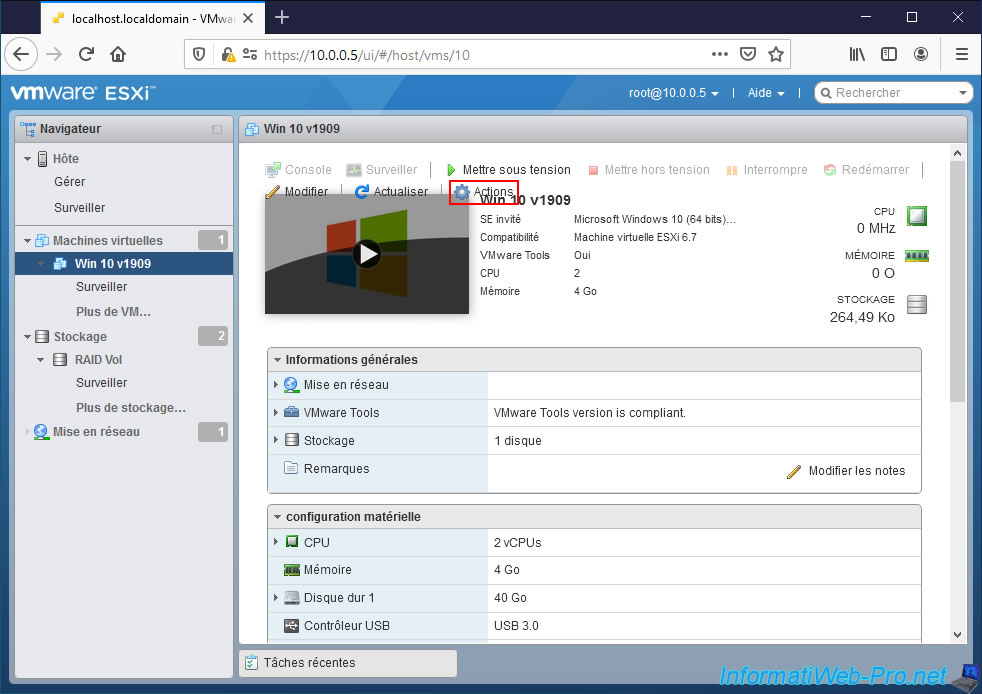
To begin, display the information of a virtual machine from the VMware ESXi web interface and click on : Actions.
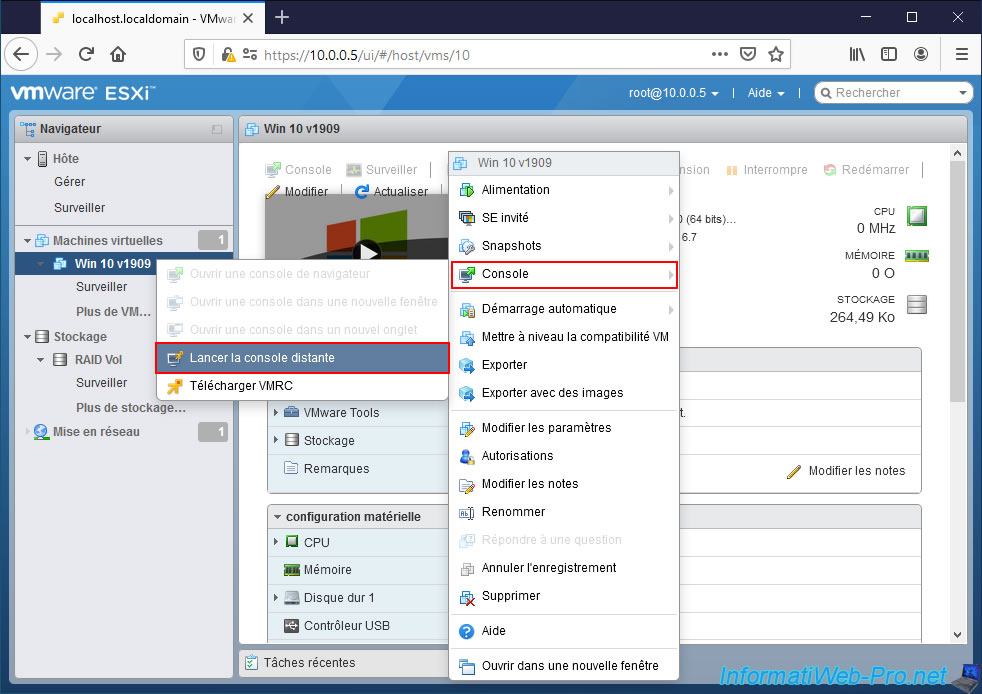
In the menu that appears, click on : Console -> Launch remote console.
A "[Name of your virtual machine] - VMware Remote Console" window will appear.
In this window, go to : VMRC -> Manage -> Virtual Machine Settings.
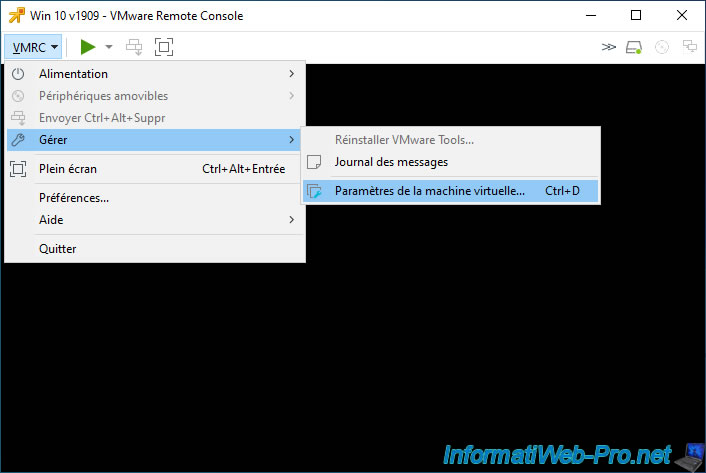
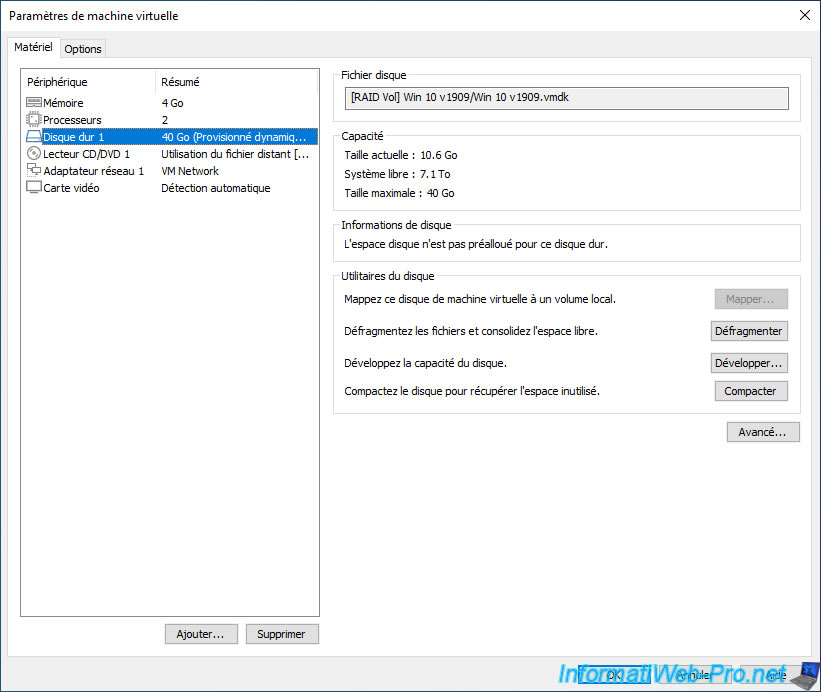
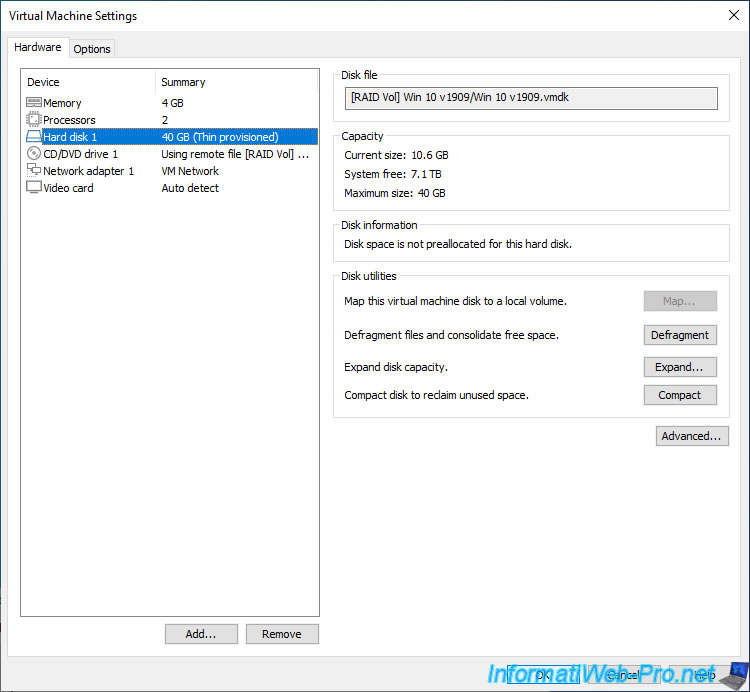
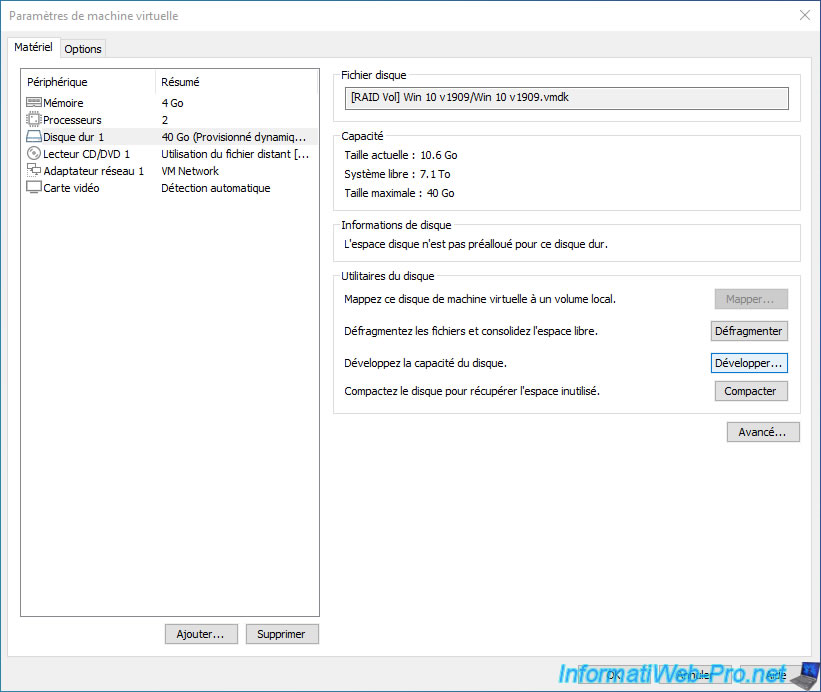
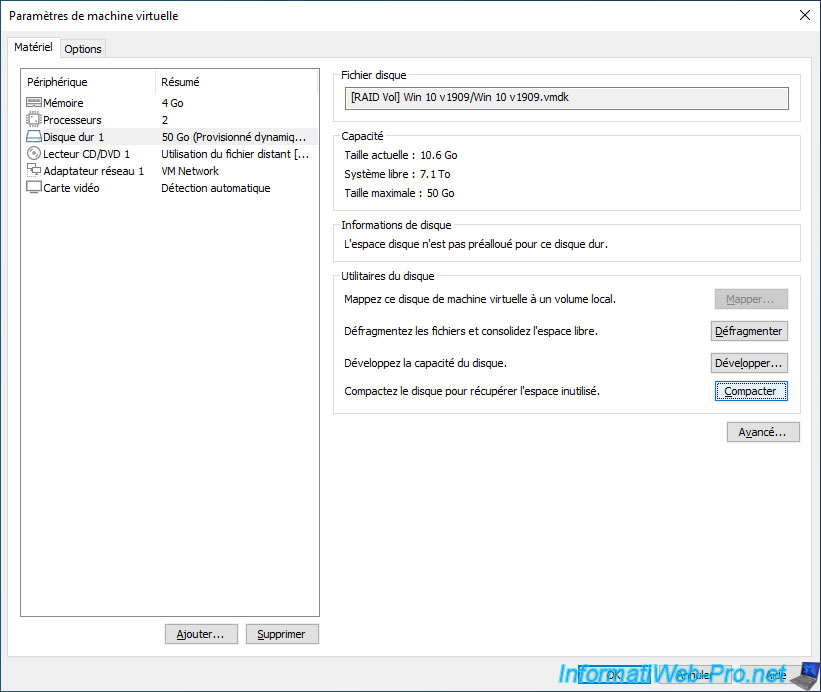
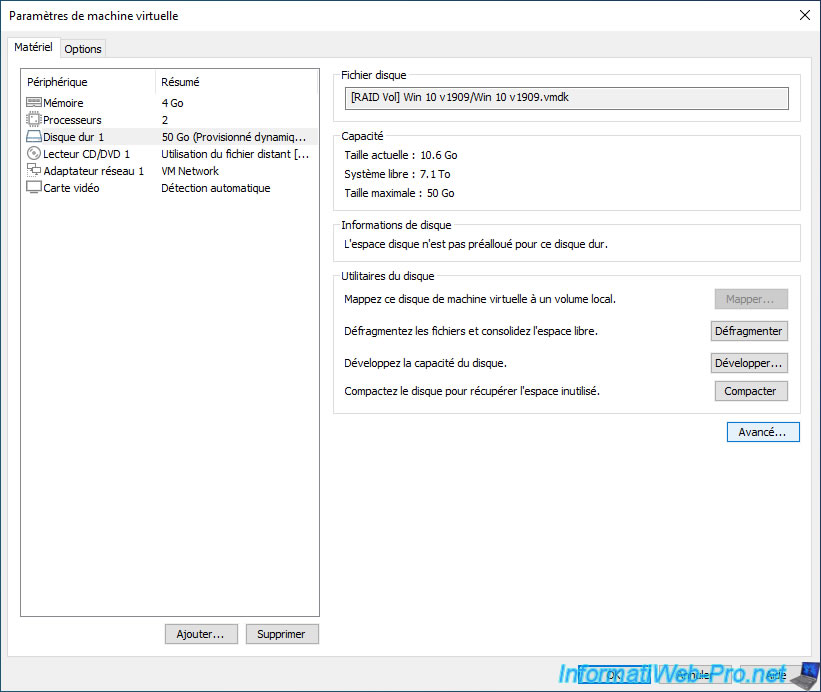
In the "Virtual Machine Settings" window that appears, select your virtual hard disk.
Note that you can access the same options by connecting to your VMware ESXi server from VMware Workstation as explained in our tutorial : VMware Workstation 16 / 15 - Manage the VMs of a ESXi server.
2. Impossible to map remote virtual hard disk
Since you are using your virtual machine remotely, it's not possible to map its virtual hard disk to your computer.
You can also check it in the official VMware documentation : Map or Mount a Virtual Disk to a Drive on the Host System.

3. Defragment your virtual machine's virtual hard disk
If you often use a virtual machine, its performance may decrease due to the fragmentation of its virtual hard disk.
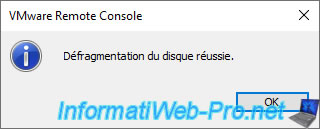
To improve its performance, you can defragment its virtual hard disk by clicking on the "Defragment" button.

After the virtual hard disk is defragmented, you will see the "Disk defragmentation successfully completed" message appear.
4. Expand (increase) the capacity of the virtual hard disk
One of the advantages of virtualization is to be able to adapt the resources (CPU usage, RAM, storage size, ...) of a virtual machine when needed.
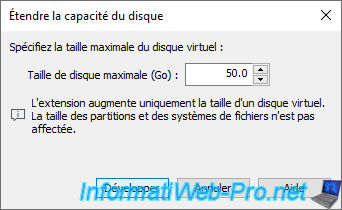
In the settings of your virtual machine, you can for example expand (so, increase) the size of a virtual hard disk by clicking on the "Expand" button.
Specify the new size of the virtual hard disk to increase its size and click "Expand".
The size you specify must therefore be larger than the current one.
Important : as shown here, expanding the virtual hard disk will not affect the size of the file system on it or its partitions.
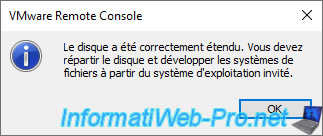
VMware Remote Console tells you that the disk has been successfully extended.
However as indicated in the message below, you will then need to repartition the virtual hard disk from the guest operating system to be able to use the additional storage space that you have just allocated to this virtual machine.
To do this, refer to the procedure appropriate for your guest operating system :
- for Windows : Extend virtual hard disk capacity from Windows
- for Linux distributions : Extend virtual hard disk capacity from Linux
5. Compact a virtual hard drive (to reclaim unused space)
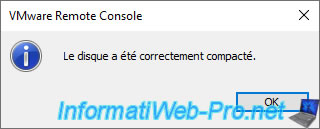
To recover the unused space by a virtual hard disk, you need to compact it.
When the operation is complete, a "The disk was successfully compacted" message will appear.
Warning : this compacting option doesn't reclaim the unused space present in the various snapshots (if any).
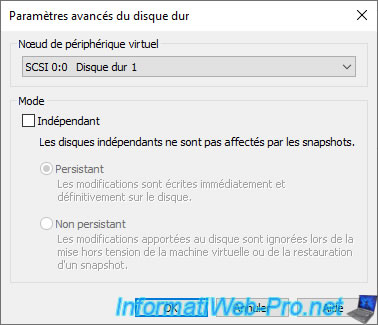
6. Advanced settings
Finally, you will also find an "Advanced" button.
In the "Hard Disk Advanced Settings" window that appears, you can :
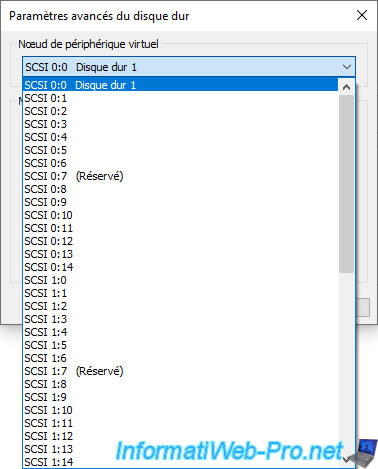
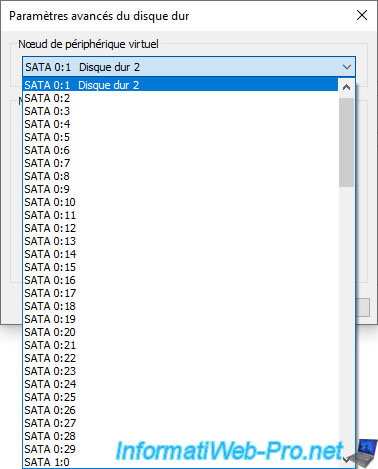
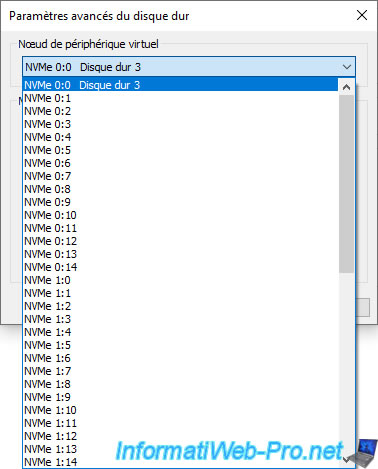
- Virtual device node : choose the position of the virtual hard disk on its type of controller (SCSI, IDE, SATA or NVMe).
- Independent : choose whether this hard disk should be independent of snapshots or not.
When this mode is enabled, you will have the choice between :- Persistent : the changes will be permanently stored on the virtual hard disk. Even if you restore a snapshot in the meantime.
- Nonpersistent : changes made to the virtual hard disk will be lost when the virtual machine is powered off or when a snapshot is restored.
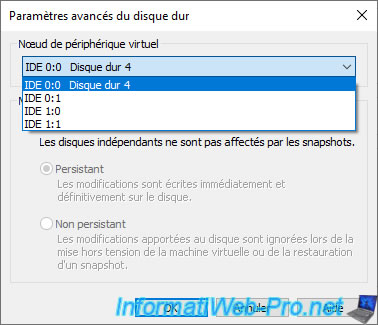
Note that the position of the virtual hard disk, as well as the number of virtual hard disks that you can connect to a controller (SCSI, SATA, IDE or NVMe) will depend on the type of controller.
For example, with a SCSI controller, you will be able to connect many devices (hard disks and CD/DVD drives).
But, with an old IDE controller, you will only have 4 possibilities :
- Primary master
- Primary slave
- Secondary master
- Secondary slave
For the SATA controller, you will have many possibilities.
Same for the NVMe controller.
Share this tutorial
To see also
-

VMware 5/25/2022
VMware ESXi 6.0 - Install the VMware Host Client web client
-

VMware 5/27/2022
VMware ESXi 6.5 - Add a network driver in the installation ISO
-

VMware 1/27/2023
VMware ESXi 6.7 - Enable virtualization-based security (VBS)
-

VMware 12/2/2022
VMware ESXi 6.7 - Install and use the VMRC console on Linux
You must be logged in to post a comment