Manage virtual hard disks (map, defragment, expand, clean up, ...) with VMware Workstation 16 or 15
- VMware
- 30 April 2020 at 12:01 UTC
-

- 2/2

3.2. Extend virtual hard disk capacity from Linux
For virtual machines whose guest OS is based on Linux, this is a bit more complicated, because everything will happen on the command line.
Unless you use the free GParted Live CD to do it through a GUI.
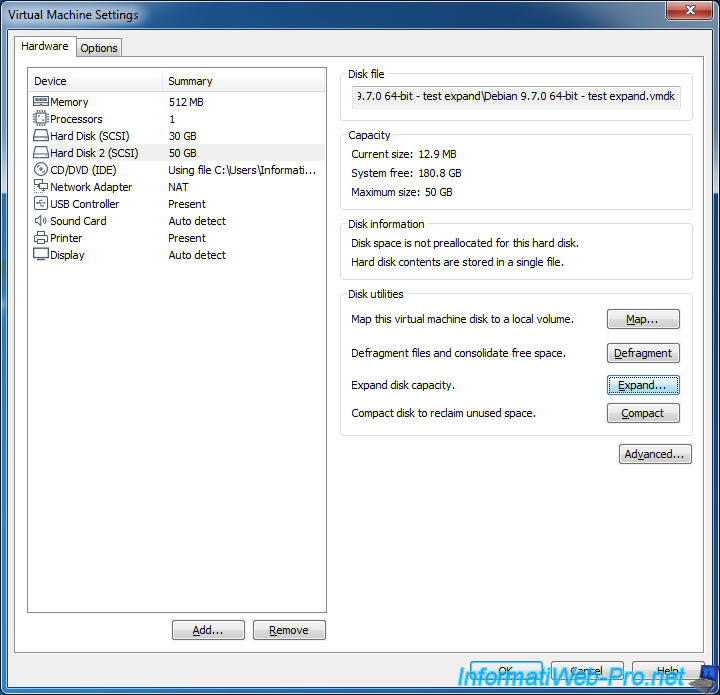
In your virtual machine settings, select the virtual hard disk to expand and click Expand.
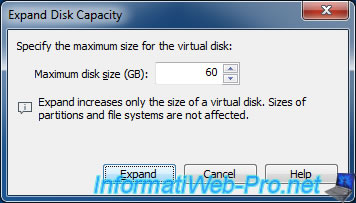
Specify the new size.
In our case, we will go from 50 GB to 60 GB.
Then, in the guest OS, open a terminal and get root rights (with the "su" or "sudo su" command).
Bash
su -
Note that the following procedure has been tested with Debian 9.7.0 x64 and Ubuntu 18.04 LTS x64.
First, run GNU parted like this to use the 2nd virtual hard disk (sdb) of the virtual machine.
Bash
parted /dev/sdb
This command will show you this :
Plain Text
GNU Parted 3.2
Using /dev/sdb
Welcome to GNU Parted! Type 'help' to view a list of commands.
(parted)
List the partitions of the virtual hard disk by typing :
Bash
In our case, you can see that we have a virtual hard disk of 64.4GB and the partition is only 53.7GB at the moment. Therefore, the 10 GB added in VMware Workstation is missing.
Plain Text
Model: VMware, VMware Virtual S (scsi)
Disk /dev/sdb: 64,4GB
Sector size (logical/physical): 512B/512B
Partition Table: msdos
Disk Flags:

Number  Start   End     Size    Type     File system  Flags
 1      1049kB  53,7GB  53,7GB  primary  ext4
Resize partition number 1 by specifying the maximum size of the virtual hard disk previously displayed :
Bash
resizepart 1 64,4GB
We re-list the partitions of this virtual hard disk :
Bash
Plain Text
Model: VMware, VMware Virtual S (scsi)
Disk /dev/sdb: 64,4GB
Sector size (logical/physical): 512B/512B
Partition Table: msdos
Disk Flags:

Number  Start   End     Size    Type     File system  Flags
 1      1049kB  64,4GB  64,4GB  primary  ext4
To finish, leave parted by typing:
Bash
quit
Plain Text
Information: You may need to update /etc/fstab.
Mount the partition of your 2nd virtual hard disk by using these commands :
Bash
mkdir /second-hdd
mount /dev/sdb1 /second-hdd
List the volumes mounted with the command :
Bash
df -h
Surprise : as you can see, the size of the sdb1 partition is still 49G.
Plain Text
Filesystem         Size    Used Avail Use% Mounted on
udev               226M       0  226M   0% /dev
tmpfs               48M    3,7M   44M   8% /run
/dev/sda1           20G    4,2G   14G  24% /
tmpfs              238M       0  238M   0% /dev/shm
tmpfs              5,0M    4,0K  5,0M   1% /run/lock
tmpfs              238M       0  238M   0% /sys/fs/cgroup
tmpfs               48M     28K   48M   1% /run/user/116
tmpfs               48M     20K   48M   1% /run/user/1000
/dev/sdb1           49G     53M   47G   1% /second-hdd    <====
To fix this problem, just make a "resize2fs" on the partition that you just resize with parted.
Bash
resize2fs /dev/sdb1
Bash
resize2fs 1.43.4 (31-Jan-2017)
Filesystem at /dev/sdb1 is mounted on /second-hdd ; on-line resizing required
old_desc_blocks = 7, new_desc_blocks = 8
The filesytem on /dev/sdb1 is now 15722400 (4k) blocks long.
Now, our partition size is 59G.
Bash
df -h
Plain Text
Filesystem         Size    Used Avail Use% Mounted on
udev               226M       0  226M   0% /dev
tmpfs               48M    3,7M   44M   8% /run
/dev/sda1           20G    4,3G   14G  24% /
tmpfs              238M       0  238M   0% /dev/shm
tmpfs              5,0M    4,0K  5,0M   1% /run/lock
tmpfs              238M       0  238M   0% /sys/fs/cgroup
tmpfs               48M     28K   48M   1% /run/user/116
tmpfs               48M     20K   48M   1% /run/user/1000
/dev/sdb1           59G     52M   56G   1% /second-hdd    <====
4. Compact (recover unused space in the virtual hard disk)
If you store and delete a lot of data in a virtual hard disk, it probably takes much more space than the size of the data it contains.
To recover the space unused by this virtual hard disk, click the Compact button.
Then, wait for a few minutes or more depending on the size of your virtual hard drive and the amount of data it contains.
IMPORTANT : if you have created snapshots after deleting data in this virtual machine, this feature will not allow you to recover the space used by these deleted files.
To recover this space, you will need to use the "Clean Up Disks" feature explained later in this tutorial.
When the process is complete, the "The disk was successfully compacted" message will appear.
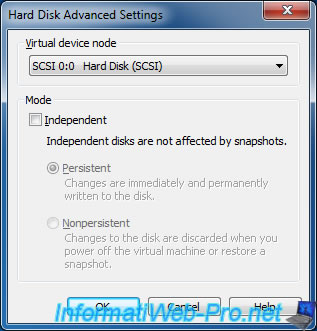
5. Advanced settings
By clicking on the Advanced button, you will be able to change some advanced settings including :
- the position of the virtual hard disk (as you would in a physical PC)
- specify whether the virtual hard disk should be independent of snapshots or not. This allows for example to store backups in it and to restore the state of Windows or Linux without altering these backups.
You can also choose to keep changes made in this virtual hard disk or cancel them when the virtual machine is stopped.
Convenient if you only store cache files for example.
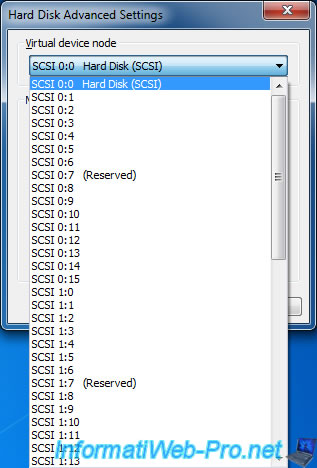
Note that the management of the hard disk position varies of course with the type of virtual hard disk used.
For example, with SCSI, it's possible to connect a lot of hard drives in a real PC (or rather a real server).
In addition, SCSI supports hot swap (hot-plug / unplug) in professional servers.
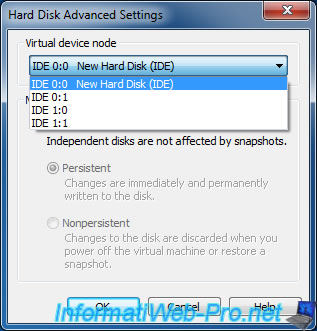
On the other hand, for the IDE (used for Windows XP, for example), you only have 4 possibilities :
- primary master
- secondary master
- primary slave
- secondary slave
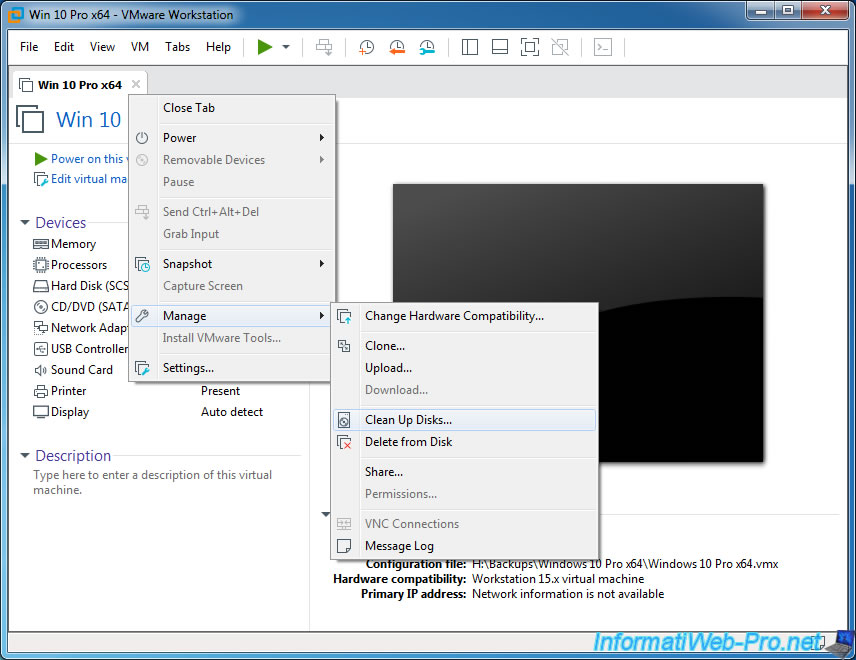
6. Clean Up Disks (recovering unused space on the virtual hard disk)
This feature is almost identical to the Compact feature, except that it is accessible via a shortcut "Manage -> Clean Up Disks" and especially that it allows you to recover all the space not used by your virtual machine.
Indeed, when you delete files in a virtual machine, then you create a snapshot on it, the space used by files deleted before the creation of the snapshot can't be recovered by the function "Compact".
To recover this space, you will need to use the "Clean Up Disks" feature.
Important : this "Clean Up Disks" option is only available for virtual machines whose operating system is Windows or Windows Server.
You will therefore not find this option if Linux is installed in your virtual machine. In this case, use the "Compact" option mentioned above which is always available, regardless of the guest operating system used.
For the demonstration, we voluntarily copied large data inside the virtual machine, and then we permanently deleted them.
Except that, as you can see, although they have been removed from the guest OS, this is not the case in the virtual hard disk.
And by the way, the same thing happens when you delete data "permanently" from your physical hard drive.
This is why data recovery software (and cops) can recover them more or less easily (it depends on whether Windows rewrote on these erased data or not).
More info in this tutorial : Data recovery with File Scavenger
In short, as you can see, our virtual hard drive currently uses 37.4 GB on our physical hard drive, while it contains 25.4GB of data that it no longer uses (data permanently erased from the guest operating system).

Wait during the cleanup process that may take longer or shorter depending on the size of your virtual hard disk and the amount of data to delete in it.
Once the process is complete, the "Disk cleanup is finished" message will be displayed.
Share this tutorial
To see also
-

VMware 3/16/2013
VMware Workstation - Boot a VM on the BIOS / EFI firmware
-

VMware 2/7/2020
VMware Workstation 15 - Installation on Linux
-

VMware 12/24/2021
VMware Workstation 15 - Slice the virtual hard disk of a VM
-

VMware 12/10/2021
VMware Workstation 15.5 - Convert a Virtual PC virtual machine to a VMware VM
No comment