- Windows Server
- 05 January 2024 at 12:04 UTC
-

- 1/4
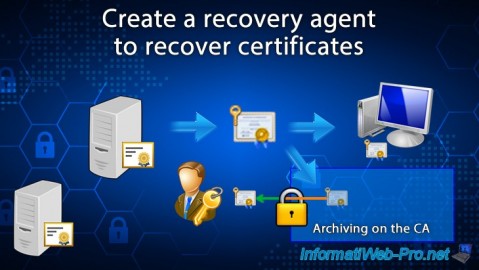
By default, when your authority issues certificates to your servers, computers, and users, the private key associated with the issued certificate is only stored in the local store of that server, computer, or user.
The problem is that the day the server or computer with this certificate goes down, you will no longer be able to access the associated private key.
To avoid this problem, you can enable private key archival on your CA.
Then, one or more recovery agents that you designate beforehand will be able to recover the private keys archived on your certification authority to recover the desired certificate in ".pfx" format (public key + private key). This will then allow you to restore the original certificate and associated private key to the affected server, computer, or user certificate store.
Warning : the activation of certificate archiving is not retroactive. Additionally, certificate archiving must be enabled on your CA, as well as in the desired certificate template for the desired certificates to be archived.
- Archiving of private keys
- Restore via recovery agent
- Create a new user in Active Directory
- Allow the recovery agent to access your CA
- Create a new certificate template : Key Recovery Agent
- Request a recovery agent certificate
- Enable certificate archival on your CA
- Enable certificate archival on the desired certificate template
- Request a new certificate (which will be automatically archived)
- Loss of certificate
- Restore a lost certificate
1. Archiving of private keys
To avoid losing the private key associated with a certificate issued to a server, computer, or user, you can enable certificate archival.
The advantage being that the certificates are completely archived (including the private key associated with each of them).
When certificate archival is enabled :
- certificates are automatically archived (including their public key)
- the private keys associated with these certificates are also archived
- archiving is automatic when issuing certificates
2. Restore via recovery agent
Since the private key must remain secret (for security reasons), by default, only the recipient (server, computer or user) has the private key associated with their personal certificate.
For security reasons, you will therefore need to designate 1 or ideally at least 2 users as key recovery agents.
Users designated as key recovery agents will be able to recover certificates and associated private keys for certificates that were archived after private key archival was enabled and that were referenced as a recovery agent in the properties of your certificate authority.
Note : the recovery agent set to a certificate authority has nothing to do with the EFS recovery agent which concerns the recovery of encrypted data via the EFS file system.
Important :
- key recovery agent certificates are not archived.
They must therefore be saved manually. - it's recommended to have multiple recovery agents to ensure that you can recover lost certificates locally, even if one of your recovery agents goes on vacation, is no longer with your company, or is not more of this world.
- archiving is only performed if archiving is enabled in the properties of the certificate template concerned.
Of course, this is not retroactive. In other words, if you enable archiving today on a specific certificate template, previous certificates issued using that certificate template will not be automatically archived. - you can designate any trusted user as a recovery agent. This one doesn't need administrator rights.
On the other hand, it will need the necessary permissions on your CA (as you will see in this tutorial), as well as a recovery agent certificate.
3. Create a new user in Active Directory
For this tutorial, we have created a new user "IWAgentRecup" which is a simple user.
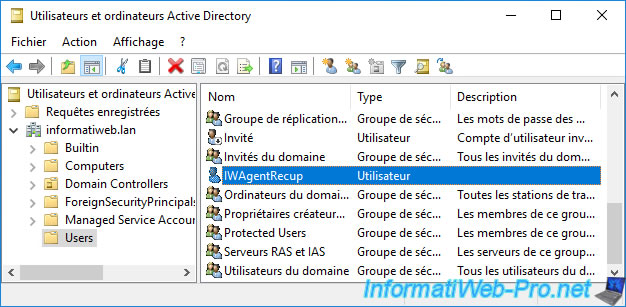
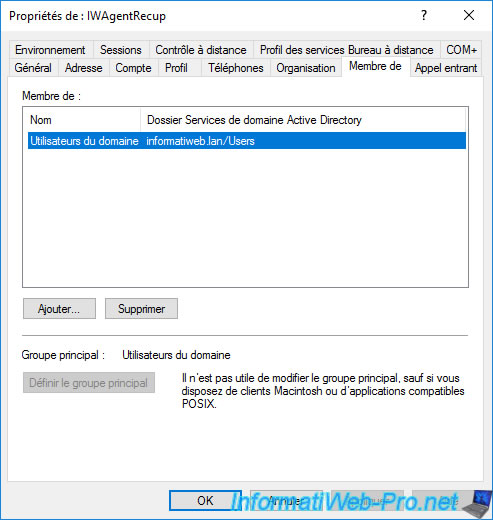
As you can see, this "IWAgentRecup" user is a simple user who is a member of the "Domain Users" group (which is the case by default).
4. Allow the recovery agent to access your CA
In order for your future recovery agent to be able to access the thumbprints of the issued certificates and the associated private keys, you must grant them the necessary permissions on your certificate authority.
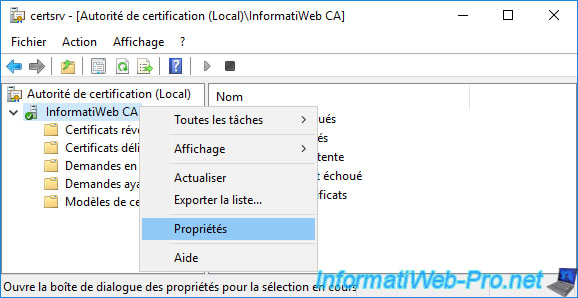
To do this, log on to your server acting as a certification authority as a domain administrator (for example) and open the "Certification Authority" console.
Then, right-click "Properties" on the name of your CA.
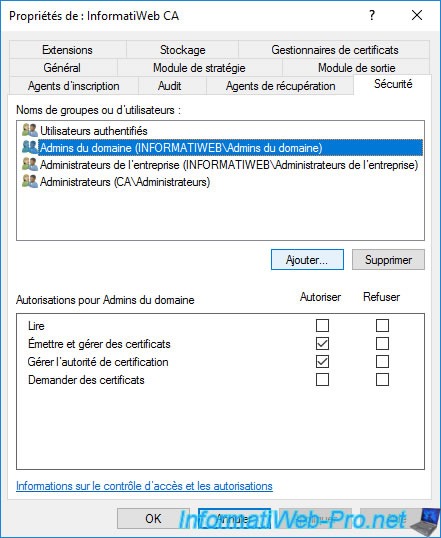
As you can see, by default, local administrators (Administrators) and Active Directory domain administrators (Domain Admins) have the right to issue and manage certificates, as well as manage the CA.
If you have created specific users (as is the case in this tutorial), you must add them here by clicking on : Add.
Provide the name of the recovery agent you want to allow access to your CA and click OK.
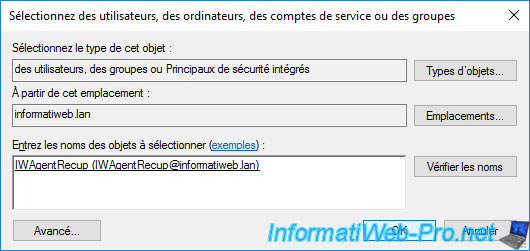
After the recovery agent is added, grant it permissions :
- Issue and Manage Certificates : allows your recovery agent to access the private key of a certificate (if it has been archived) to be able to recover the certificate and the private key and store them in a ".pfx" file.
Without this permission, the "certutil -GetKey ..." command will return the error "0x80094004 ... CERTSRV_E_PROPERTY_EMPTY". - Manage CA : allows access to the "Certification Authority" console to see in particular the list of certificates issued and to be able to access their digital fingerprint in order to be able to retrieve one of the archived certificates.
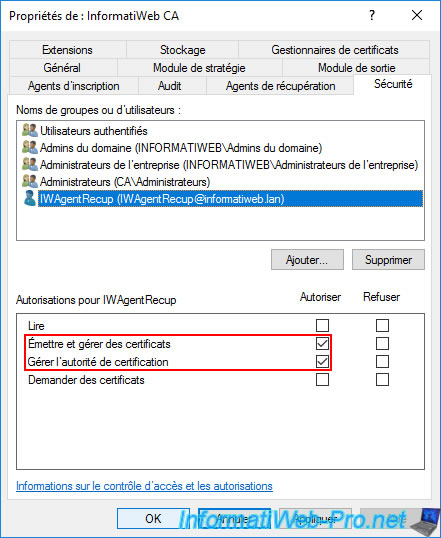
5. Create a new certificate template : Key Recovery Agent
In order for the newly created user to be able to recover the private keys associated with archived certificates, he must first have a key recovery agent certificate.
To do this, right-click "Manage" on the "Certificate Templates" folder.
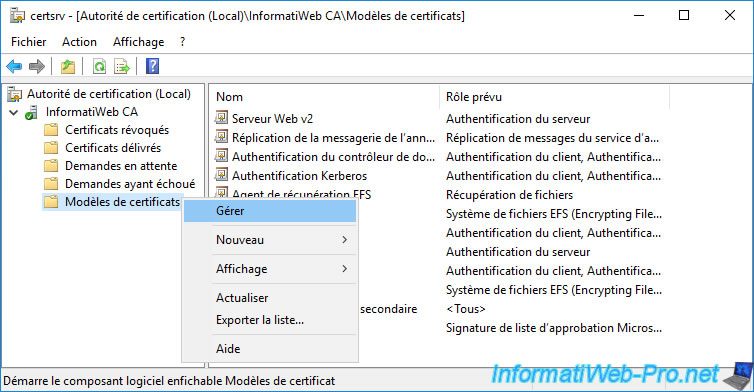
Right-click "Duplicate Template" on the "Key Recovery Agent" certificate template.
Warning : don't be mistaken with the other model of certificate named "EFS Recovery Agent" which has nothing to do and which concerns the recovery of files encrypted via the EFS file system.
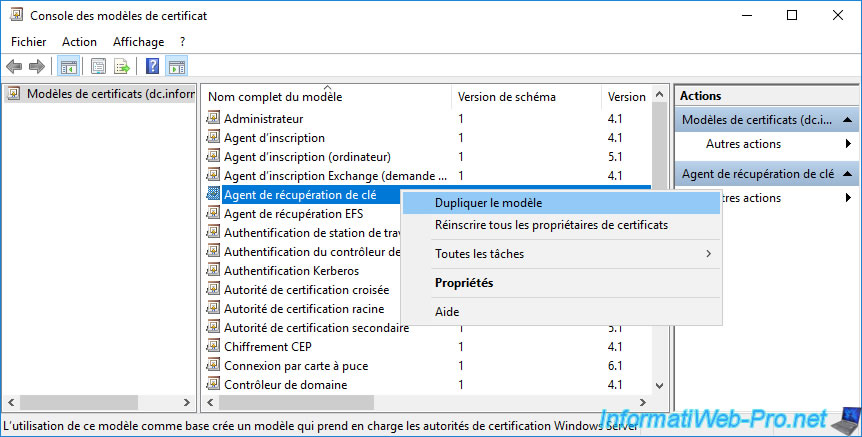
By default, this certificate template is compatible since Windows Server 2003.
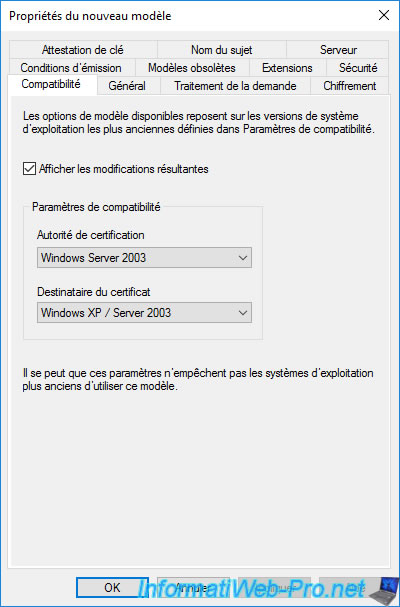
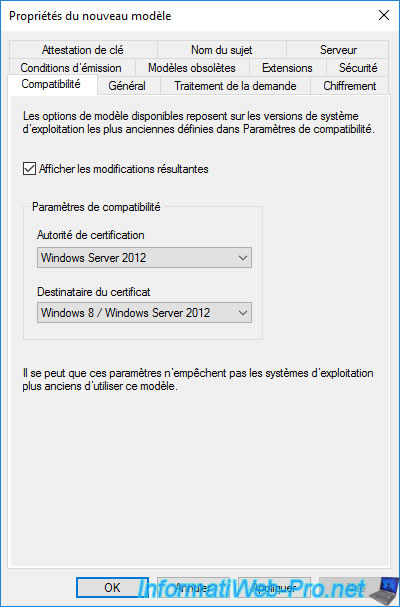
Select "Windows Server 2012" for these 2 compatibility settings.
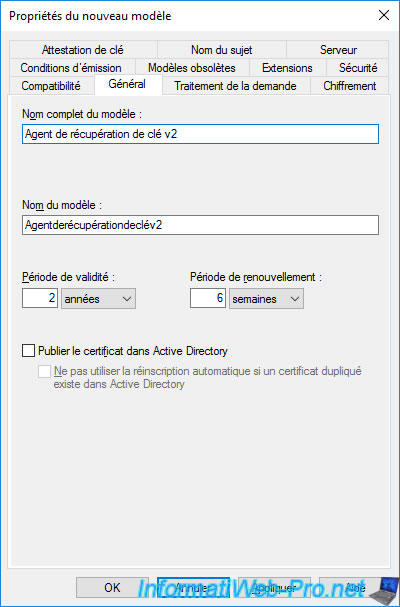
In the "General" tab, specify "Key Recovery Agent v2" (for example) as the full model name.
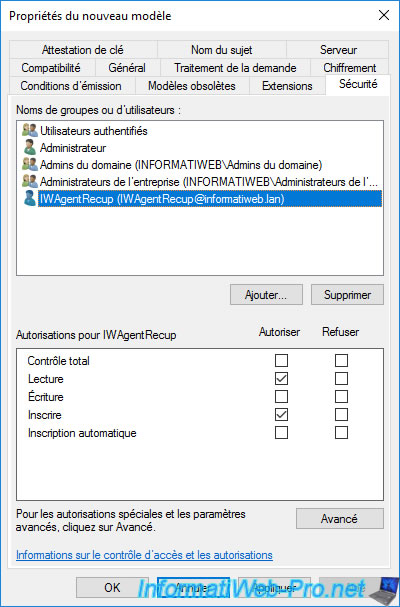
In the "Security" tab, by default, you will see that domain admins can enroll a recovery agent certificate (and therefore become one).
If you have created a new user that you want to use as a recovery agent, you will need to add it to the list by clicking on : Add.
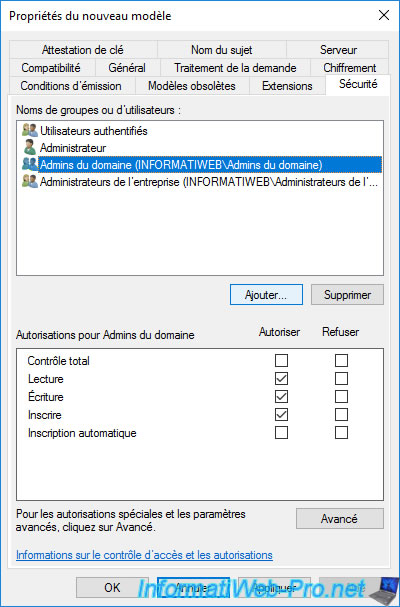
Specify the name of your future recovery agent (in our case : IWAgentRecup), then click OK.
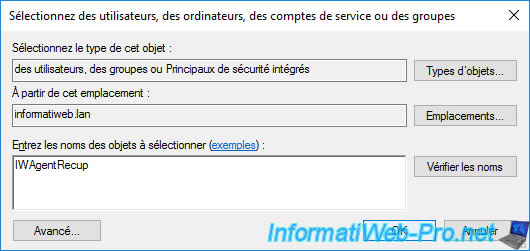
This user appears in the list.
Grant it "Read" and "Write" rights.
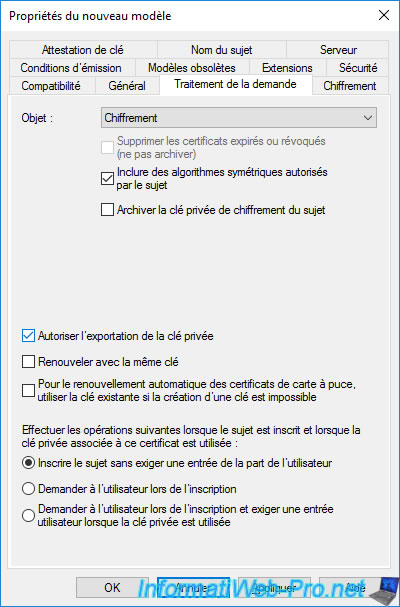
In the "Request Handling" tab, ensure that the "Allow private key to be exported" box is checked so that your recovery agents can manually export their own certificates in ".pfx" format from their store "Personal" certificates.
This is because recovery agent certificates are not archived.
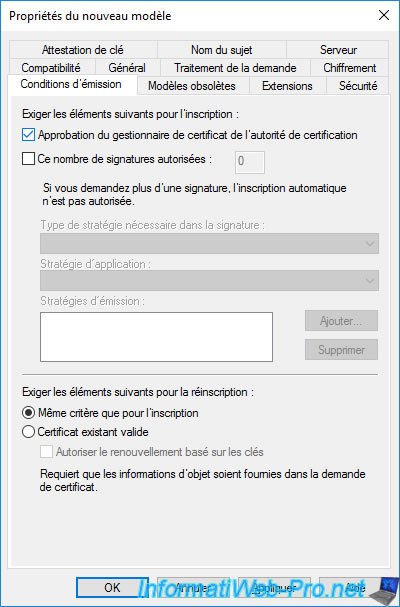
In the "Issuance Requirements" tab, you will see that by default, the "CA certificate manager approval" box is checked.
This means that when your user requests his recovery agent certificate, the administrator must manually validate the certificate request from the "Certification Authority" console.
Click OK.
The new "Key Recovery Agent v2" certificate template has been created.
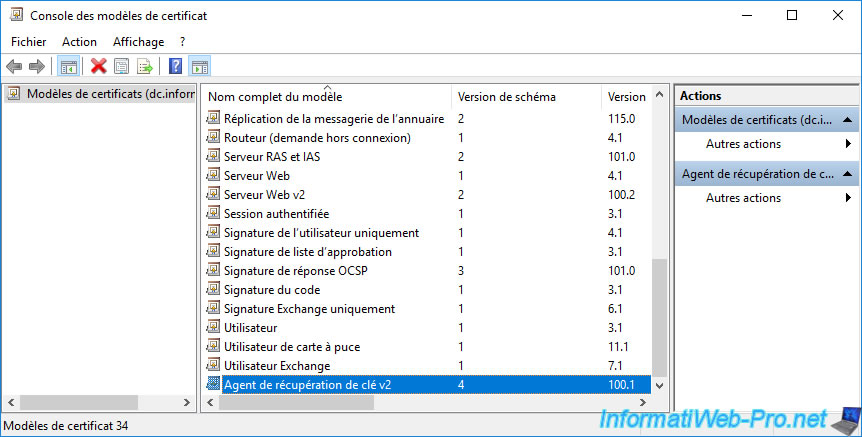
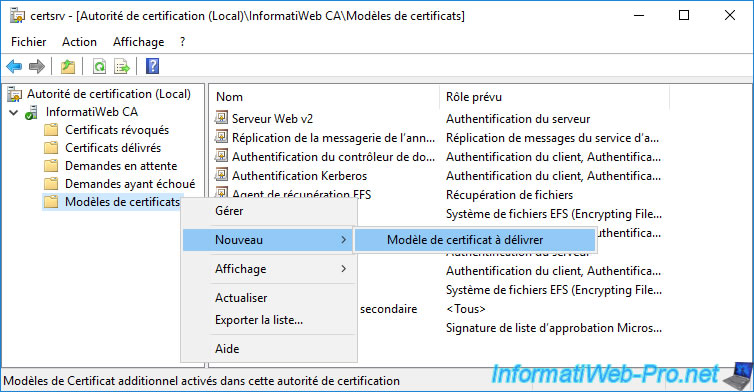
As usual, once the new certificate template has been created, right-click "New -> Certificate Template to Issue" on the "Certificate Templates" folder.
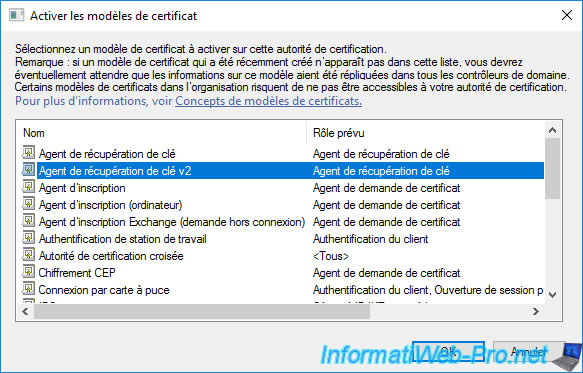
Select the "Key Recovery Agent v2" certificate template you just created and click OK.
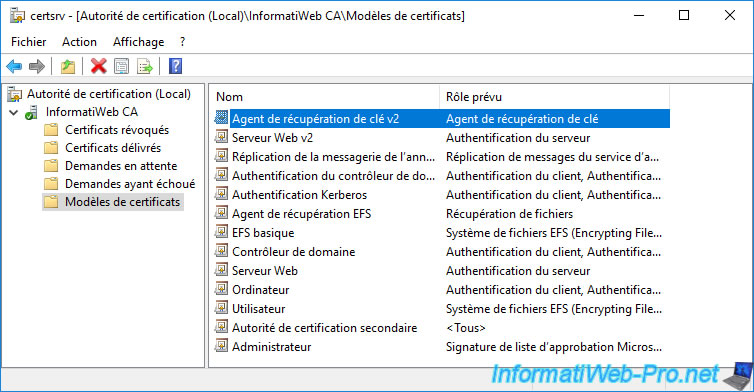
The new certificate template to be issued appears.
Share this tutorial
To see also
-
Articles 1/26/2024
SafeNet Authentication Client (SAC) - Installation and overview
-
Articles 9/8/2023
What is encryption and how does it work ?
-
Windows Server 12/29/2023
WS 2016 - AD CS - Backup and restore a certificate authority (CA)
-

Windows Server 1/19/2024
WS 2016 - AD CS - Buy smart cards and log in via them

You must be logged in to post a comment