Create a recovery agent to recover certificates on Windows Server 2016
- Windows Server
- 05 January 2024 at 12:04 UTC
-

- 3/4

7. Enable certificate archival on your CA
Log in as the domain administrator on your certificate authority.
Open the "Certification Authority" console and right-click "Properties" on the name of your CA.
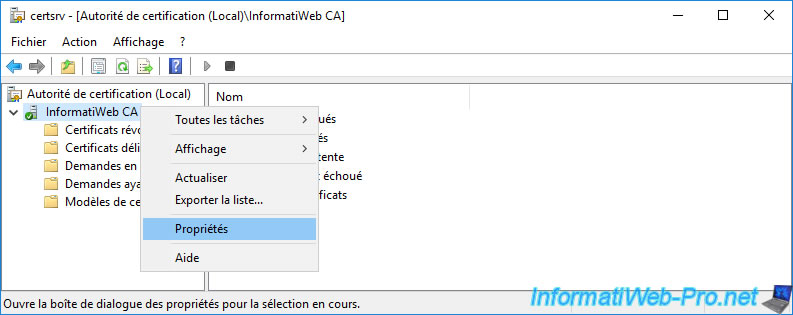
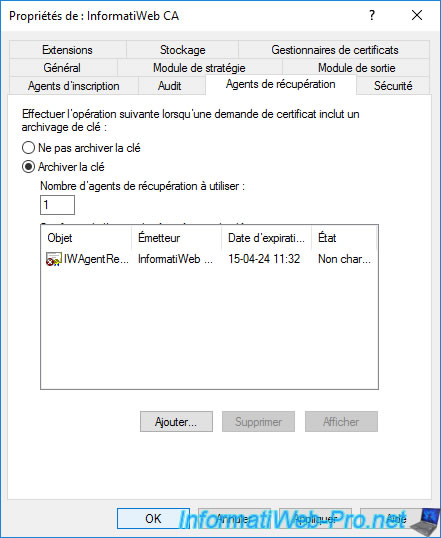
In the properties window that appears, go to the "Recovery Agents" tab.
As you can see, by default, the "Do not archive the key" option is selected.
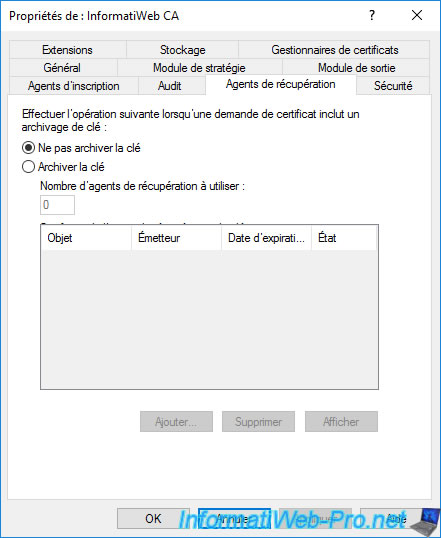
To enable archiving of certificates with their associated private keys on your CA, you will need to select the "Archive the key" option.
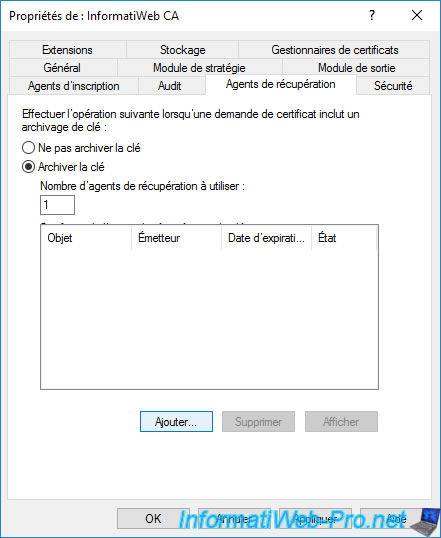
Then, you will need to specify the number of recovery agents to use. Default : 1.
However, as mentioned above, in business, it's recommended to use several recovery agents for security reasons (in case the recovery agent is no longer part of your company or is no longer in this world).
Click on : Add.
Select your key recovery agent certificate that appears and click OK.
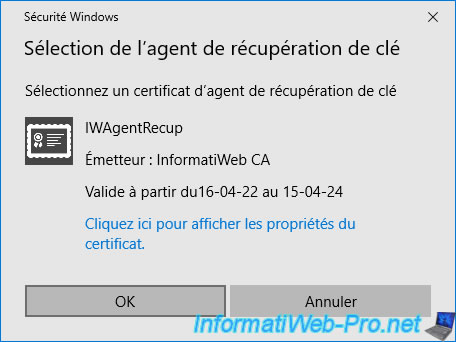
Your recovery agent certificate has been added.
However, if you look in the "State" column, you can see that it says "Not loaded" (hence the red cross visible on the icon of this certificate).
Indeed, for it to be used, the Active Directory certificate services must be restarted.
To do this, click OK.
Confirm restarting Active Directory Certificate Services by clicking Yes.

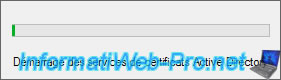
Wait while Active Directory Certificate Services restarts.
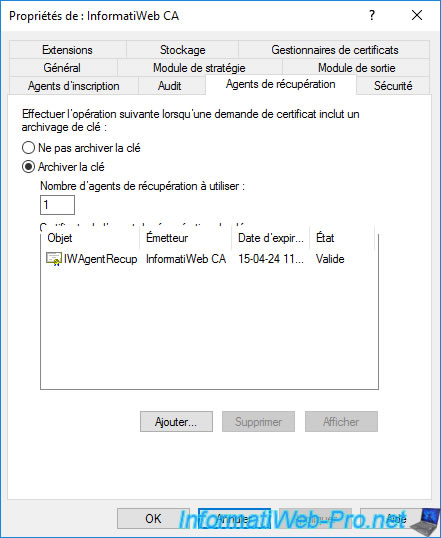
Now, if you go back to the "Recovery Agents" tab of your CA properties, you will see that the status is "Valid" and that the red cross has disappeared from the icon of the added certificate.
8. Enable certificate archival on the desired certificate template
For a certificate to be archived, key archiving must also be enabled in the settings of the desired certificate template.
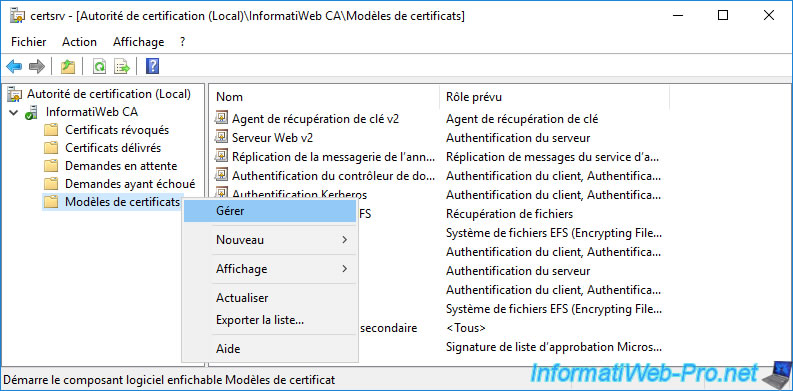
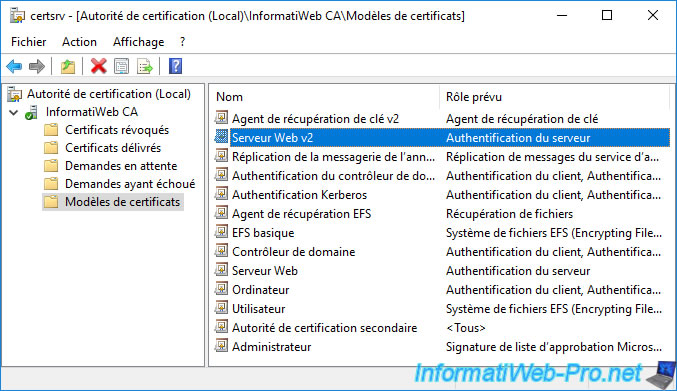
To do this, in the "Certification Authority" console, right-click "Manage" on the "Certificate Templates" folder.
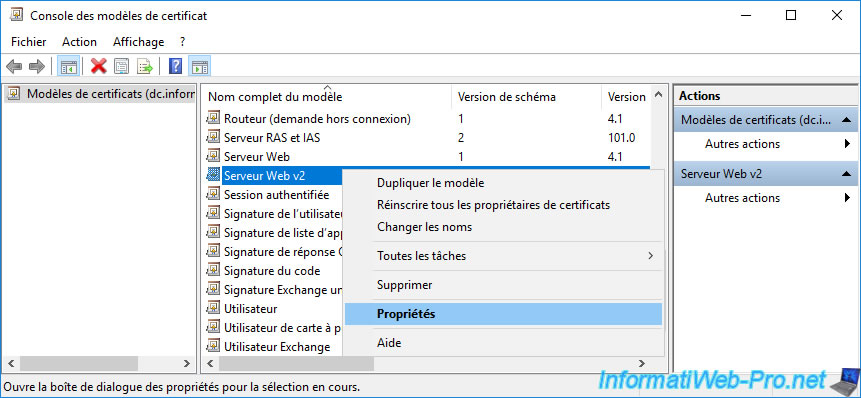
Edit one of your custom certificate templates (or duplicate an existing one).
In our case, we are going to edit our "Web Server v2" certificate template created in another tutorial by right-clicking "Properties" on it.
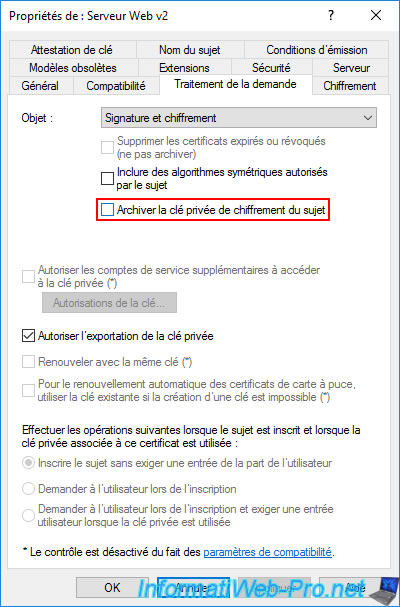
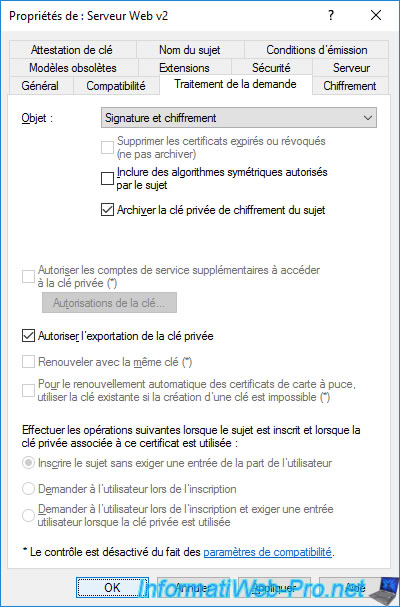
In the "Request Handling" tab, check the "Archive subject's encryption private key" box.
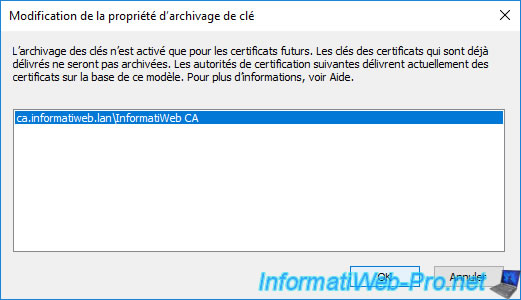
A "Changing Key Archival Property" window will appear telling you that key archival is not retroactive.
Indeed, only the keys of future certificates issued using this certificate template will be archived.
Select your CA and click OK.
Now that the "Archive subject's encryption private key" box is checked, click OK.
Note that in our case, our "Web Server v2" custom certificate template is already part of the certificate templates to be issued.
Otherwise, don't forget to add it by right-clicking "New -> Certificate Template to Issue" on the "Certificate Templates" folder.
9. Request a new certificate (which will be automatically archived)
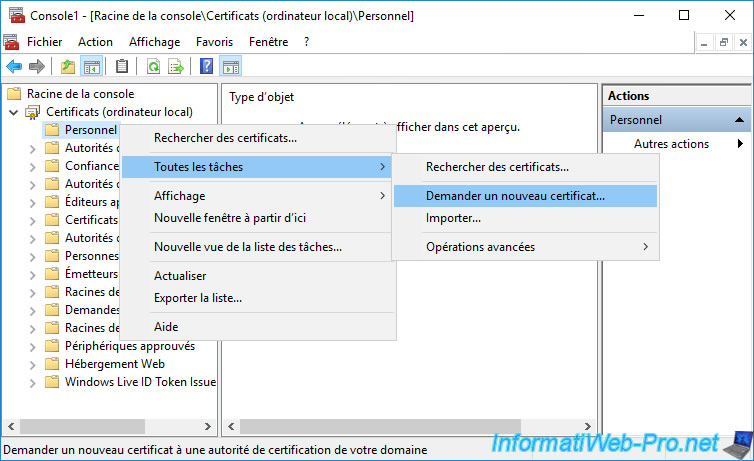
To test key archiving, we are going to request a new certificate for our web server from its "mmc" console.
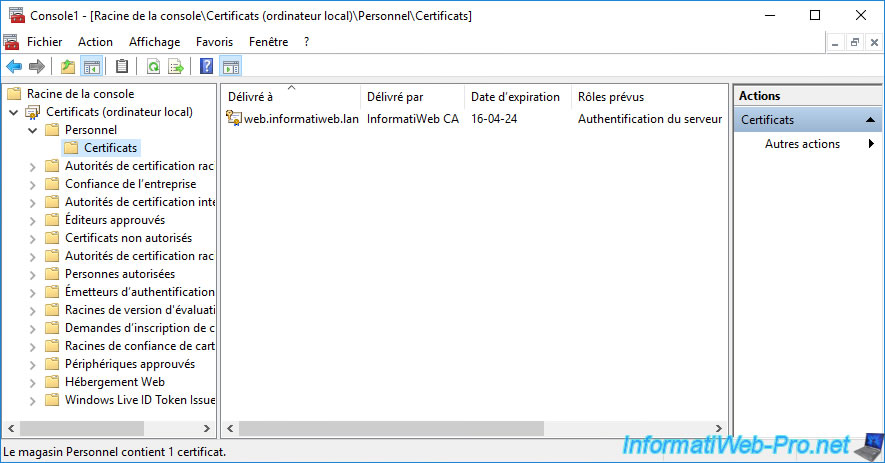
To do this, open a "mmc" console and add the "Certificates" component for the local computer (given that it's a certificate for a web server).
Then, right-click on the "Personal" certificate store and click : All Tasks -> Request New Certificate.
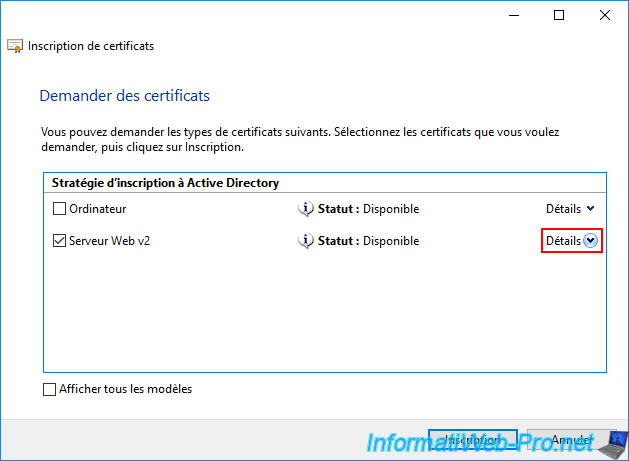
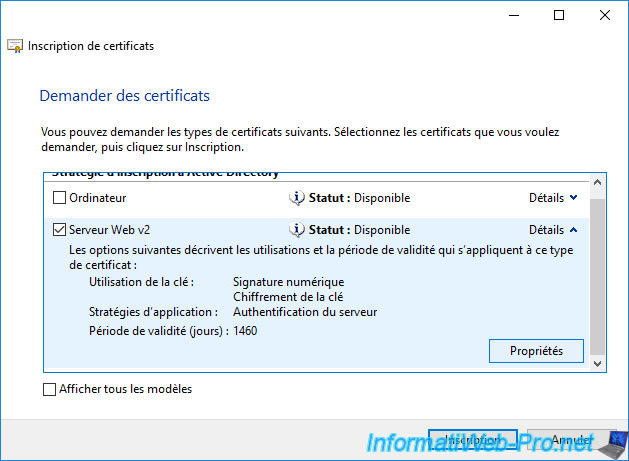
Select your certificate template (in our case : Web Server v2) and click on : Details.
Note : if this certificate template doesn't appear, make sure that your user account and the server or computer you are on are authorized to enroll certificates using this certificate template.
Click on the "Properties" button.
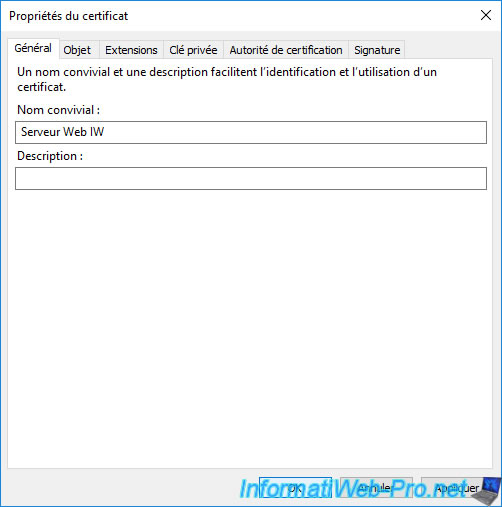
Provide a friendly name (if desired), then click OK.
In our case, we specified : Web Server IW.
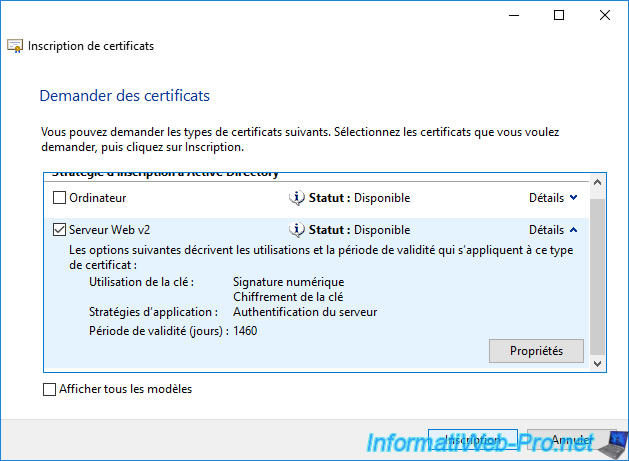
Click on : Enroll.
The certificate has been issued (delivered).
Click Finish.
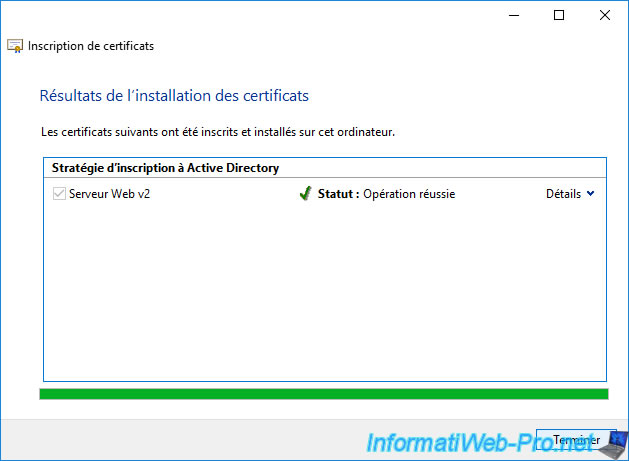
The issued certificate appears in your "Personal" certificate store.
Share this tutorial
To see also
-

Articles 1/26/2024
SafeNet Authentication Client (SAC) - Installation and overview
-

Articles 9/8/2023
What is encryption and how does it work ?
-
Windows Server 12/29/2023
WS 2016 - AD CS - Backup and restore a certificate authority (CA)
-

Windows Server 1/19/2024
WS 2016 - AD CS - Buy smart cards and log in via them
No comment