- Windows Server
- 15 December 2023 at 09:36 UTC
-

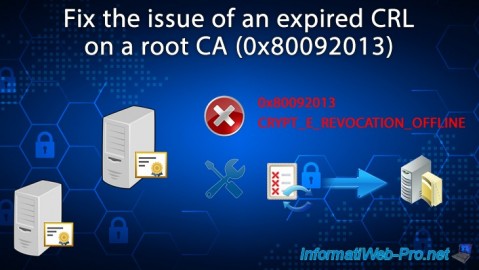
When you deploy a standalone root CA (certainly offline, if you follow Microsoft's best practices), as well as multiple subordinate CAs, your infrastructure may suddenly stop working one day.
This is because when you take your standalone root CA offline, you must manually publish and update that CA's revocation list in your Active Directory infrastructure.
If you forget to do this, all your subordinate CAs under this standalone root CA will stop working when your root CA's revocation list expires.
- Encountered problem
- Expired root CA revocation list
- Change the validity period of your root CA's certificate revocation list
- Update the certificate revocation list in your Active Directory
- Start your secondary CA
1. Encountered problem
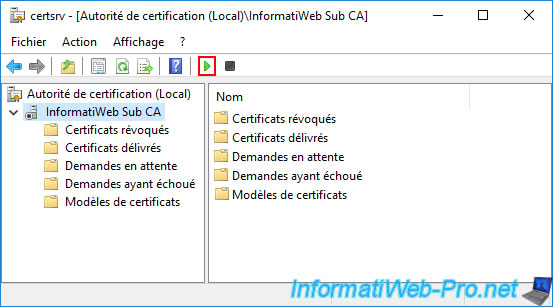
On one of your secondary CAs, you notice that it's not started.
So, you try to start it manually.
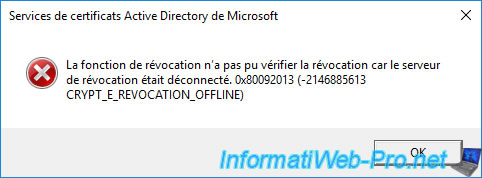
Your secondary CA refuses to start and this error appears :
Plain Text
The revocation function was unable to check the revocation because the revocation server was offline. 0x80092013 (-2146885613 CRYPT_E_REVOCATION_OFFLINE).
This error tells you that your subordinate CA could not check for revocation of its certificate because your standalone root CA is not reachable.
Which is normal since you keep it offline for security reasons.
If your subordinate CA is trying to re-download your standalone root CA's revocation list, it's because the previously published copy in your Active Directory infrastructure has expired.
2. Expired root CA revocation list
To see this revocation list, you can use the "Active Directory Sites and Services" console of your domain controller.
In this console, click on "View -> Show Services Node" to display the "Services" node of this console.
Then, go to : Services -> Public Key Services -> CDP -> [root CA server name].
As you can see, your root CA's certificate revocation list is there.
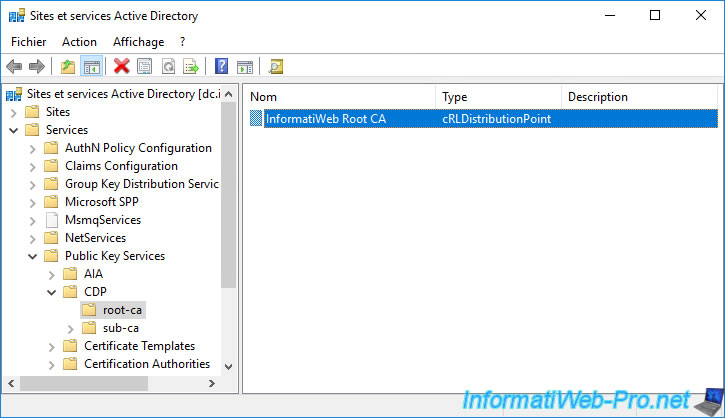
In our case, this revocation list was published manually in the Active Directory on 04/16/2022.
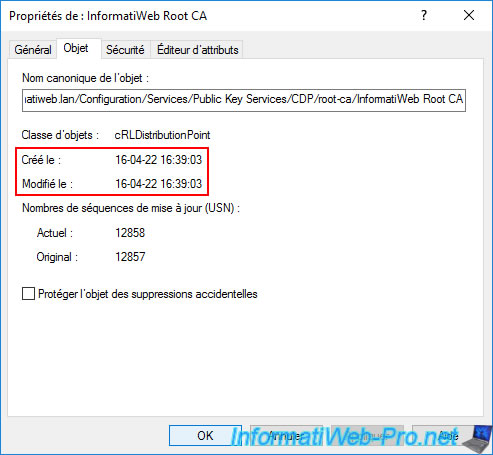
Which corresponds to the file below that we had published in the AD previously.
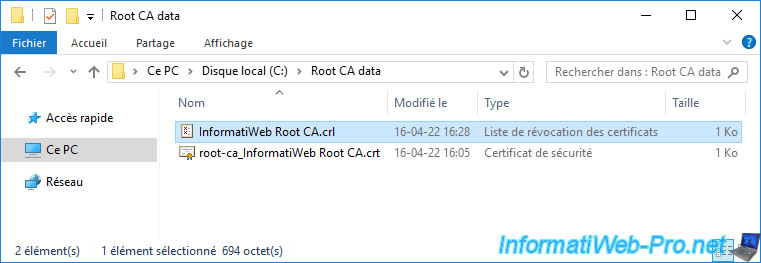
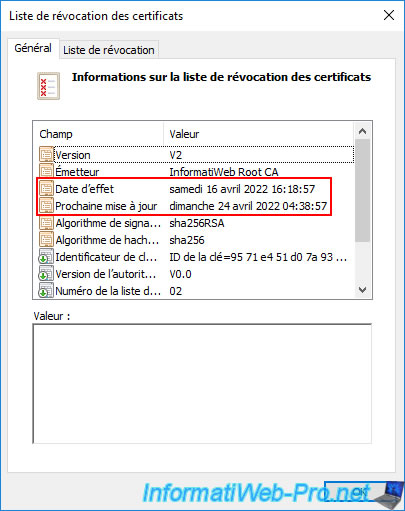
As you can see, this one was created on 04/16/2022 and this one is due to be updated on April 24th.
In other words, it expires on that day.
Because this certificate revocation list of your root CA has expired, you receive an error regarding revocation checking on your subordinate CA.
3. Change the validity period of your root CA's certificate revocation list
To prevent this revocation error from appearing in the future, you can change the validity period of your root CA's certificate revocation list.
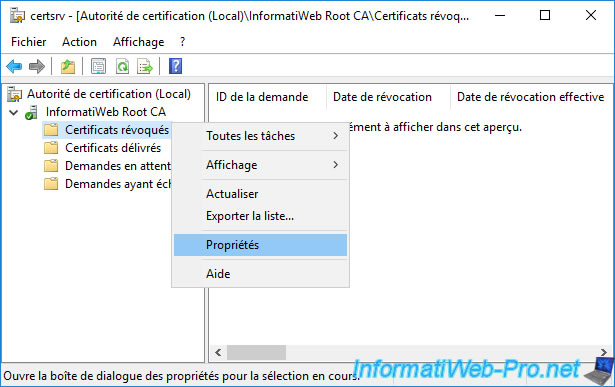
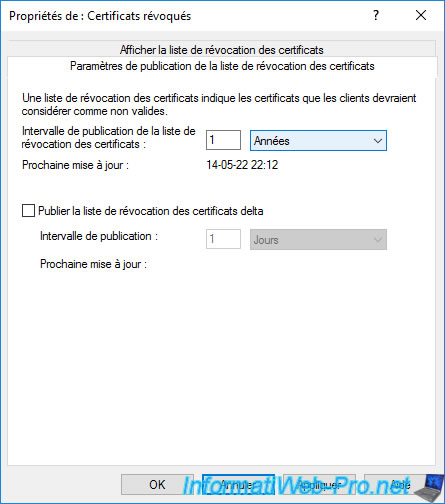
To do this, on this root authority, right-click "Properties" on the "Revoked Certificates" folder.
As you can see, in our case, we left the default "1 week".
Which is obviously too low, because it means you'll have to start your standalone root CA every week (minus 1 day) to manually publish the new CRL to your Active Directory infrastructure.
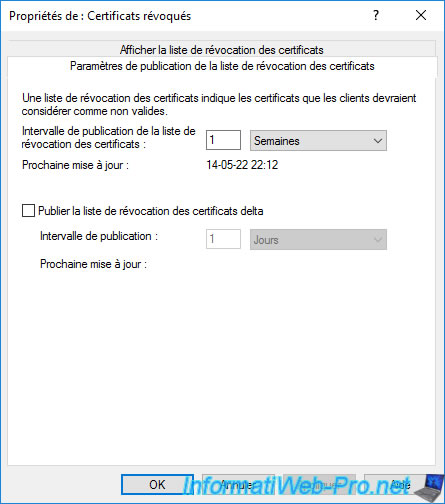
To solve the problem, it's advisable to extend this publication interval to 6 months or 1 year (for example).
Thus, you will need to start this standalone root CA and manually republish its revocation list only once or twice a year.
Click "Apply" to save this change.
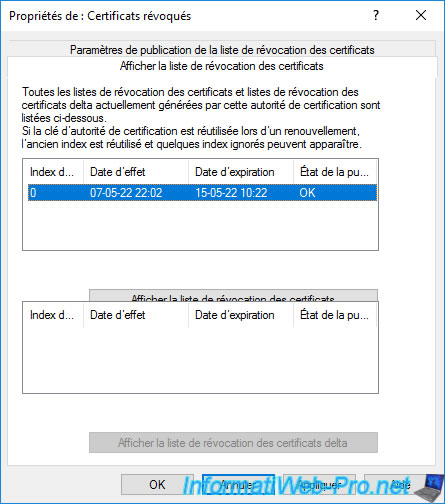
Then, if you go to the "View CRLs" tab, you will see that a new full CRL has already been generated by your standalone root CA since the old one was expired.
However, this is only valid for one week (by default).
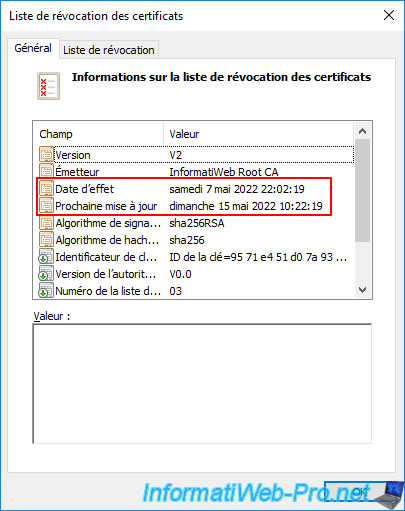
You can get more information about this revocation list by clicking the "View CRL" button.
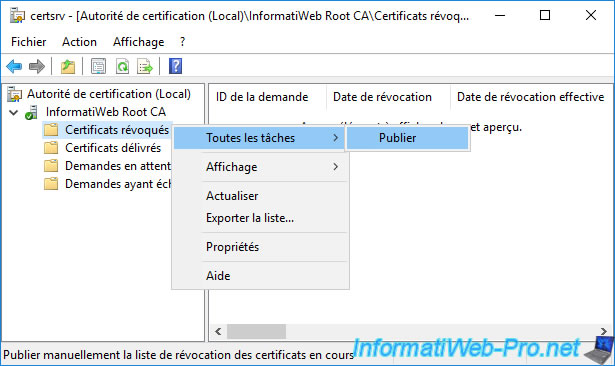
To use the new publishing interval, you will need to manually publish (once) the new CRL.
To do this, right-click "All Tasks -> Publish" on "Revoked Certificates".
On a standalone root CA, you can only generate a certificate revocation list (CRL).
So, just click OK.
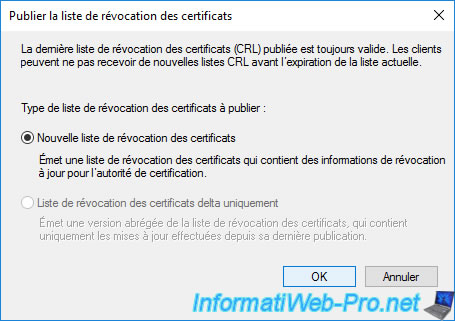
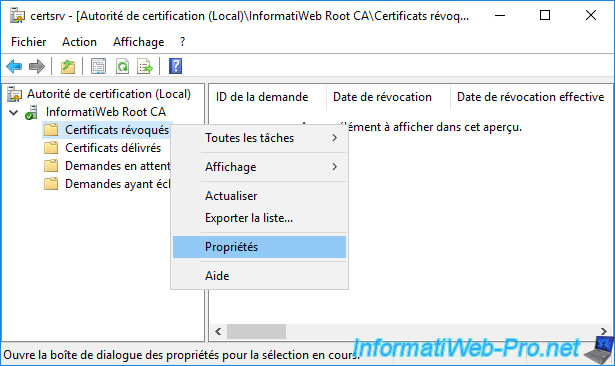
Then, right-click "Properties" on "Revoked Certificates".
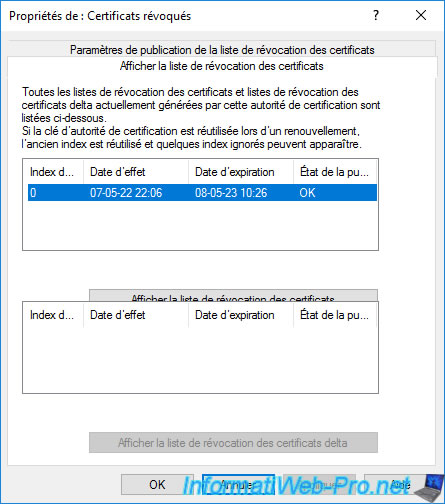
In the "View CRLs" tab, you will see that the CRL has been updated.
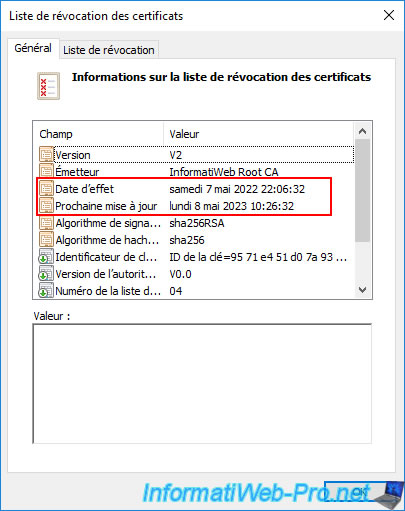
If you click on the "View CRL" button, you will see that it's valid for 1 year.
As usual, you will find this new revocation list in the "C:\Windows\System32\CertSrv\CertEnroll" folder of your standalone root certification authority.
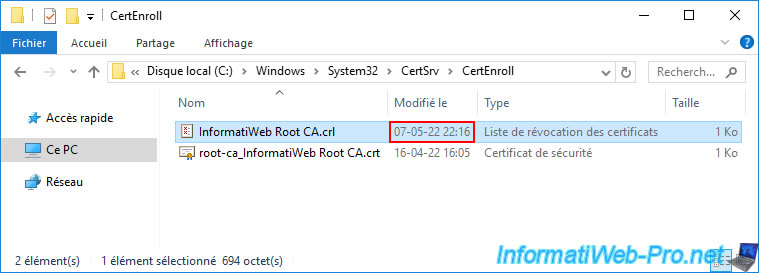
If you double click on it, you will see that it's the same revocation list.
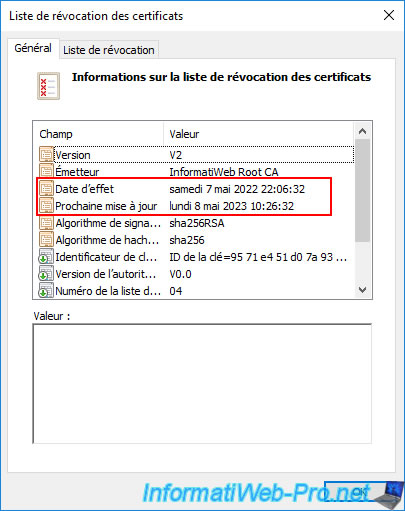
4. Update the certificate revocation list in your Active Directory
Now that you've generated a new CRL from your standalone root CA console, you need to update the one in your Active Directory infrastructure.
To do this, transfer the corresponding ".crl" file to one of your domain controllers (using an USB key, for example).
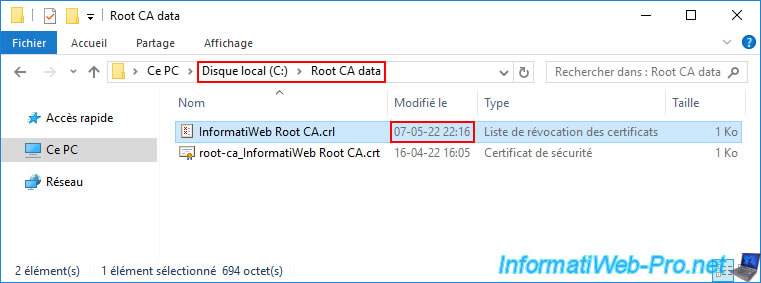
Then, use the command below to publish this certificate revocation list to your Active Directory infrastructure.
Batch
certutil -dspublish "C:\Root CA data\InformatiWeb Root CA.crl"

Return to the "Active Directory Sites and Services" console and go to the folder : Services -> Public Key Services -> CDP -> [root CA server name].
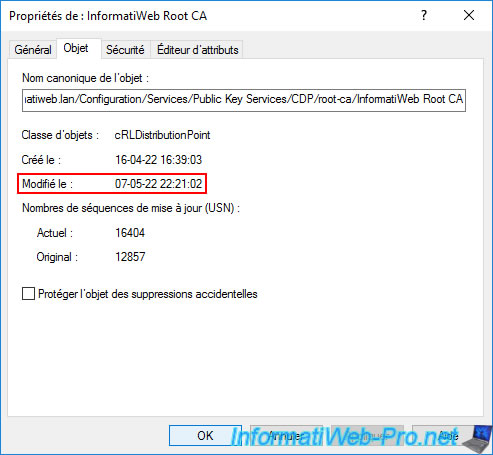
As you can see, the "cRLDistributionPoint" type object is still present.
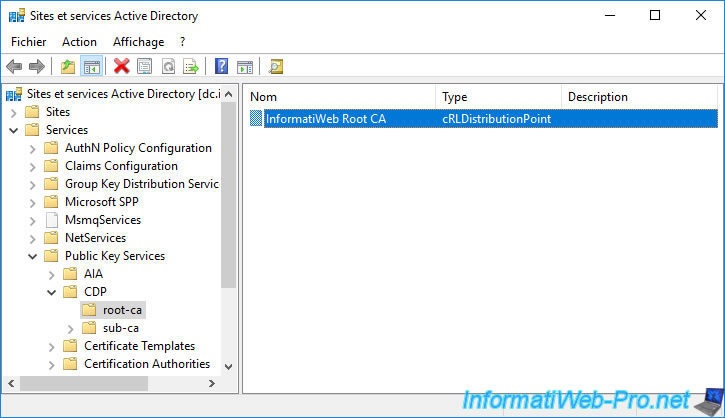
But if you double click on it, you will see that the modified date has been updated.
This means that the revocation list present in the Active Directory has been replaced by the new one.
5. Start your secondary CA
Now that your standalone root CA's revocation list has been updated in your Active Directory infrastructure, you can start your secondary CA.
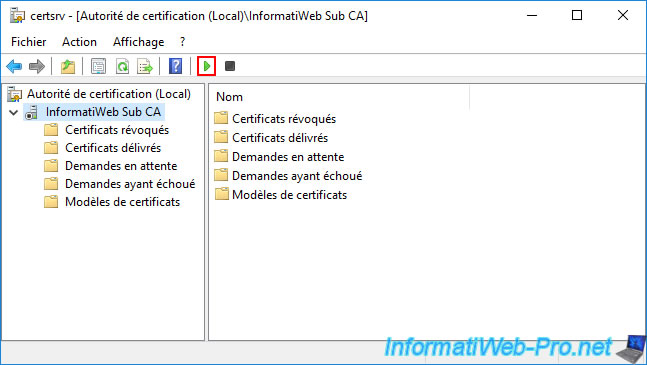
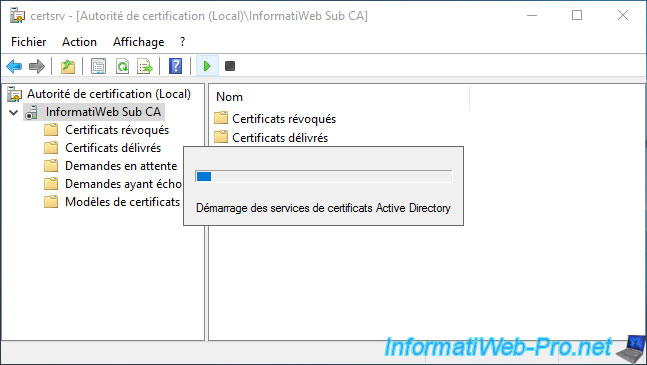
Wait while it starts.
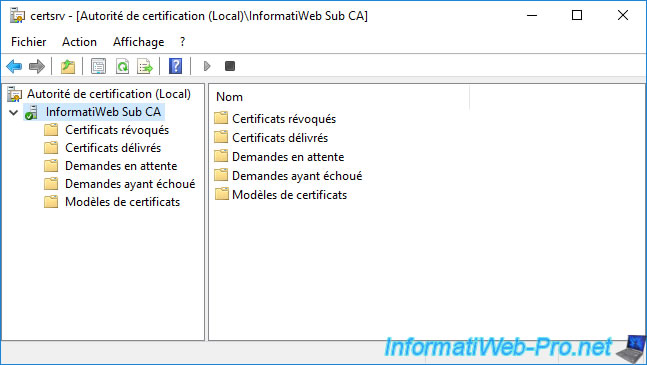
As expected, your subordinate CA started without issue.
Share this tutorial
To see also
-

Articles 1/26/2024
SafeNet Authentication Client (SAC) - Installation and overview
-

Articles 9/8/2023
What is encryption and how does it work ?
-

Windows Server 12/29/2023
WS 2016 - AD CS - Backup and restore a certificate authority (CA)
-

Windows Server 1/19/2024
WS 2016 - AD CS - Buy smart cards and log in via them

You must be logged in to post a comment