Create a site-to-site (S2S) VPN tunnel via PPTP/L2TP on Windows Server 2022, 2016 and 2012
6.3.3. Create the VPN tunnel between site 2 (Paris) and site 1 (Brussels)
Similar to before, now go to the VPN server of the remote site (in our case: PARIS-VPN).
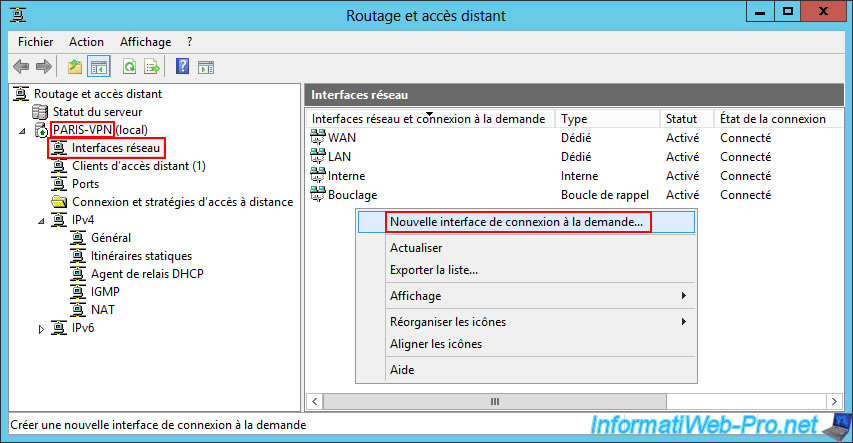
In the "Network Interfaces" section of the remote VPN server, right-click "New Demand-dial Interface" (on the right side).
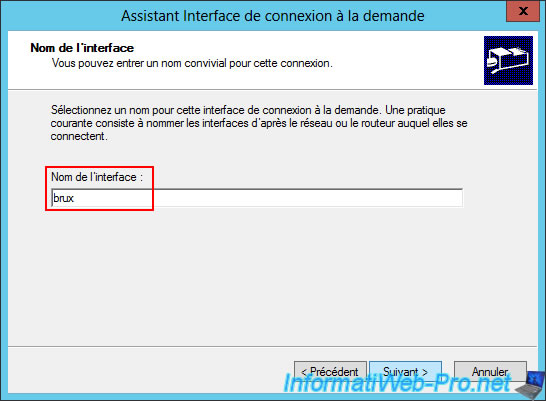
Again, type the name of the remote physical site (for example) for the interface name.
In our case: brux.
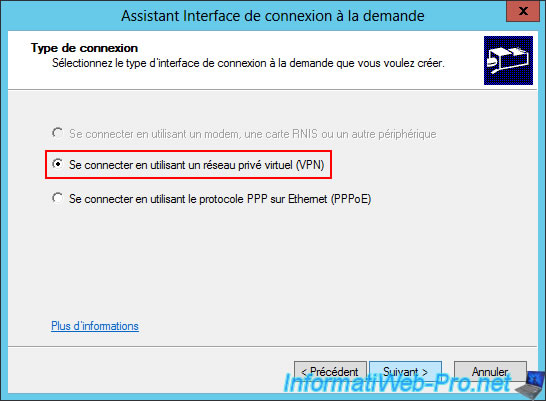
Select "Connect using a virtual private network (VPN)" again (as before).
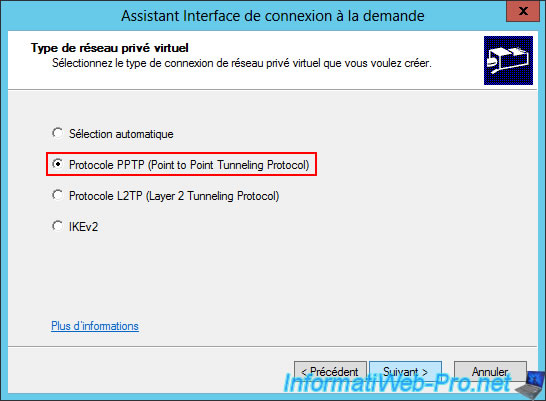
Again, select "Point to Point Tunneling Protocol (PPTP)".
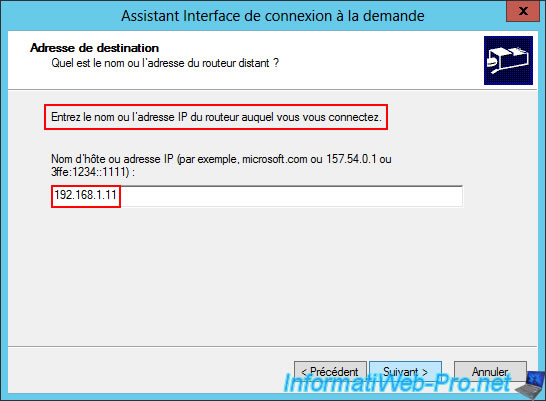
This time, enter the public IP address (provided by the ISP) of Site 1 (Brussels).
Warning : as explained previously, we used virtual machines for this tutorial, and therefore virtual switches, allowing us to simply enter the IP address of the WAN interface of the VPN server at the remote site (in this case, Site 1 (Brussels).
However, in a corporate environment, you will obviously need to enter the public IP address (provided by the ISP) of Site 1 (Brussels).
Again, don't forget to forward the necessary VPN ports on the remote site's box, as explained in step "2. Configuring hardware firewalls" of this tutorial.
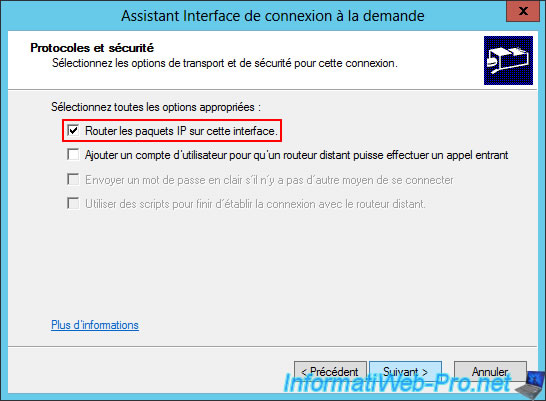
Again, select the "Route IP packets on this interface" option.
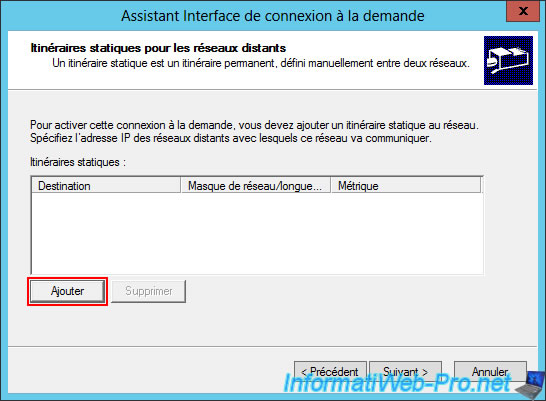
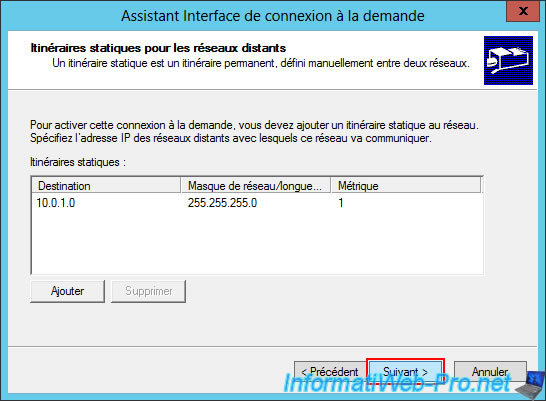
Click the "Add" button to add a static route that will allow access to the remote network (that of site 1 (Brussels) in this case, given that we are on the Paris VPN server).
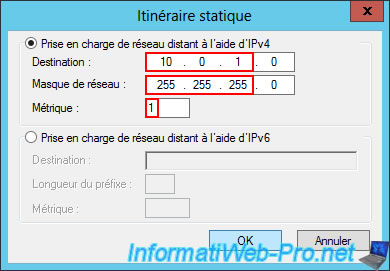
Specify the network used at the remote site (site 1 (Brussels) in this case).
In our case, this gives:
- Destination: 10.0.1.0.
- Subnet Mask: 255.255.255.0.
- Metric: 1.
Note: again, since there is only one path to this network, simply enter the number "1" for the metric.
The configured static route appears in the list.
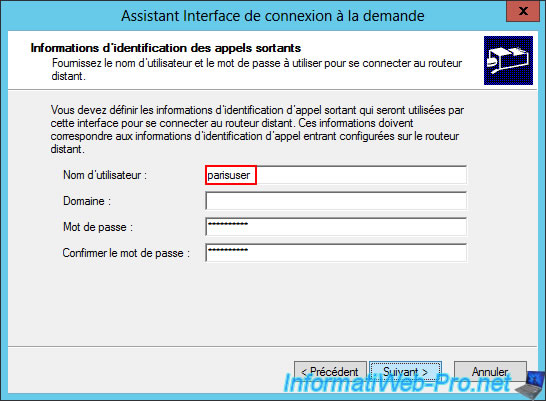
Enter the credentials for the remote site.
In this case, it's the "parisuser" user account configured on the remote VPN server "brux-vpn".
Note: again, the remote VPN server "brux-vpn" is located in a workgroup, so it's a local user account, and simply leave the "Domain" box blank.
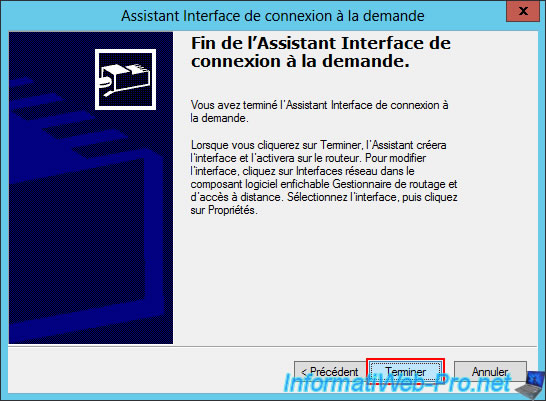
Click "Finish".
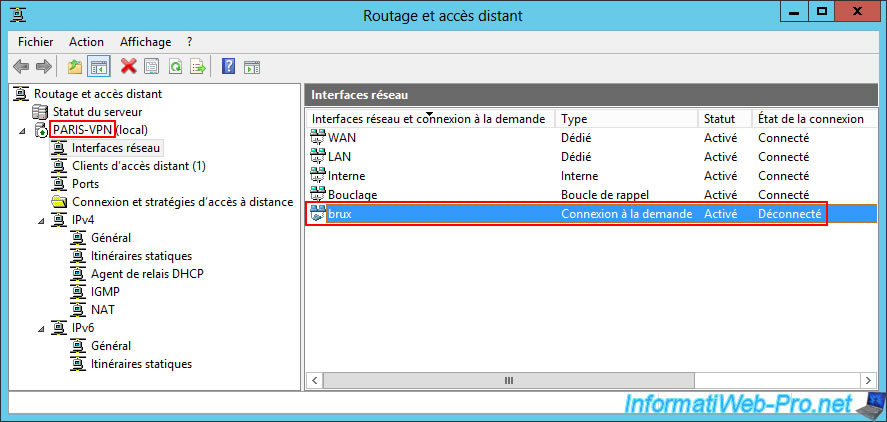
An on-demand connection "brux" appears in the list of network interfaces of your VPN server "PARIS-VPN" (from site 2 (Paris)).
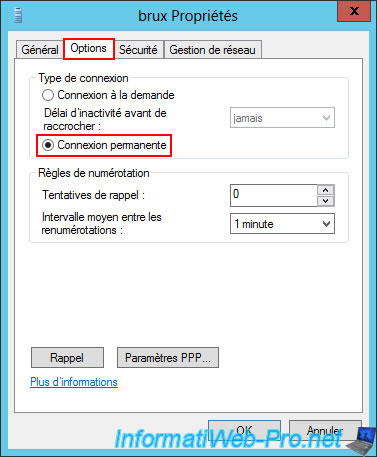
Again, double-click on it, go to the "Options" tab and select the "Persistent Connection" connection type so that the site-to-site link remains established permanently.
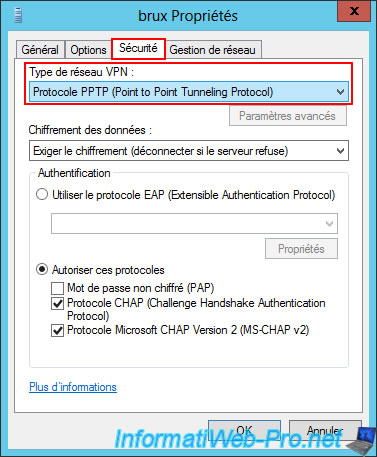
Again, in the "Security" tab, you will see that the VPN network type used is "PPTP Protocol" (as you desired when creating this on-demand connection).
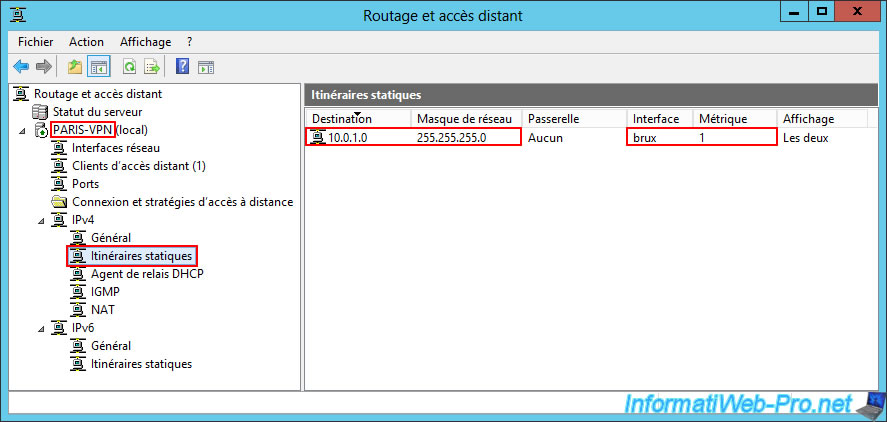
As before, a static route for the remote network (site 1 (Brussels) in this case) appears in the "IPv4 -> Static Routes" section.
This indicates that this remote network will be accessible via the "brux" interface (in this case), which corresponds to the previously configured demand-dial interface.
6.3.4. Configure routing between site 2 (Paris) and site 1 (Brussels)
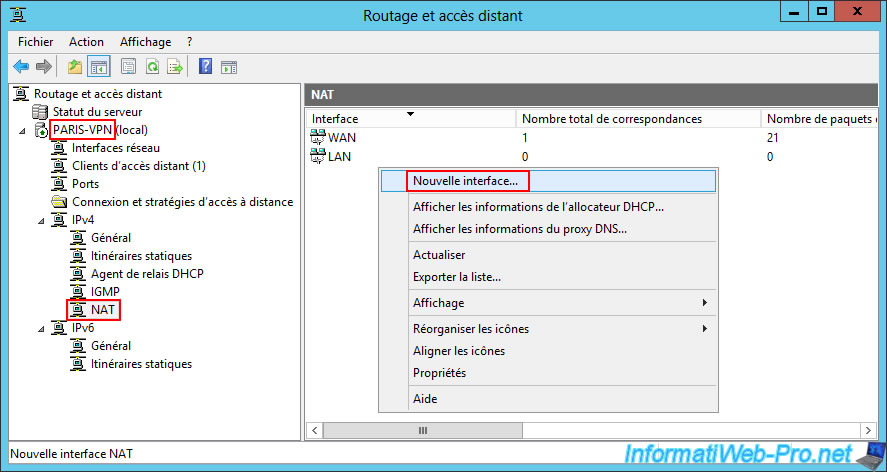
Similar to earlier, on this VPN server at Site 2 (Paris), you also need to add the "brux" on-demand connection interface to the "IPv4 -> NAT" section of your server so that network packets are correctly routed by your server.
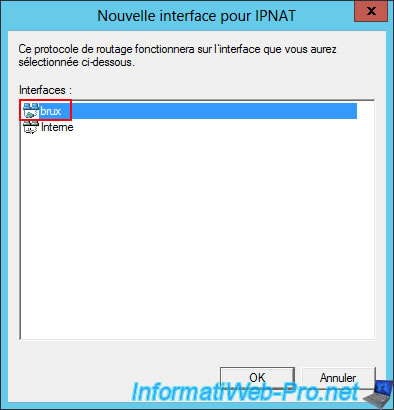
To do this, in the "IPv4 -> NAT" section of the "paris-vpn" server, right-click "New Interface".
Select the "brux" interface (which corresponds to your on-demand connection).
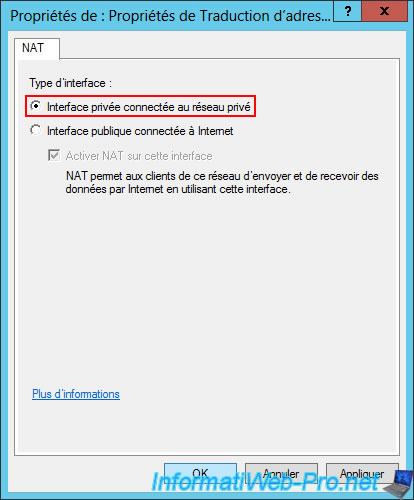
Select "Private interface connected to private network".
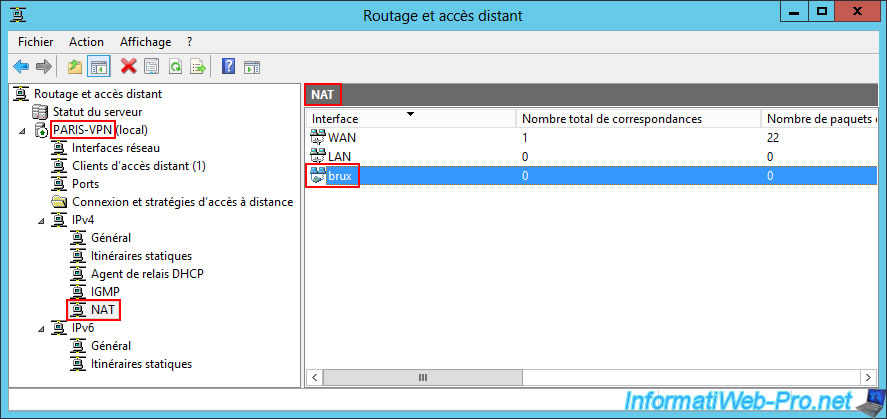
Your server will now be able to route packets between these three networks.
Note: a restart of the routing service is required.
Right-click "All Tasks -> Restart" on the name of your VPN server "PARIS-VPN" (so that the new interface added in the NAT configuration is taken into account).
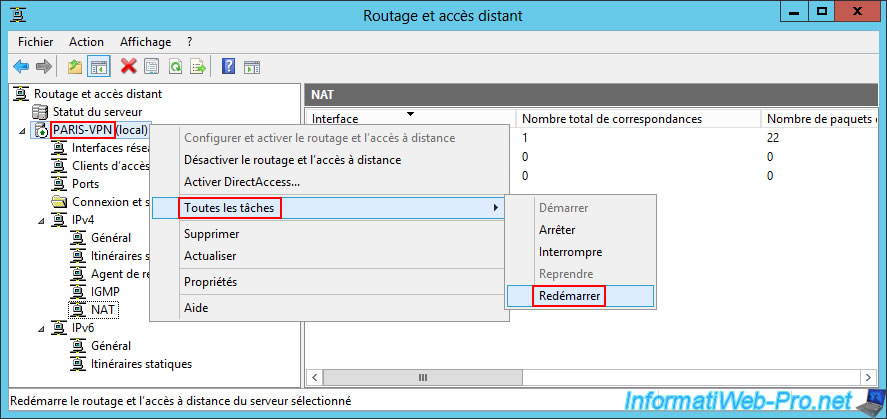
Please wait while the Routing and Remote Access service on PARIS-VPN restarts.

Share this tutorial
To see also
-

Windows Server 4/28/2012
WS 2003 - NAT and network routing
-

Windows Server 8/8/2012
WS 2008 - NAT and network routing
-

Windows Server 4/22/2015
WS 2012 - NAT and network routing
-
Windows Server 11/23/2017
WS 2012 / 2012 R2 - Dynamic routing (RIPv2)

No comment