- RAID
- 25 April 2025 at 11:24 UTC
-

- 1/3

When you have a Broadcom MegaRAID controller, you can create virtual disks on it using the Broadcom configuration tool accessible through your motherboard BIOS.
Indeed, this Broadcom configuration tool is accessible thanks to HII (Human Interface Infrastructure).
Important : this configuration tool accessible via HII is available on MegaRAID 9361 and newer controllers, as well as HBA 9300 and newer controllers with IT firmware.
Additionally, since the MegaRAID 9460 controller, the configuration tool which was accessible via the keyboard shortcut "CTRL + R" is no longer available.
Warning : the configuration tool accessible via HII is only accessible if your computer boots in UEFI mode.
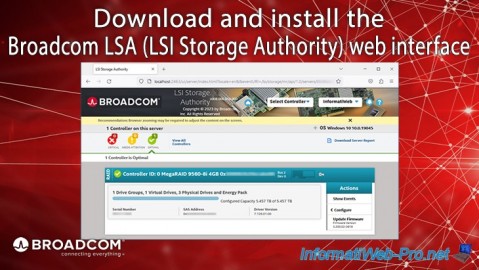
Otherwise, you will have to use the LSA (LSI Storage Authority) software available in particular for Windows.
Indeed, as said previously, from the MegaRAID controller, the configuration tool which was accessible in BIOS LEGACY mode via the keyboard shortcut "CTRL + R" no longer exists.
Sources :
- Using HII to configure Broadcom controller - Broadcom
- Behavior of HII - Broadcom
- HII Configuration Utility - Broadcom
- LSI Storage Authority Overview - Broadcom
- Creating a RAID virtual disk
- Controller information displayed at startup (Legacy BIOS mode only)
- Partition logical disk RAID
- Initialization completed
1. Creating a RAID virtual disk
1.1. Create a RAID virtual disk
To begin, enter the BIOS of your motherboard (most of the time pressing "Del" or "Delete" when starting your computer).
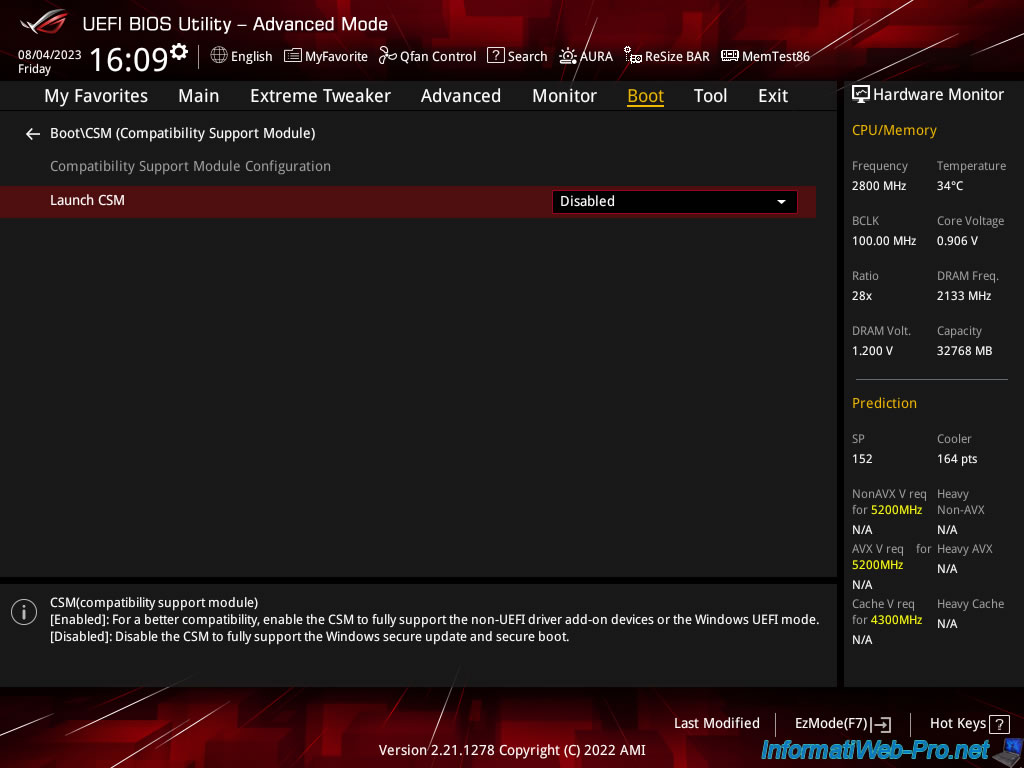
As explained previously, the configuration tool for your Broadcom MegaRAID controller will only be accessible via HII if your computer boots in UEFI mode.
Indeed, HII allows operations to be performed via a UEFI environment before the operating system starts.
To do this, simply deactivate "CSM" in the BIOS of your motherboard.
For more information on enabling UEFI booting in the BIOS of your motherboard (mainly Asus), refer to our tutorial: Configure your computer's BIOS to boot in UEFI mode (firmware).
Source : HII Configuration Utility - Broadcom.
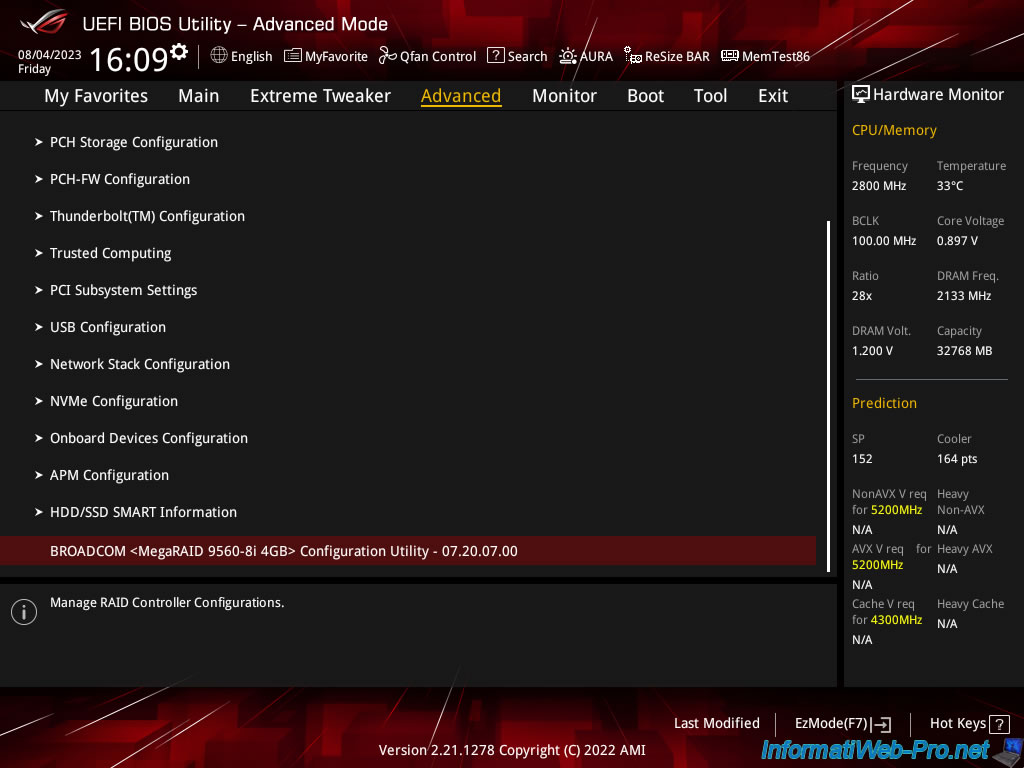
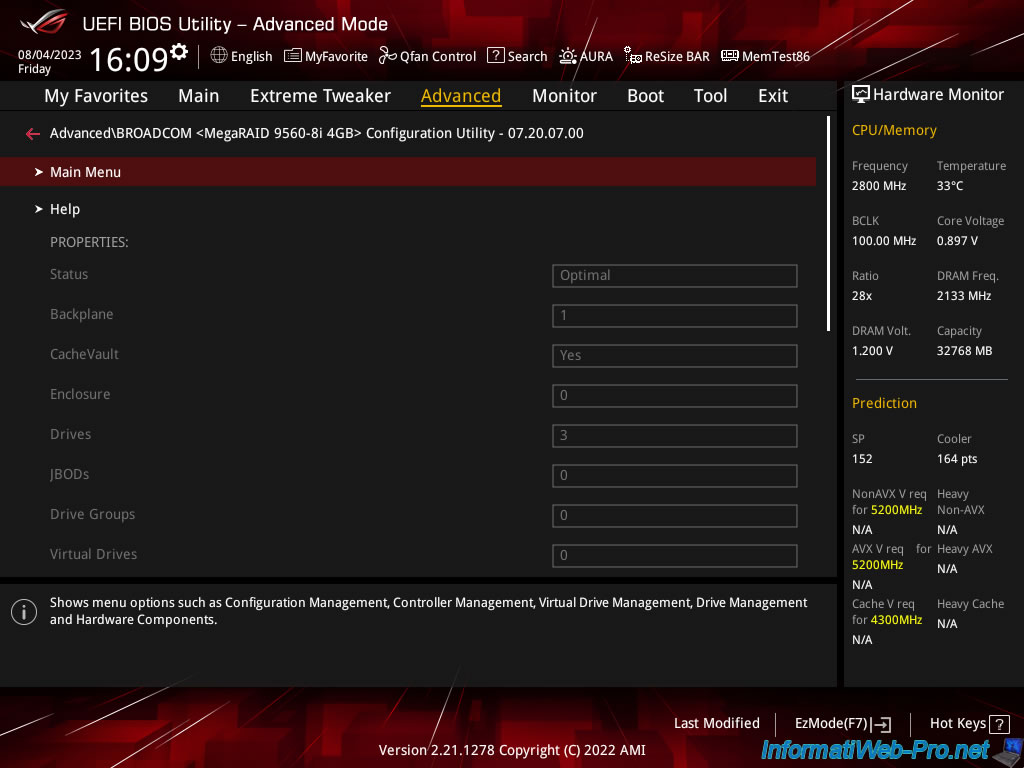
If your computer's BIOS is configured to boot in UEFI mode, then you will usually find Broadcom's configuration tool at the bottom of the "Advanced" tab.
In our case, this option is named "BROADCOM <MegaRAID 9560-8i 4GB> Configuration Utility - 07.20.07.00".
Note: it may be necessary to scroll down this page to see the "BROADCOM..." option appear.
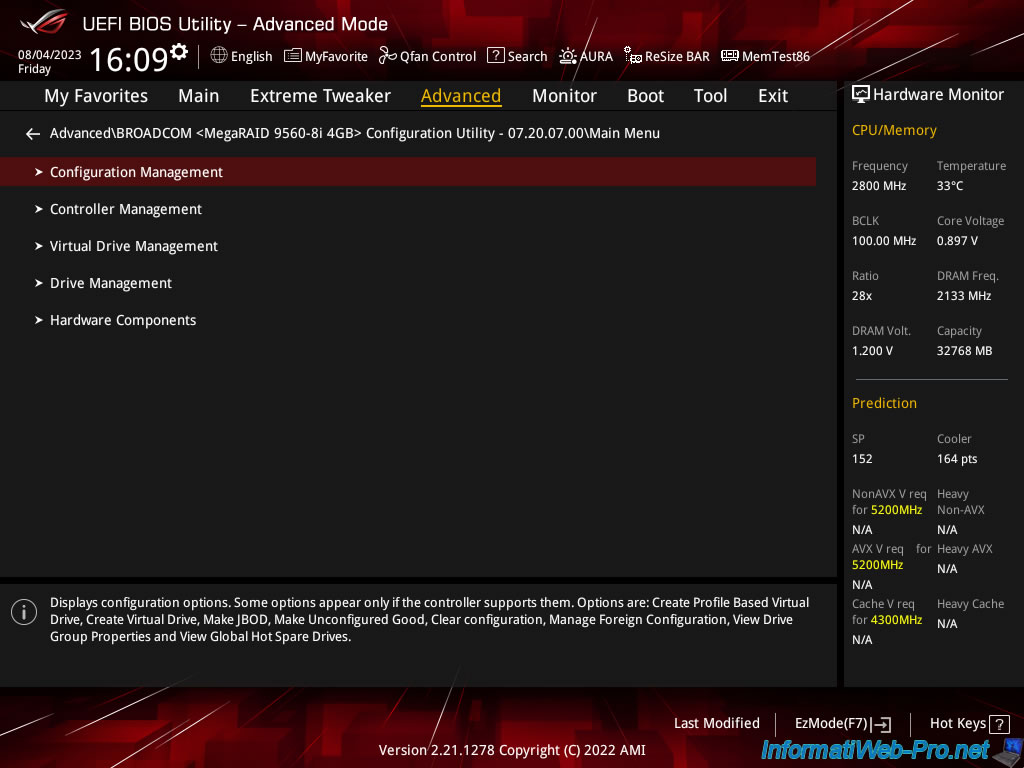
In this "BROADCOM ... Configuration Utility" menu, go to: Main Menu.
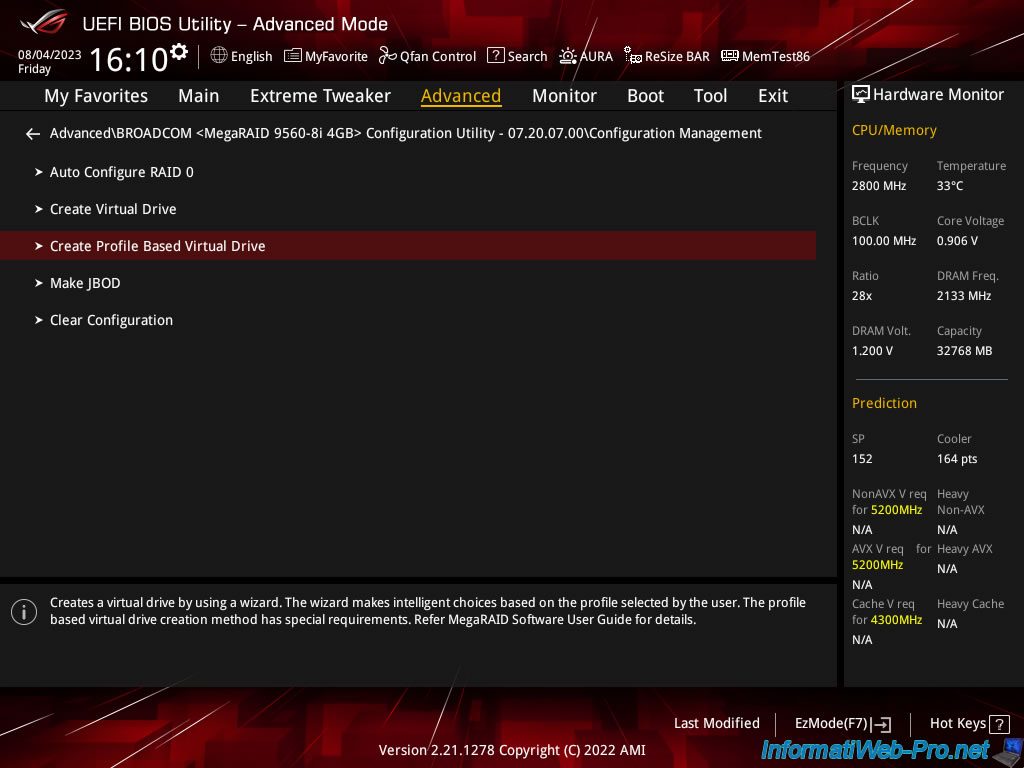
Then, go to: Configuration Management.
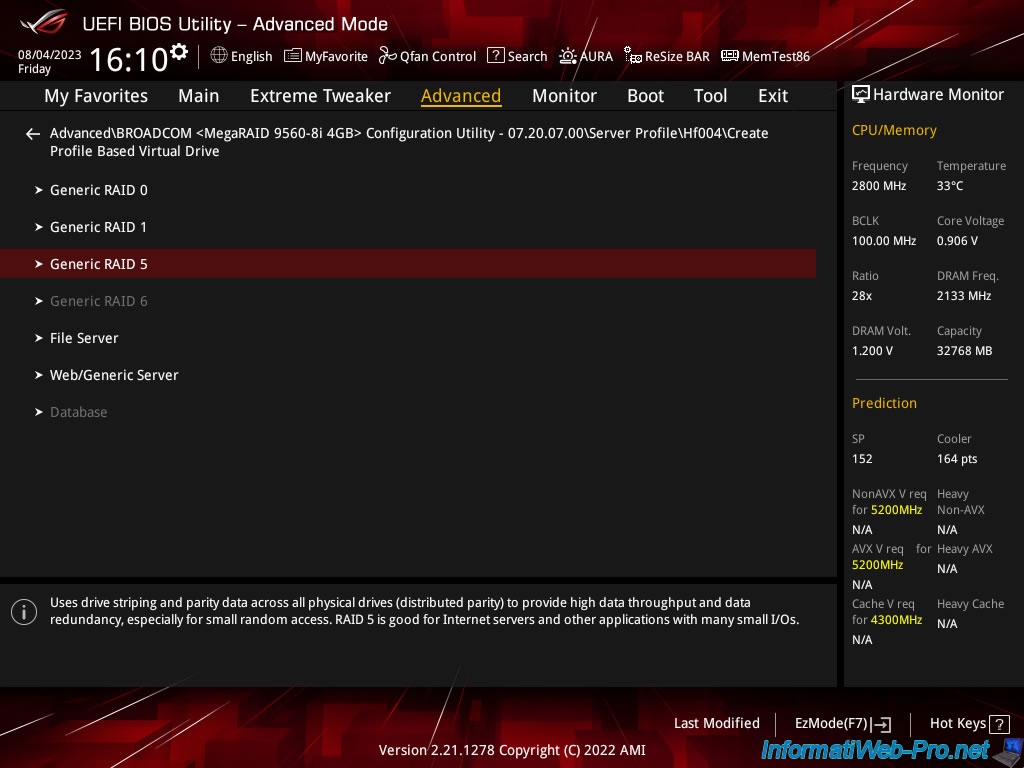
Click on : Create Profile Based Virtual Drive.
As you can see, you can choose between 4 RAID levels:
- Generic RAID 0: to create a RAID 0 virtual disk (striped volume).
With 2 physical disks, half of the data is written to the 1st physical disk and the other half is written to the 2nd physical disk. Which improves performance.
However, if a physical disk fails, you will lose all the data present on this virtual disk in RAID 0. In fact, you will only have half of each data left. - Generic RAID 1: to create a virtual disk in RAID 1 (mirror).
All data is written to all disks. That is, the same data is stored on all member disks of this RAID virtual disk.
If a physical disk fails, you won't lose any data.
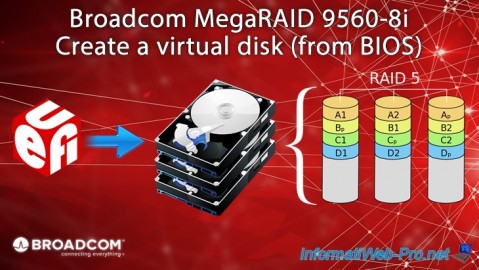
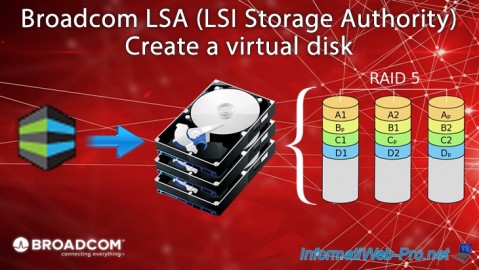
However, this does not improve storage performance. - Generic RAID 5: to create a virtual disk in RAID 5 (volume aggregated by stripes and parity).
In the case of RAID 5 with 3 physical disks:
- half of each data is written on the 1st physical disk.
- the other half of each data is written on the 2nd physical disk.
- a parity code is written on the 3rd physical disk.
This level of RAID is the most interesting and the most economical, because it only requires a minimum of 3 physical disks and this allows you to combine performance and security.
If a physical disk fails, you won't lose any data. Indeed, the RAID controller will be able to recalculate the missing disk from the parity (or recalculate the parity from the remaining data disks otherwise). - Generic RAID 6: similar to RAID 5, but parity data is stored on 2 disks.
If you are using 4 physical disks (which is the minimum required for RAID 6), this means:
- half of each data will be written on the 1st disk.
- the other half of each data will be written on the 2nd disk.
- parity data will be written to the 3rd and 4th disk.
This allows you to tolerate the failure of up to 2 physical disks without data loss.
This also means that you lose the capacity of 2 disks for parity in the case of RAID 6. - and more.
Notes :
- RAID 0 requires at least 1 physical disk.
- RAID 1 requires at least 2 physical disks.
- RAID 5 requires a minimum of 3 physical disks.
- RAID 6 requires at least 4 physical disks (hence the fact that this option is grayed out in our case, given that we have 3 physical disks).
Sources :
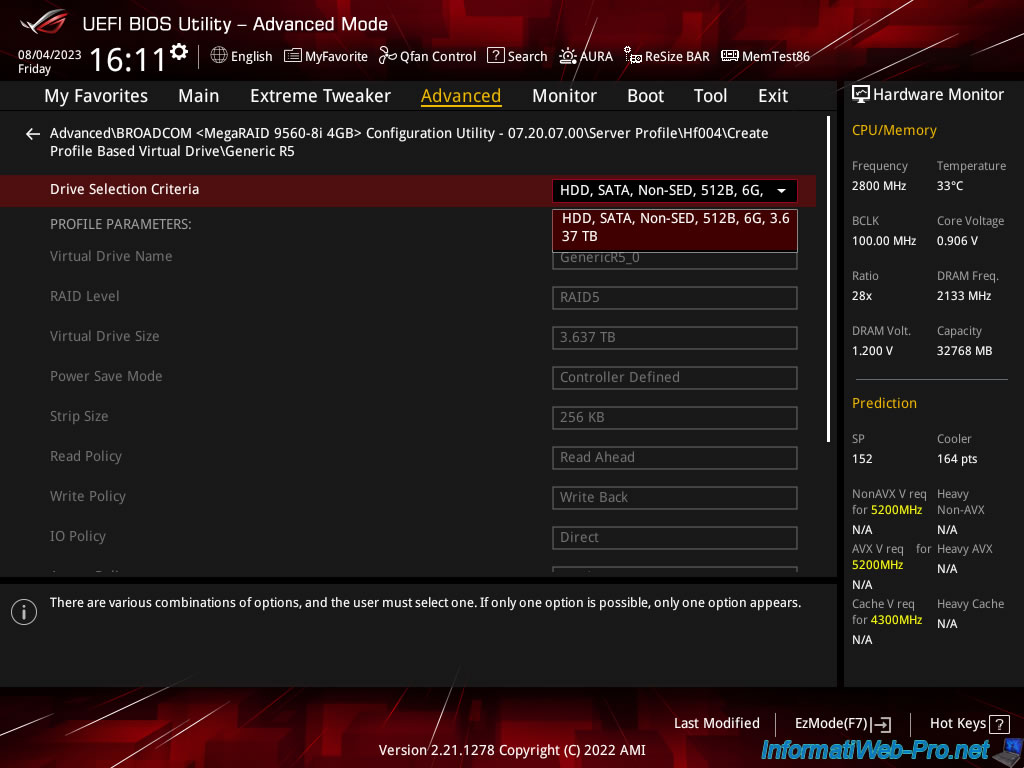
Choose a Drive Selection Criteria if there are several available.
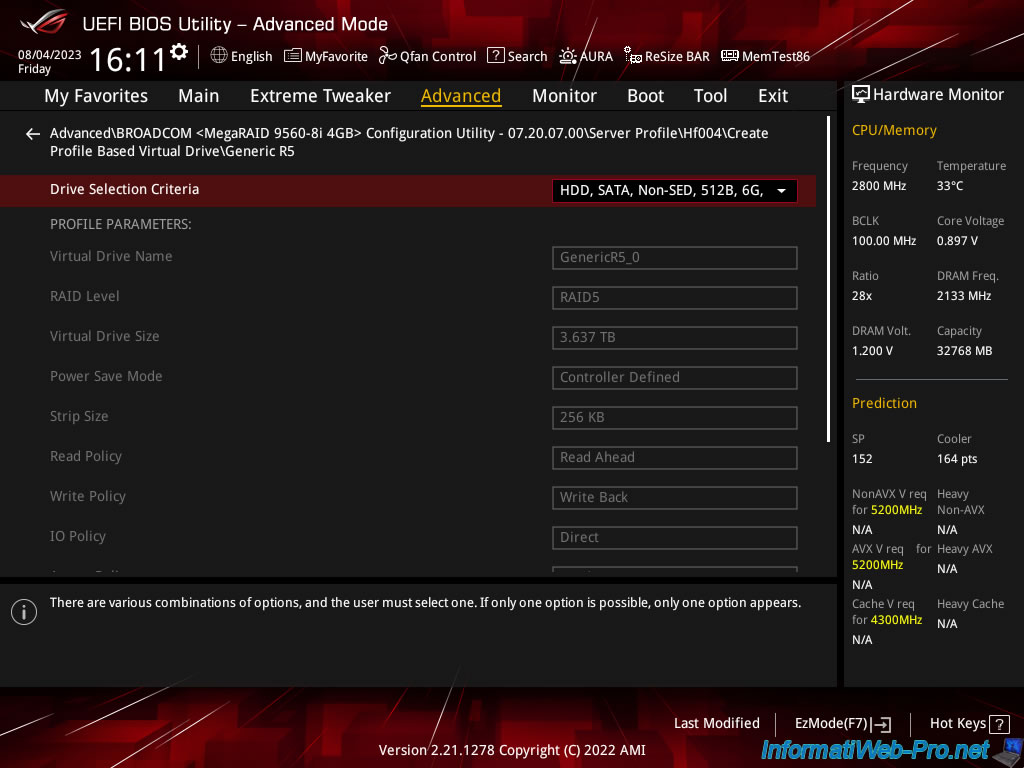
In our case, there is only one. The RAID virtual disk that will be created will therefore have a capacity of 3,637 TB.
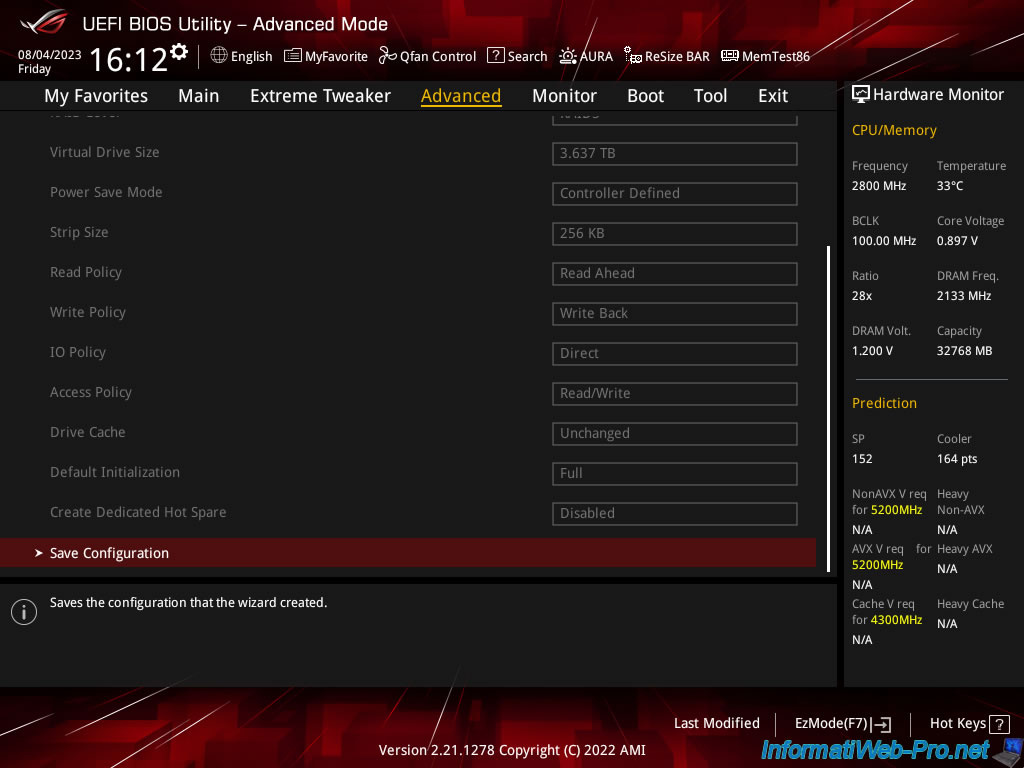
Note that the other options are pre-populated with the factory-defined values in the profile used (in our case: Generic RAID 5).
These cannot be modified at the moment, but you can modify certain settings later from this configuration tool.
At the bottom of the page, click: Save Configuration.
As you can see, the creation of a virtual disk will cause the erasure and therefore the permanent loss of the data that was on the associated physical disks.
Select "Confirm: Enabled", then click "Yes".

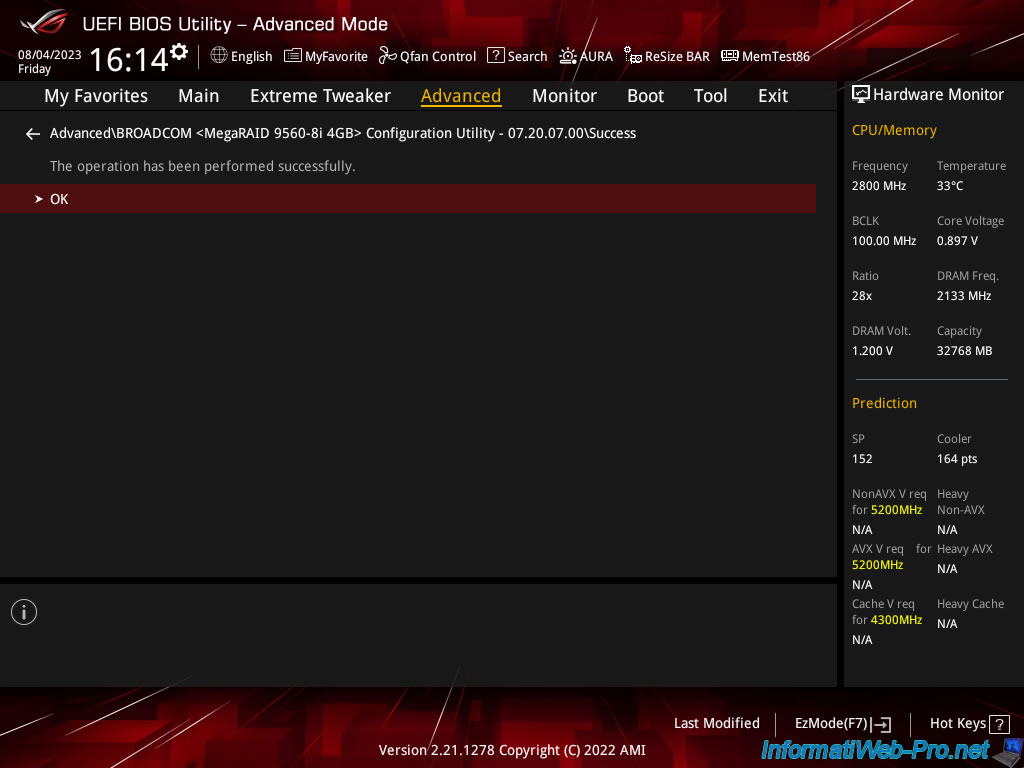
The "The operation has been performed successfully" message appears.
Click OK.
Source : Creating a Virtual Drive from a Profile - Broadcom.
Share this tutorial
To see also
-
RAID 5/2/2025
Broadcom LSA (LSI Storage Authority) - Create a virtual disk
-
RAID 5/1/2025
Broadcom LSA (LSI Storage Authority) - Download and install
-

RAID 4/18/2025
Broadcom MegaRAID 9560-8i - Buy a SATA drive cable
-
RAID 5/7/2025
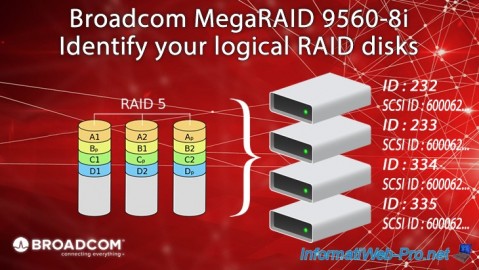
Broadcom MegaRAID 9560-8i - Identify your logical RAID disks
You must be logged in to post a comment