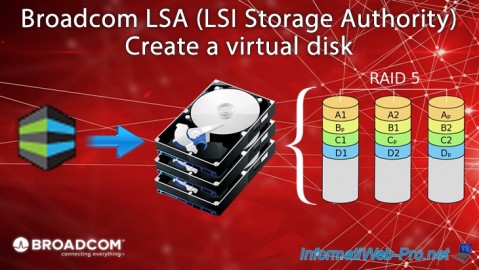
Create a virtual disk (from BIOS) on your Broadcom MegaRAID 9560-8i controller
- RAID
- 25 April 2025 at 11:24 UTC
-

- 2/3

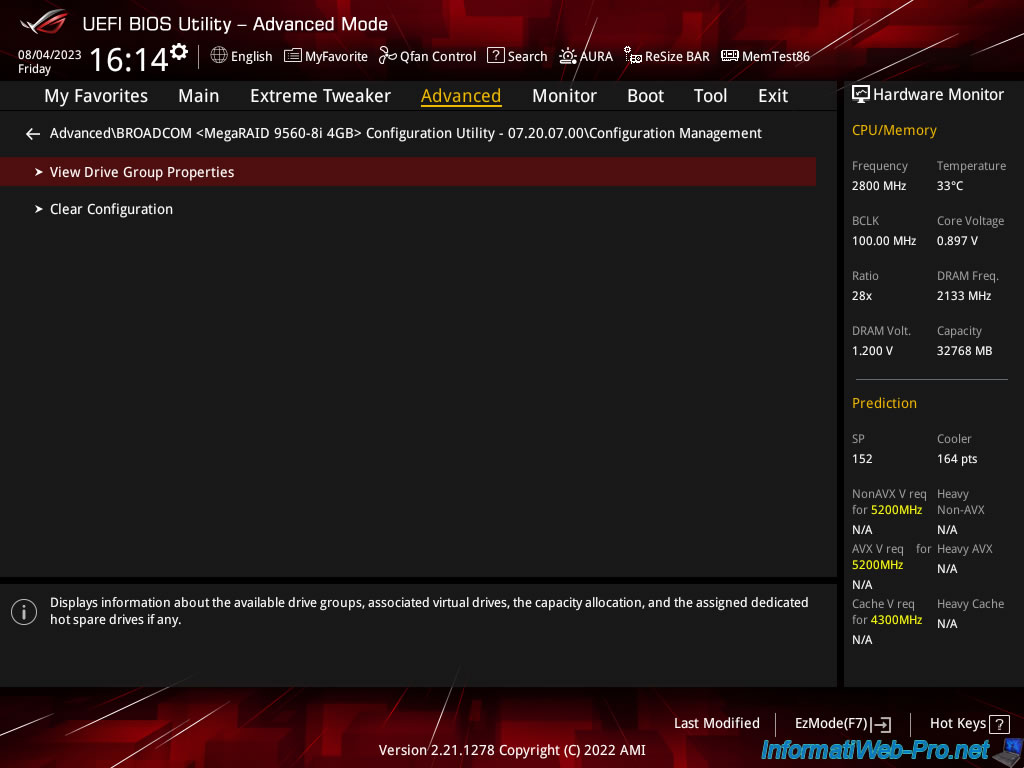
1.2. View information about the created drive group
To view the information of the created drive group, go to: Configuration Management -> View Drive Group Properties.
Note: a disk group is a logical collection of physical disks connected to your Broadcom MegaRAID controller on which you can create one or more virtual disks.
All virtual disks created on the same disk group must use the same RAID level.
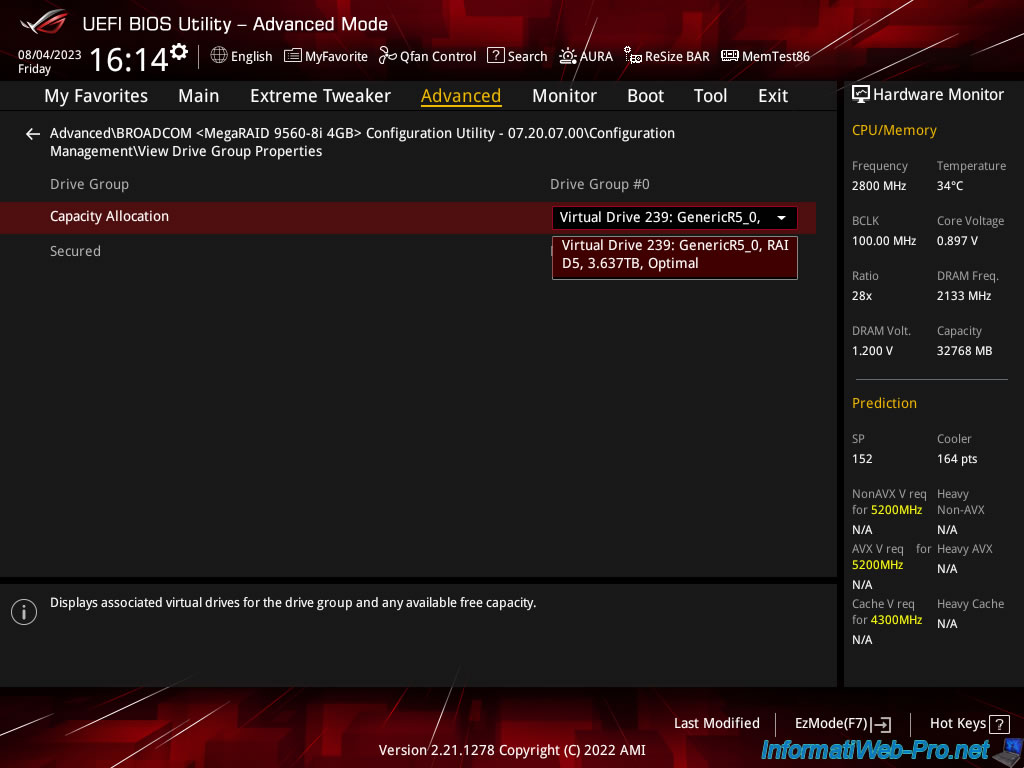
In this "View Drive Group Properties" section, you will find:
- Drive Group: drive group name.
For example: Drive Group #0. - Capacity Allocation: list of virtual disks created in this physical disk group.
In our case: Virtual Drive 239: GenericR5_0, RAID5, 3.637 TB, Optimal.
Which corresponds to the RAID 5 virtual disk that we have just created.
To see the remaining free space on a disk group, select this option "Capacity Allocation" and press Enter. The information will appear in the form of a popup. - Secured: indicates whether this disk group is secure (protected) or not.
Source : Viewing Drive Group Properties - Broadcom.

In our case, we created a single RAID 5 virtual disk on this disk group.
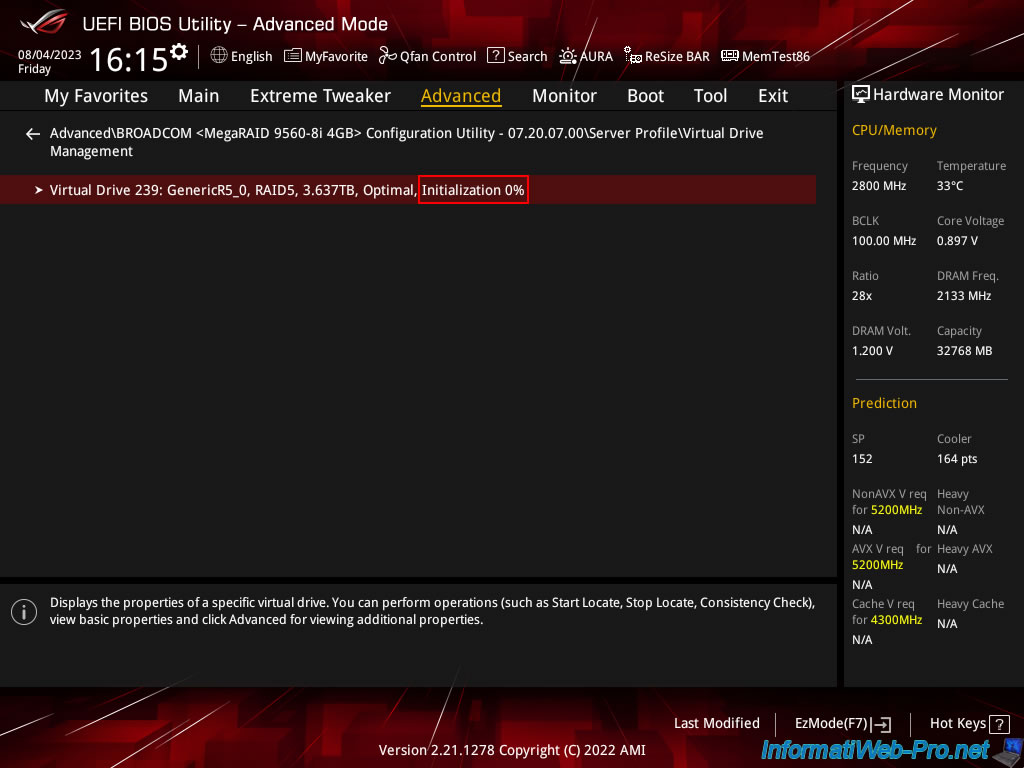
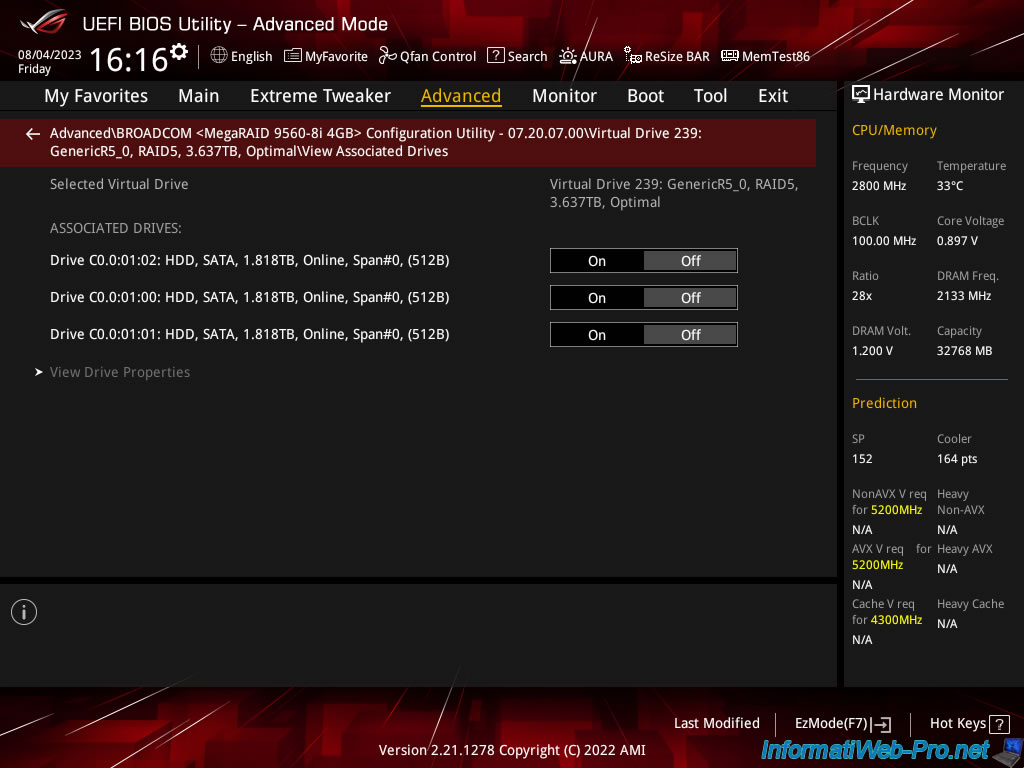
1.3. View physical disks associated with a RAID virtual disk
To view the physical disks associated with a RAID virtual disk, go to the "Virtual Drive Management" section of the Main Menu.

Click on the RAID virtual disk you just created.
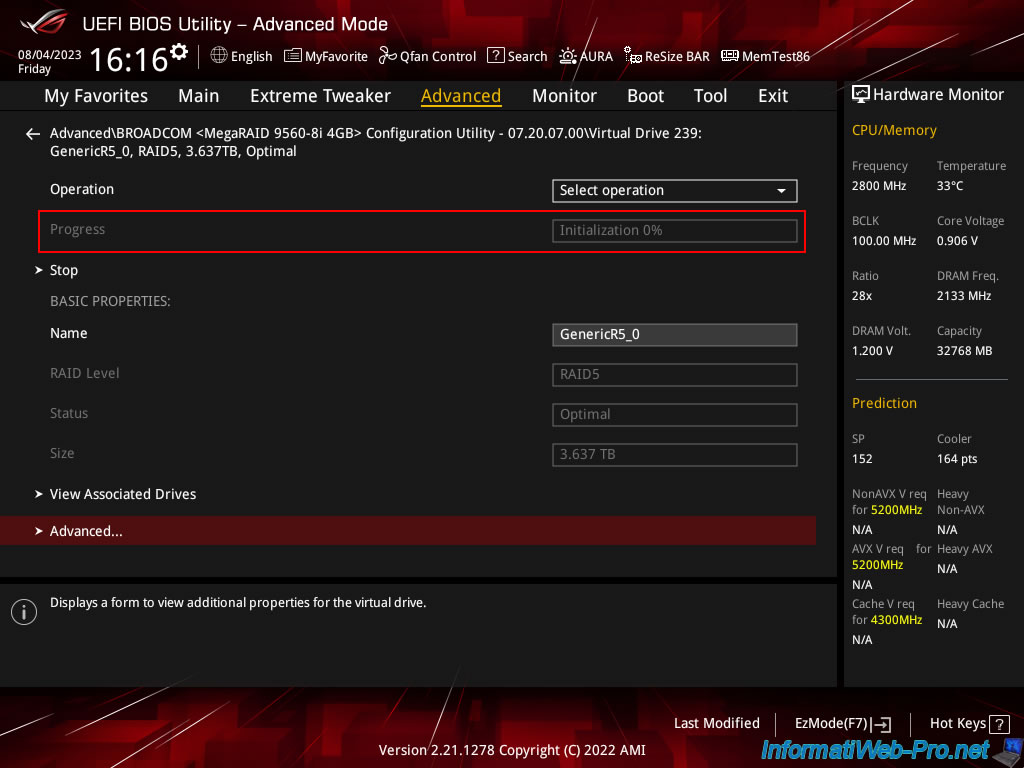
In our case: Virtual Drive 239: GenericR5_0, RAID5, 3.637 TB, Optimal, Initialization 0%.
Note: as you may have noticed, you can easily see the initialization progress of your virtual disk at the end of its name.
Click on : View Associated Drives.
The list of physical disks used by this RAID virtual disk appears.
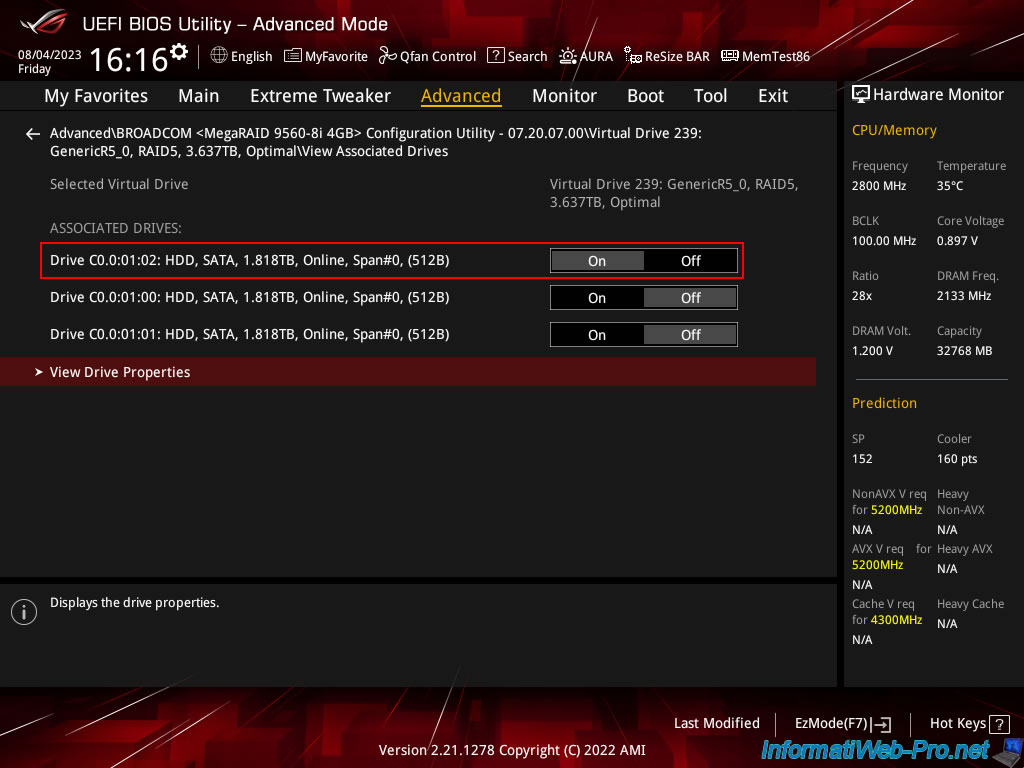
To obtain information about a physical drive, select it by placing the switch to "On", then click "View Drive Properties".
Source : Viewing Associated Drives - Broadcom.
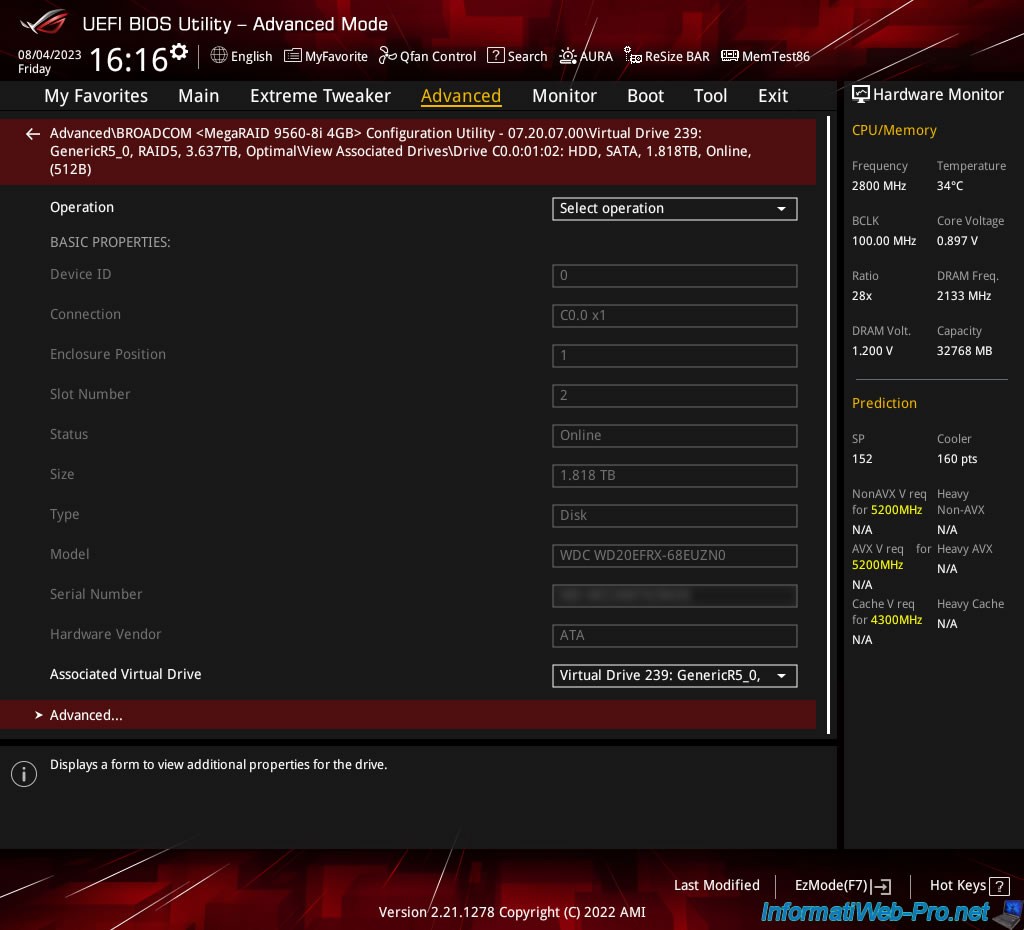
Information about your physical disk appears.
- Status: its status. Typically the status will be "Online".
Which means this disk is accessible by your RAID controller. - Size: the capacity of your physical disk.
In our case: 1.818 TB (= approximately 2 TB). - Model: the model of your physical disk.
In our case: WDC WD20EFRX-68EUZNO. - Serial Number: the serial number of your physical disk.
- Hardware Vendor: its connections.
- Associated Virtual Drive: virtual disk using this physical disk.
- and more.
To get advanced information about this physical disk, click Advanced (at the bottom of the page).
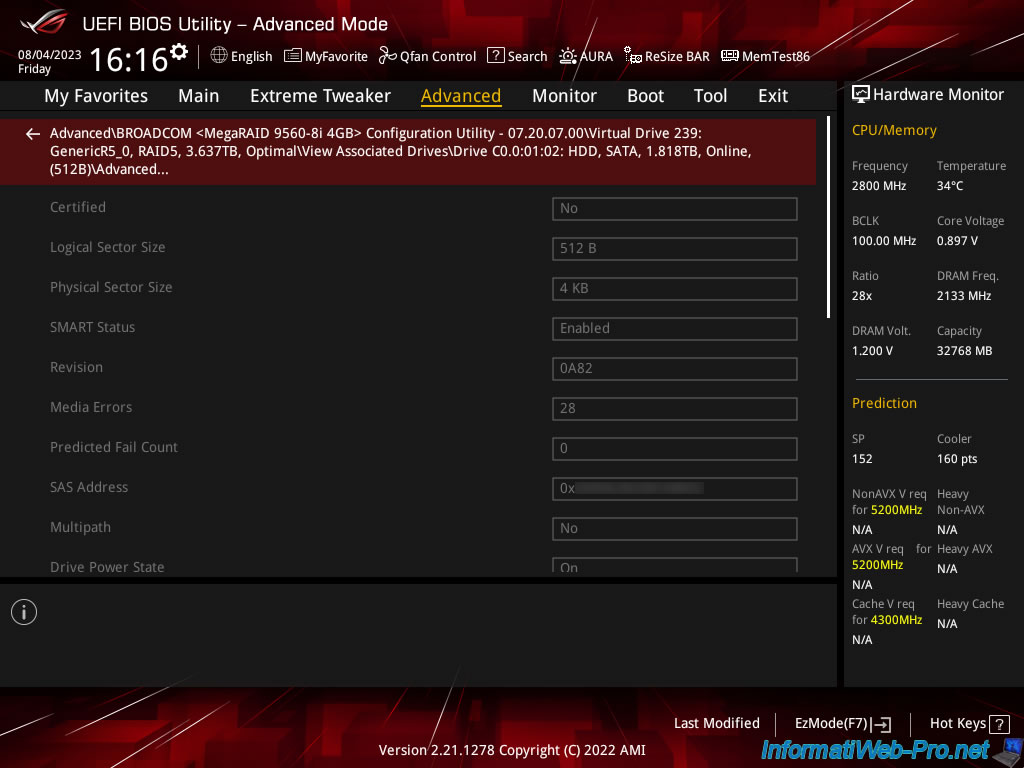
In this "Advanced" section, you will find:
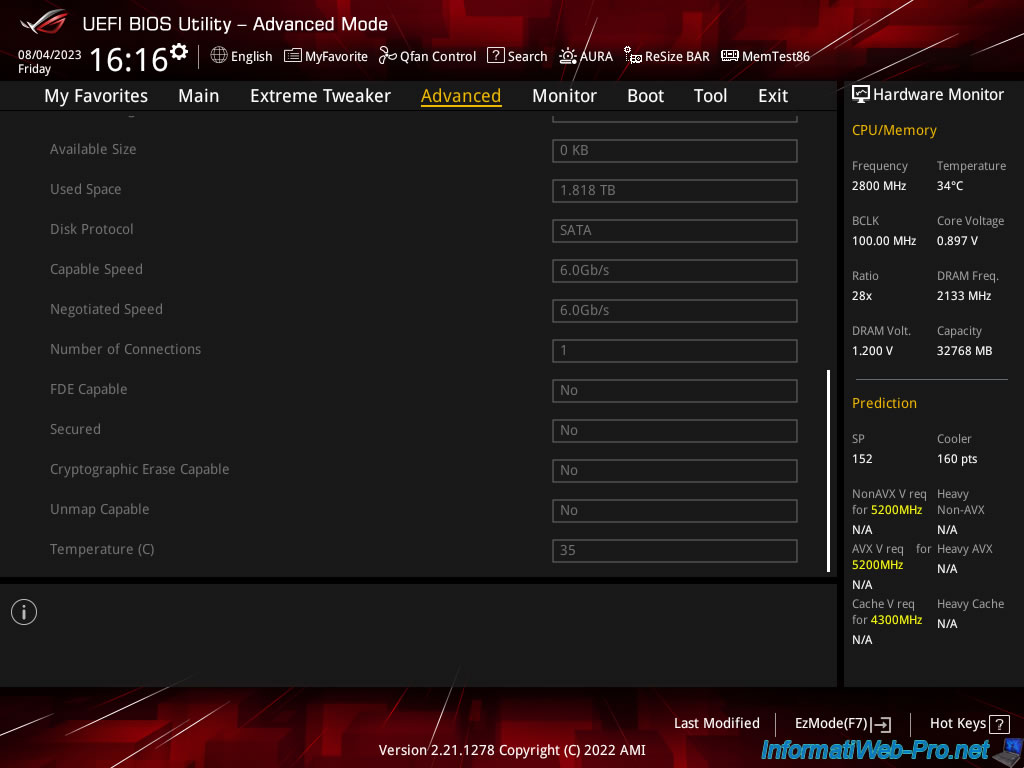
- Physical Sector Size: the logical sector size of this disk.
- SMART Status: indicates whether "SMART" (Self-Monitoring Analysis and Reporting Technology) is enabled on this physical disk.
- Media Errors: indicates the number of physical errors detected on the media.
- SAS Address: SAS address of the connected disk.
In the case of an NVMe disk, the value will correspond to its "WWID" (World-Wide Identifier). - Available Size: available (free) disk space on this physical disk for creating virtual disks.
- Used Space: disk space used on this physical disk by virtual disks.
- Disk Protocol: connection used.
For example: SAS, SATA or PCIe. - Capable Speed: maximum speed supported by this physical disk.
- Negotiated Speed: speed negotiated between the Broadcom MegaRAID controller and your physical disk.
So this is the speed that will actually be used. - Secured: indicates whether the disk is secure or not.
- Temperature: shows the current disk temperature.
Which is practical to avoid overheating. - and more.
Source : Viewing Advanced Drive Properties - Broadcom.
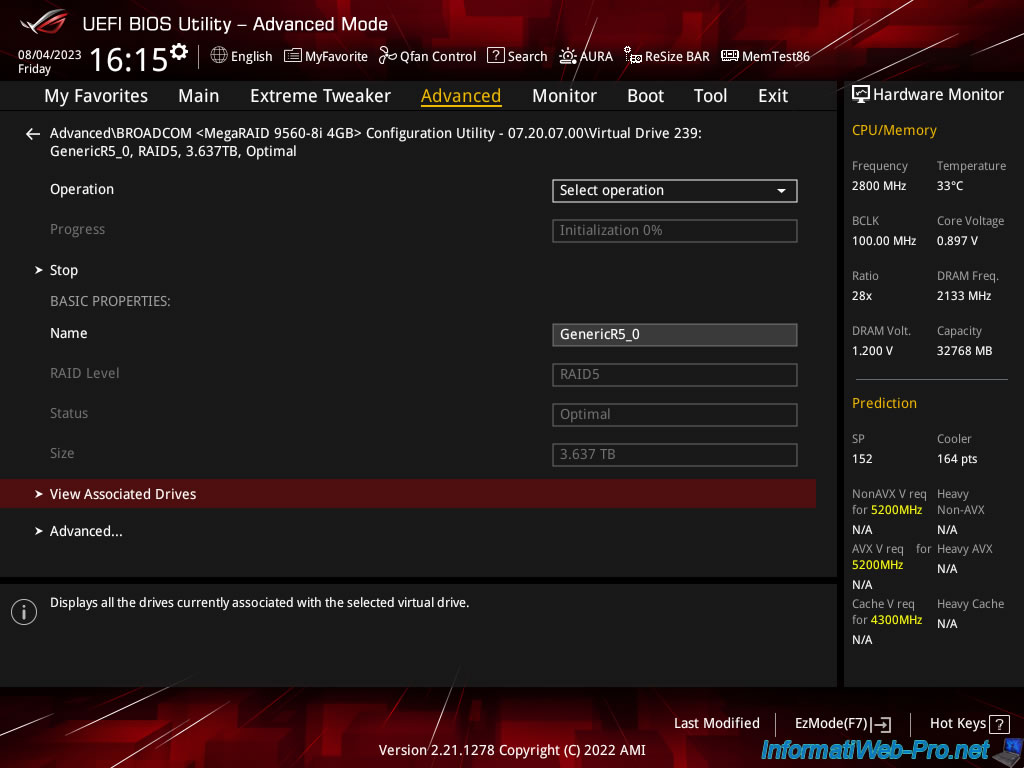
1.4. Virtual disk settings
If you access the settings of a virtual disk, you will be able to see:
- Operation: allows you to choose an operation to perform on this virtual disk.
For example: delete the virtual disk, perform a quick or complete initialization, ... - Progress: the progress of its initialization.
In our case: Initialization 0%. - Name: his name. You can change this name if you wish.
By default, this name looks like this "GenericR5_0" which refers to the 1st disk (index 0) in RAID 5 (R5). - RAID Level: the RAID level used for this virtual disk.
In our case: RAID5. - Status: the status of this virtual disk.
- Size: the capacity in MB, GB or TB of this virtual disk.
- View Associated Drives: allows you to see the physical disks used by this RAID virtual disk.
- Advanced: allows you to obtain advanced information about this virtual disk, as well as modify some of its parameters.
Sources :
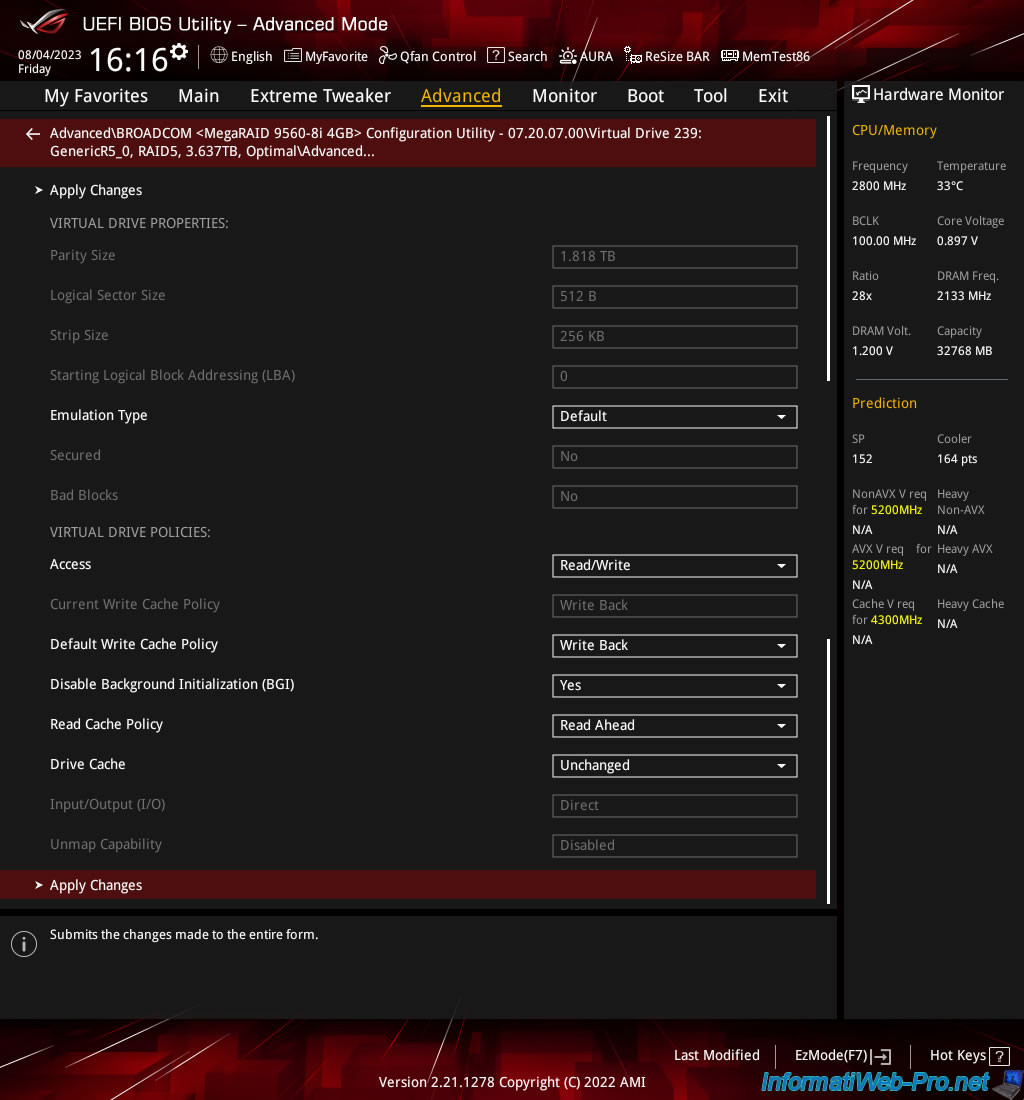
In the "Advanced" section, you will be able to see or modify certain information or settings:
- Virtual Drive Properties: virtual disk properties.
- Parity Size: disk space used by parity data.
Parity allows a disk to be recalculated when a physical disk in the RAID array fails. - Logical Sector Size: logical sector size.
- Strip Size: strip size used by the RAID system.
- Starting Logical Block Addressing (LBA): indicates where the 1st data block of the virtual disk begins.
- Emulation Type: allows you to change the type of emulation used for this virtual disk.
Possible values: Default, Disable, and Force. - Secured: indicates whether the virtual disk is secure or not.
- Bad Blocks: indicates if a virtual disk has bad blocks.
- Parity Size: disk space used by parity data.
- Virtual Drive Policies: virtual disk policies.
- Access: allows you to choose whether the virtual disk is accessible for reading and writing (Read/Write), for reading only (Read Only) or if access is blocked (Blocked).
- Current Write Cache Policy: indicates the current write cache policy.
- Default Write Cache Policy: allows you to modify the policy to use for the write cache.
- Write-Through (WThru): the controller sends the end of data transaction signal once the virtual disk has received the data and writing is completed on it.
- Write-Back (WBack): the controller sends the end of data transaction signal after the virtual disk has received the data. Data writing is then carried out according to the policies defined on your controller.
- Force Write Back: allows you to force the use of this strategy.
- Disable Background Initialization (BGI): indicates whether background initialization is enabled or not.
- Read Cache Policy: indicates the current policy for the read cache.
- Default: indicates that the default policy is "Always Read Ahead" or "No Read Ahead".
- Always Read Ahead: allows the controller to read the requested data sequentially and store the rest in the cache.
This helps improve performance for sequential data. But reading random data will not be improved. - No Read Ahead: disables the controller's "Always Read Ahead" functionality.
- Drive Cache: allows you to enable (Enable) or disable (Disable) the disk cache policy for this virtual disk.
By default, the value "Unchanged" is indicated. This allows you not to modify the value of this parameter. - Input/Output (I/O): indicates the input/output (I/O) strategy used for this virtual disk.
- Direct: read data is not buffered in cache. But, if the same data blocks are read again, the data will be read from the cache.
- Cached: all data read will be buffered in cache.
If you have changed a setting, click "Apply Changes" to save the changes.
Sources :
- Viewing and Managing Virtual Drive Properties and Options - Broadcom
- Manually Creating a Virtual Drive - Broadcom
Share this tutorial
To see also
-
RAID 5/2/2025
Broadcom LSA (LSI Storage Authority) - Create a virtual disk
-
RAID 5/1/2025
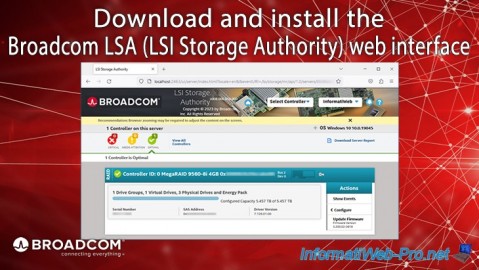
Broadcom LSA (LSI Storage Authority) - Download and install
-

RAID 4/18/2025
Broadcom MegaRAID 9560-8i - Buy a SATA drive cable
-
RAID 5/7/2025
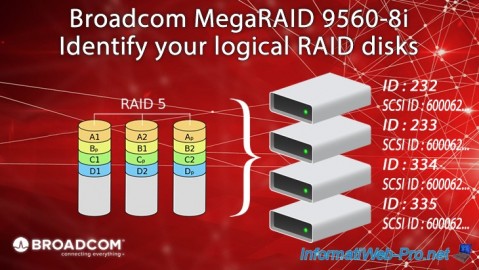
Broadcom MegaRAID 9560-8i - Identify your logical RAID disks
No comment