- RAID
- 02 May 2025 at 12:43 UTC
-

- 1/3

Using Broadcom's LSA (LSI Storage Authority) web interface, you can create a RAID volume (RAID virtual disk) on Windows.
- HDDs used
- Create a RAID virtual disk from the LSA (LSI Storage Authority) web interface
- Disk group and virtual disk created
- Start quick initialization of a RAID virtual disk
- Start full (slow) initialization of a RAID virtual disk
- Change the properties of a RAID virtual disk
- Partition your RAID virtual disk
1. HDDs used
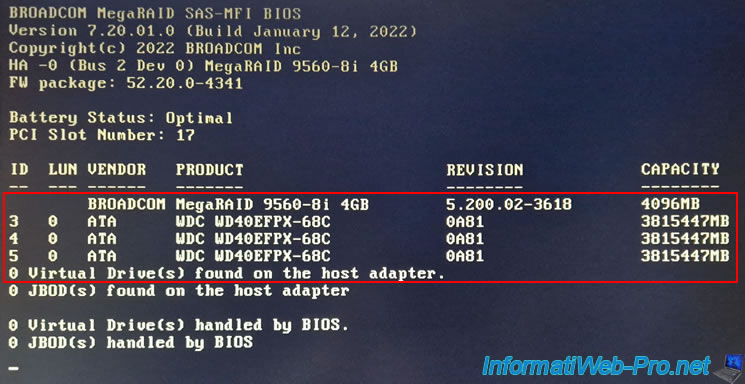
For this tutorial, we used 4TB Western Digital Red (WD40EFPX) hard drives.
The interest being that these are intended to be used in a RAID array.
However, you could also use disks of the same model or at least of the same capacity. That would work too.

When you start your computer, if it is configured to start in LEGACY BIOS mode, you will see this appear with the list of hard drives connected to your RAID controller and detected by it.
2. Create a RAID virtual disk from the LSA (LSI Storage Authority) web interface
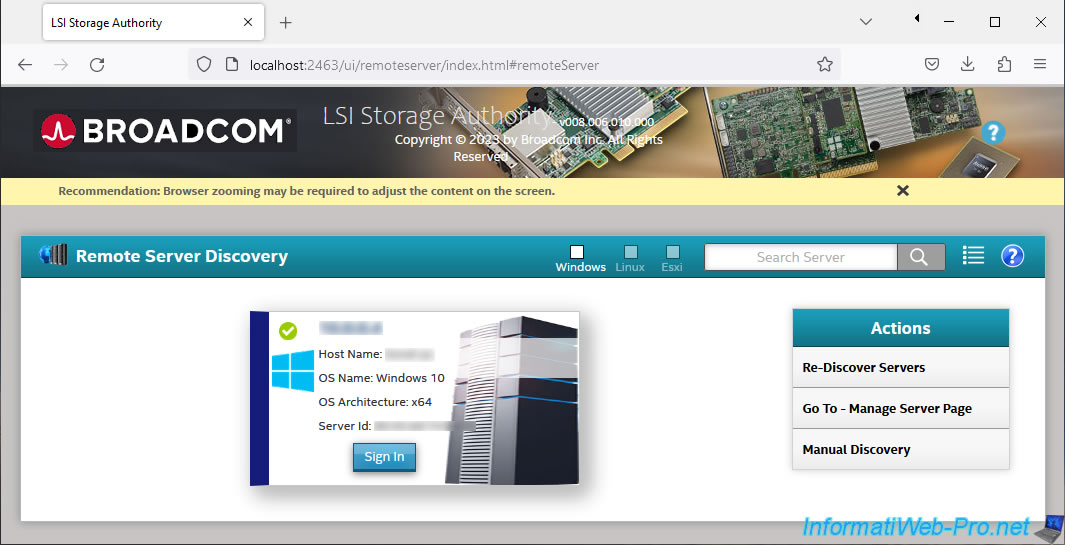
To create a virtual disk on Windows, go to the LSA (LSI Storage Authority) web interface and click "Sign In".
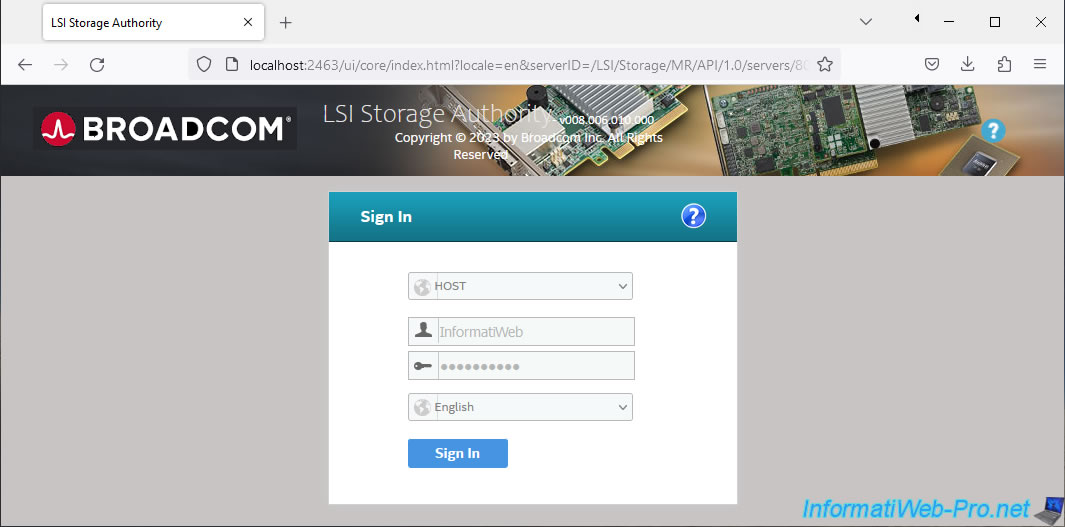
Log in with the credentials of a Windows account that is part of the "Administrators" group (which is particularly the case for the Windows account created during the installation of Windows).
Your Broadcom MegaRAID controller appears.
In our case, we have a Broadcom MegaRAID 9560-8i controller.
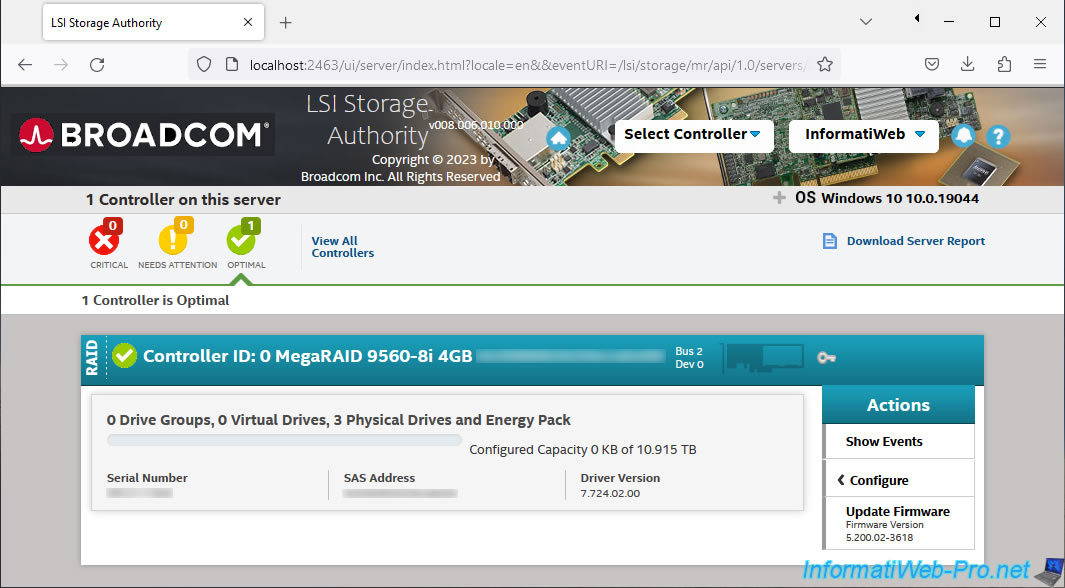
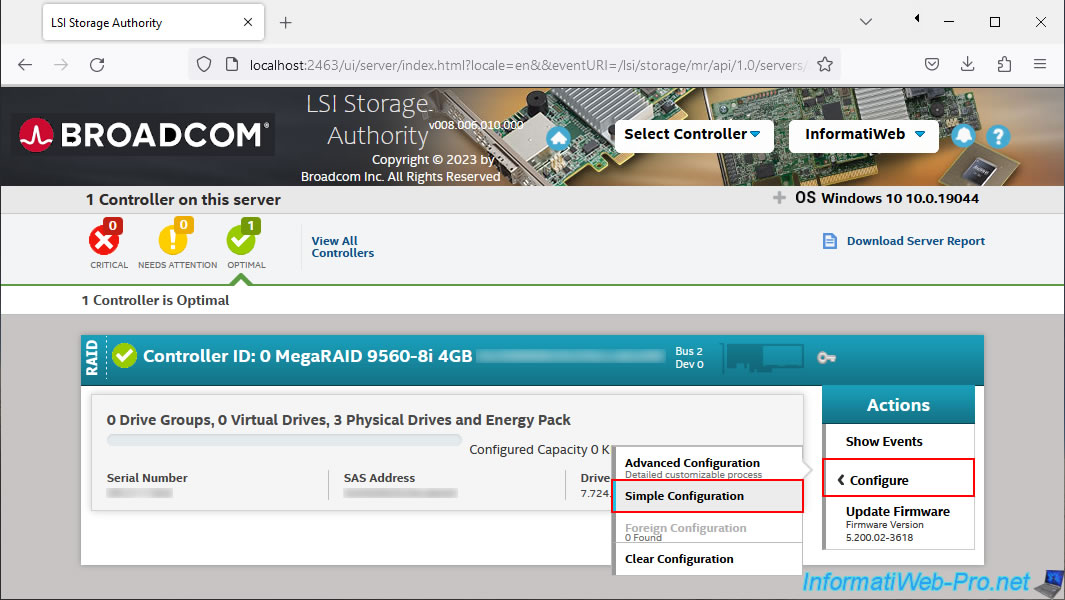
Click: Simple Configuration -> Configure.
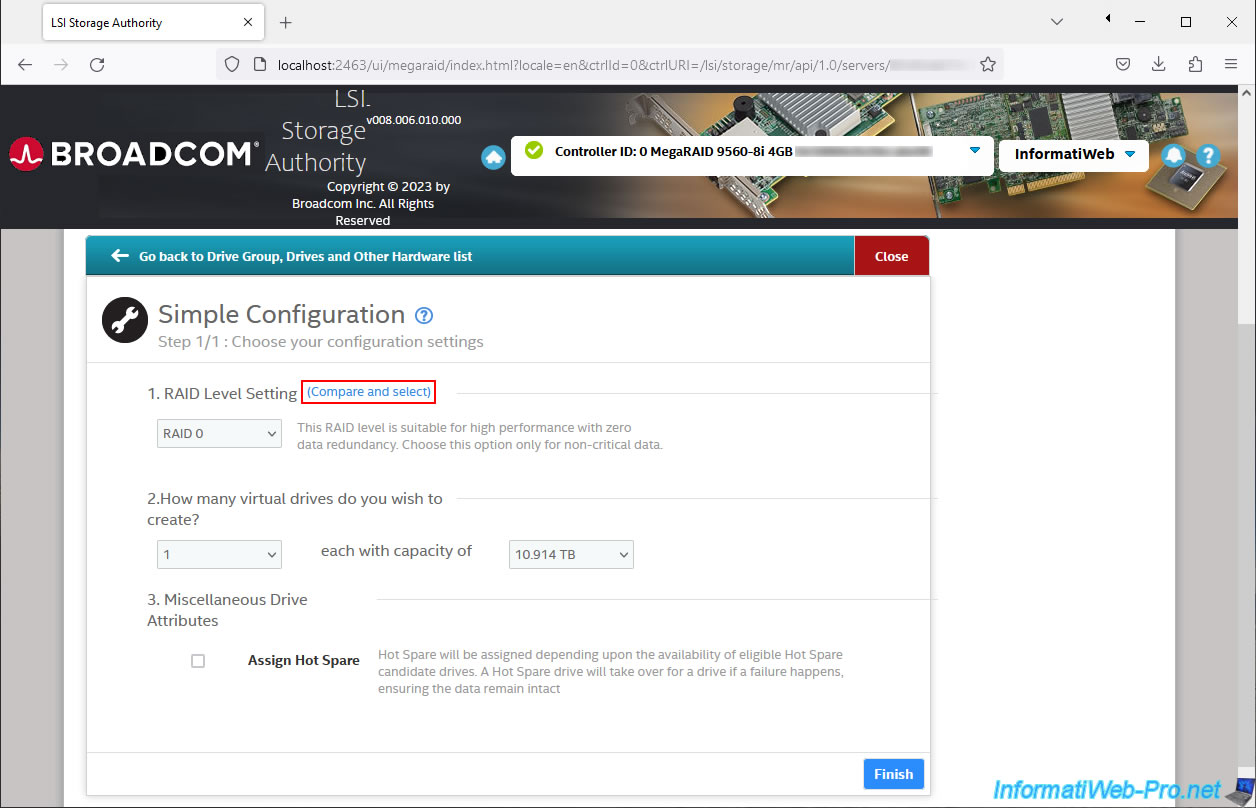
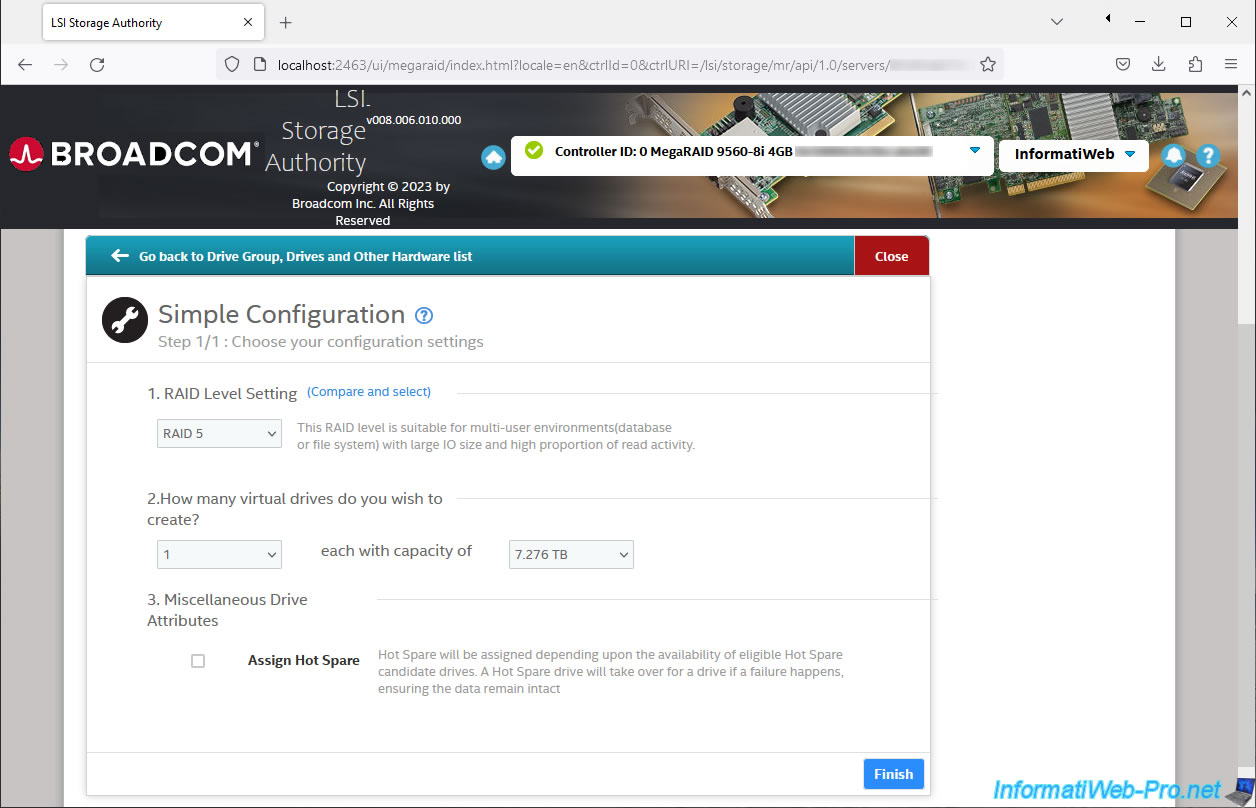
In the "Simple Configuration" section, you can first choose the RAID level.
For information about different RAID levels, click the "Compare and select" link to the right of the "1. RAID Level Setting" step.
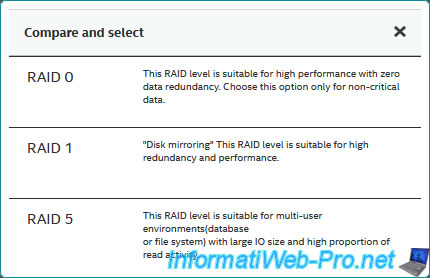
In the "Compare and select" window that appears, you will see that:
- RAID 0 allows you to get high performance, but WITHOUT having data redundancy.
In the case of RAID 0 with 2 hard drives, half of EACH file is stored on the 1st hard drive and the other half of EACH file is stored on the 2nd hard drive. Which is dangerous in the event of a disk failure. - RAID 1 allows you to benefit from better performance while benefiting from data redundancy.
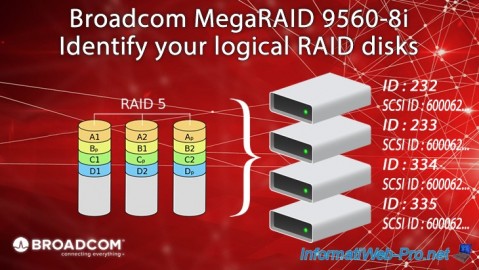
- RAID 5 allows you to benefit from high performance while also benefiting from data redundancy.
Which is recommended for multi-user environments (databases, ...) with a high number of inputs/outputs.
In our case, virtualization.
In the case of RAID 5 with 3 hard drives, half of each file is stored on the 1st hard drive, the other half on the 2nd hard drive and the parity (an error code) is stored on the 3rd Hard disk.
If a drive fails, simply replace it and the MegaRAID controller will be able to rebuild it.
Warning : if you choose "RAID 0" and one of the hard drives fails, you will lose all the data on your RAID virtual disk.
In fact, you will end up with half of each data (in the case of RAID 0 with 2 hard drives). Which means all files will be corrupted.
To create your RAID virtual disk(s), configure these settings:
- RAID Level Setting: choose the desired RAID level (see information above).
In our case: RAID 5. - How many virtual drives do you wish to create: choose the number of RAID virtual drives to create, as well as the desired capacity.
However, if you want to create multiple RAID virtual disks, you will not be able to manually specify the desired capacity.
If you select "2" for the number of RAID virtual disks, the used capacity will therefore be half of the total available capacity.
By default, only one RAID virtual disk will be created on your RAID array. So the capacity in our case is 7,726 (in RAID 5).
Indeed, in our case, a hard drive will be used for parity. We can therefore store around 8 TB of data. - Miscellaneous Drive Attributes: if you want, you can assign a hard drive as Hot Spare.
This hard disk will only be used in the event of a disk failure in the array to be able to rebuild the missing disk.
Then, click Finish.
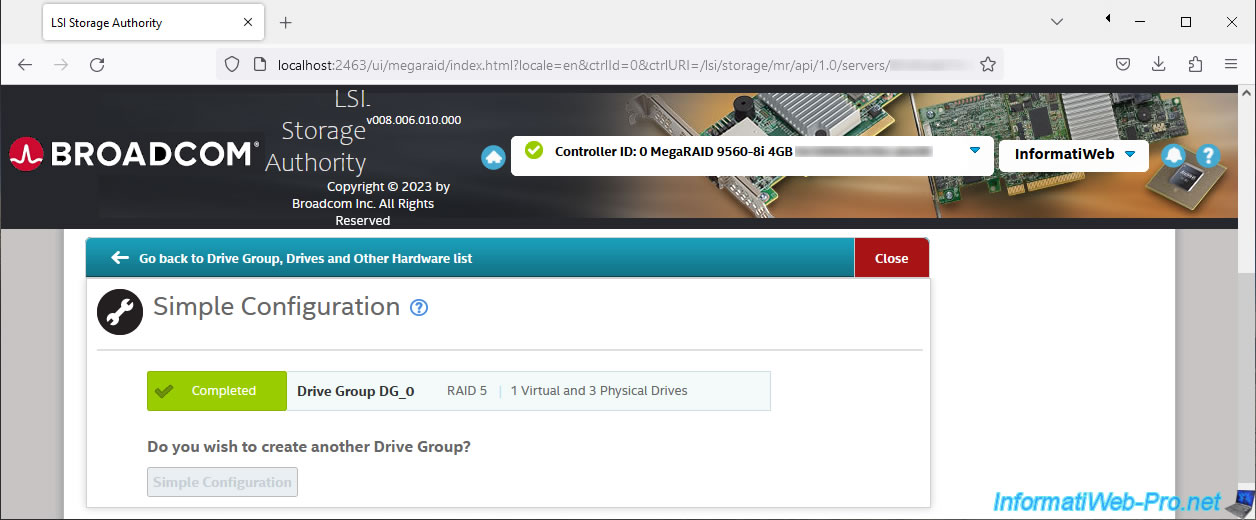
Once the RAID virtual disk has been created, you will see the "Completed" status appear.
Plain Text
Completed / Drive Group DG_0 / RAID 5 / 1 Virtual and 3 Physical Drives.
3. Disk group and virtual disk created
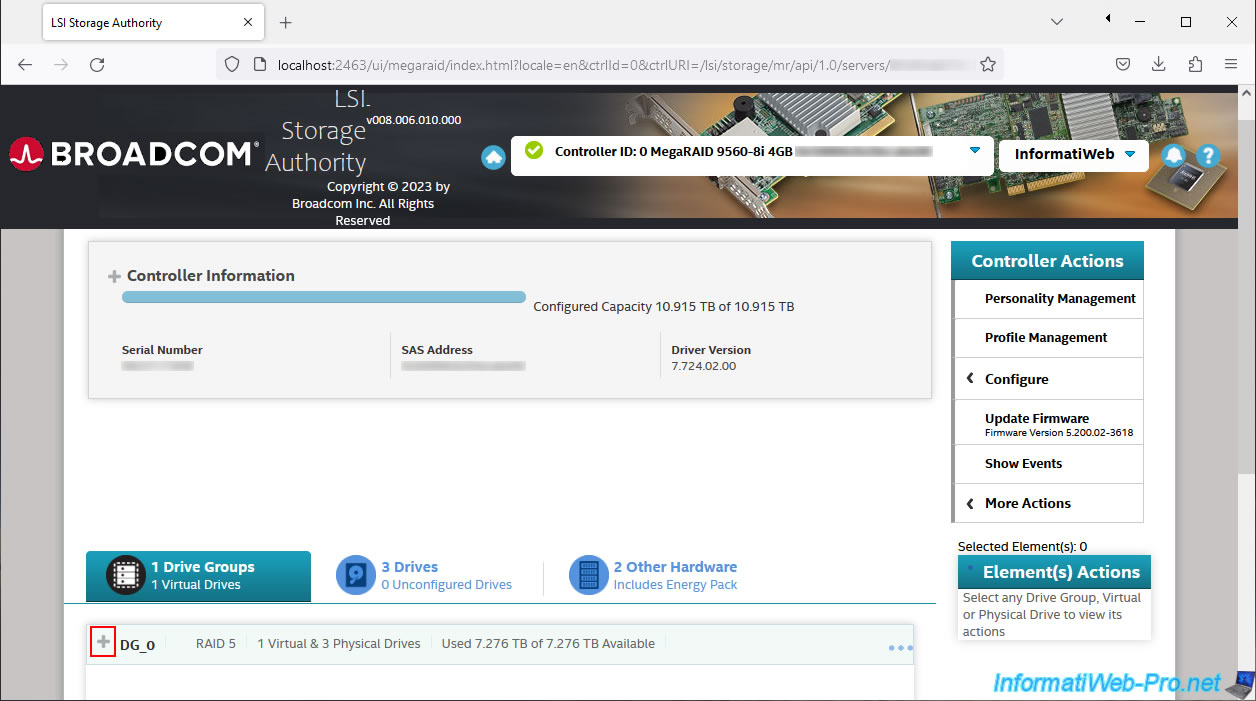
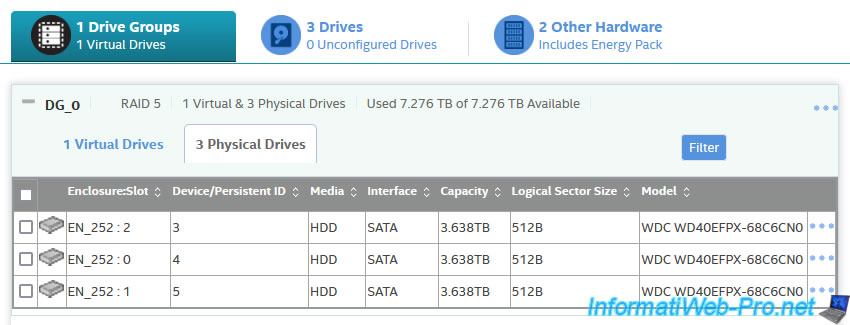
At the bottom of the page, you will see that a Drive Group and a Virtual Drive have been created.
By default, the 1st disk group is called "DG_0". A group of disks is more commonly called a disk array (RAID array).
In our case, it is a group of RAID 5 disks with a capacity (storage only) of 7.27 TB.
To see the RAID virtual disks there, click the "+" icon to the left of this "DG_0" disk group.
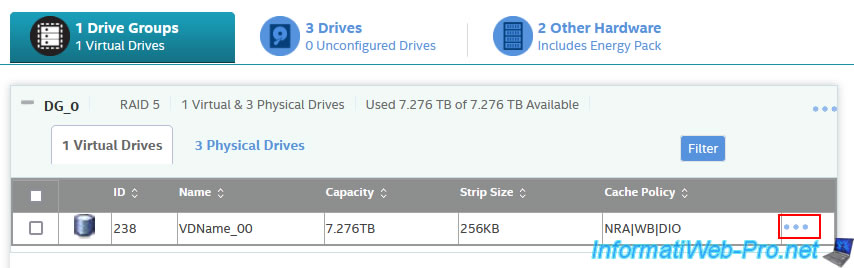
In the "1 Virtual Drives" sub-tab, you will see the created virtual disk appear with:
- ID: its ID on the MegaRAID controller.
- Name: his name. Default: VDName_00.
- Capacity: its storage capacity (disk space used for parity is NOT included).
- Strip Size: the size of the strips.
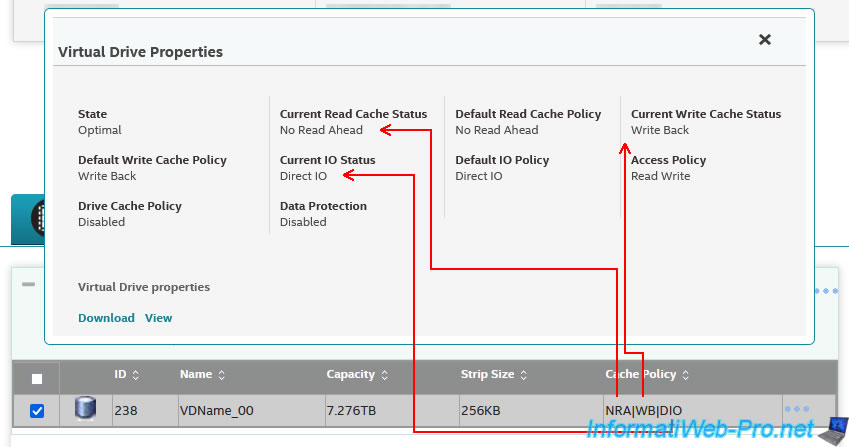
- Cache Policy: the cache options used (NRA = No Read Ahead|WB = Write Back|DIO = Direct IO) whose full names you will see by modifying the properties of your RAID virtual disk.
- ...: allows you to display more information about this RAID virtual disk.
In the "Virtual Drive Properties" window that appears, you will see:
- State: its state. Optimal when everything is going well.
- Default Write Cache Policy: the default policy for write cache.
Default: Write Back. (See step 6 for detailed info.) - Drive Cache Policy: the disk cache policy.
Default: Disable = disabled. - Current Read Cache Status: the current read cache status.
Default: No Read Ahead. - Current IO Status: current status for I/O.
Default: Direct IO. - Data Protection: indicates whether data protection is enabled or not.
Default: Disabled = disabled. - Default Read Cache Policy: the default policy for read cache.
- Default IO Policy: the default policy for I/O.
- Current Write Cache Status: the current status of the write cache.
- Access Policy: the access policy.
Default: Read Write = read and write.
In the "X Physical Drives" subtab, you will find the list of physical hard drives connected to your Broadcom MegaRAID controller and used by this disk group. In our case: 3 Western Digital 4 TB hard drives.
For each physical disk, you will see:
- EnclosureSlot: its location on the MegaRAID controller.
Ex: EN_252: 0, EN_252: 1, EN_252: 2, ... - Device/Persistent ID: an unique ID per physical disk.
- Media: the type of disk used.
In our case "HDD", because these are hard disks. - Interface: in our case, SATA hard drives.
- Capacity: the actual capacity of each physical disk.
In our case: 3.638TB. - Logical Sector Size: the size of logical sectors used.
In our case: 512B (512 bytes). - Model: the brand and model of each physical hard drive.
In our case, 3 "WDC WD40EFPX-68C6CNQ" hard drives.
Share this tutorial
To see also
-
RAID 5/1/2025
Broadcom LSA (LSI Storage Authority) - Download and install
-

RAID 4/18/2025
Broadcom MegaRAID 9560-8i - Buy a SATA drive cable
-
RAID 4/25/2025
Broadcom MegaRAID 9560-8i - Create a virtual disk (from BIOS)
-
RAID 5/7/2025
Broadcom MegaRAID 9560-8i - Identify your logical RAID disks
You must be logged in to post a comment