- RAID
- 04 February 2022 at 12:34 UTC
-

- 1/2

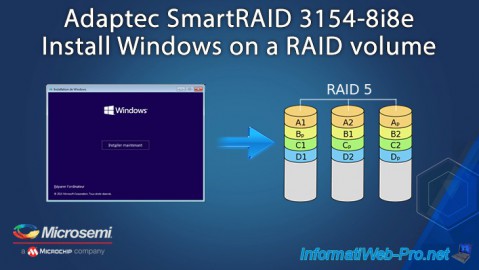
Although a RAID volume is often used to store important data, virtual machines, ... you can also install Windows (or any other supported operating system) on a logical drive created in a RAID volume.
For this tutorial, we have created a RAID 5 volume on our Microsemi Adaptec SmartRAID 3154-8i8e controller and it contains a single logical drive.
- Download the correct driver for your Microsemi Adaptec SmartRAID controller
- Create a RAID volume
- Configure the BIOS of your computer / server
- Install Windows 10 on your RAID volume
- Windows is installed
- Partition the logical drive of the RAID volume
- Install the drivers for your computer
1. Download the correct driver for your Microsemi Adaptec SmartRAID controller
To begin, before installing the operating system on your RAID volume, you must download the correct driver for your Microsemi Adaptec SmartRAID controller from the Microsemi official website.
To do this, simply go to the page of your SmartRAID controller and locate your version of Windows in the "Downloads" tab.
In our case, we will install Windows 10 in 64 bits (x64), so we click on "Microsoft Windows 10 x64".
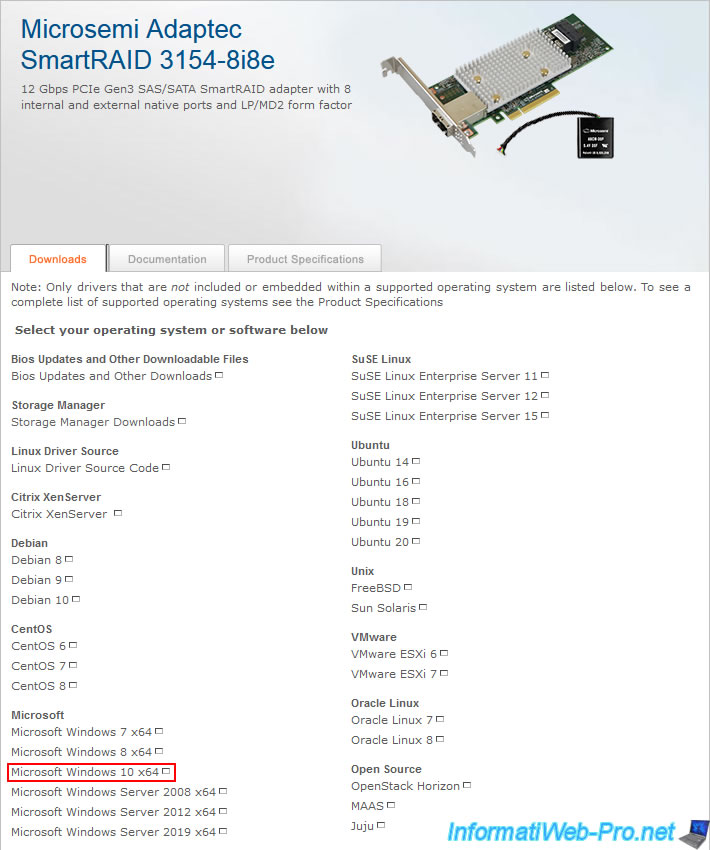
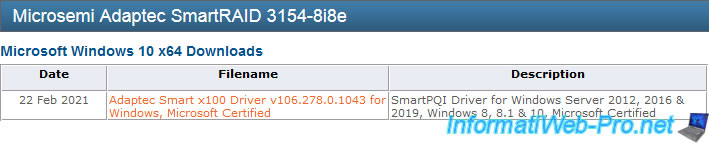
The Microsemi site will redirect you to a page with the downloads available for your Microsemi SmartRAID controller and the version of Windows selected.
You click on the proposed filename.
You are redirected to the desired driver download page which is obviously compatible with your SmartRAID controller.
You click on Download Now.
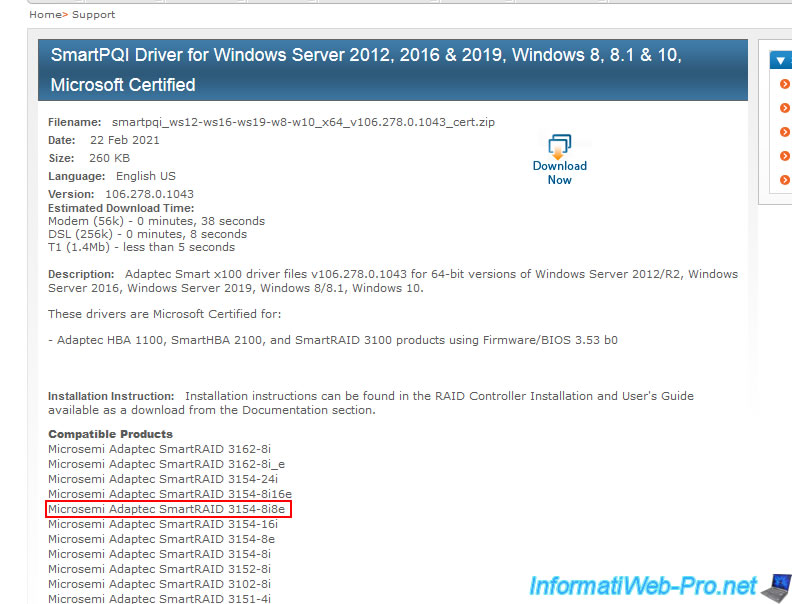
You accept the Adaptec contract by selecting "Yes", then clicking on : I agree and answer truthfully.
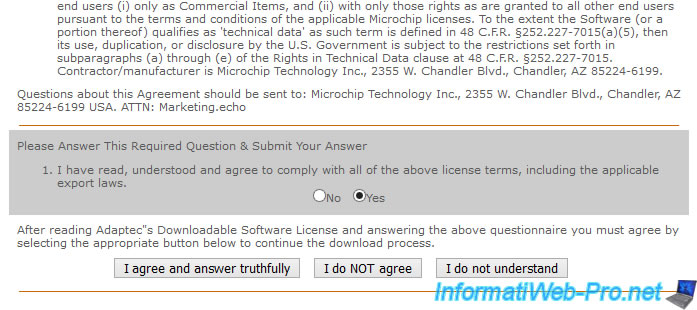
Finally, you click on the "Primary" button to download the driver.
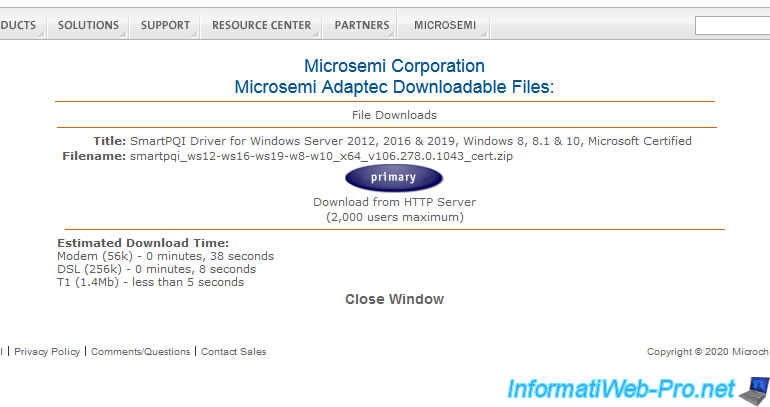
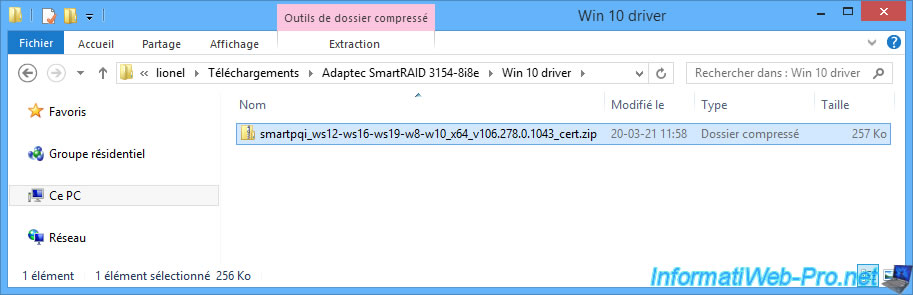
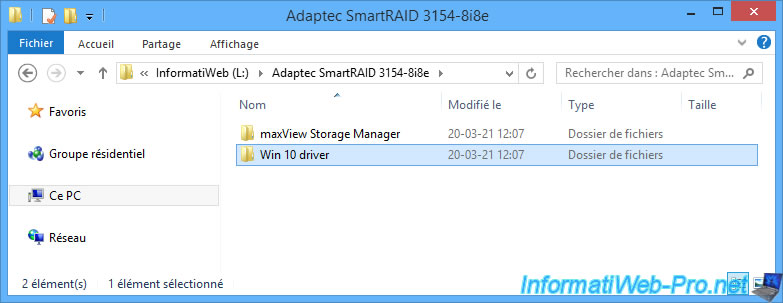
You will have a compressed file like this : smartpqi_ws12-ws16-ws19-w8-w10_x64_v106.278.0.1043_cert.zip
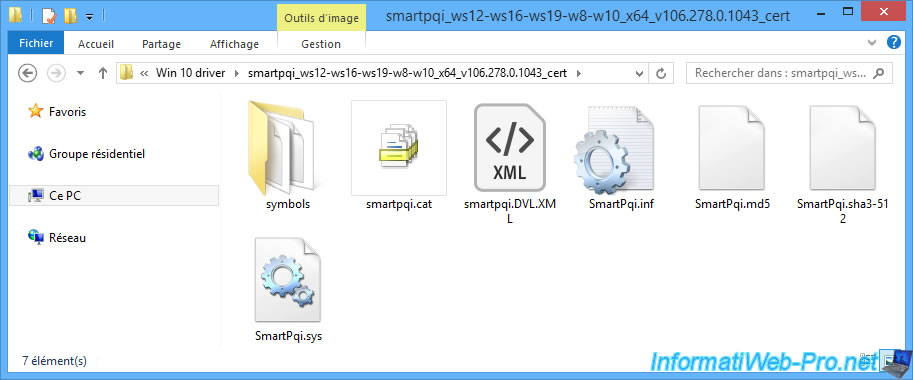
Once the file is decompressed, you will see that the folder contains in particular :
- SmartPqui.inf : the driver configuration file
- SmartPqi.sys : the driver itself
Copy this folder to an USB key so that you can provide them to the Windows installer.
2. Create a RAID volume
To create a RAID volume and logical drive in it, refer to our tutorial : Adaptec SmartRAID 3154-8i8e - Create a RAID volume (from ACU).
In our case, we have already created a 7.2 TiB RAID 5 volume using 3 hard drives of 3.6 TiB.

3. Configure the BIOS of your computer / server
To be able to install Windows on your RAID volume (or more precisely the logical drive located there), then boot on it once Windows is installed, you must configure the BIOS of your computer / server so that it started :
- first on your CD/DVD drive
- second on your RAID volume created beforehand
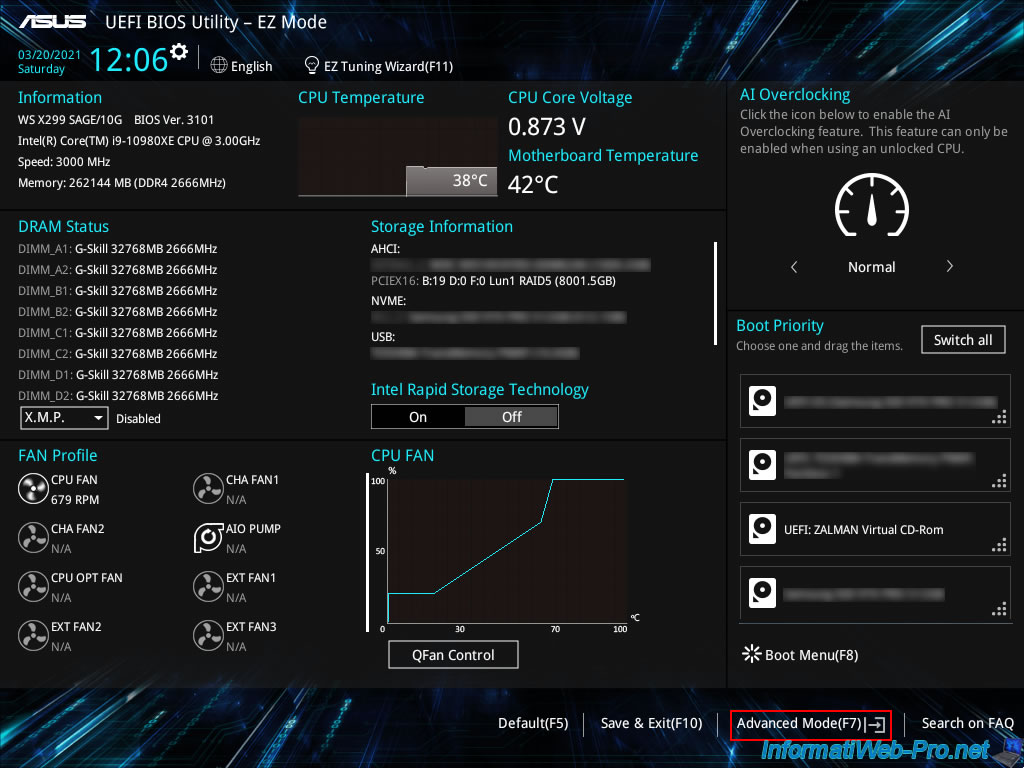
For that, in our case, we go to the advanced mode of the BIOS of our Asus WS X299 SAGE/10G motherboard by clicking on : Advanced Mode (F7).
If you have another BIOS, refer to our tutorial "Change the BIOS boot priority" where you will find other BIOS interfaces.
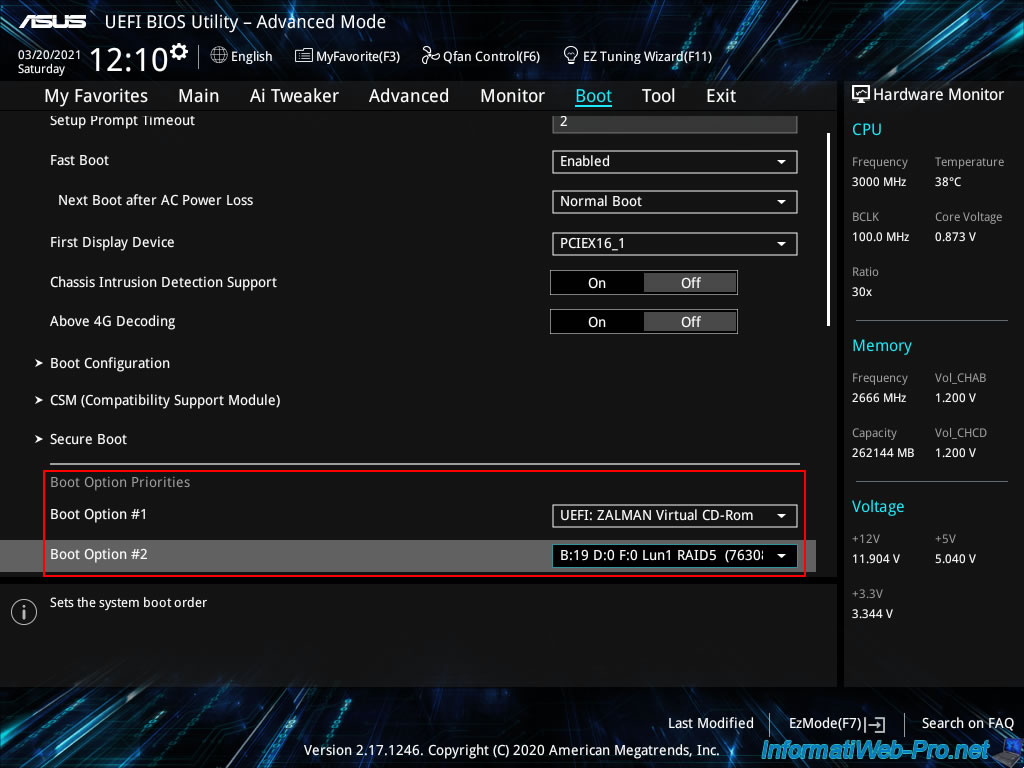
In the "Boot" tab, scroll down to the "Boot Option Priorities" section and select :
- Boot Option #1 : your CD / DVD drive
- Boot Option #2 : your RAID volume. Which in our case appears under the name : B:19 D:0 F:0 Lun1 RAID5 ...
Explanations about the name of the RAID volume displayed by the BIOS :
- The "B:19 D:0 F:0" prefix means "Bus:19, Dev:00, Func:00" and corresponds to the PCI slot where your SmartRAID controller is plugged.
This location is also displayed in white on a black background each time your computer is started. - Lun1 means this is the 1st logical drive created on your SmartRAID controller
- RAID5 corresponds to the RAID level chosen when creating the RAID volume
- (.... GB) corresponds to the size of the logical drive present in this RAID volume
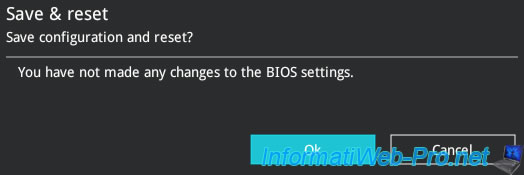
Then, go to the "Exit" tab and click on : Save Changes & Reset.

Confirm saving the changes.
4. Install Windows 10 on your RAID volume
If the Windows installation DVD is in your computer's CD/DVD drive, your computer will boot from it.
Depending on your Windows installation DVD, it may ask you to press a key to boot from it.
If so, do it.

Then, the Windows logo will appear.
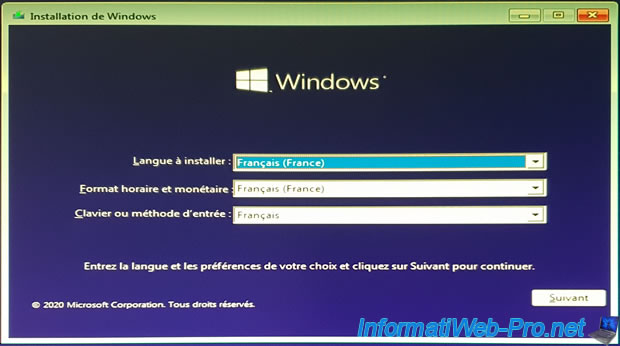
Select your language and country, then click Next.
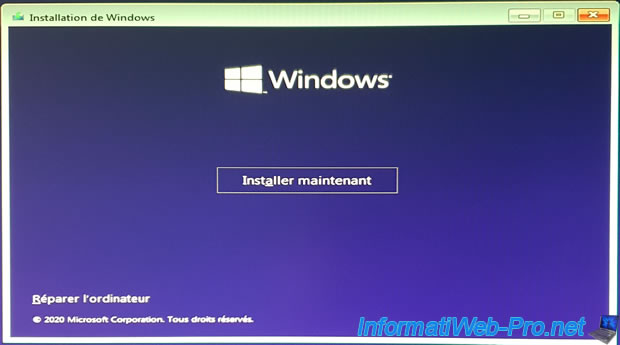
Click on : Install now.
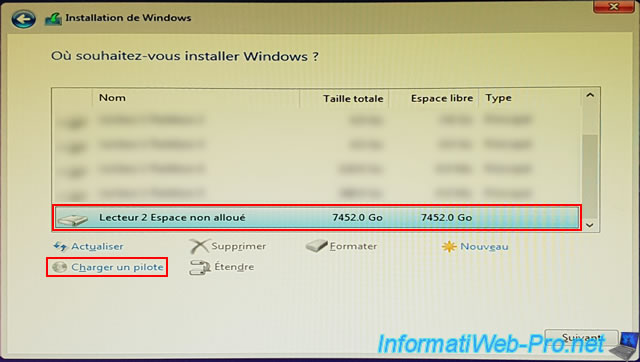
If you are installing a recent version of Windows, the Windows installer may automatically detect the RAID volume created through your Microsemi SmartRAID controller.
In this case, you will find a drive with unallocated space whose total size and free size are equal and match the size of your RAID volume.
Otherwise, this drive will not be displayed here.
In both cases, even if Windows has detected your RAID volume, you must click on "Load Driver" so that the driver that will be installed is up to date and that it's that of the manufacturer (Microsemi) and not the generic driver created by Microsoft.
Once you have clicked on "Load Driver", a window will appear with a "Browse" button that you must click.
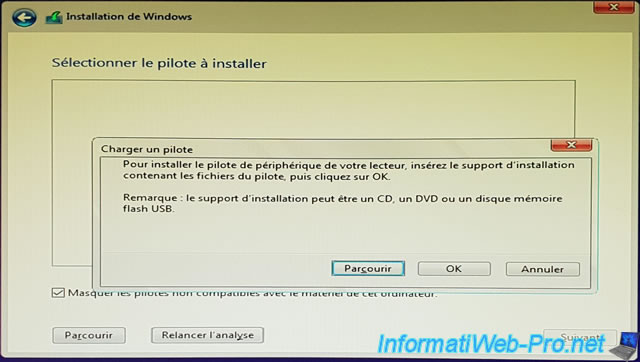
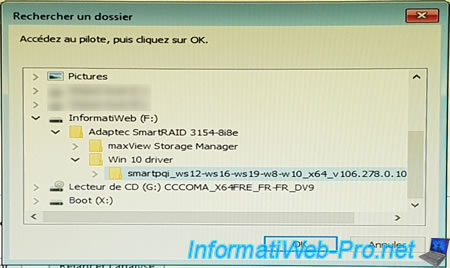
Select the "smartpqi_ws12-ws16-ws19-w8-w10_x64_v106.278.0.1043_cert" folder where the driver downloaded previously from the Microsemi site is located.
In our case, we had transferred it to an USB key.
Note that the zip file downloaded from the Microsemi site must obviously have been decompressed (extracted) beforehand so that the Windows installer can detect the ".inf", ".sys", ... files of the driver concerned.
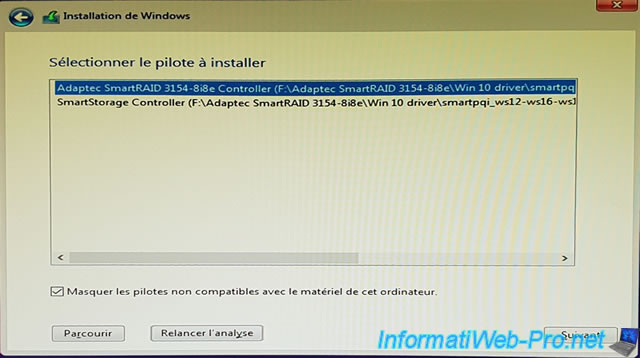
The Windows installer will detect the "Adaptec SmartRAID 3154-8i8e" driver.
This is the driver you need to select to install the correct driver. Note that the model of the RAID controller may obviously be different in your case.
Then, click on Next.
Wait while the driver installs : Adaptec SmartRAID 3154-8i8e.
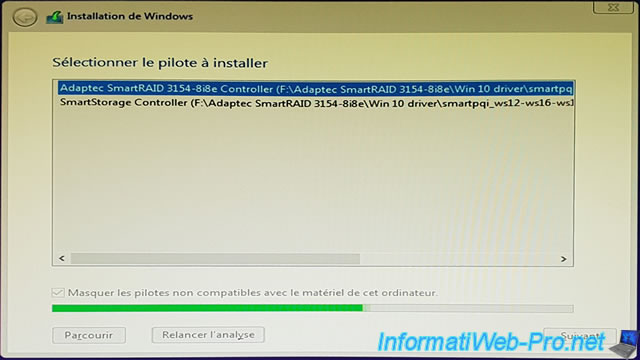
Once the driver is installed, the installer will automatically return to the screen listing the hard disks and partitions detected on your computer.
Now, you must have a drive with unallocated space that appears here.
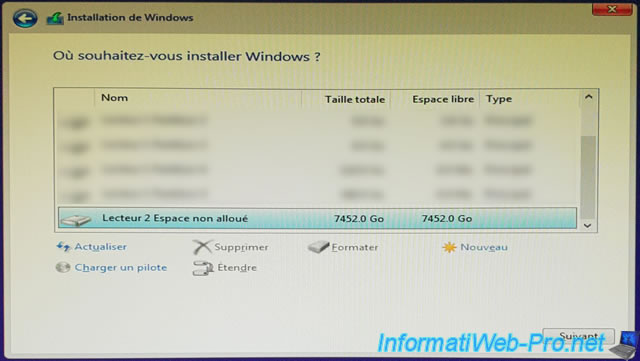
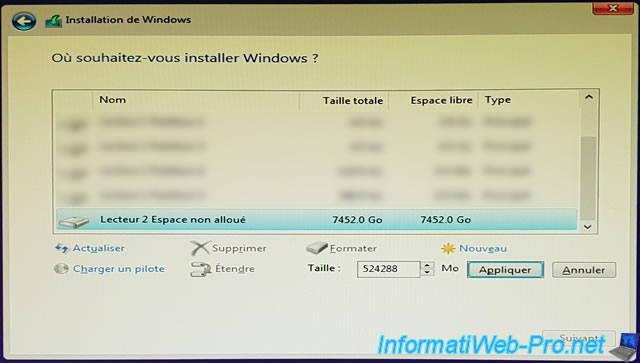
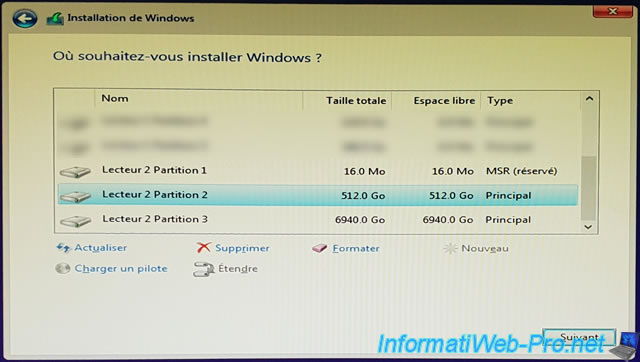
Partition it if you want or select it and click Next directly.
In our case, we created a 512 GB partition (= 524,288 MB) to install Windows and other programs in it in the future.
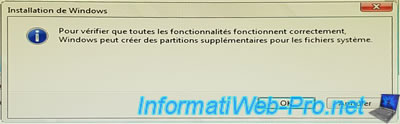
Windows will automatically create its system partition. Click on OK.
For the 2nd partition, we left the default to use all the remaining space on our RAID volume.
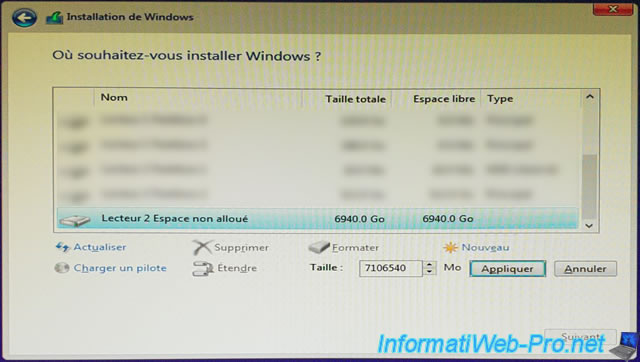
Select the 1st partition you created yourself (in our case, the 512 GB partition) and click Next to install Windows there.
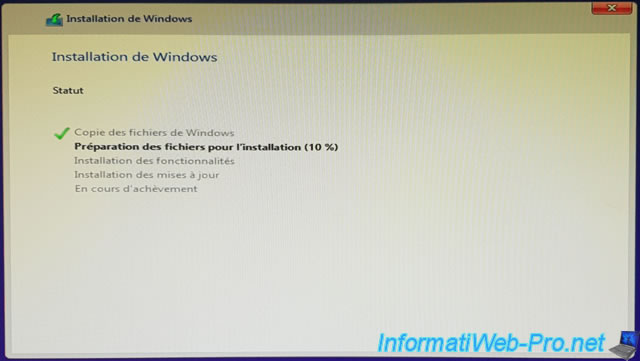
Wait while Windows installs.
Share this tutorial
To see also
-

RAID 4/20/2022
Adaptec maxView Storage Manager v3 - Create a RAID volume
-

RAID 4/8/2022
Adaptec maxView Storage Manager v3 - Download and boot on USB version
-

RAID 4/13/2022
Adaptec maxView Storage Manager v3 - Installation on Linux
-

RAID 4/15/2022
Adaptec maxView Storage Manager v3 - Manage an Adaptec SmartRAID controller on VMware ESXi 6.7
You must be logged in to post a comment