Create a RAID array of SSDs with an Adaptec SmartRAID 3154-8i8e controller
- RAID
- 18 February 2022 at 13:14 UTC
-

- 2/2

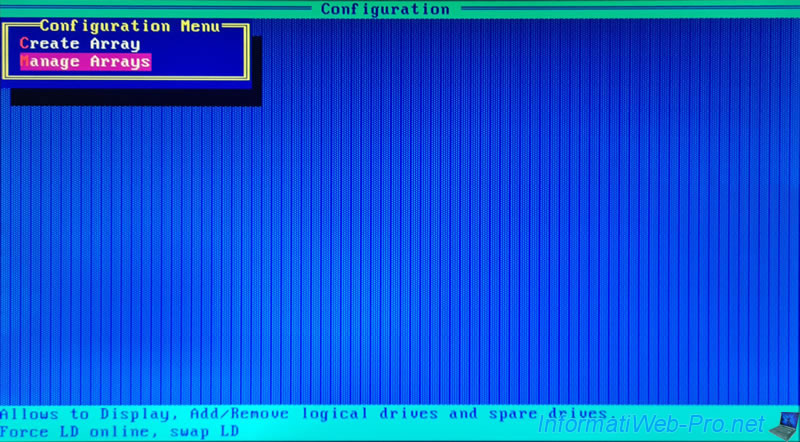
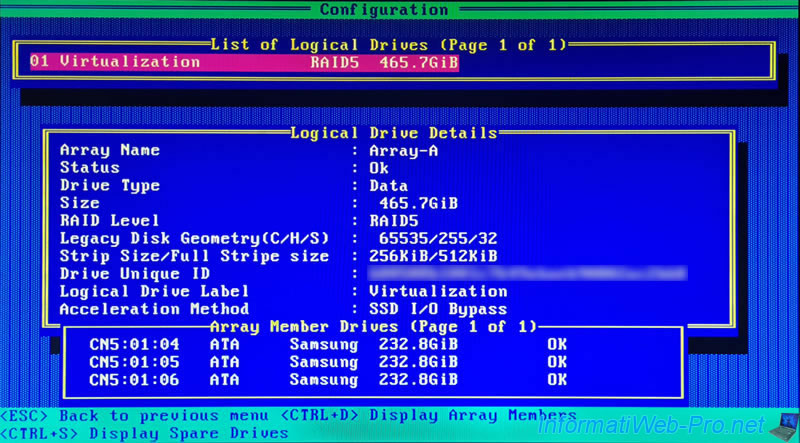
3. Information about your array in ACU
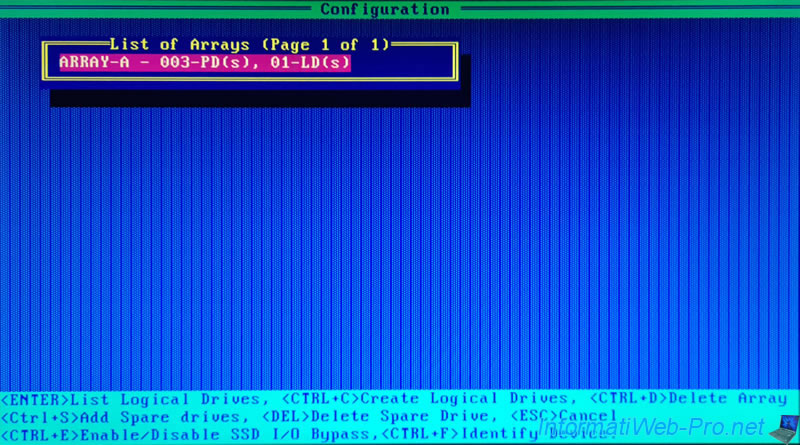
Then, in : Manage Arrays.
Select your array and press Enter.
Select your RAID logical drive and press Enter.
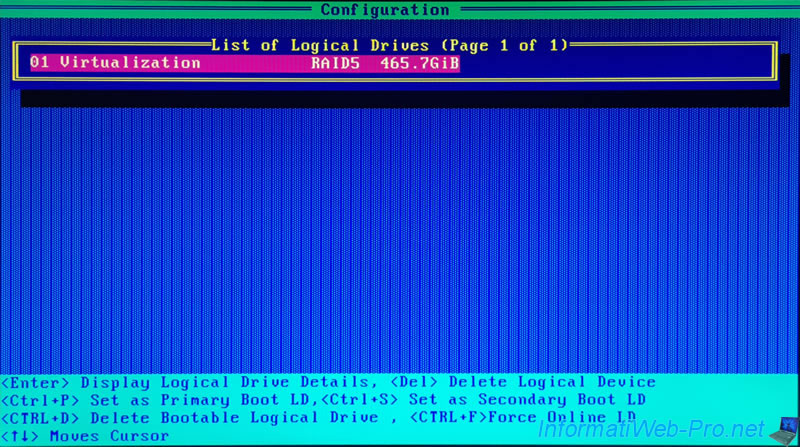
Your logical drive appears and you can see that the Acceleration Method used is : SSD I/O Bypass.
Press "CTRL + D" to display the list of members (physical disks).
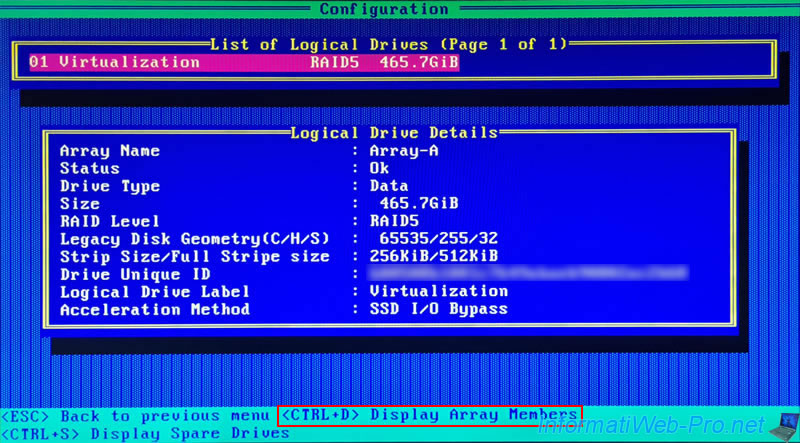
The list of physical disks affected by this logical drive appears.
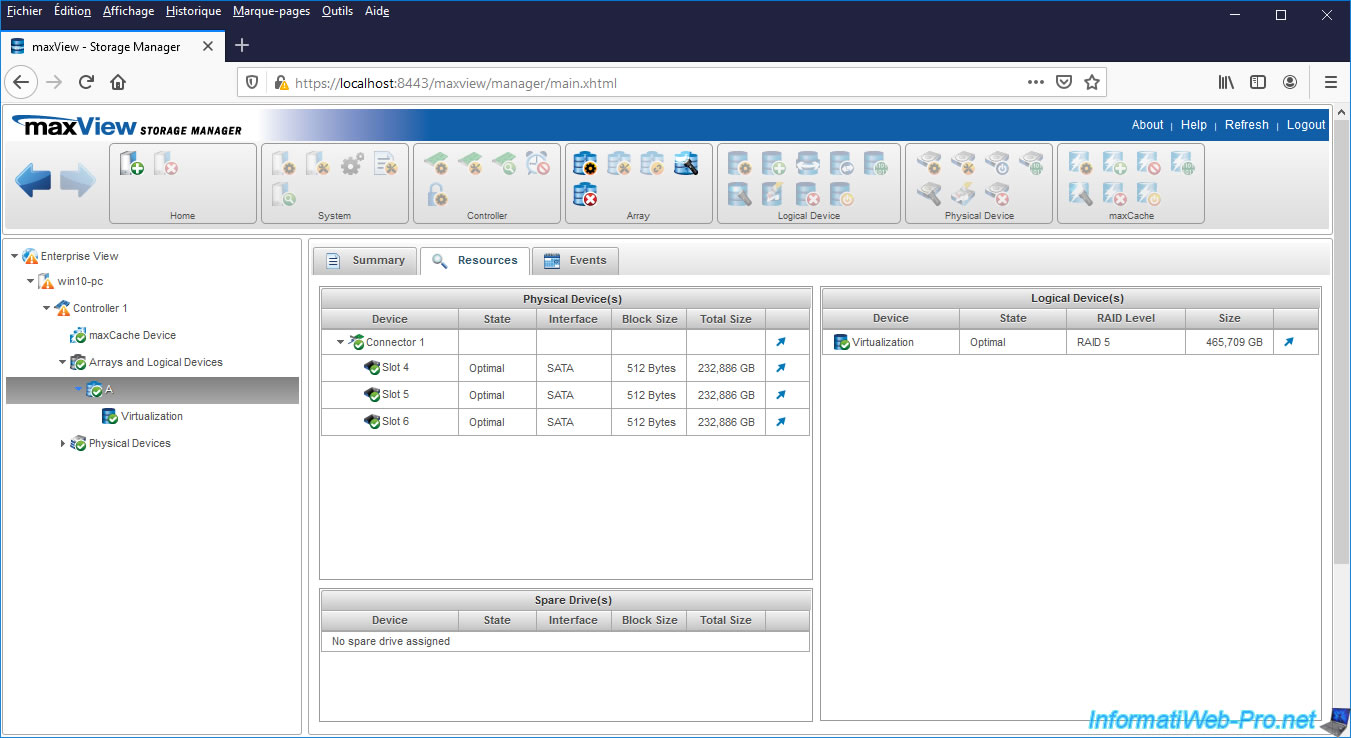
4. Information about your array in maxView
If you look in maxView, you will see that the Interface Type is "SATA SSD" and the "SSD I/O Bypass" setting is Enabled.

If you look in the "Resources" tab, you will see that there are 3 SATA physical devices.
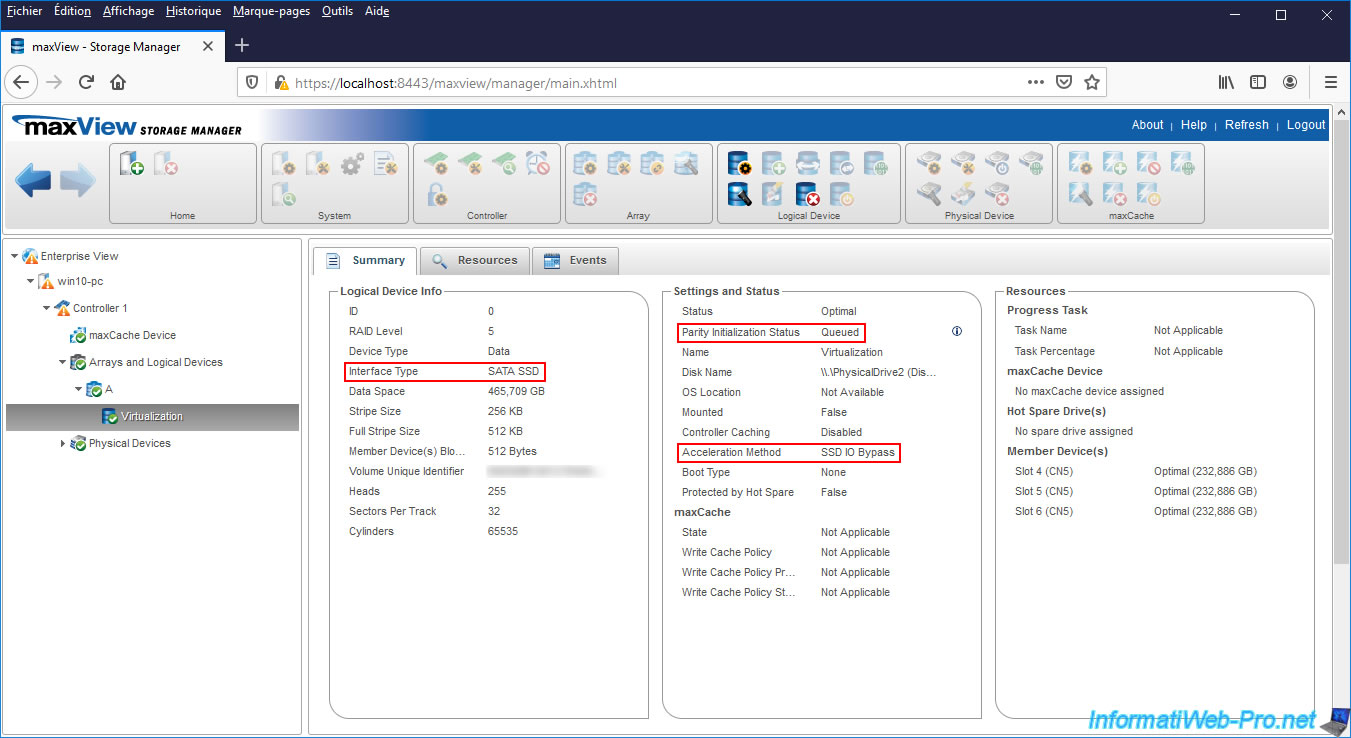
If you select your logical drive, you will see that :
- the interface type is again : SATA SSD
- the parity initialization status is "Queued" if you have not used this one yet
- the acceleration method is : SSD IO Bypass
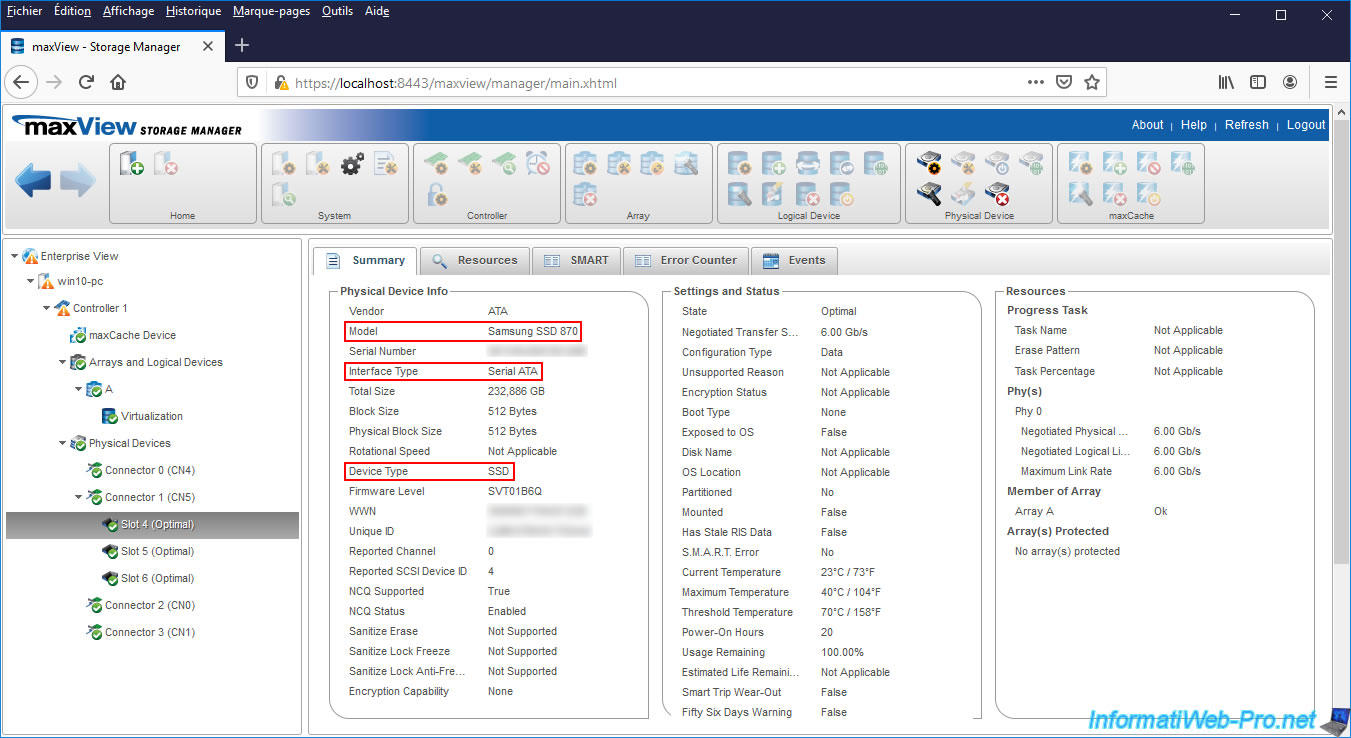
If you look at the information for one of the SSDs in your array, you will see that :
- Model: in our case, the model is : Samsung SSD 870
- Interface Type : the interface type is Serial ATA (SATA)
- Device Type : the device type is SSD
5. Start parity initialization on your logical drive
To initialize parity on your logical drive, just start using it.
For example, by partitioning it or creating files on it.
To partition it, right click "Manage" on "This PC" (or "Computer") from the file explorer.
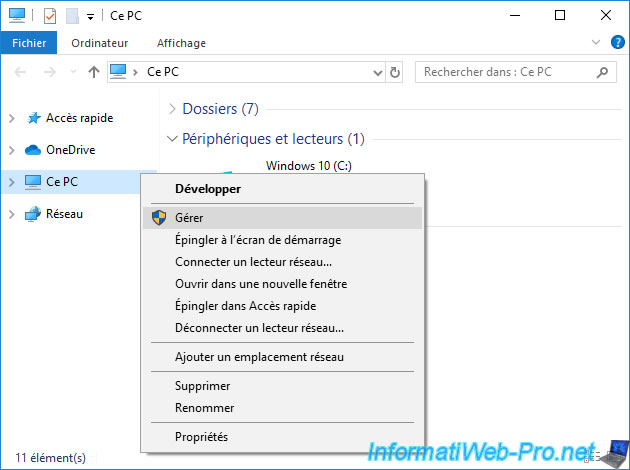
Go to : Disk Management.
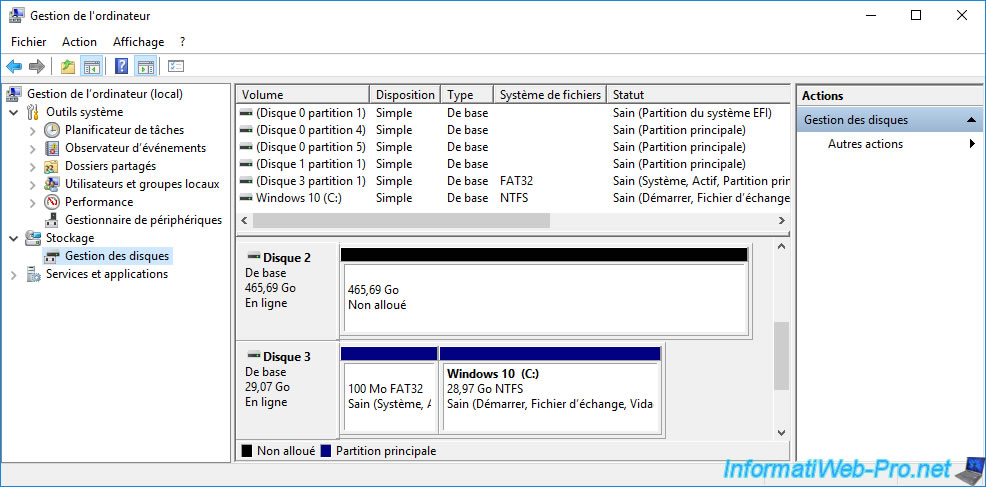
An "Initialize Disk" window will appear.
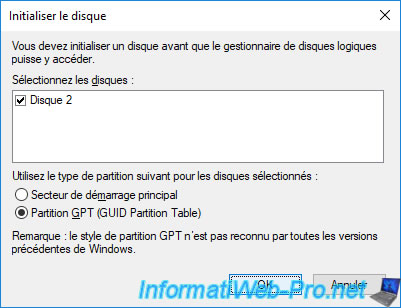
Select the type of partition table you want to use and click OK.
Then, create a new simple volume (partition) on it.
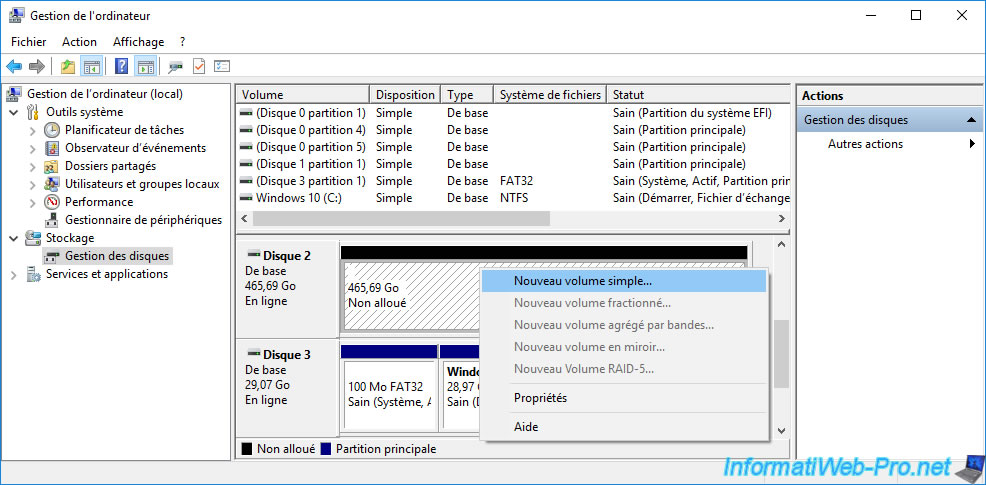
In our case, we created a single simple volume on this RAID logical drive.
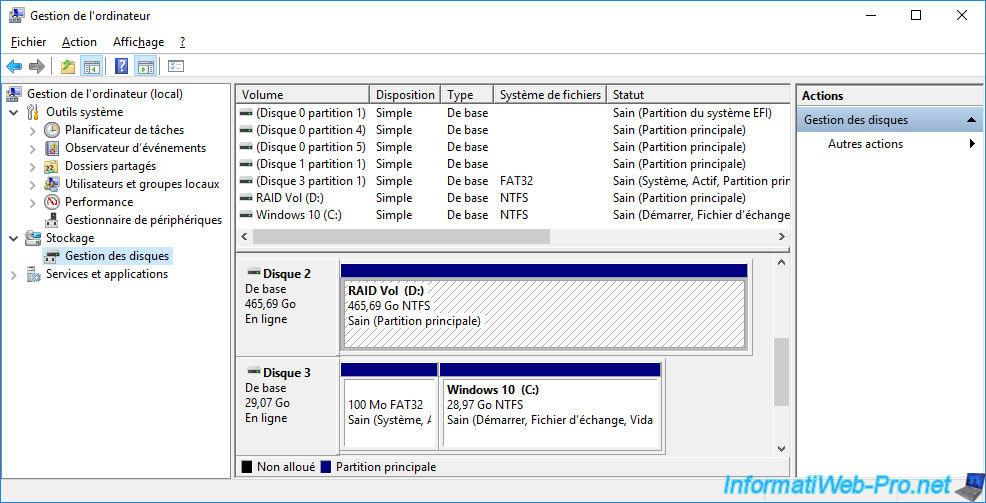
Partitioning your RAID logical device will have caused I/O on it and the initialization of the parity (Background Parity Initialization) will therefore have started.
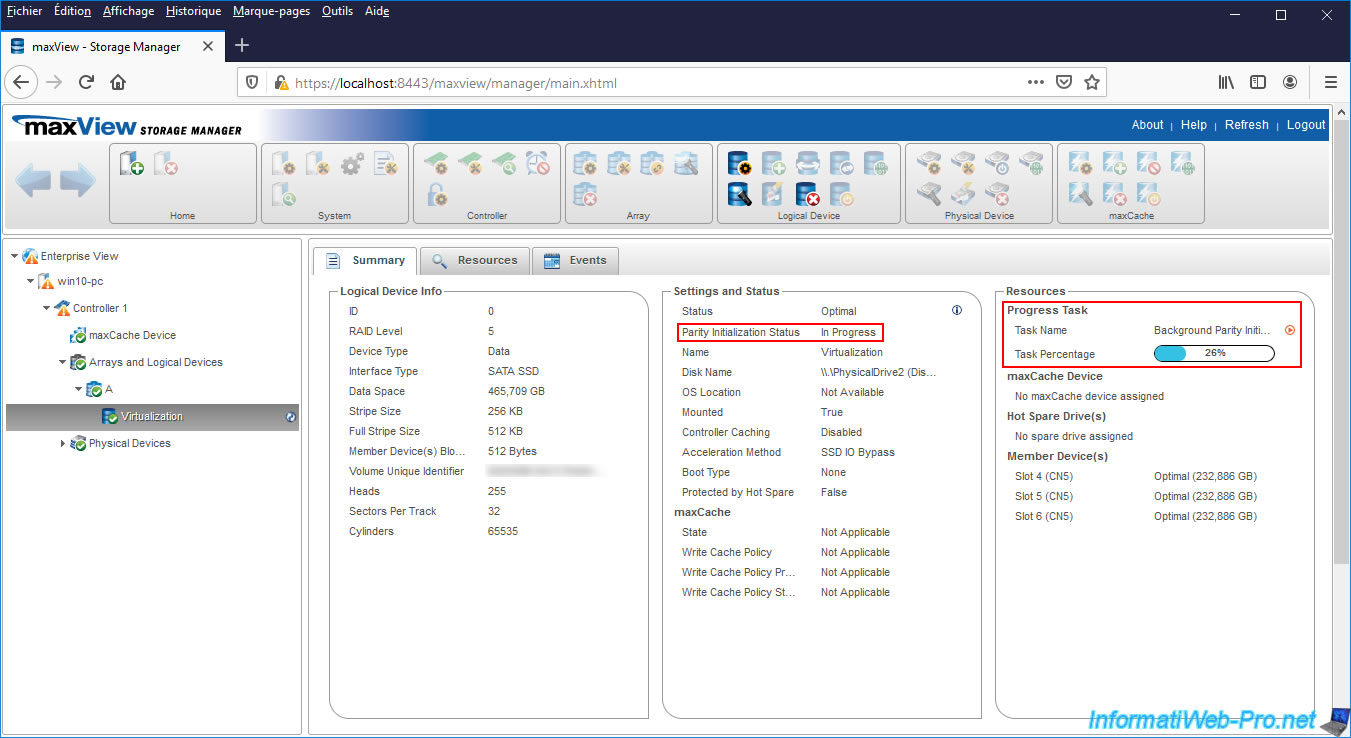
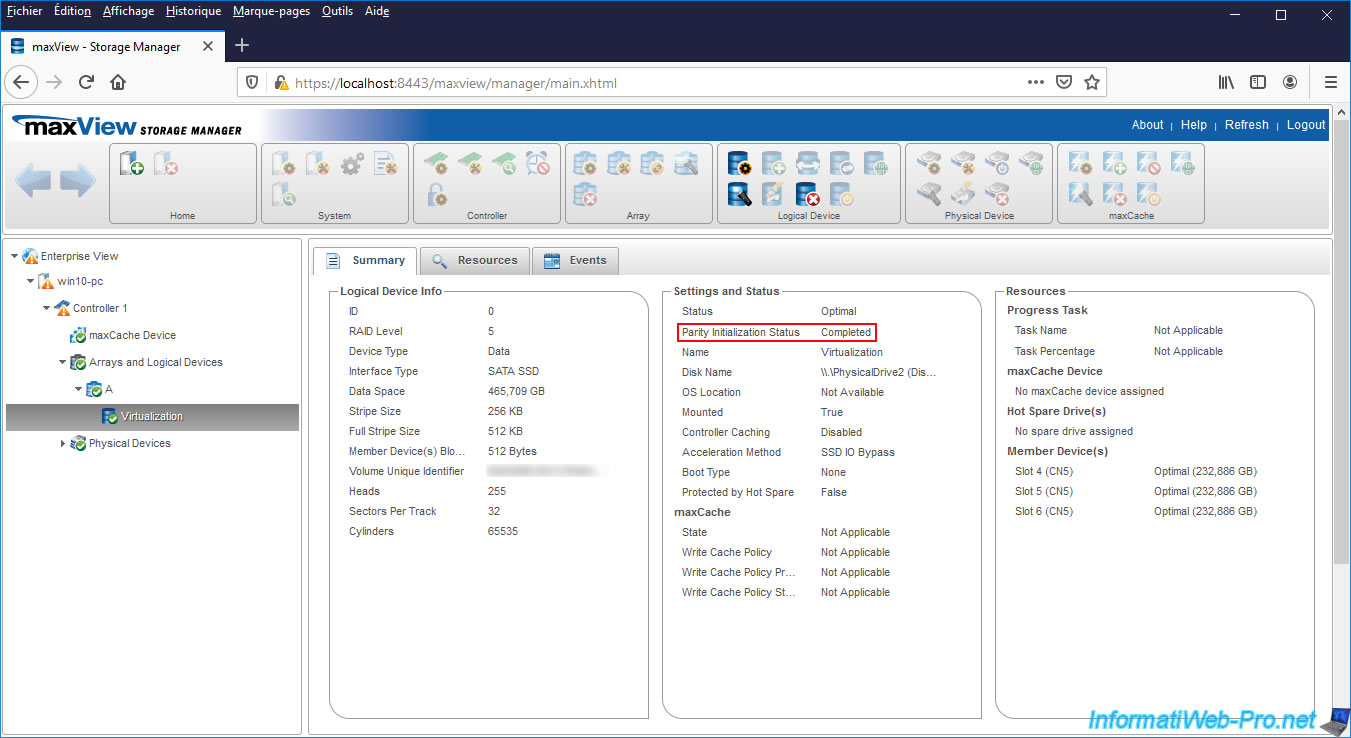
Once parity initialization is complete, the status will be : Completed.
Share this tutorial
To see also
-

RAID 4/20/2022
Adaptec maxView Storage Manager v3 - Create a RAID volume
-

RAID 4/8/2022
Adaptec maxView Storage Manager v3 - Download and boot on USB version
-

RAID 4/13/2022
Adaptec maxView Storage Manager v3 - Installation on Linux
-

RAID 4/15/2022
Adaptec maxView Storage Manager v3 - Manage an Adaptec SmartRAID controller on VMware ESXi 6.7
No comment