Automatically rebuild a failed physical disk using an Auto-Replace Spare with an Adaptec SmartRAID 3154-8i8e controller
- RAID
- 06 May 2022 at 17:00 UTC
-

- 2/2
11. Rebuilding the physical disk using the Spare (in case of failure or predicted failure)
In the event of a failure (or predicted failure, if applicable), your controller will replace your failed drive with the Spare since we have used the "Auto Replace Spare" mode.
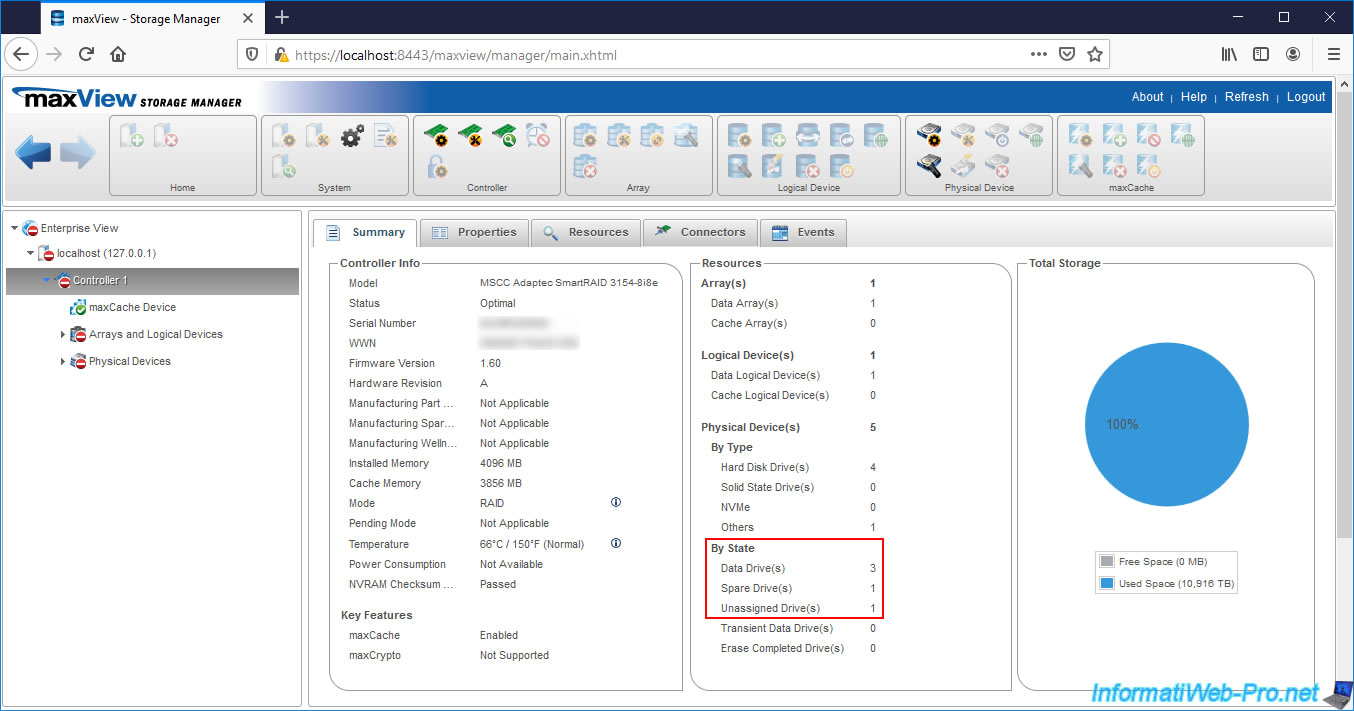
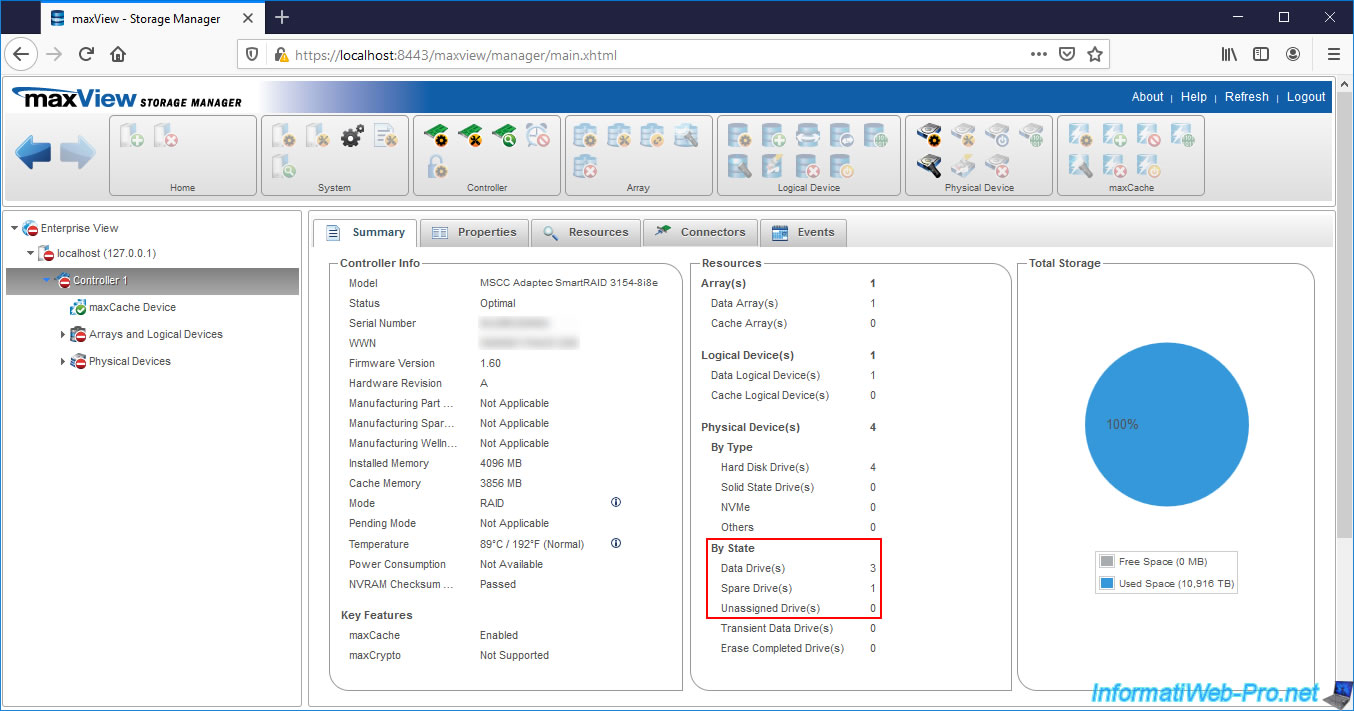
If you look in the "maxView Storage Manager" web interface, you will see :
- Data Drives - 3 : 3 hard disk drives used for storage
- Spare Drives - 1 : 1 Spare
- Unassigned Drive - 1 : 1 unassigned physical disk
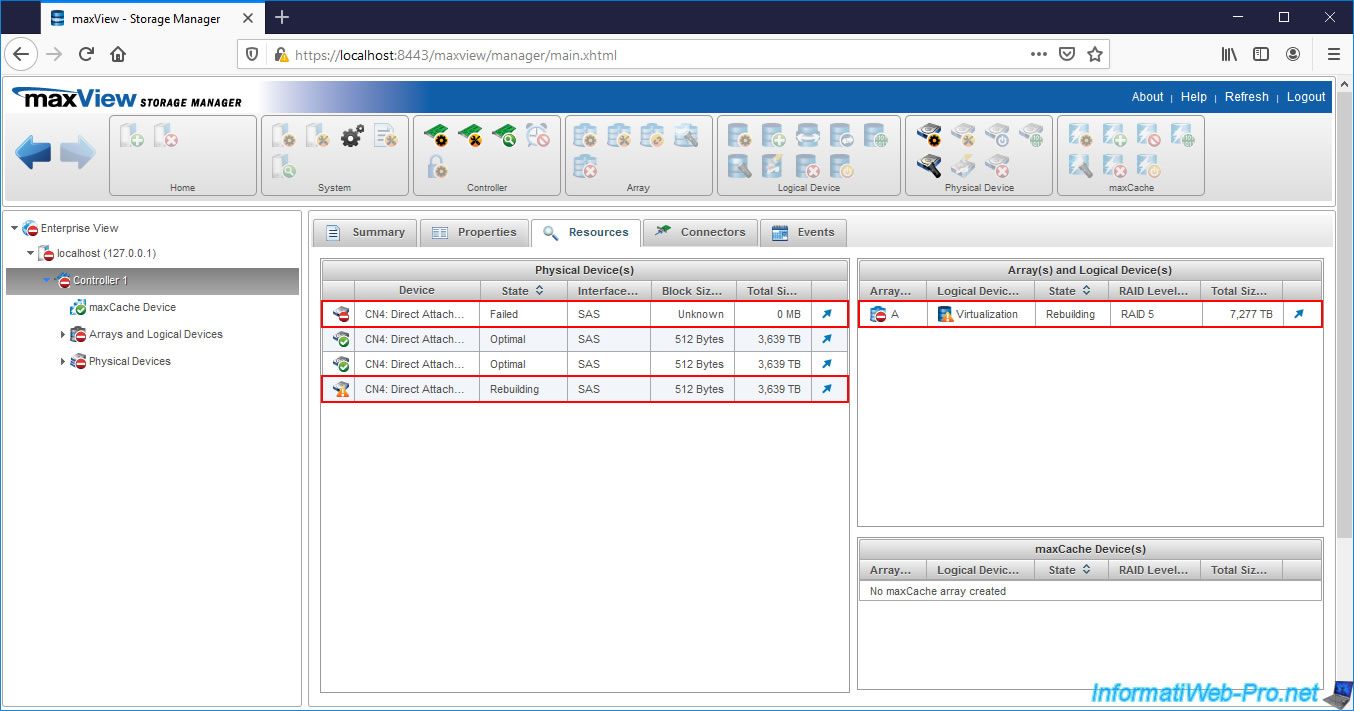
If you look in the "Resources" tab of your controller, you will see that you have :
- 1 failed physical disk (Failed)
- 2 physical disks in Optimal state (Optimal)
- 1 physical disk being rebuilt (Rebuilding)
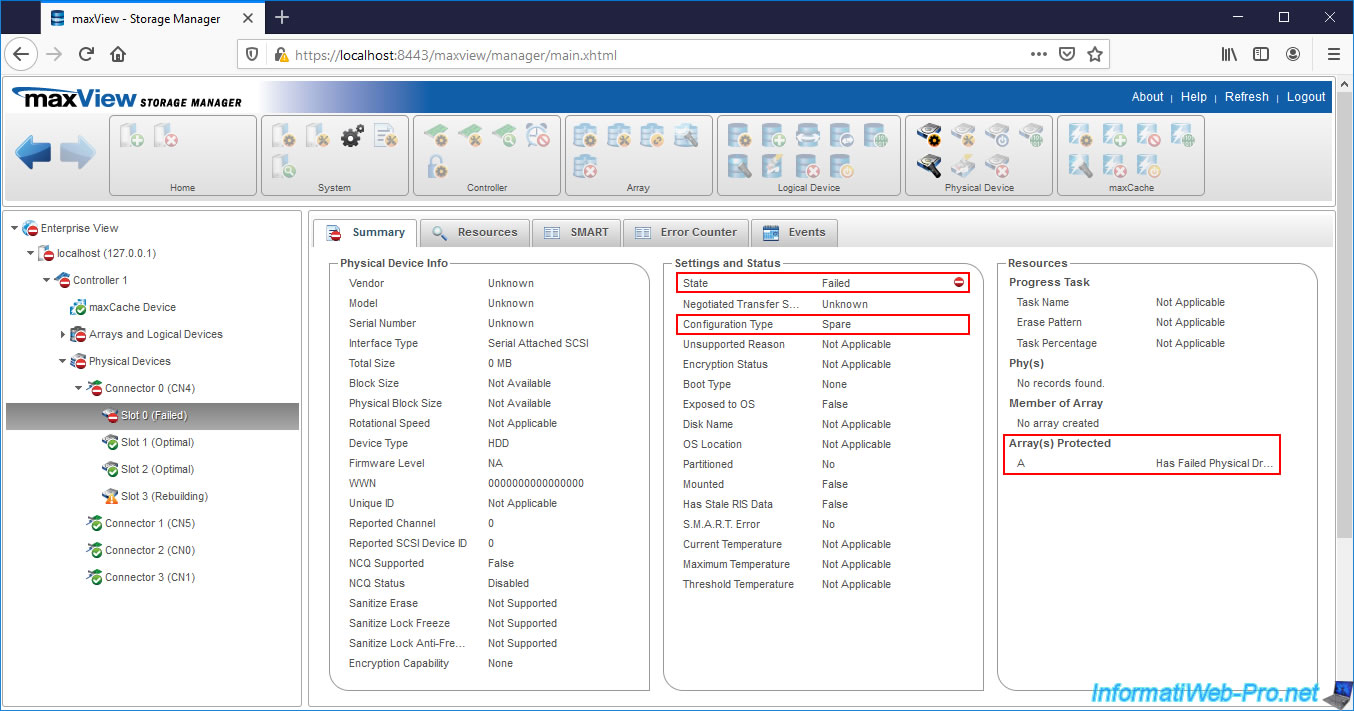
If you look at the informations of the 1st physical disk, you will see that it's the hard disk connected to the port "Connector 0 - CN4 - Slot 0" (= CN4:01:00 in ACU) and which was a simple member of our cluster before it fails.
However, since we had configured the Spare mode to "Auto Replace", this former member became the Spare at the time of its failure.
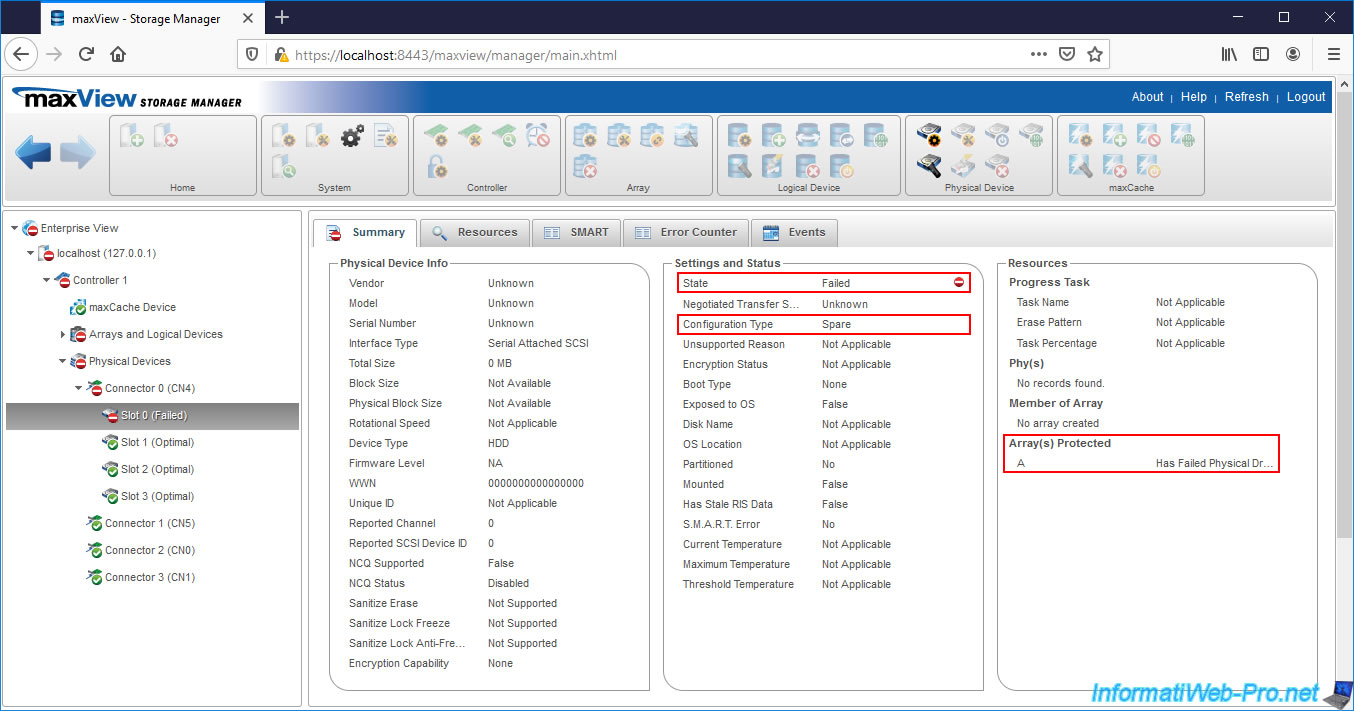
You can also see that its configuration type is "Spare" and that it "protects" your array A (Array Protected : A).
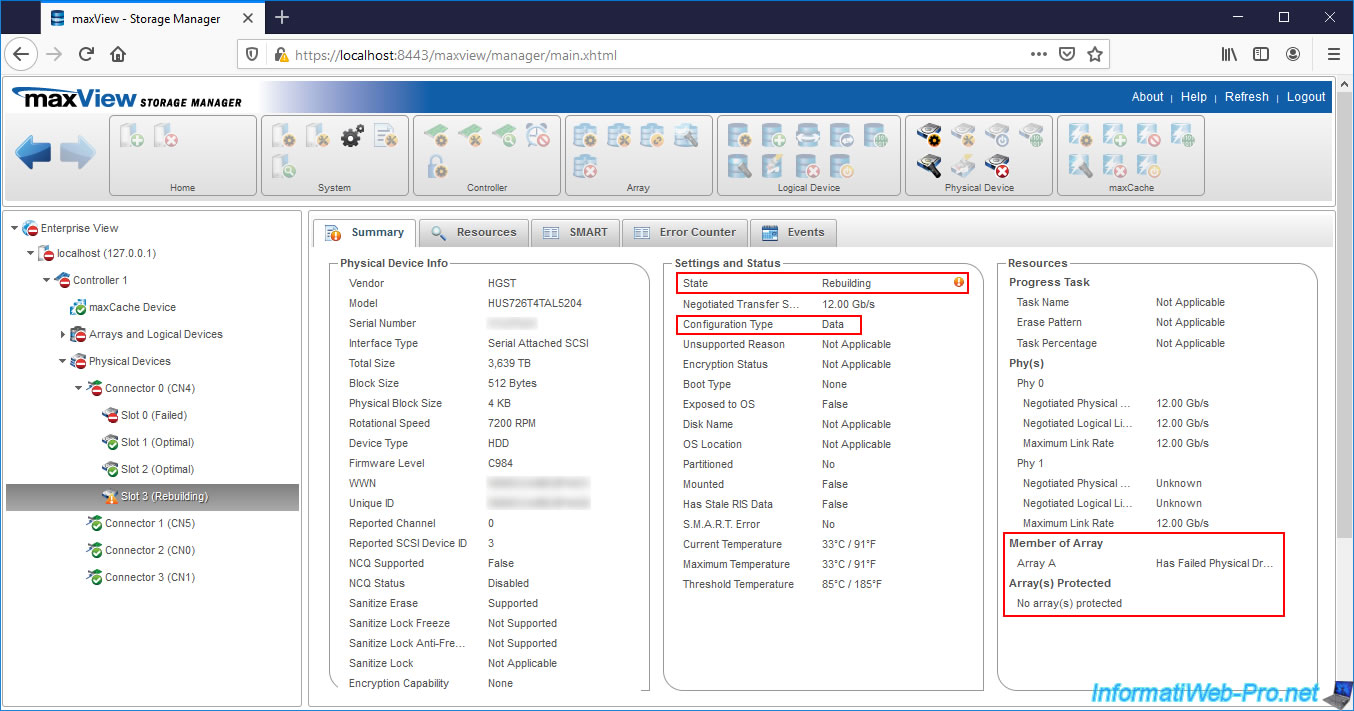
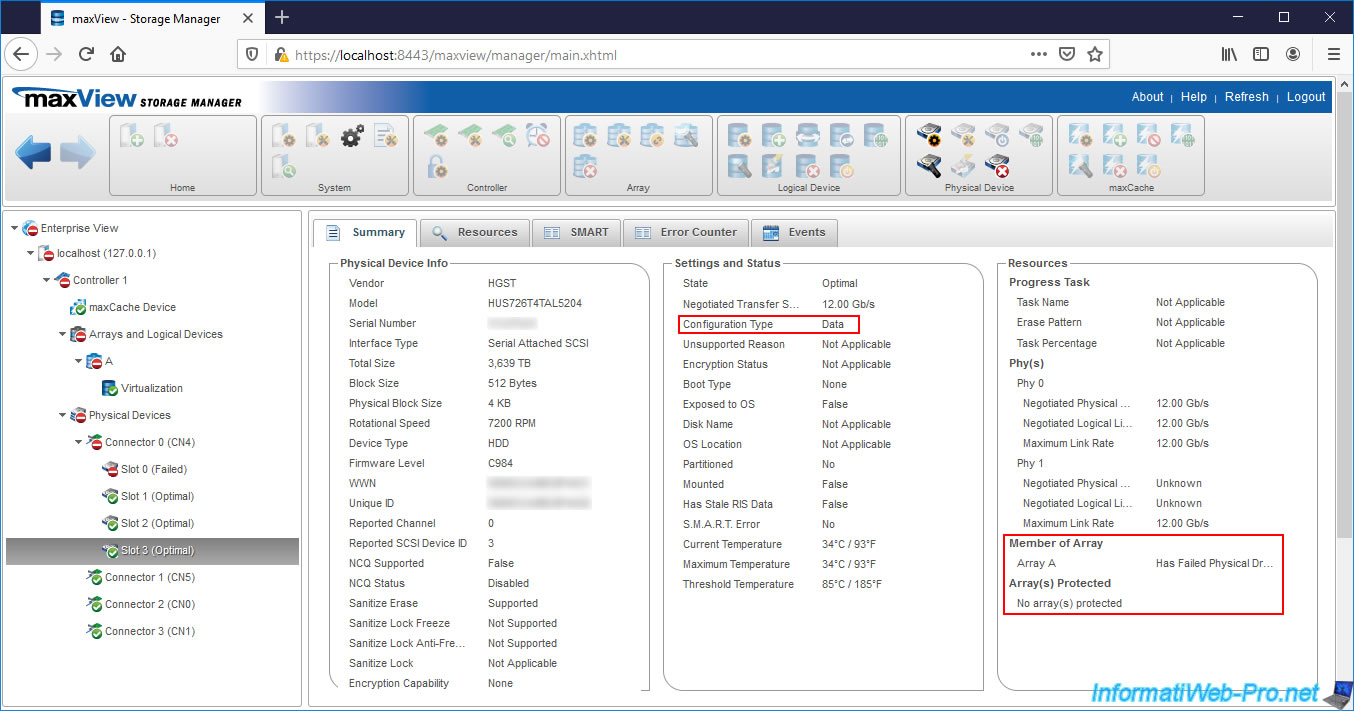
If we look at the physical disk connected to the "Slot 3" port which was the "Auto Replace Spare" at the start of the tutorial, you can see that this is now a permanent member of your array A (Member of Array - Array A) and that it's no longer a Spare (Configuration Type : Data).
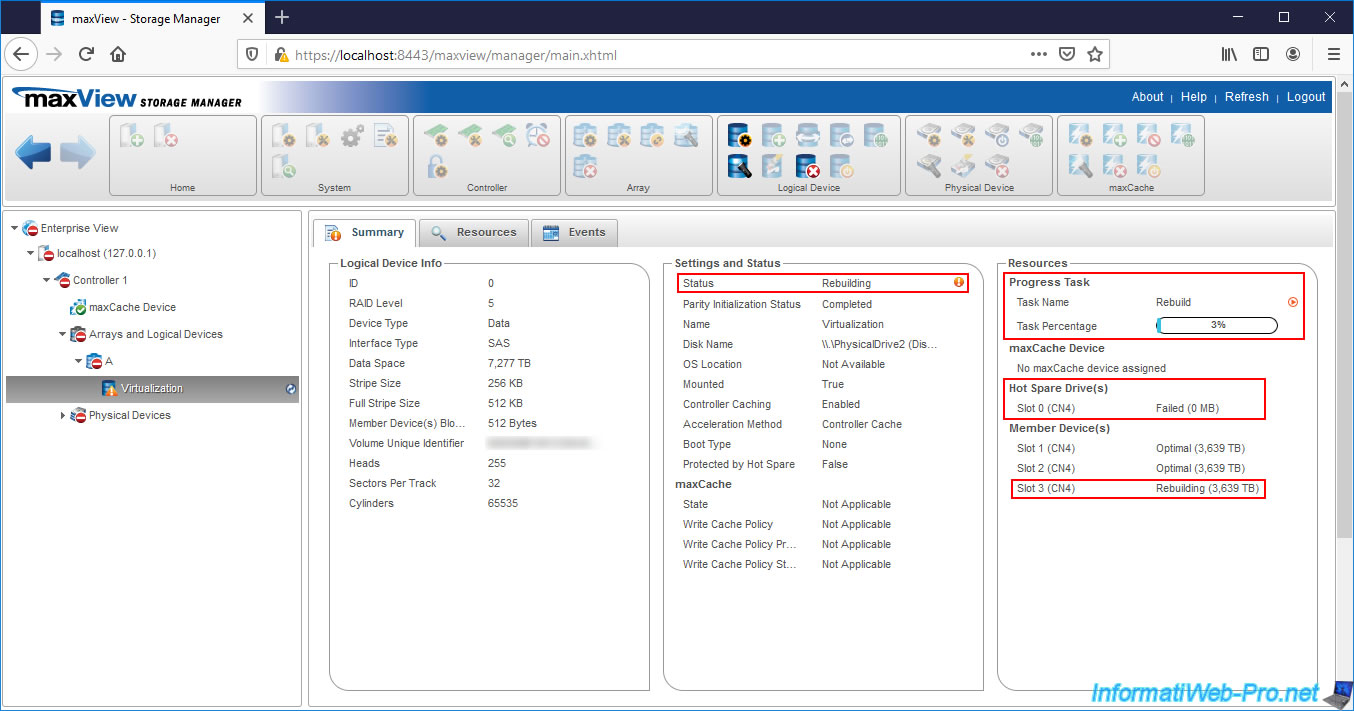
If you select your logical drive, you will see that it's being rebuilt (Status : Rebuilding) and that the physical device being rebuilt is a permanent member (Member Device) of your array.
The failed drive is defined as Spare (Hot Spare Drive) following the replacement of the failed physical drive by the Spare.
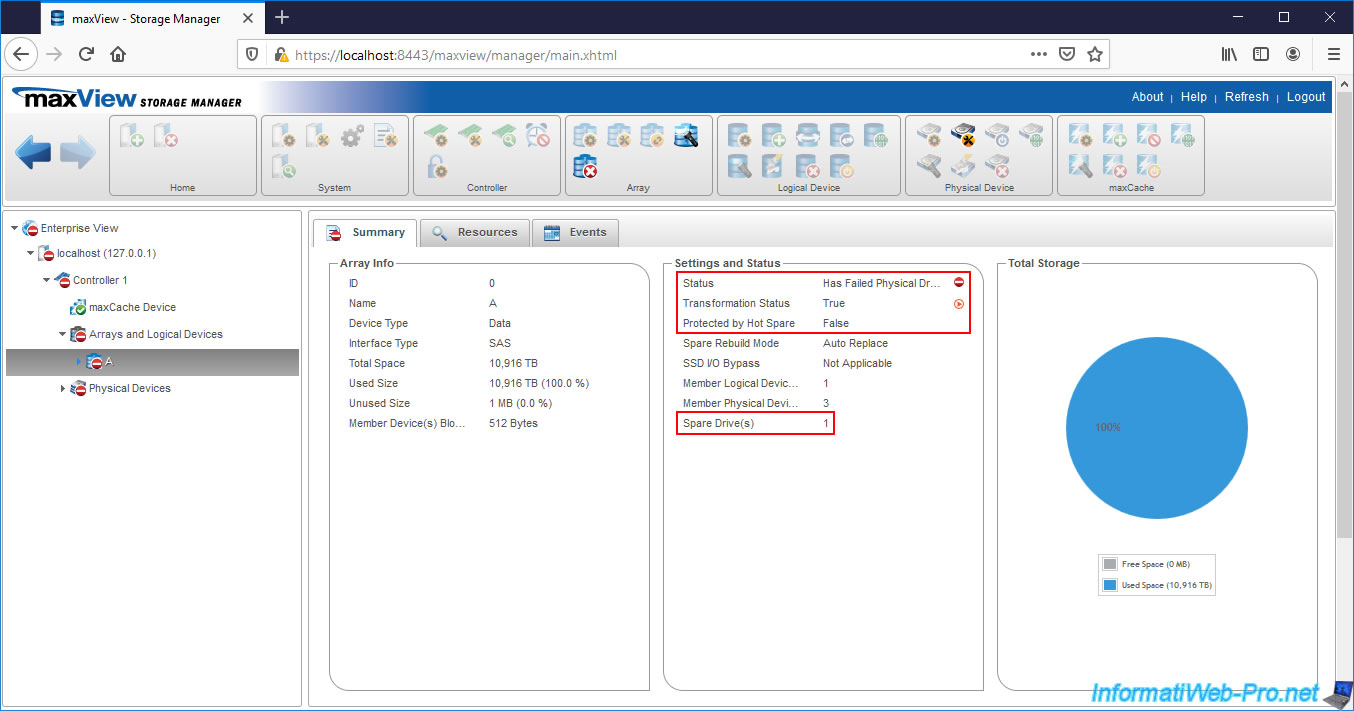
If you select your Array, you will see that :
- it has at least 1 failed disk (Has Failed Physical Drive)
- this one is being transformed (following the rebuilding of one of its members)
- it's no longer protected by a Hot Spare (since it's the failed physical disk that has been defined as Spare)
- this one includes a Spare (except that it's the failed physical disk)
12. Parity initialization
After the failed drive is rebuilt, the number of Unassigned Drives will decrease by 1.
If you select the failed physical disk, you will see that it's now a Spare and that it "protects" your array A.
If you select your array, you will therefore see that it has at least one failed physical drive.
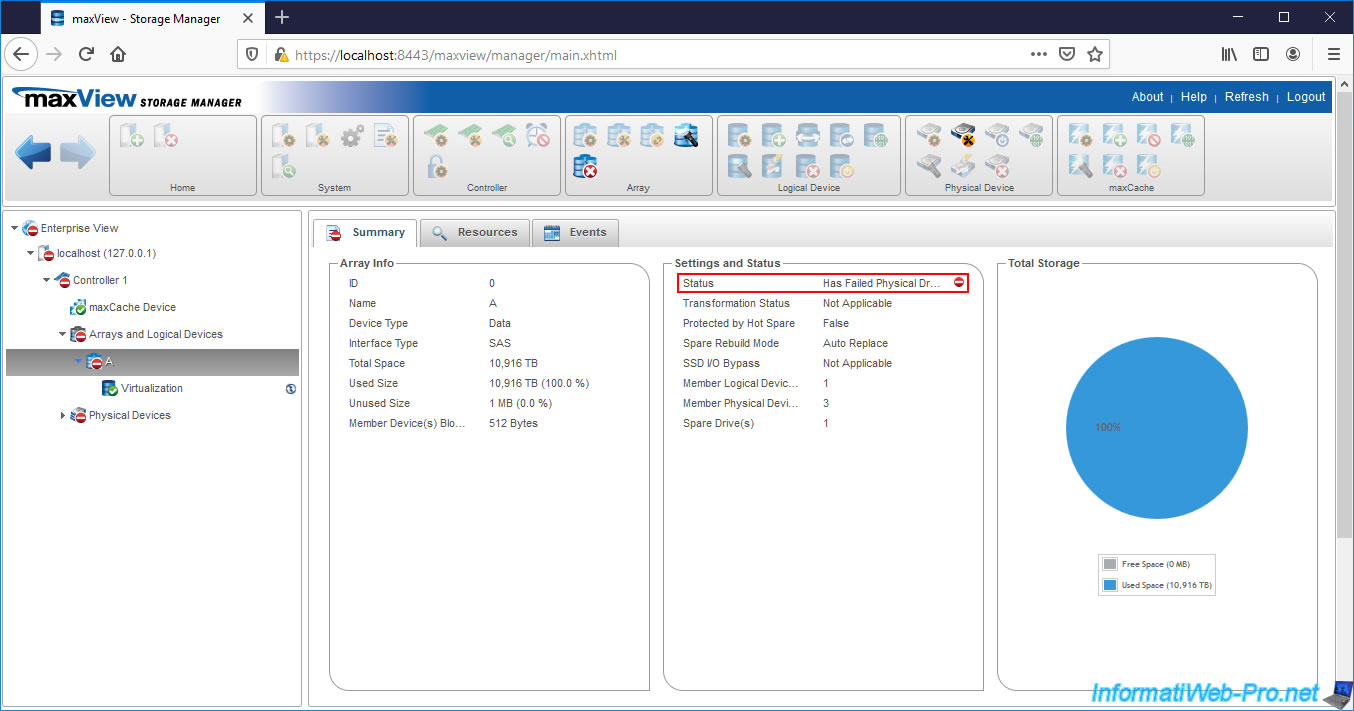
Since the rebuilding of the failed drive is complete, parity initialization of your logical drive will start automatically.
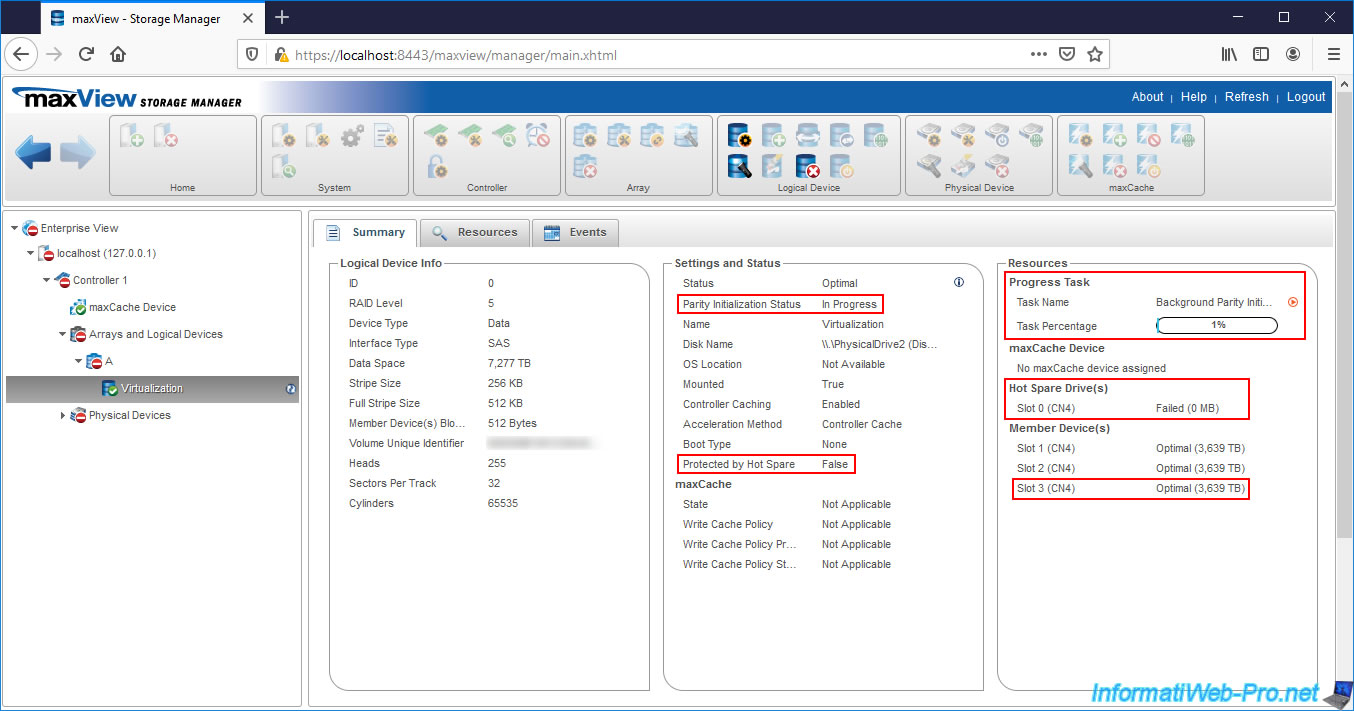
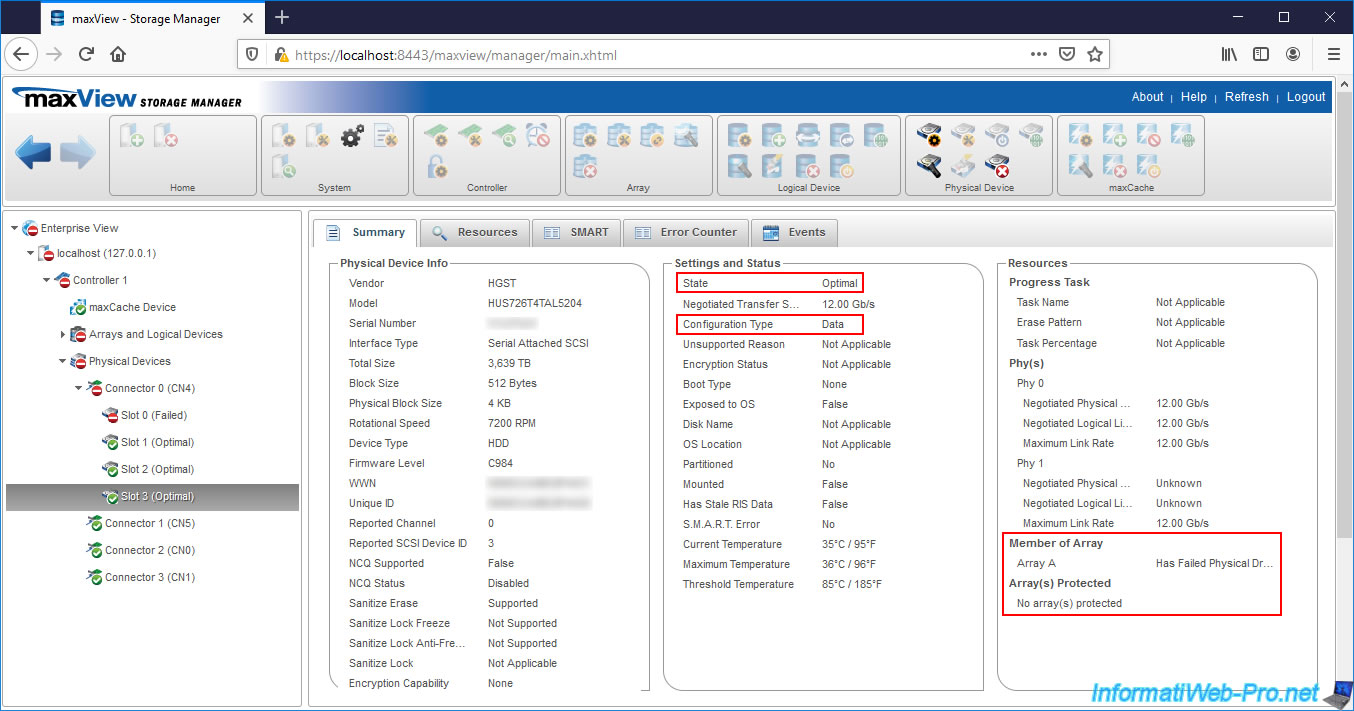
If you select the physical disk that you had previously added as a Spare, but which has become a simple permanent member of your array, you will see that its status is "Optimal".
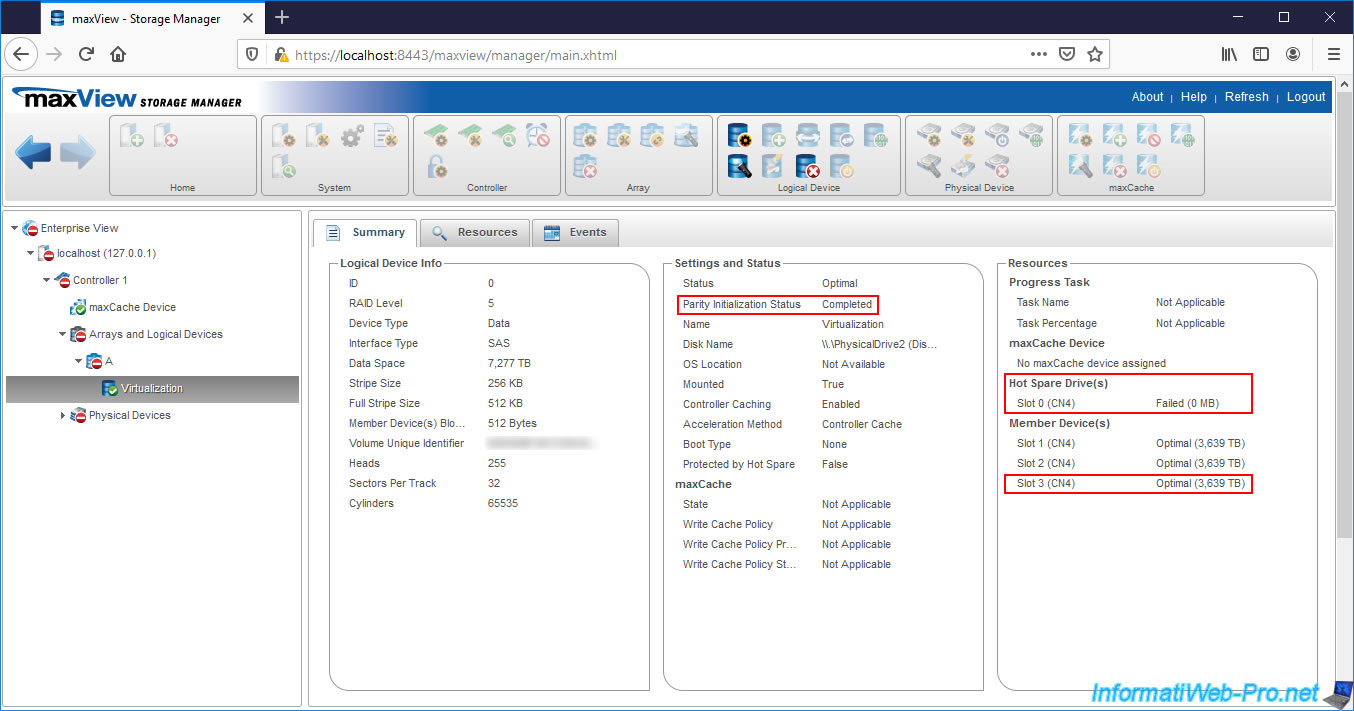
Once parity initialization is complete, the status will be "Completed" and you will see that the failed drive will still appear as "Hot Spare".
13. Waiting for a replacement of the failed physical disk
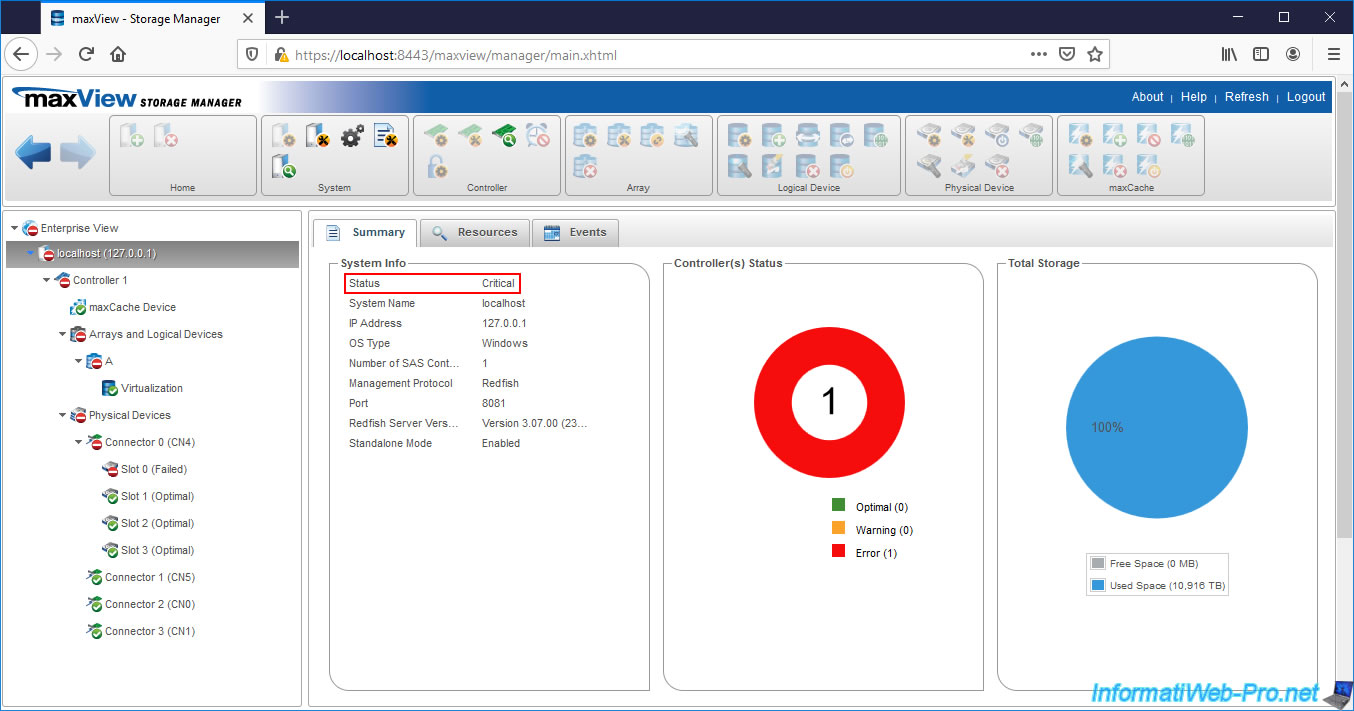
If you select the name of your computer / server (or "localhost" if maxView has been installed in "standalone" mode), you will see that the status is "Critical" despite the rebuilding and parity initialization of your logical drive are completed.
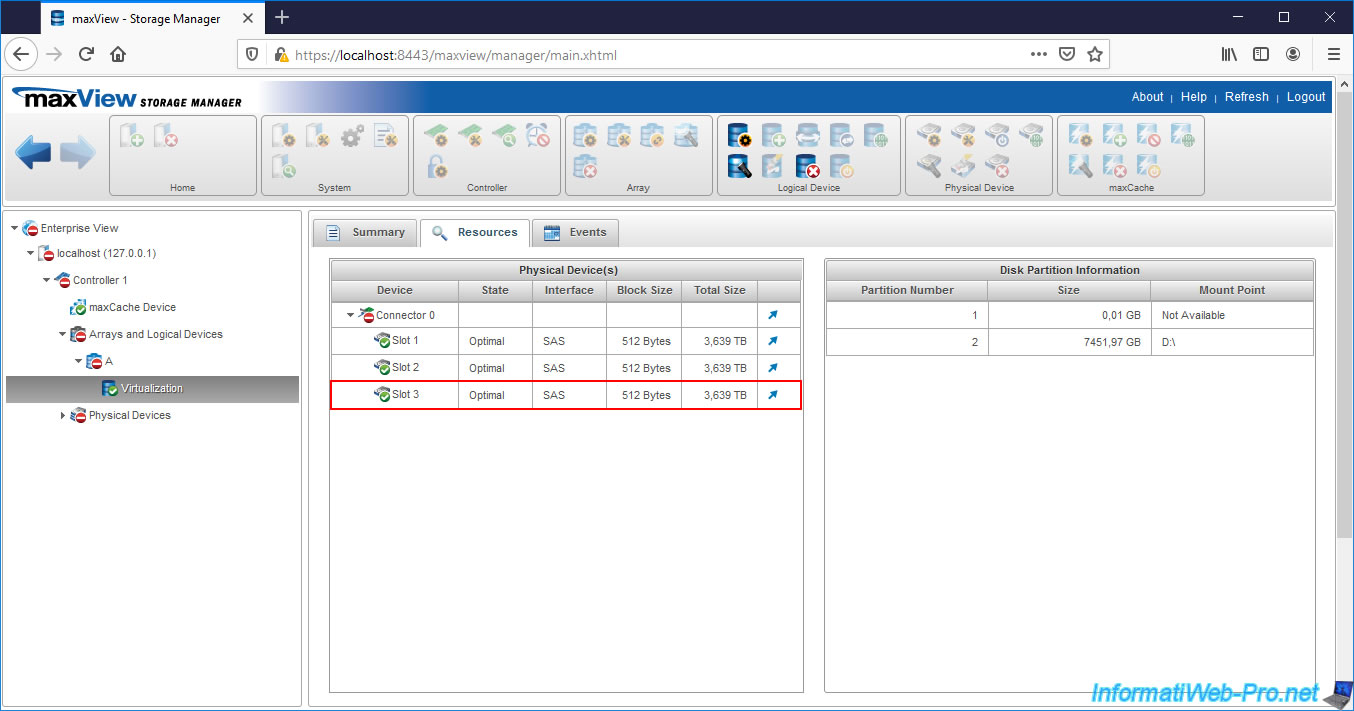
If you select your logical drive and go to the "Resources" tab, you will see that your physical devices are all in good condition (State : Optimal).
But, if you select your array "A", you will see that its status is always : Has Failed Physical Drive.
As you can see in the image below, the rebuild mode for the Spares (Spare Rebuild Mode) used is "Auto Replace". This means that the Spare automatically replaces a failed physical disk (and vice versa).
That said, it also means that once the rebuild and parity initialization are complete, your controller will wait for you to replace the failed physical disk (which is currently set as Spare) so that your array will be protected again in the event of a failure of a physical disk in the future.

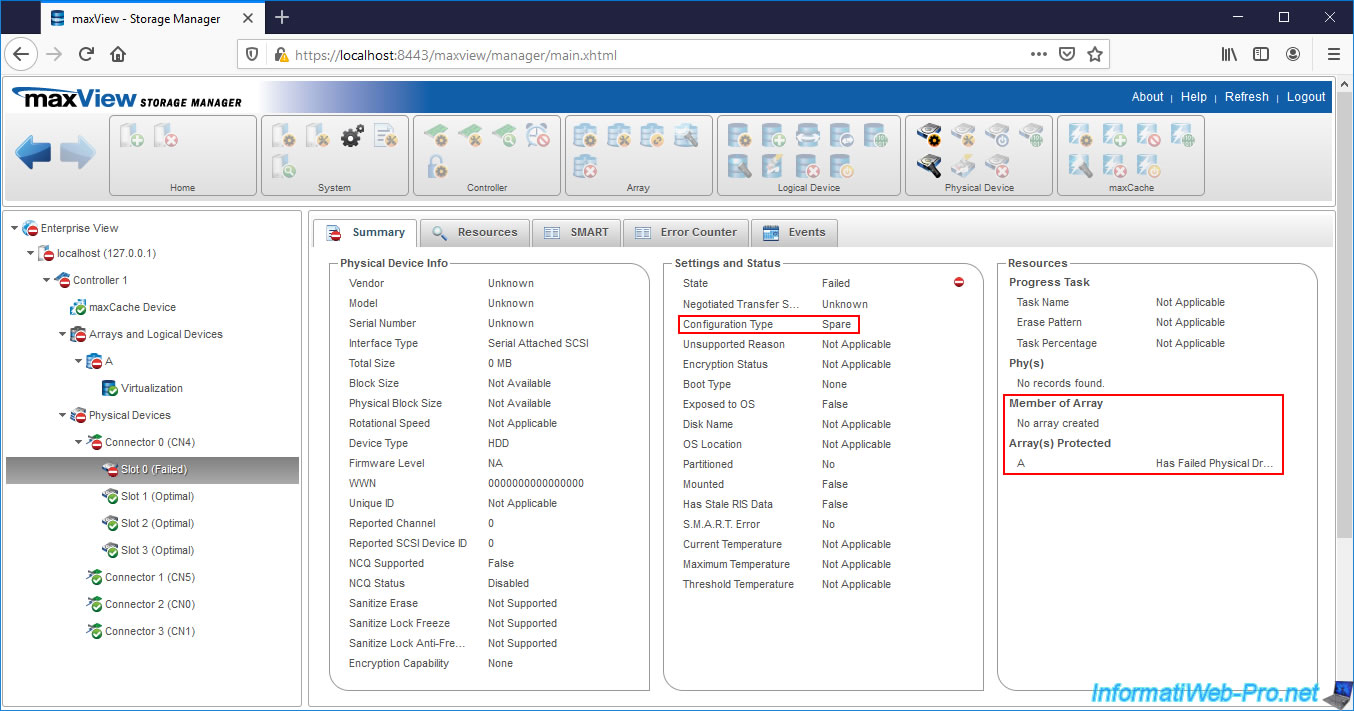
Indeed, if you select the failed physical disk in the "Physical Devices" section (located on the left), you will see that it's still referenced as Spare with a "Failed" state.
It's therefore this physical disk that you must replace to correct the "Critical" status of your computer / server.
For the rebuilded physical disk, its status is "Optimal" and its configuration type is "Data".
14. Replacing the failed physical disk
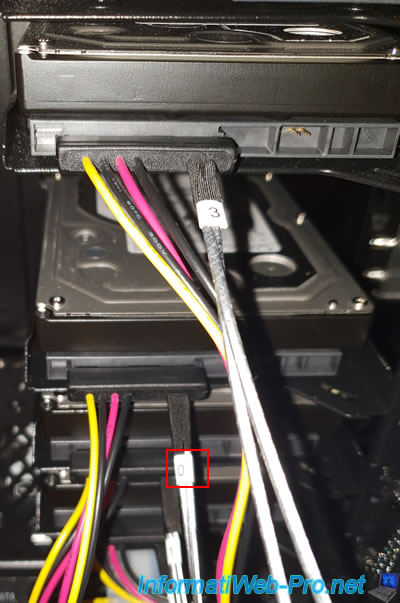
We are replacing physical disk # 0 whose state is currently "Failed" and which is configured as Spare for our array.
Warning : respecting the cable number is important so that your Microsemi Adaptec SmartRAID controller can detect the change for the physical disk whose status is "Failed".
15. Spare again available
Once the failed physical disk is replaced, you will see that maxView will tell you that there is :
- 4 Hard Disk Drives : the 3 members of the array + 1 Spare
- 3 Data Drives : the array members
- 1 Spare : the spare of the array
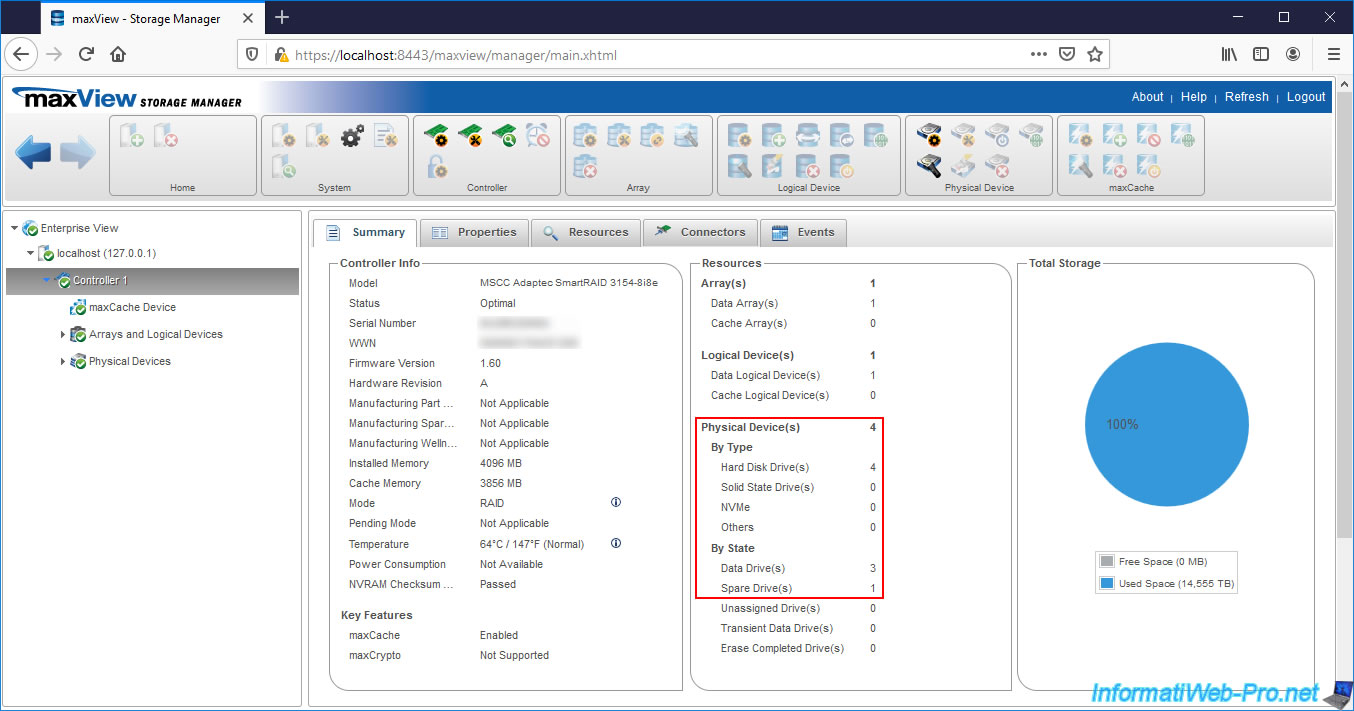
If you look in the "Resources" tab of your Microsemi Adaptec SmartRAID controller, you will see that :
- the physical device serving as Spare is displayed again with the "Auto Replace Spare" state
- the 3 physical devices that are members of your array and used as storage disks with an "Optimal" status
- your cluster and logical drive are in good state (State : Optimal)
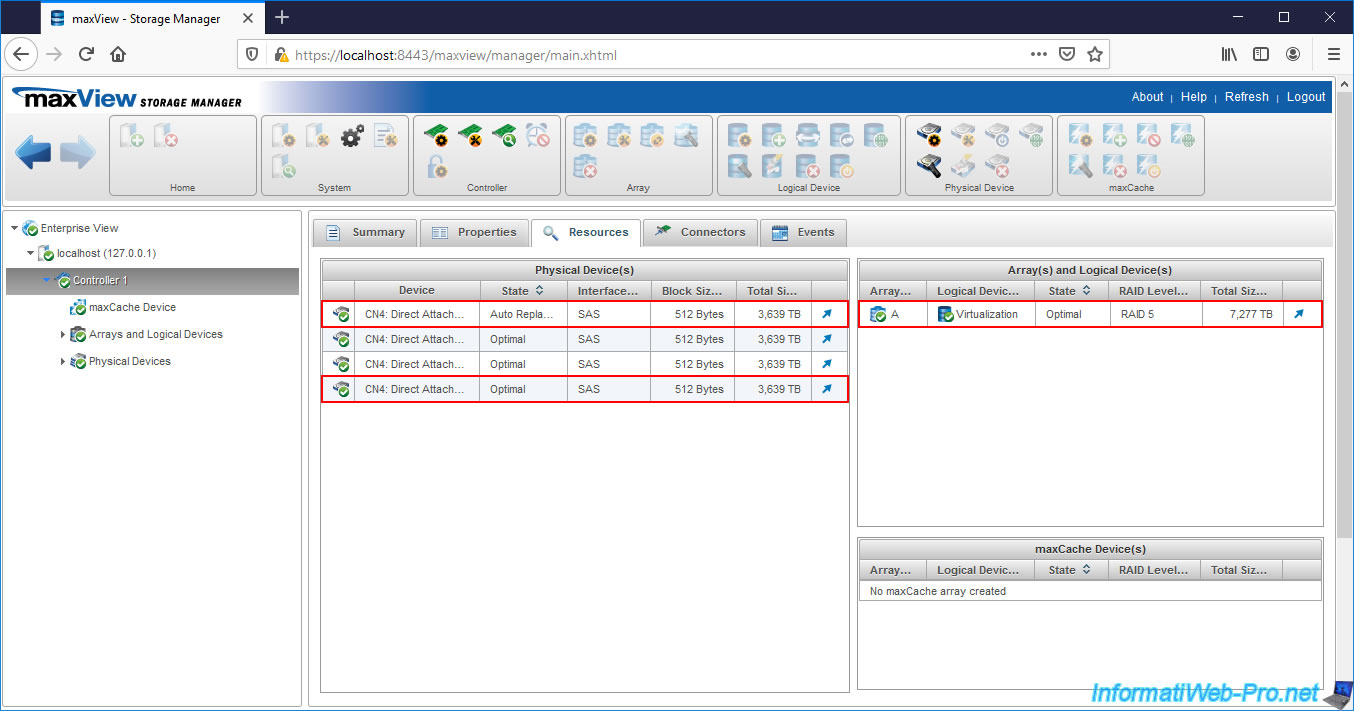
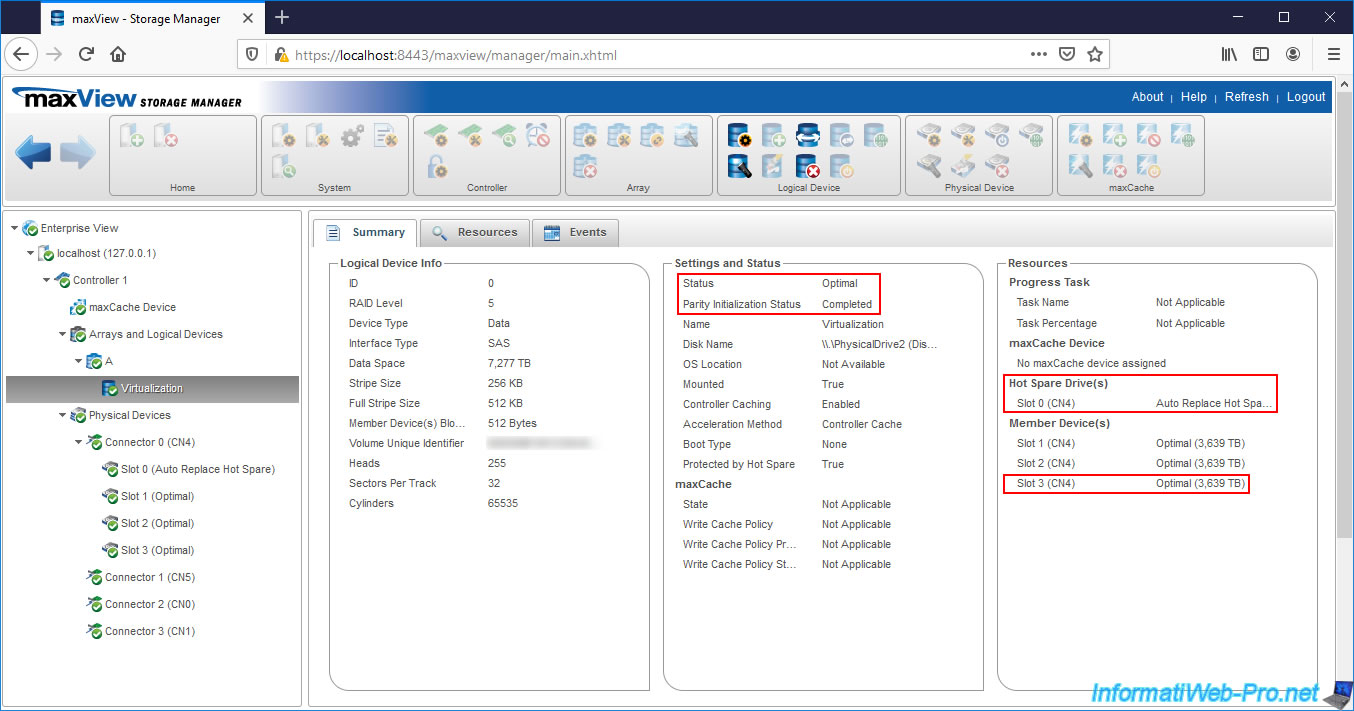
As you can see, the status of the replaced physical device (connected with cable # 0) is : Auto Replace Hot Spare.
However, at the beginning of the tutorial, before one of the members of our array fails, this physical disk was a "Data" type physical disk and therefore had an "Optimal" state.
In other words, when you use the "Auto Replace" mode for the management of Spare, when a failure occurs, the Spare is no longer on the same physical cable connected to the controller.
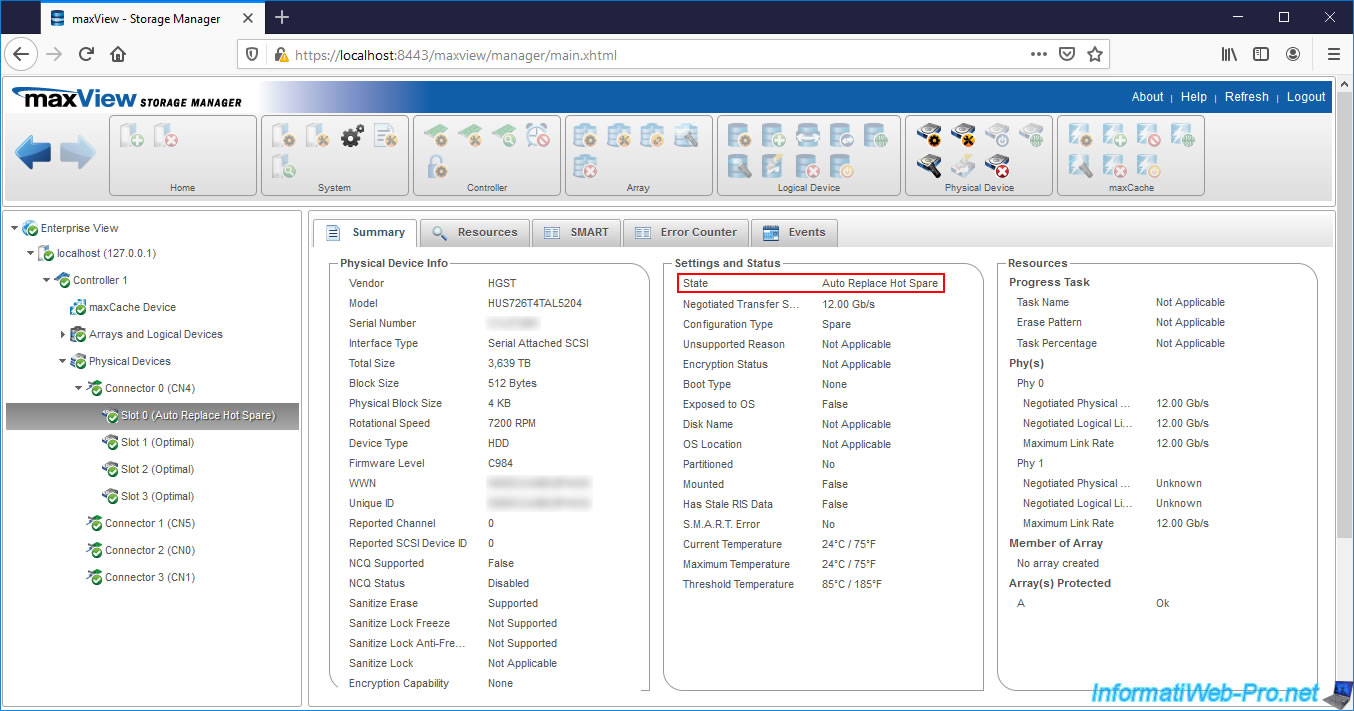
If you select your logical drive, you will see that its state and parity status will not have changed.
The only thing that changes with the "Auto Replace" mode is that the Spare will be available again and displayed in the "Hot Spare Drives" section.
The 2nd thing that has changed is the number of the "Slot" on which this Spare is connected. Since the physical disk that was failing had been swapped with the Spare in optimal state.
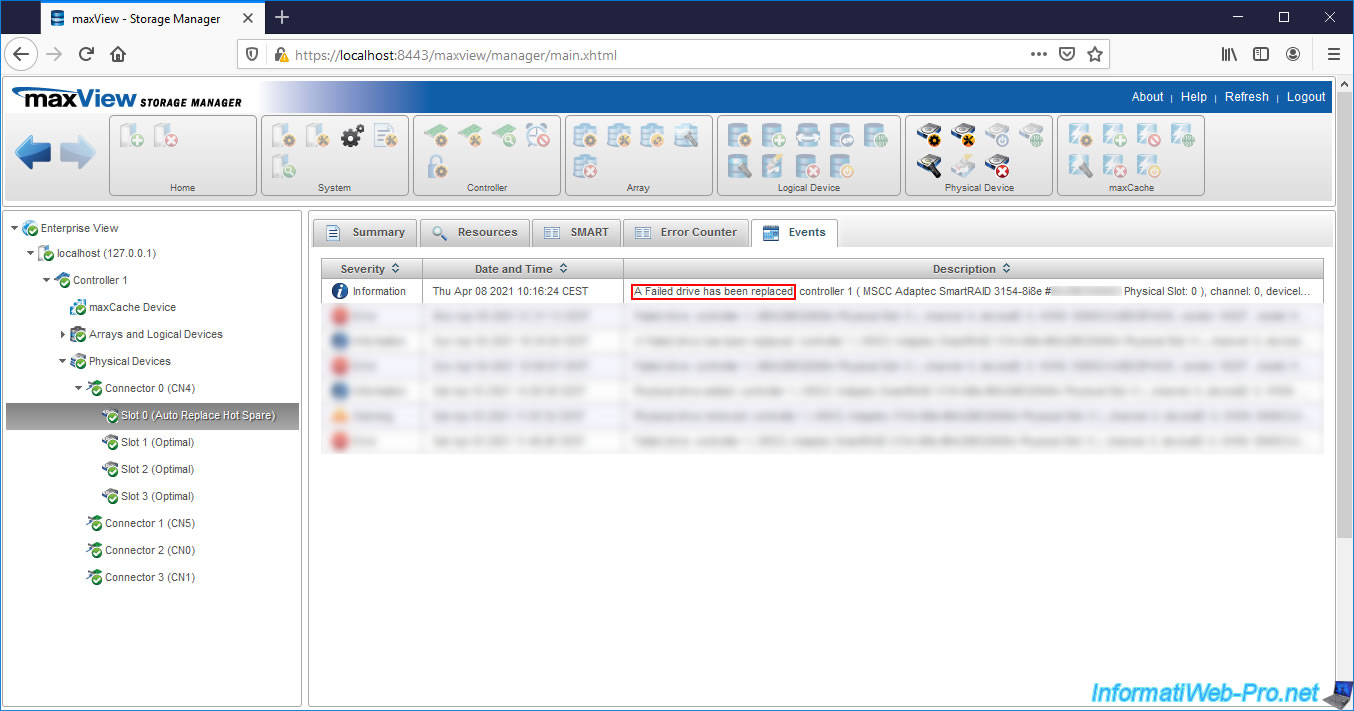
If you select the "Slot" where you replaced the failed physical drive and go to the "Events" tab of it, you will see that a failed drive has been replaced.
Share this tutorial
To see also
-
RAID 4/20/2022
Adaptec maxView Storage Manager v3 - Create a RAID volume
-
RAID 4/8/2022
Adaptec maxView Storage Manager v3 - Download and boot on USB version
-

RAID 4/13/2022
Adaptec maxView Storage Manager v3 - Installation on Linux
-

RAID 4/15/2022
Adaptec maxView Storage Manager v3 - Manage an Adaptec SmartRAID controller on VMware ESXi 6.7

No comment