- RAID
- 28 March 2025 at 12:52 UTC
-

- 1/3

When your computer boots into LEGACY BIOS mode, information about your Adaptec RAID controller appears before your motherboard logo is displayed.
In addition, a keyboard shortcut appears to allow you to access the configuration tool of your Adaptec RAID controller.
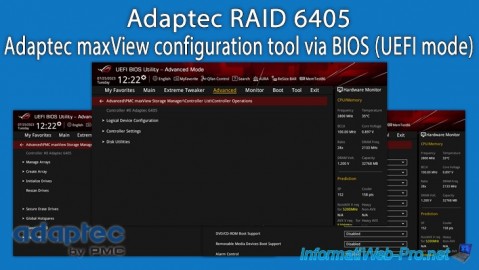
However, if your computer boots in UEFI mode, you will not have access to this Adaptec utility.
To overcome this problem, a "maxView" section is available in one of the BIOS menus of your motherboard.
To learn more about this maxView section accessible via the BIOS / UEFI firmware of your motherboard, refer to our article: Adaptec RAID 6405 - Adaptec maxView configuration tool via BIOS (UEFI mode).
- Create the RAID volume on your Adaptec RAID controller from your motherboard BIOS
- Partition visible RAID disk on Windows
- View the progress of creating your RAID array via maxView Storage Manager
- View RAID array build status in motherboard BIOS
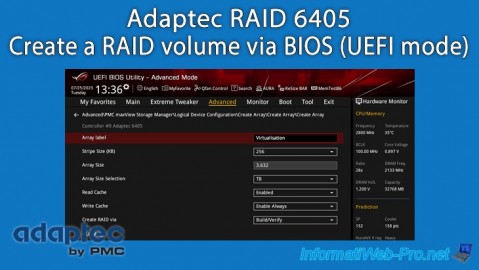
1. Create the RAID volume on your Adaptec RAID controller from your motherboard BIOS
When starting your computer, press the "DEL" key (in most cases) to enter the BIOS / UEFI firmware of your motherboard.
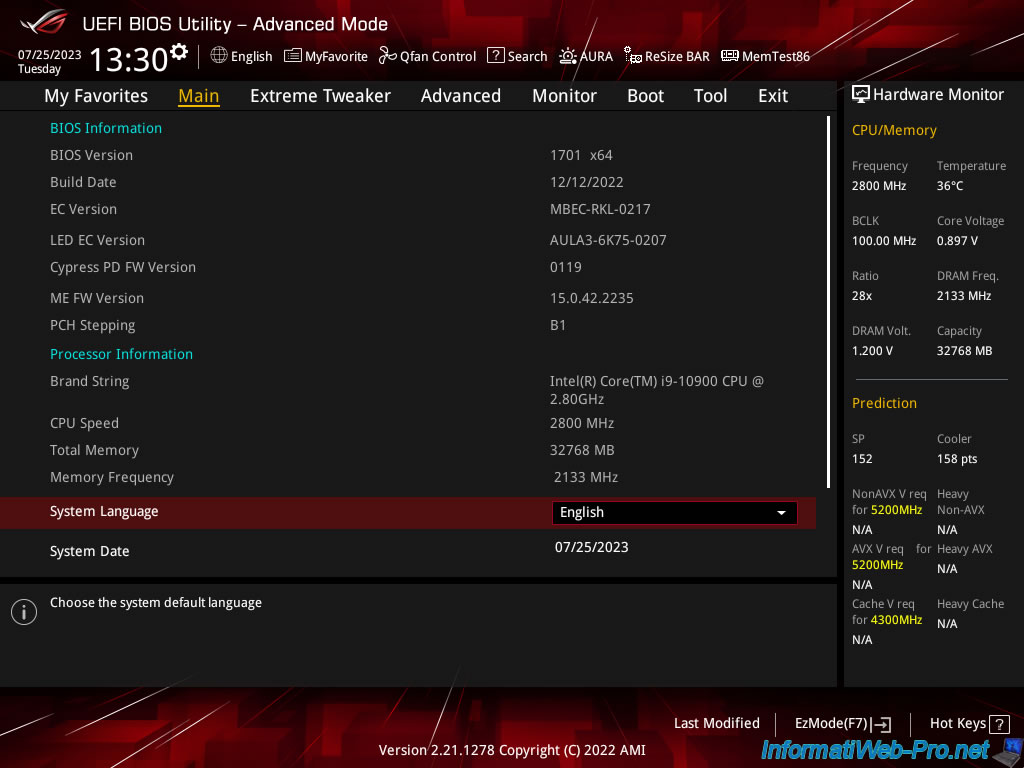
In our case we have an Asus ROG motherboard.
In our case, the BIOS of our Asus ROG motherboard is displayed.
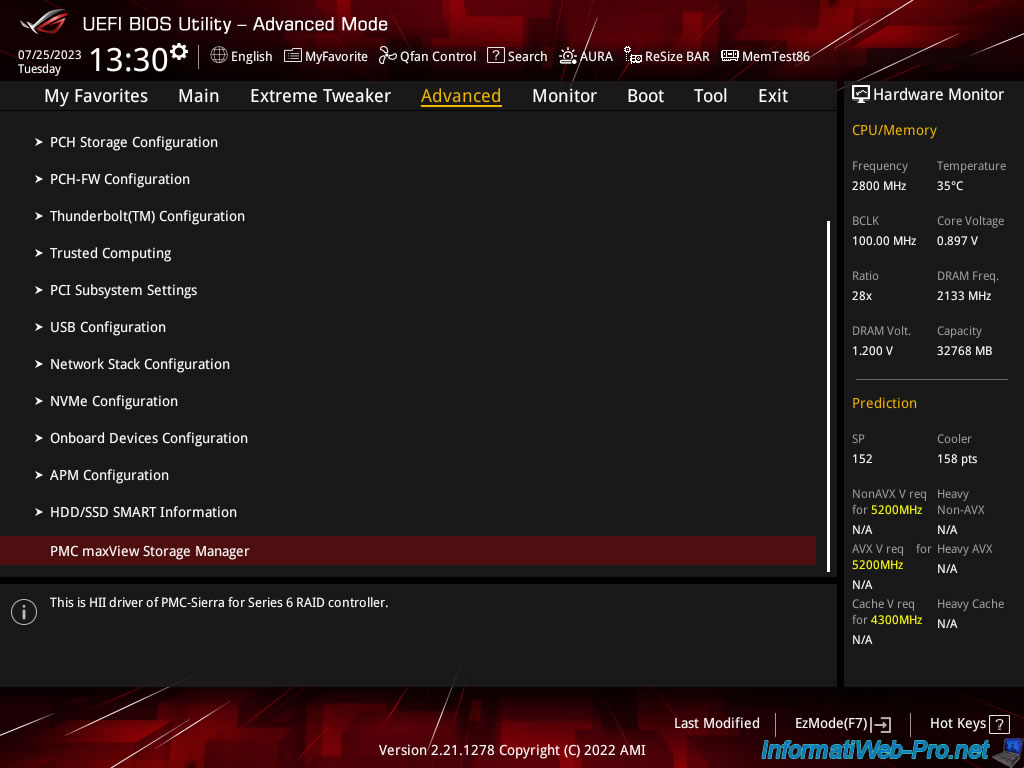
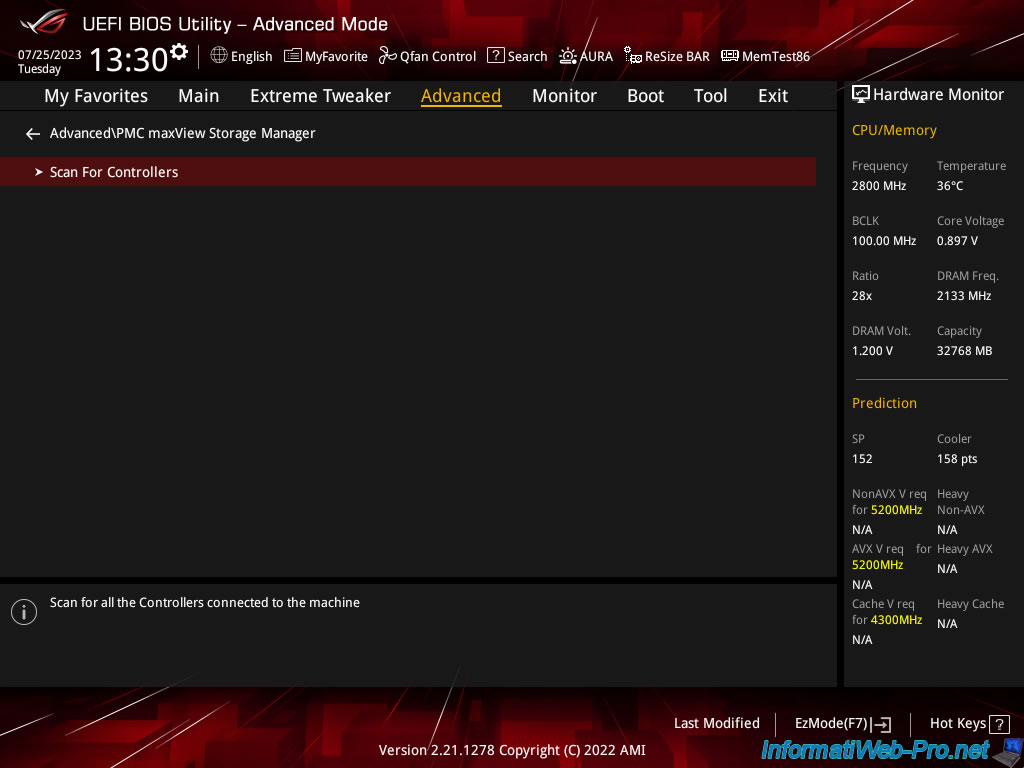
In the case of Asus ROG motherboards, you must go to the "Advanced" tab and go down to the bottom of the page.
At the end of the list you will find a setting named "PMC maxView Storage Manager". Click on this one.
Note: it may be necessary to scroll down on this page for this parameter to appear on the screen.
Plain Text
This is HII driver of PMC-Sierra for Series 6 RAID controller.
Click: Scan For Controllers.
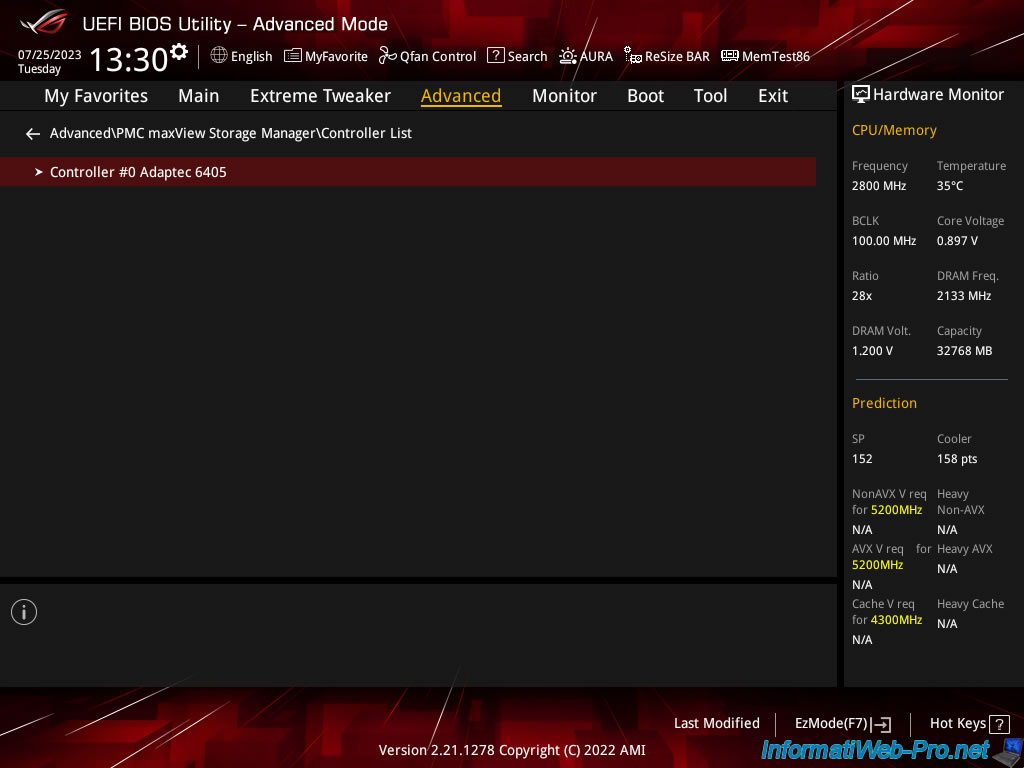
Click the name of your Adaptec RAID controller.
In our case: Controller #0 Adaptec 6405.
1.1. View existing arrays (if applicable)
Click: Logical Device Configuration.

To see the RAID arrays already configured on your Adaptec RAID controller (if applicable), click: Manage Arrays.
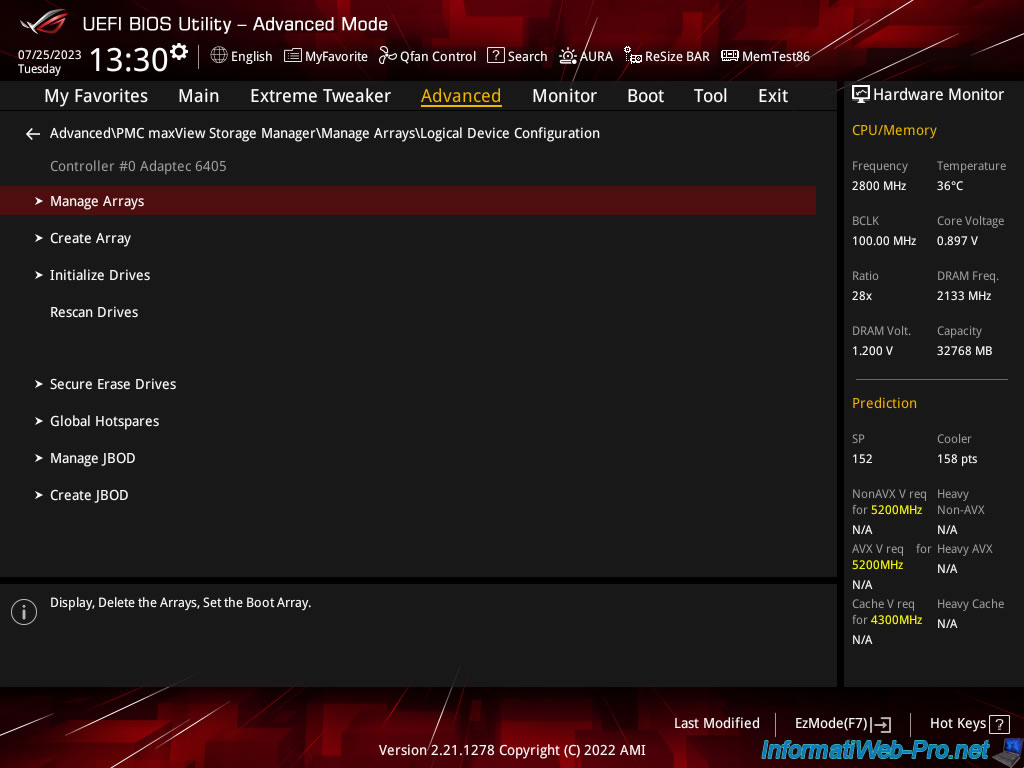
If there is no RAID array currently configured on your Adaptec RAID controller, the message "No Array present" will appear.
![]()
1.2. Initialize the disks to use for the future RAID array
To avoid strange bugs (due to data that would be present on the hard drives that you will use for your future RAID array), it is recommended to initialize the desired drives.
This will have the effect of erasing the data contained there.
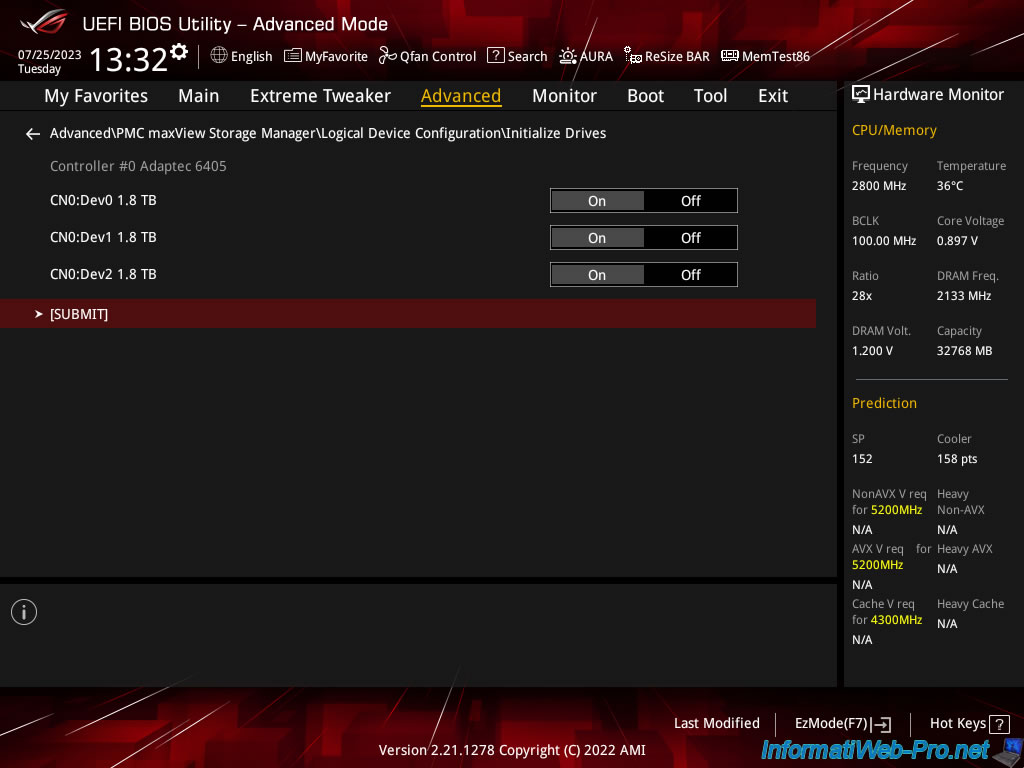
To do this, click on: Initialize Drives.
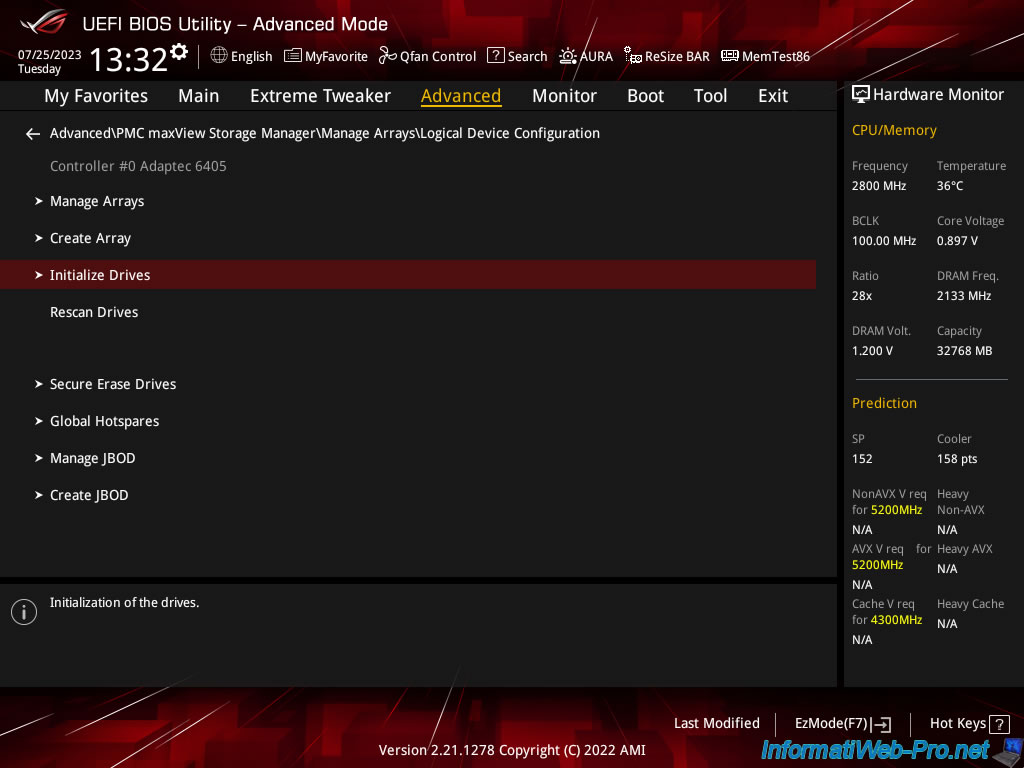
As you can see, in our case, 3 2TB (1.8TB) hard drives are connected to our Adaptec 6405 controller.
Indeed, we want to create a RAID 5 to combine performance and security.
Select "On" for each hard drive you want to initialize (erase), then click "[SUBMIT]".
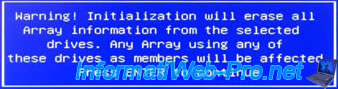
As the message that appears indicates, initialization will erase all RAID array information found on the selected disks.
The RAID arrays which would be affected by the initialized disks will therefore be impacted.
Plain Text
Warning! Initialization will erase all Array information from the selected drives. Any Array using of these drives as members will be affected.
Confirm the initialization of these disks by pressing Enter.
The message "Initializing drives" appears for a few seconds.
![]()
Share this tutorial
To see also
-
RAID 11/16/2015
Adaptec maxView Storage Manager v1 - Presentation
-
RAID 3/21/2025
Adaptec RAID 6405 - Adaptec Configuration Utility (ACU)
-
RAID 3/26/2025
Adaptec RAID 6405 - Adaptec maxView configuration tool via BIOS (UEFI mode)
-
RAID 1/14/2022
Adaptec RAID 6405 - Add Adaptec AFM-600 (ZMM) battery
You must be logged in to post a comment