- RAID
- 26 March 2025 at 14:12 UTC
-

- 1/3

When your motherboard BIOS is configured so that your computer boots in LEGACY BIOS mode, information about your Adaptec RAID controller appears before your motherboard logo is displayed.
Additionally, a message "Press <Ctrl><A> for Adaptec RAID Configuration Utility" appears when your computer starts up.
However, if your computer boots in UEFI mode, this message will not appear and you will therefore not have access to the "Adaptec RAID Configuration Utility" utility of your RAID controller.
To overcome this problem, it is possible to access the settings of this utility installed on your Adaptec RAID controller from a BIOS menu on your motherboard.
Note: the options that are available via the special option present in the BIOS of your motherboard are almost the same as those of the "Adaptec RAID Configuration Utility". You will therefore easily find the desired settings.
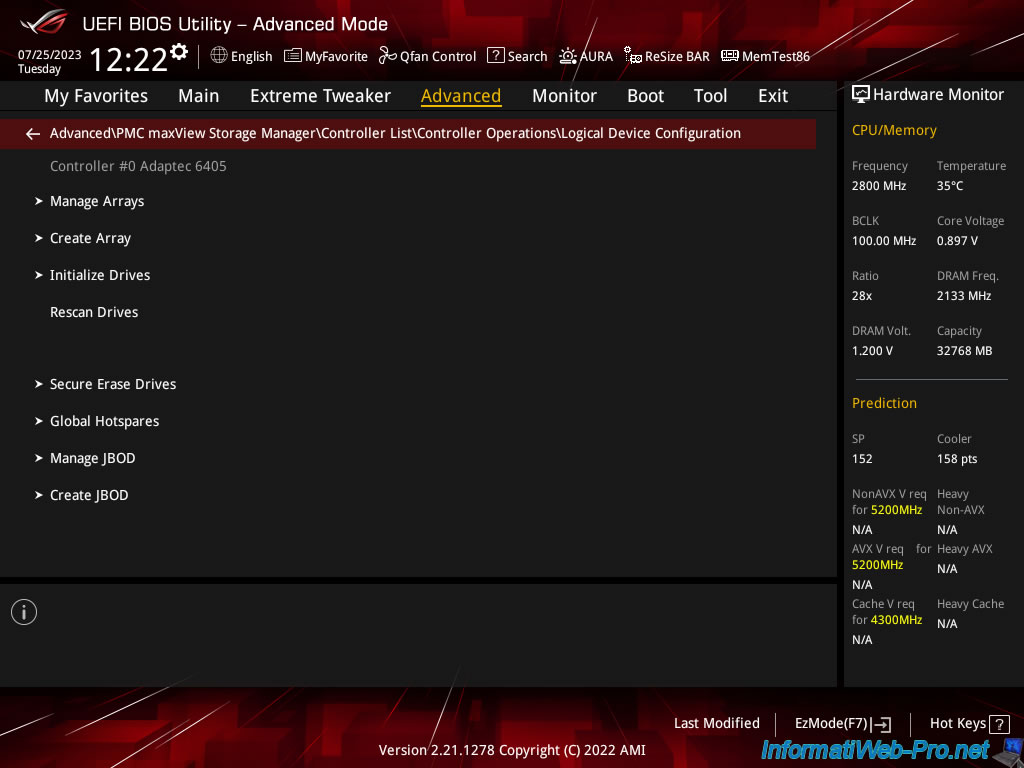
- Logical Device Configuration (to configure RAID arrays and logical drives)
- Manage Arrays (to manage each RAID or JBOD array)
- Create Array (to create a RAID array)
- Initialize Drives (to initialize physical disks)
- Rescan Drives (rescan disks)
- Secure Erase Drives (erase physical disks)
- Global Hotspares (manage global Hotspares)
- Manage JBOD (single logical disk from multiple physical disks)
- Create JBOD (create a single logical disk from multiple physical disks)
- Controller Settings (Adaptec RAID controller settings)
- Disk Utilities (physical disk tools)
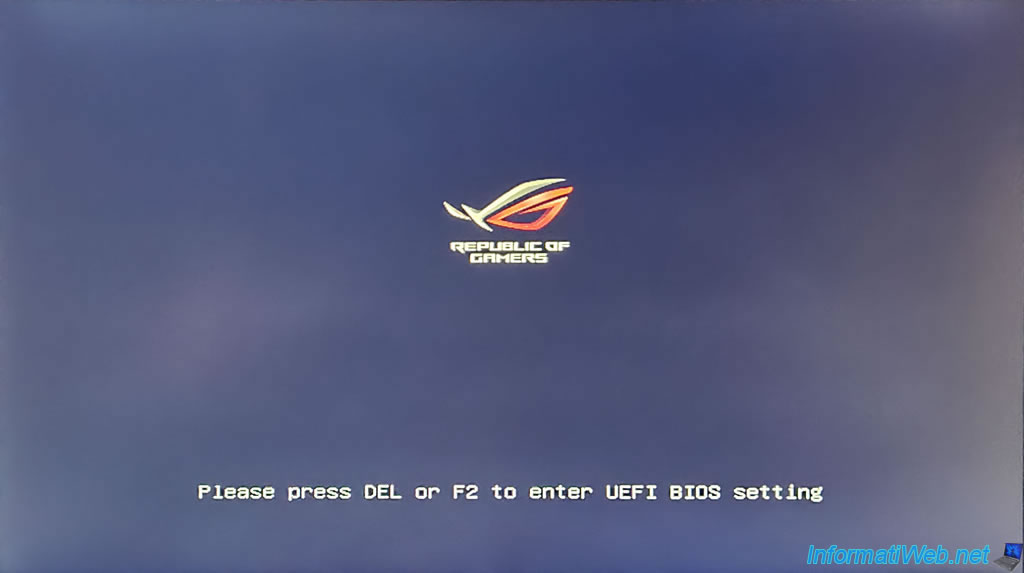
When starting your computer, press "Del" to enter the BIOS / firmware of your motherboard.
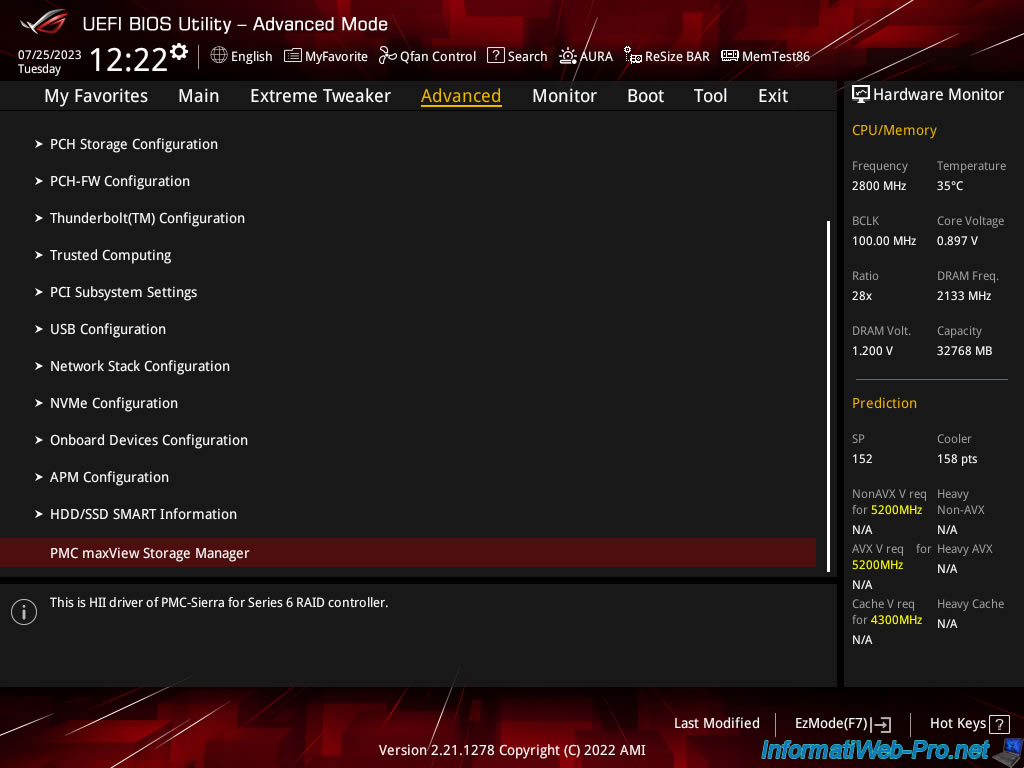
Then, in the case of the Asus ROG motherboard BIOS, go to the "Advanced" tab and go down to the bottom of the page.
At the bottom of the page, you should find an option: PMC maxView Storage Manager.
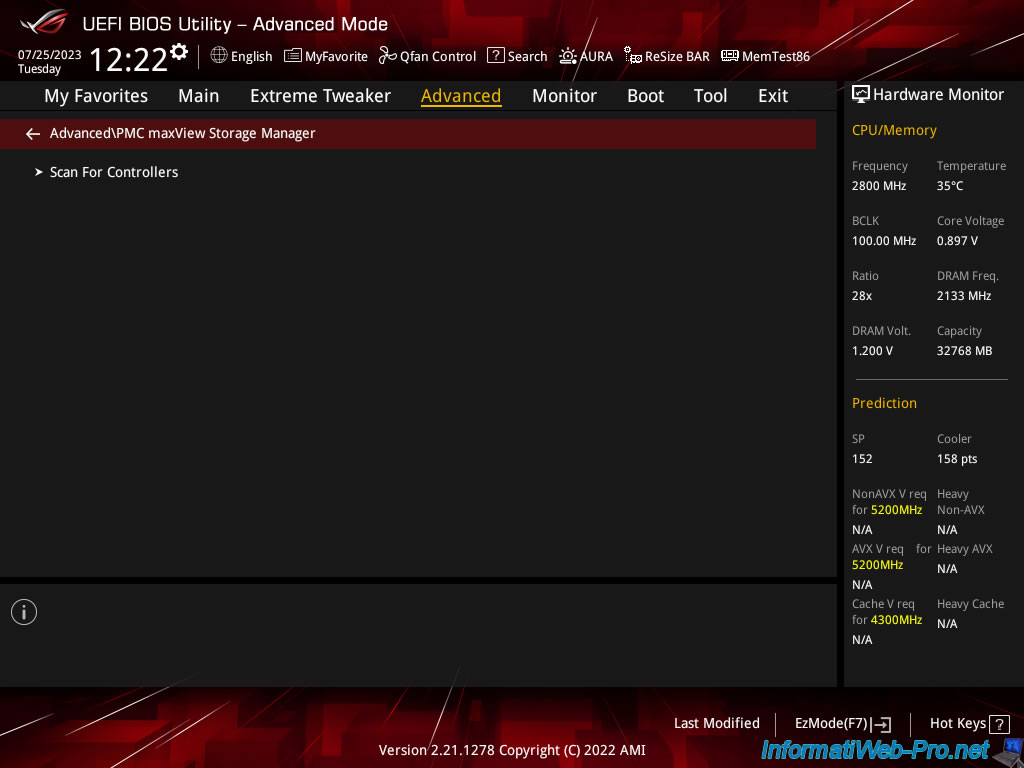
Click: Scan For Controllers.
Click on the name of your controller: Controller #0 Adaptec 6405.
Note: in our case, we have an Adaptec RAID 6405 controller.
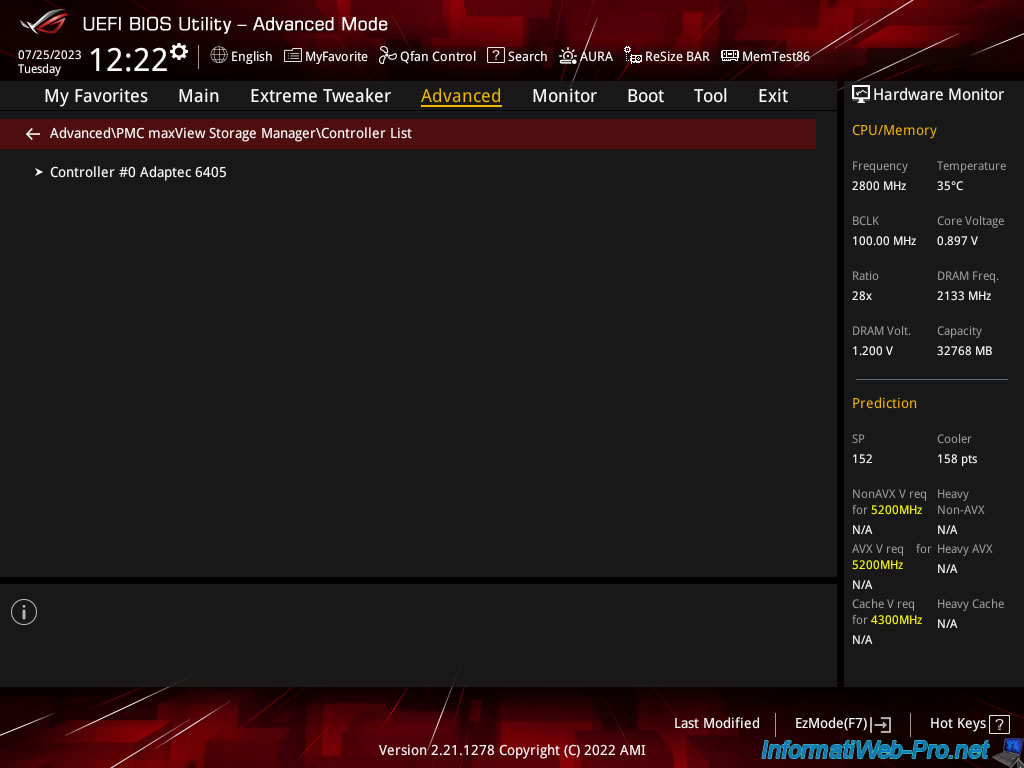
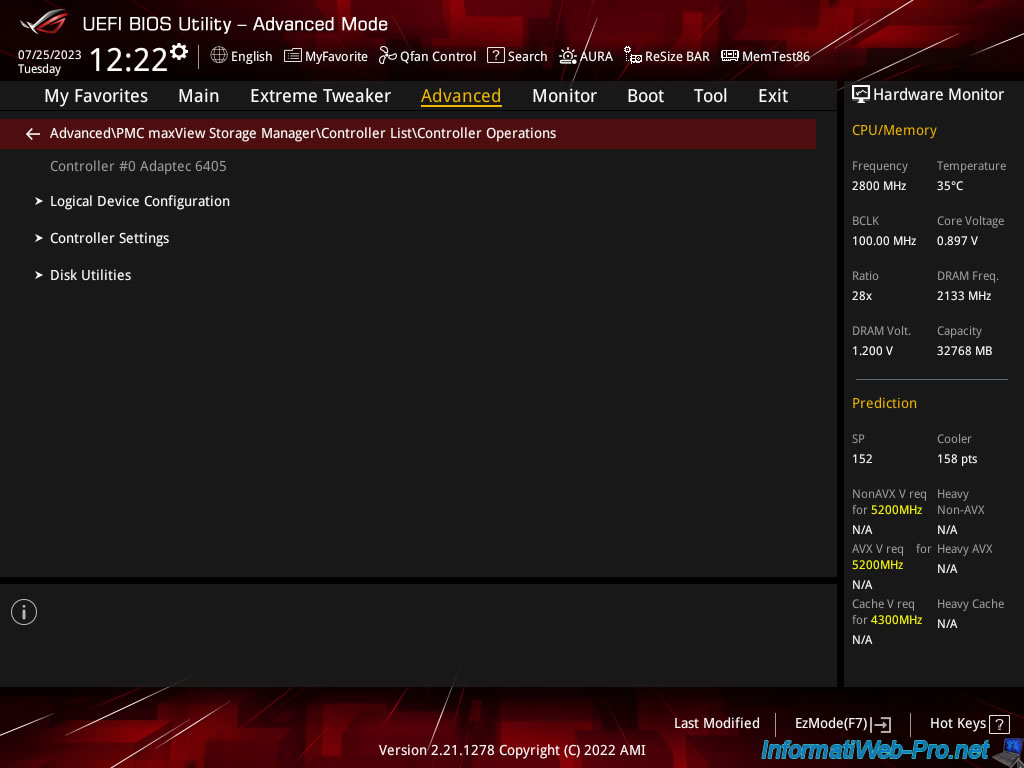
As you can see, you will have access to 3 sections:
- Logical Device Configuration: to manage the RAID arrays and RAID logical drives on your Adaptec RAID controller.
This section corresponds to the "Array Configuration Utility" section of the "ACU" configuration utility (Adaptec RAID Configuration Utility). - Controller Settings: to manage your Adaptec RAID controller settings.
This section corresponds to the "SerialSelect Utility" section of the "ACU" configuration utility. - Disk Utilities: to manage the physical disks connected to your Adaptec RAID controller.
Indeed, the operating system (Windows, Linux, ...) installed on your computer will not see these physical disks, but only the RAID logical disks created on your Adaptec RAID controller.
This section corresponds to the section of the same name of the "ACU" configuration utility.
1. Logical Device Configuration (to configure RAID arrays and logical drives)
In the "Logical Device Configuration" section (or "Array Configuration Utility" in "ACU"), you can:
- Manage Arrays: manage RAID arrays and the RAID logical disks present on them.
- Create Array: create a new RAID array (if physical disks are free or they are not fully used by other existing RAID arrays).
- Initialize Drives: initialize your physical disks to delete data relating to RAID arrays that may be found on them.
Initializing your disks before using them in a RAID array is recommended and avoids problems that could be caused by data currently on those disks. - Rescan Drives: allows you to rescan the disks of your Adaptec RAID controller to detect new hot-plugged physical disks, as well as changes made to volumes.
- Secure Erase Drives: allows you to erase drives securely.
Important: This takes 6 times longer than simply rewriting 0s all over the disk. - Global Hotspares: allows you to assign one or more disks as "hotspares". These disks will not normally be used.
However, in the event of a disk failure on a RAID array, one of these "hotspare" disks will be automatically assigned to the RAID array concerned and the reconstruction of the missing disk will be carried out on this "hotspare". - Manage JBOD: allows you to manage JBOD disks which allow multiple physical disks to appear as a single logical disk.
- Create JBOD: allows you to create a single logical disk from multiple physical disks.
The operating system will only see a single logical disk whose size will be equivalent to the sum of the sizes of the physical disks used.
However, there is no redundancy with the JBOD. Which means that if a physical disk fails, you will inevitably lose data.
Additionally, your computer cannot boot to a JBOD logical drive. Unlike a RAID logical drive where this is possible.
Source : Adaptec RAID Controller Installation and User’s Guide | Adaptec.
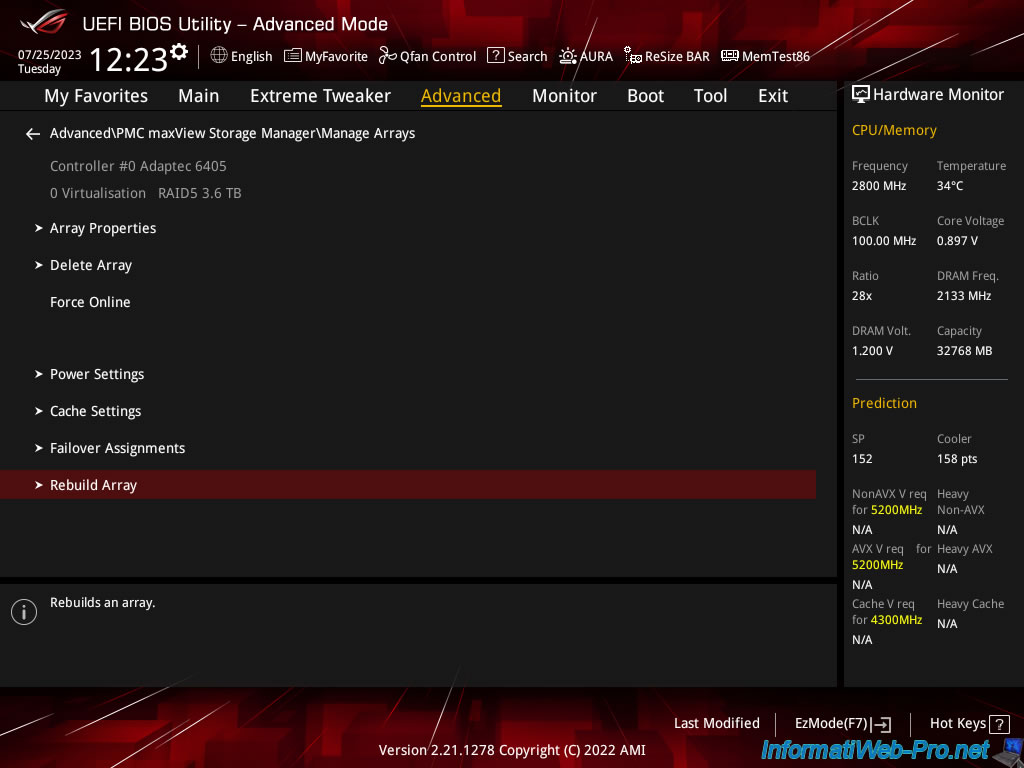
1.1. Manage Arrays (to manage each RAID or JBOD array)
In the "Manage Arrays" section, you can list the RAID arrays configured on your Adaptec RAID controller.
In our case, there is only one called "Virtualization", whose RAID type is "RAID5" and the usable capacity (size) is 3.6 TB.
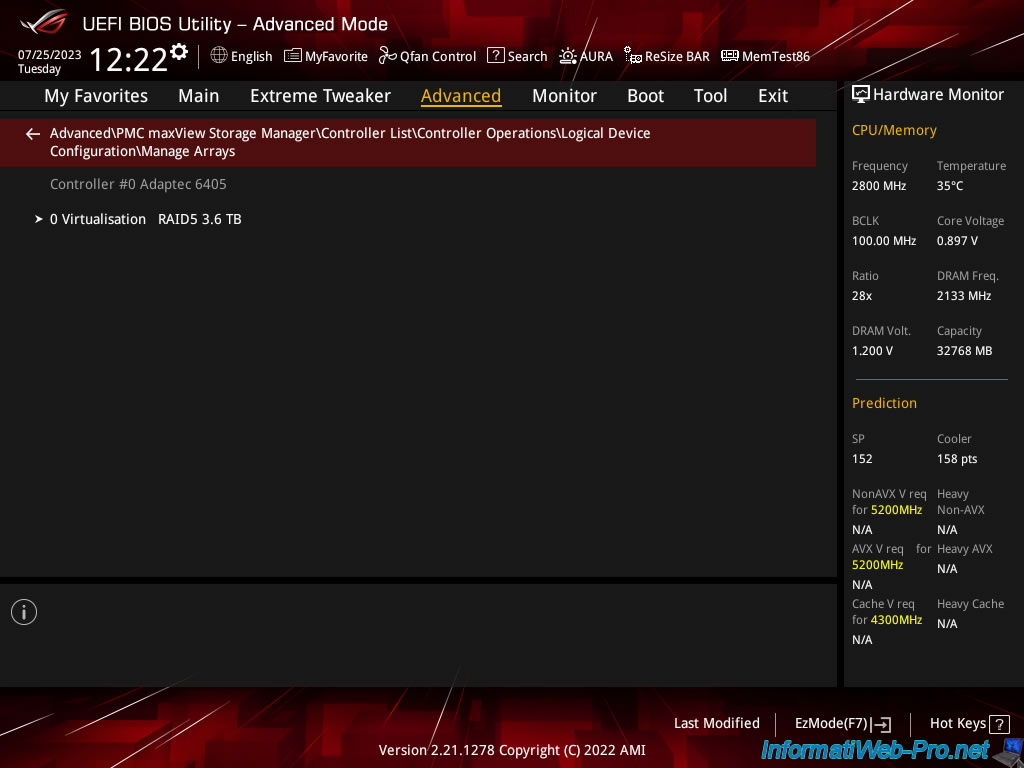
If you click on a RAID array, you will be able to access the different options concerning it.
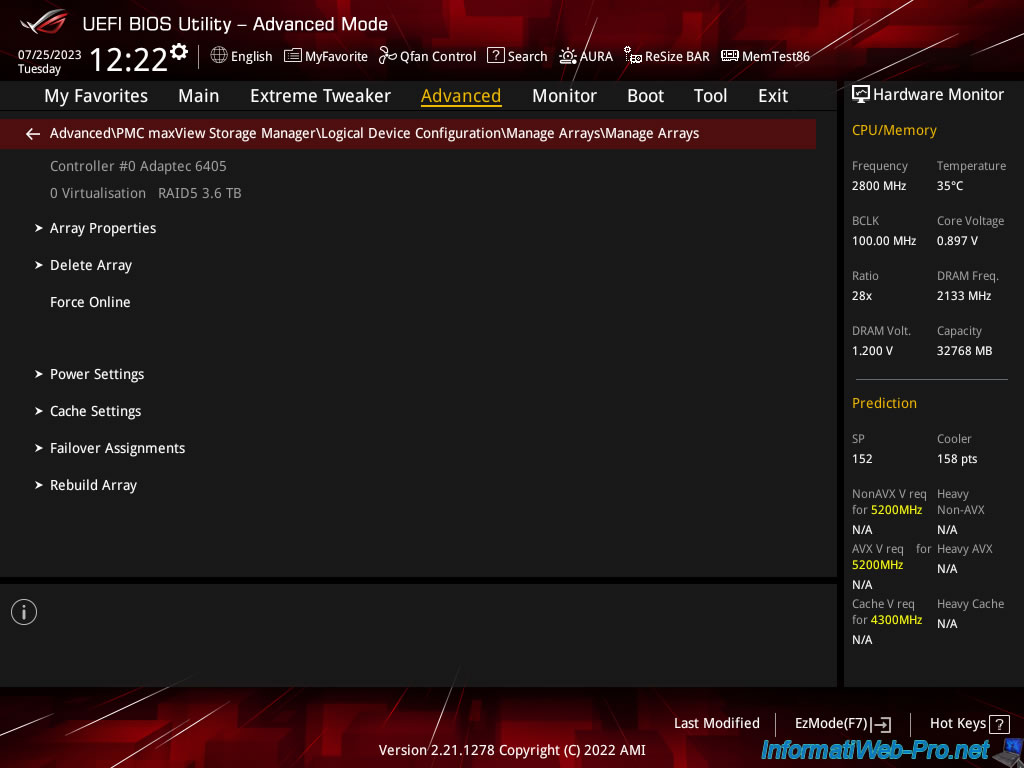
In the "Array Properties" section, you can find:
- Array name: the name of the RAID array.
- Array Type: the type of array or generally the RAID level used.
In our case: RAID5. - Array Size: the capacity (size) usable by the user on it.
In our case: 3.6 TB. - Stripe size (KB): the size of strips used.
- Status: the status of your RAID array.
When initializing/building the RAID array, the status is "Build/Verify".
Once the RAID array is initialized and completely built, the status changes to "Optimal". - Show Progress: when initializing / building a RAID array, this option appears and allows you to know the percentage of progress by clicking on it.
Once initialization/creation is complete, this option disappears. - Array Members: the list of physical disks used by this RAID array with the make, model, and capacity of each disk.
Note that it is preferable to use identical physical disks and especially of the same capacity.
In our case, 3 physical disks "WDC WD20EFRX-68EUZNO" of 1.8 TB.

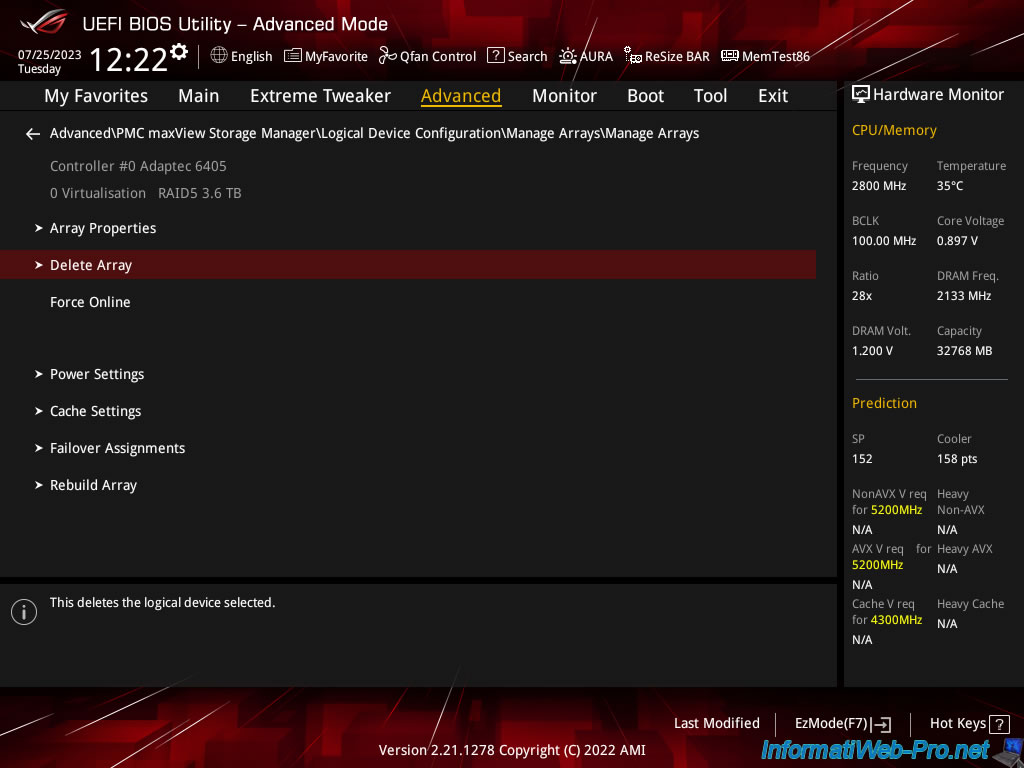
The "Delete Array" option allows you to delete the RAID array, as well as the RAID logical disks created on it.
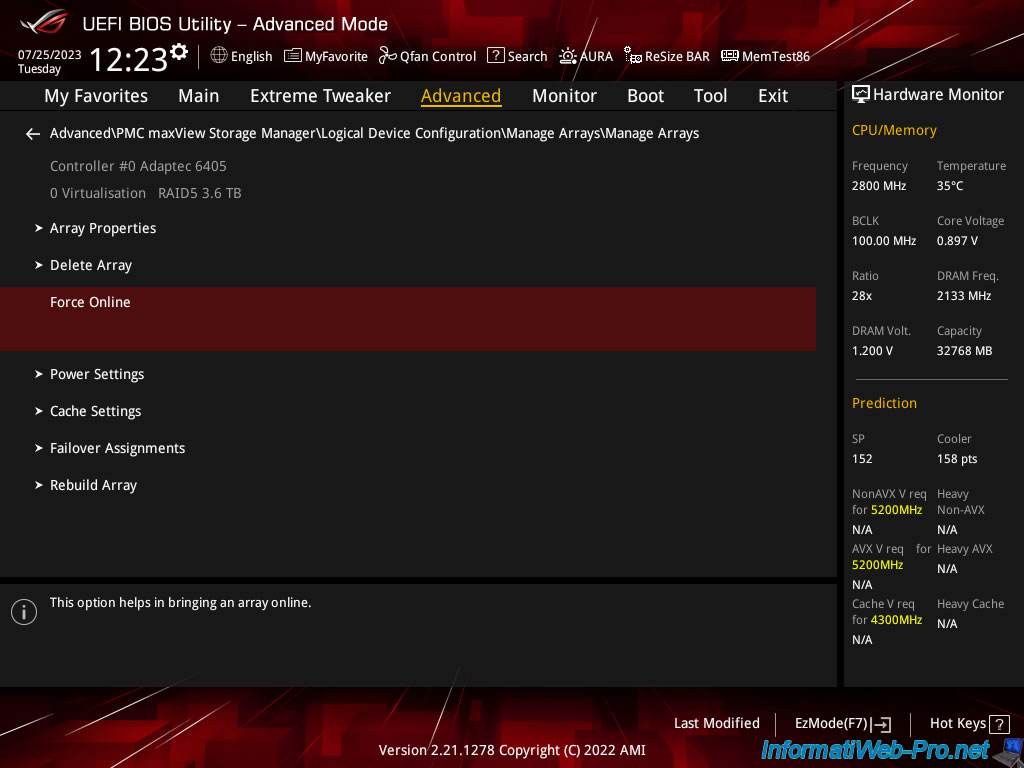
The "Force Online" option allows you to force the currently selected RAID logical disk to be put online so that it is visible to the operating system.
This can be useful if a RAID logical drive does not currently appear in your operating system.
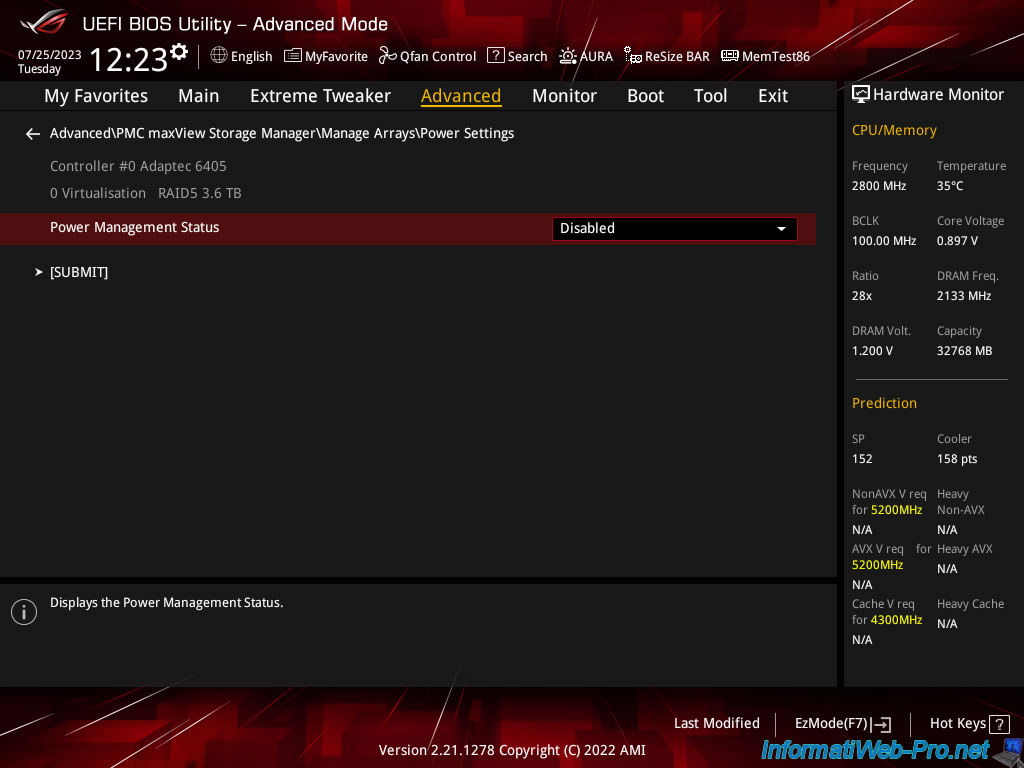
In the "Power Settings" section, you will be able to change the Power Management Status of the Adaptec RAID controller.
This helps reduce power consumption when an array is not used for at least a certain period of time.
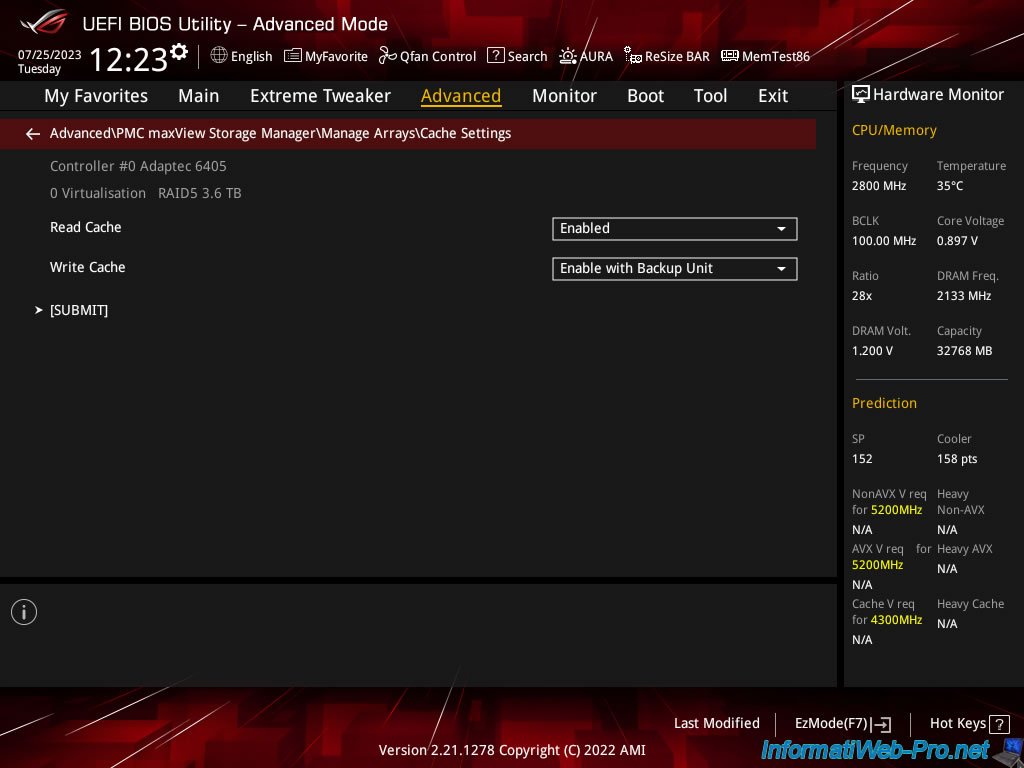
In the "Cache Settings" section, you can enable or not the read and/or write cache:
- Read Cache: Allows you to enable (Enabled) or disable (Disabled) the Adaptec RAID controller read cache for this RAID array.
- Write Cache: the same for the write cache.
- Enable always: allows you to always enable write cache even if there is no battery (ZMM) connected to your Adaptec RAID controller.
Warning: If a power outage occurs, data loss may occur due to use of the write cache. - Enable with Backup Unit: enables write cache only when a battery (ZMM) is plugged into your Adaptec RAID controller and it is sufficiently charged.
Which is recommended if you have a battery (ZMM), because you will benefit from better performance by avoiding losing data in the event of a power outage. - Disable: allows you to disable write cache for this RAID array.
- Enable always: allows you to always enable write cache even if there is no battery (ZMM) connected to your Adaptec RAID controller.
After changing the settings, click "[SUBMIT]" to save the changes.
The "Failover Assignments" option allows you to assign physical disks as "Spares" for this RAID array.
Thus, in the event of failure of a physical disk in this array, one of these "Spares" will be used to automatically rebuild the missing disk.
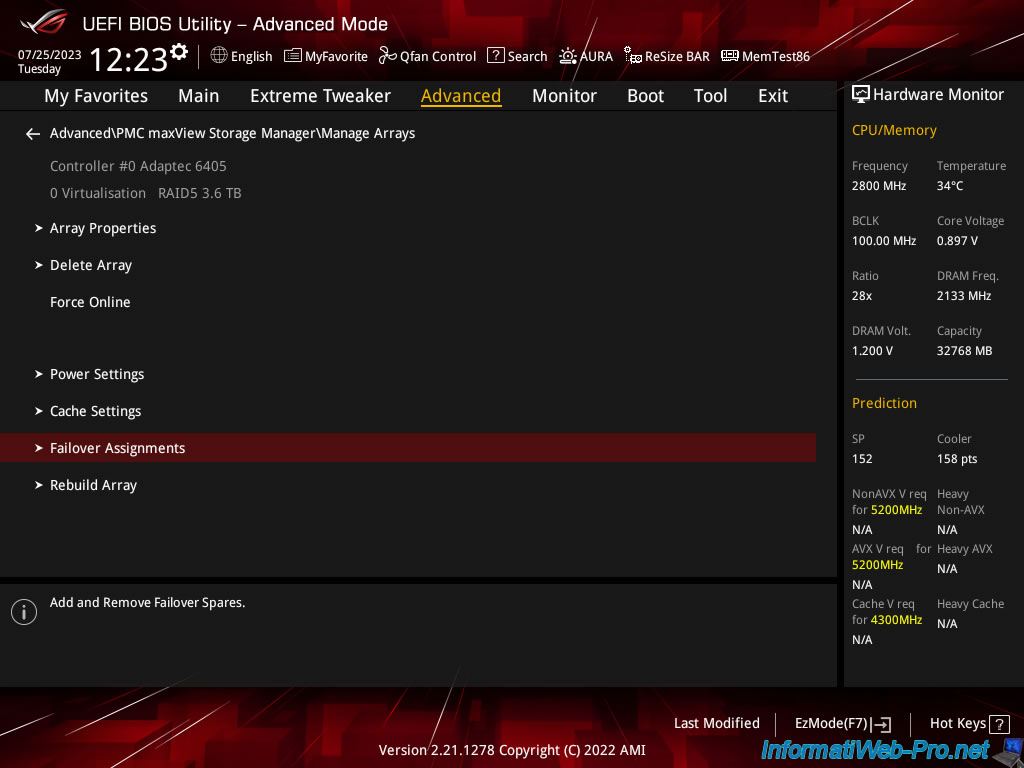
The "Rebuild Array" option allows you to rebuild the existing RAID array.
Share this tutorial
To see also
-
RAID 11/16/2015
Adaptec maxView Storage Manager v1 - Presentation
-
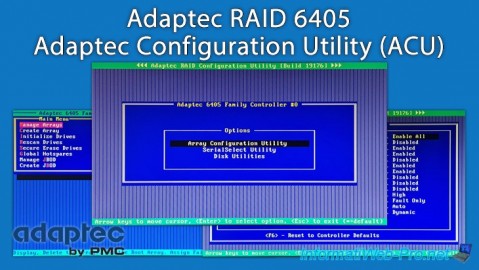
RAID 3/21/2025
Adaptec RAID 6405 - Adaptec Configuration Utility (ACU)
-
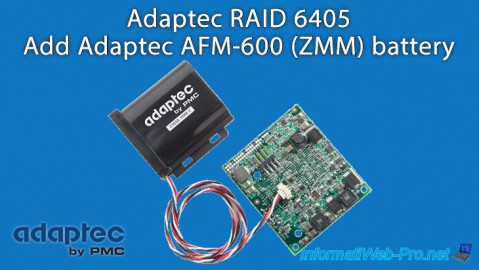
RAID 1/14/2022
Adaptec RAID 6405 - Add Adaptec AFM-600 (ZMM) battery
-
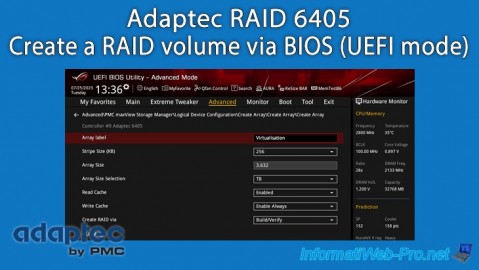
RAID 3/28/2025
Adaptec RAID 6405 - Create a RAID volume via BIOS (UEFI mode)
You must be logged in to post a comment