Create a RAID volume via the BIOS of an Asus ROG motherboard in UEFI mode on an Adaptec RAID 6405 controller
- RAID
- 28 March 2025 at 12:52 UTC
-

- 3/3

2. Partition visible RAID disk on Windows
When your Adaptec RAID controller creates and verifies your RAID array, the created RAID logical drive is ready for direct use.
But, performance will be degraded until the "Build\Verify" process is completed.
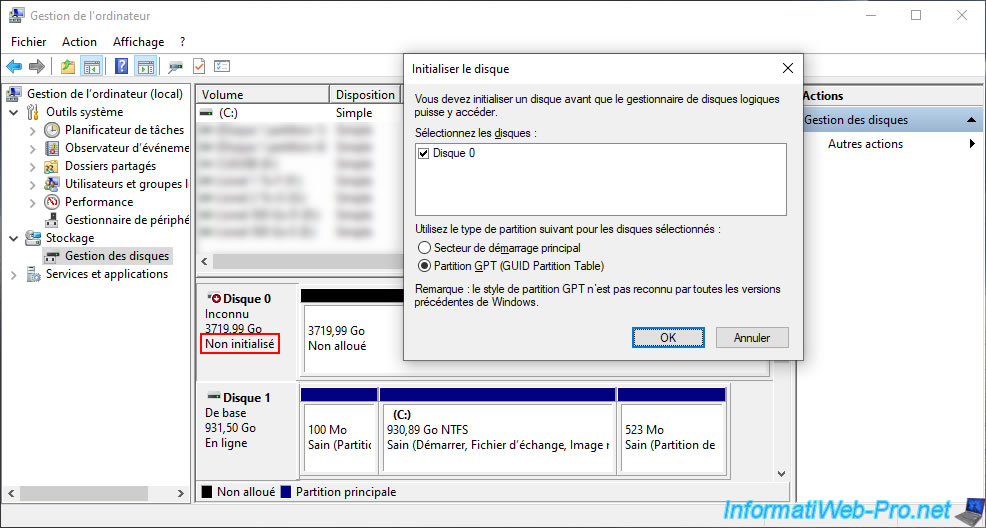
In short, to use your RAID logical drive under Windows, you will need to open the "Computer Management" console and go to: Disk Management.
An "Initialize Disk" window will automatically appear. Choose the partition type to use, but "GPT" (GUID Partition Table) will be required if the disk is larger than 2 TB.
Once the disk is initialized, create the desired partitions (volumes).
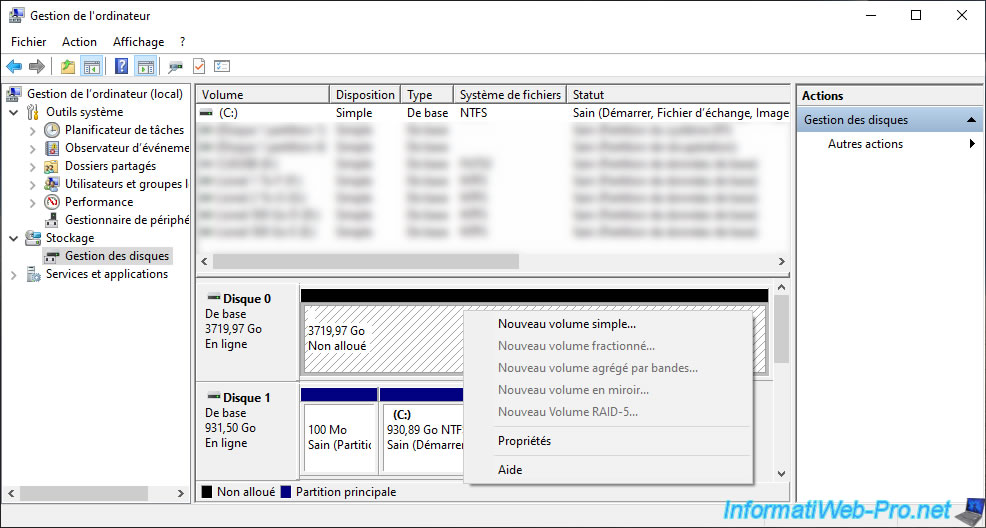
For this tutorial, we created a single partition on this disk.

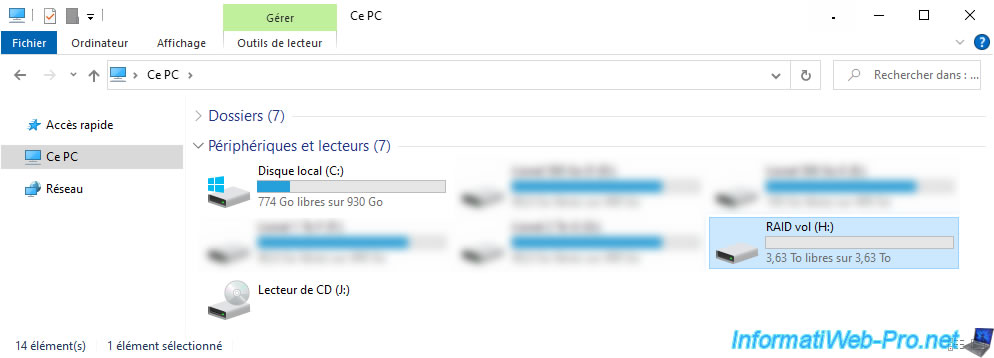
Thus, the partition created on our RAID logical drive appears in the file explorer.
3. View the progress of creating your RAID array via maxView Storage Manager
To avoid having to restart your computer every time you want to see the progress of your RAID array creation/verification, install maxView Storage Manager on your computer.
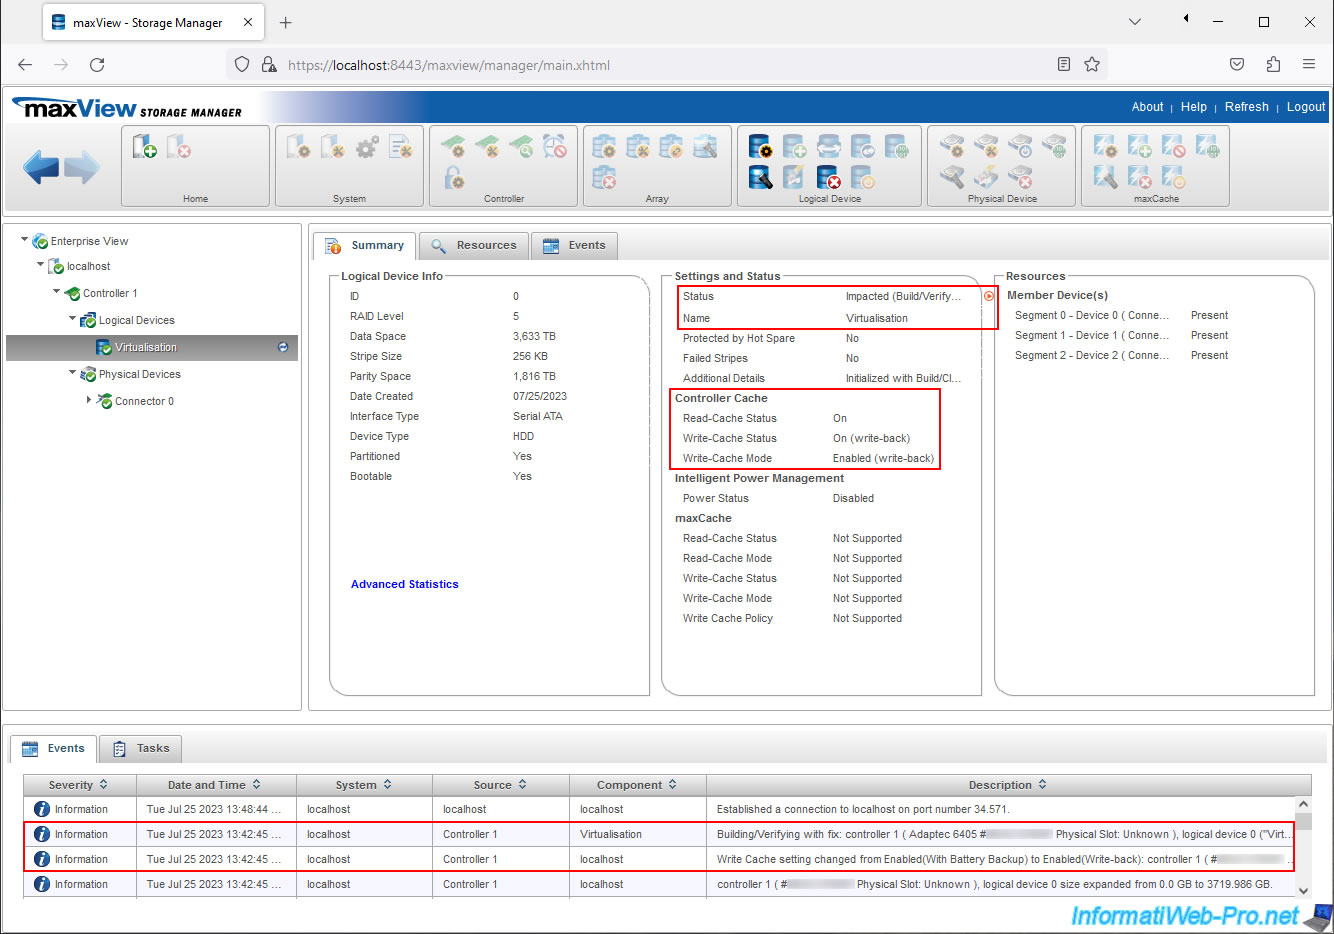
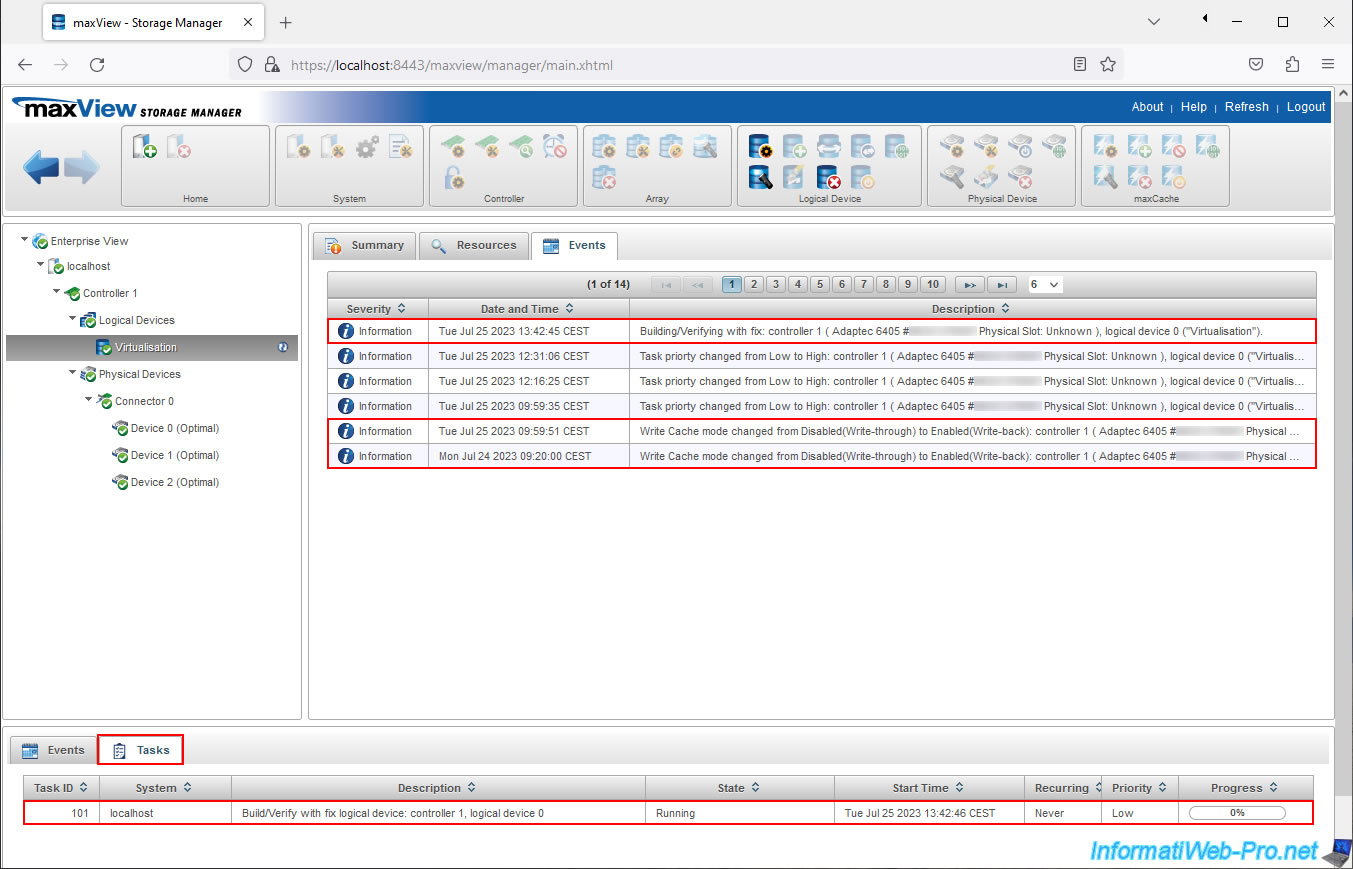
Then go to: localhost -> Controller 1 -> Logical Devices -> [name of your RAID array].
In the "Summary" tab, you will see that the current status is: Impacted (Build/Verify).
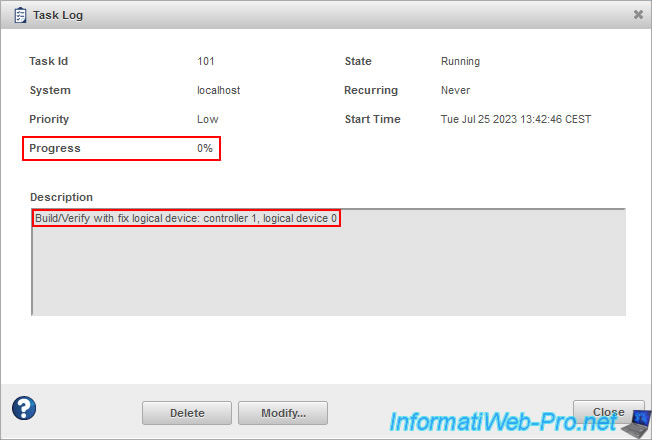
To see the progress percentage of this process, click on the small orange icon to its right.
Note: you will also see the Read-Cache Status and Write-Cache Status.
Currently the progress status is 0%. But as said before, it may take a few days depending on the size of your RAID array.
Note that you can shut down your computer whenever you want and restart it later without losing the progress of this process.
Important : to speed up this process, you can change the priority (currently "Low") to "High" by clicking "Modify".
This will further degrade the performance of the RAID logical drive being created (while it's being created), but if you're not currently using it, it's worth it to get this task completed faster.
In the "Events" tab, you will see that your RAID array is being created/verified and write cache has been enabled (in our case).
Plain Text
Building/Verifying with fix: controller 1 (Adaptec 6405 #... Physical Slot: Unknown), logical device 0 ("Virtualisation").
Write Cache mode changed from Disabled (Write-through) to Enabled (Write-back): controller 1 (Adaptec 6405 #... Physical Slot: Unknown), logical device 0 ("Virtualisation").
At the bottom of the page, in the "Tasks" tab, you will also be able to see the progress of this "Build/Verify" process.
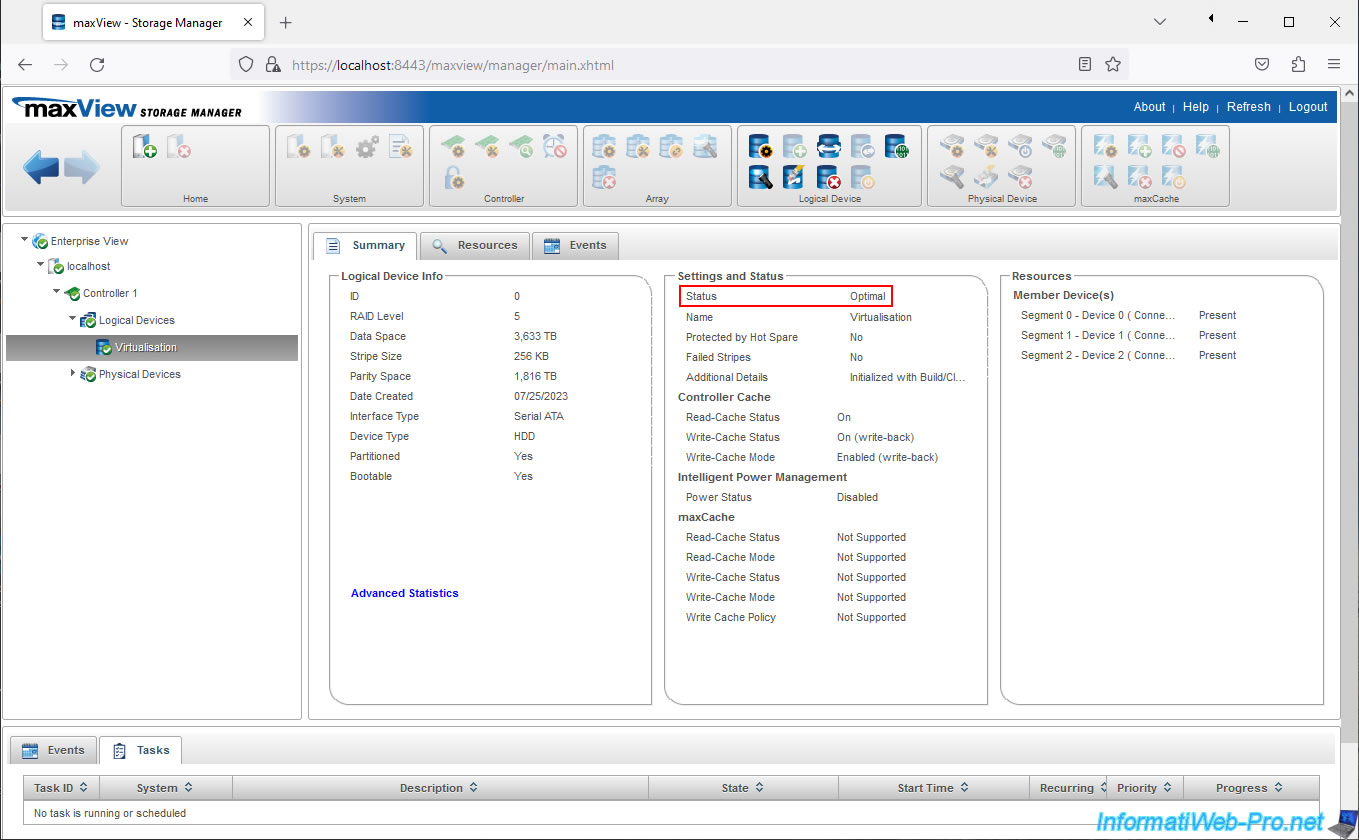
A few days later, once the RAID logical drive has been created, its status will be "Optimal" and the task will have disappeared.
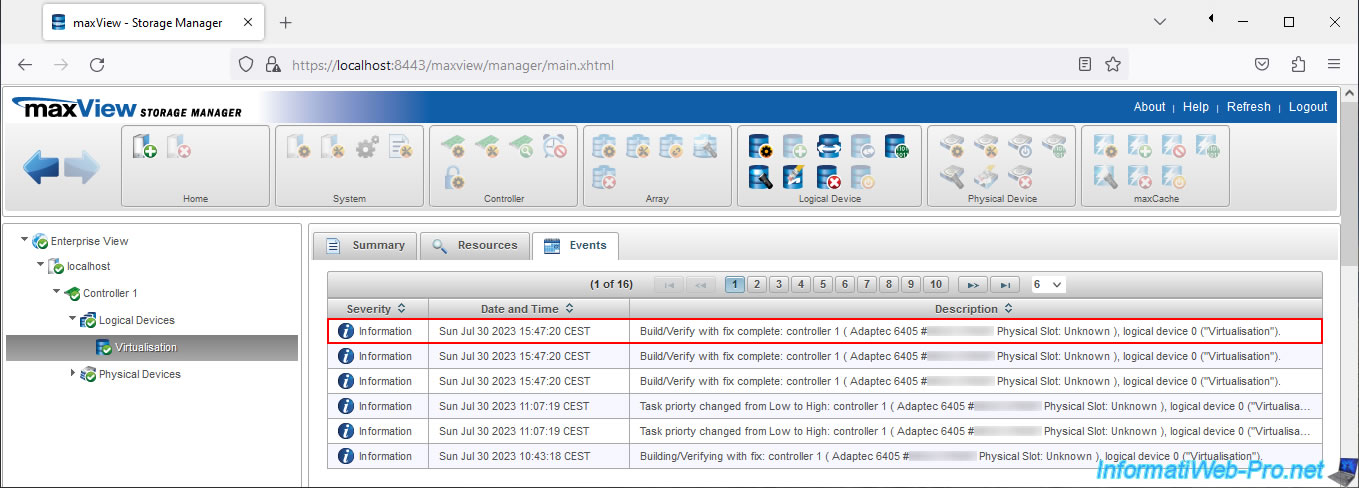
In the "Events" tab of your RAID logical drive, you will see this event: Build\Verify with fix complete.
In File Explorer you won't see a difference.
The previously created partition on your RAID logical drive is still visible in File Explorer.

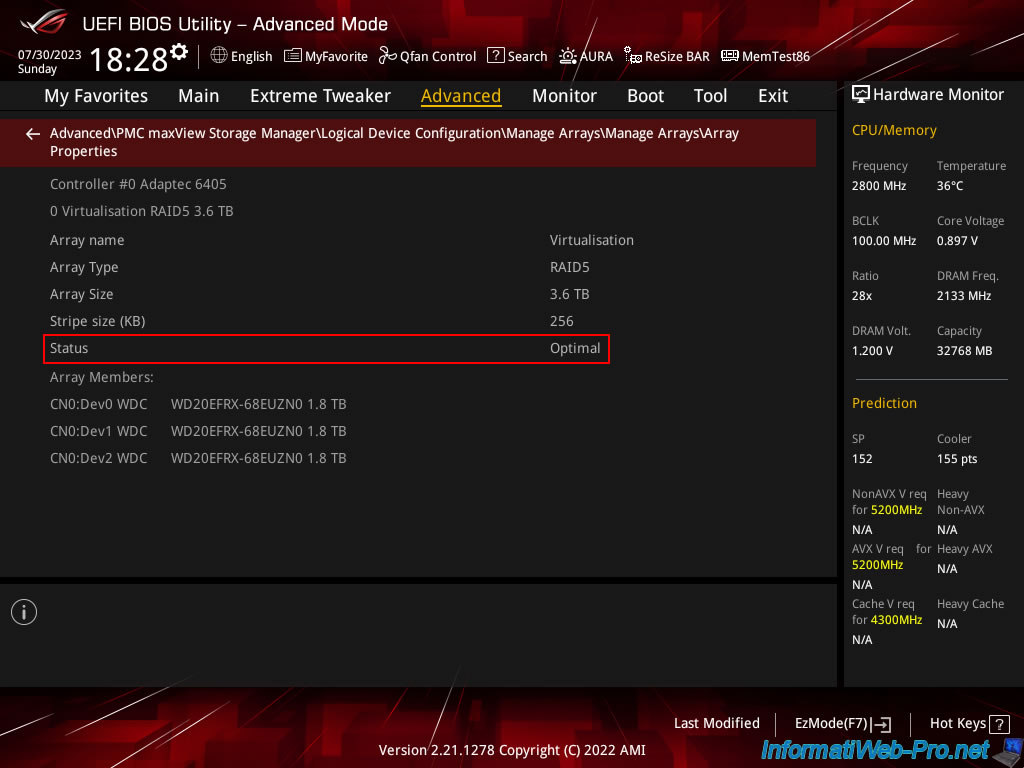
4. View RAID array build status in motherboard BIOS
If you wish, you can also return to your motherboard BIOS to see the status of your RAID array.
To do this, go to: Advanced\PMC maxView Storage Manager\Logical Device Configuration\Manage Arrays\[name of your RAID array]\Array Properties.
Once construction is complete, the status will be "Optimal".
Share this tutorial
To see also
-
RAID 11/16/2015
Adaptec maxView Storage Manager v1 - Presentation
-
RAID 3/21/2025
Adaptec RAID 6405 - Adaptec Configuration Utility (ACU)
-
RAID 3/26/2025
Adaptec RAID 6405 - Adaptec maxView configuration tool via BIOS (UEFI mode)
-
RAID 1/14/2022
Adaptec RAID 6405 - Add Adaptec AFM-600 (ZMM) battery
No comment