- NAS
- Unraid
- 03 June 2026 at 16:03 UTC
-

- 1/2

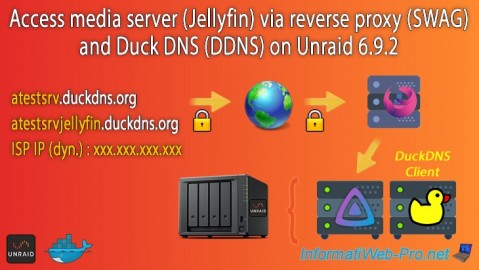
When you want to use free subdomains created at Duck DNS with the "swag" reverse proxy, the procedure is slightly different from when you use subdomains created on your own domain.
In this tutorial, we will use the open-source media server "Jellyfin" as an example for its remote access via this "swag" reverse proxy.
- Add subdomains to your Duck DNS account
- Add your new subdomains in the duckdns client on Unraid
- Use the same Docker network as the reverse proxy (swag)
- Add the configuration for Jellyfin on the reverse proxy (swag)
- Add the subdomain for Jellyfin in the certificate generated via the swag container
- Configure Jellyfin for use via proxy
- Remotely access Jellyfin via swag reverse proxy
1. Add subdomains to your Duck DNS account
To get started, log in to the Duck DNS website with the account you previously used to register with Duck DNS.
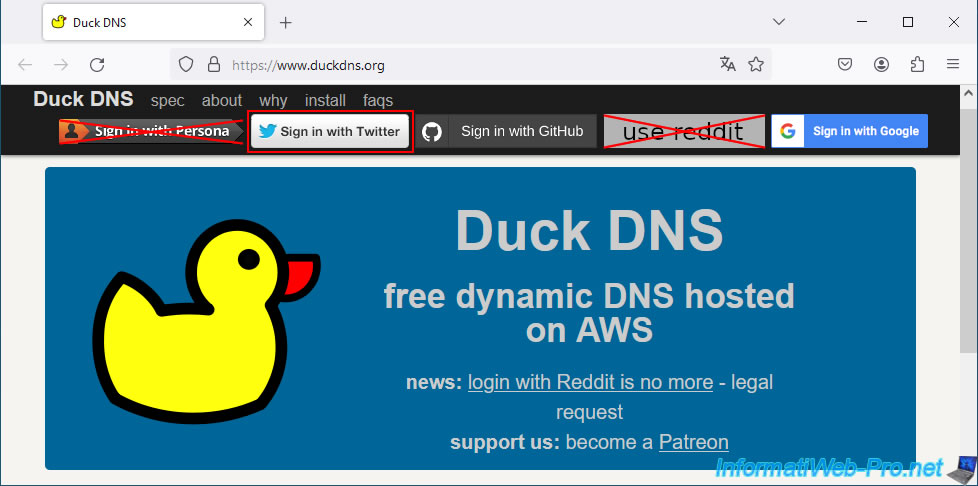
In the case of a Duck DNS account created using your Twitter account, click on the "Sign in with Twitter" button, then on the button: Authorize app.
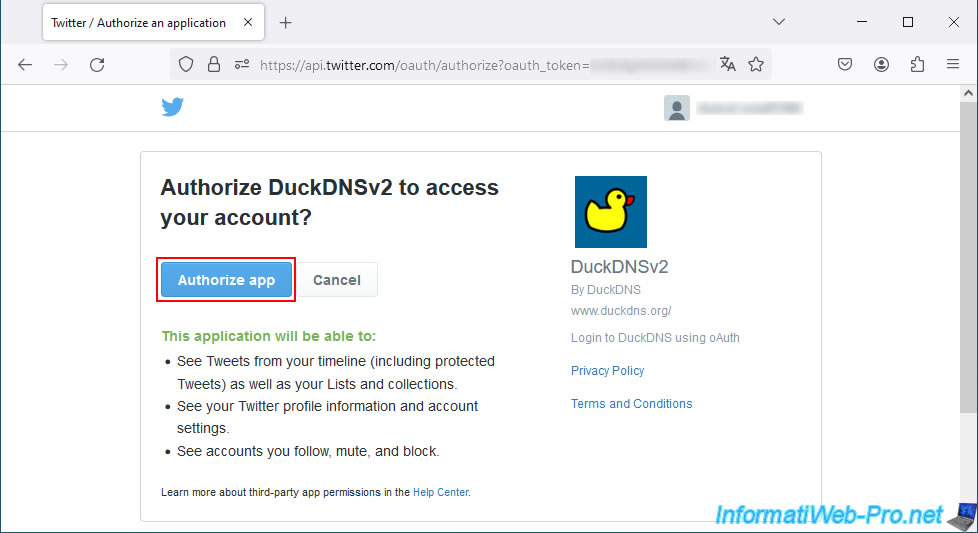
You will then be connected to the Duck DNS website.

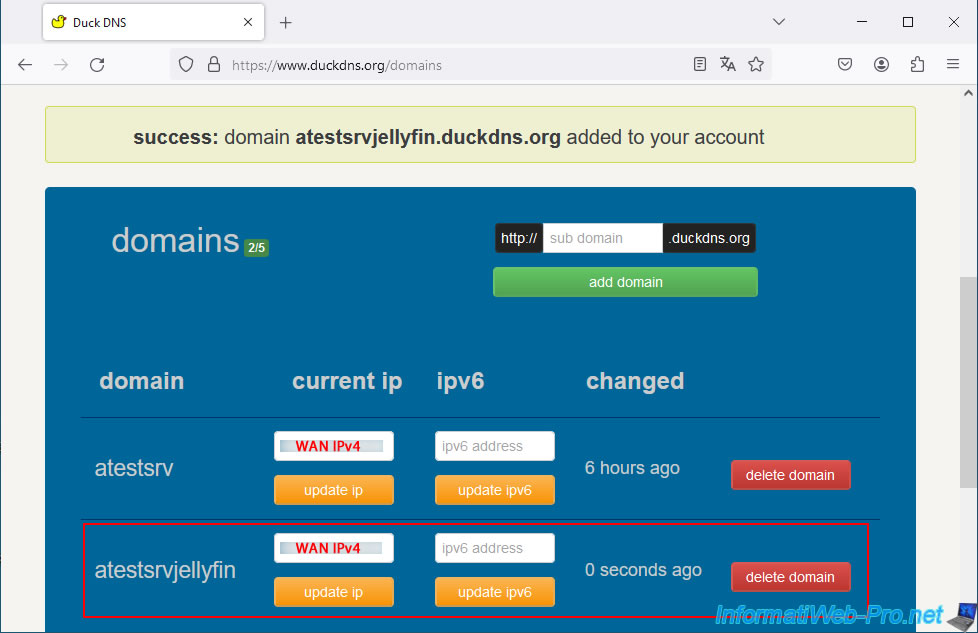
Add the desired subdomain for the desired service.
In our case, the subdomain "atestsrvjellyfin" for the "Jellyfin" service.

Your new subdomain appears in your Duck DNS account with your current WAN IP address.
2. Add your new subdomains in the duckdns client on Unraid
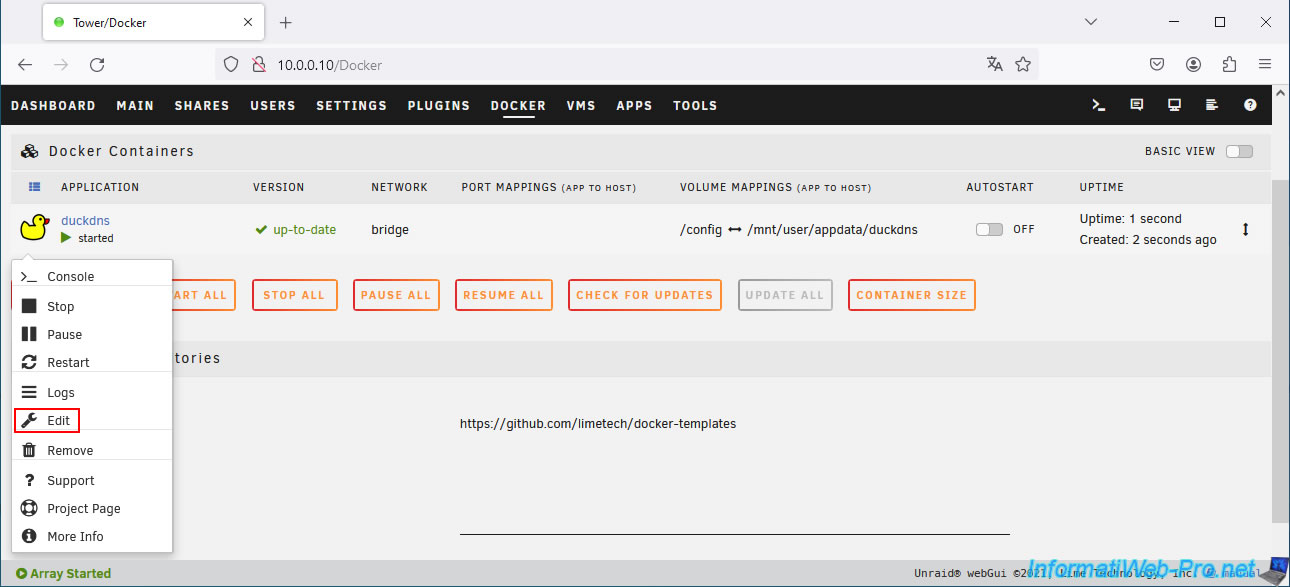
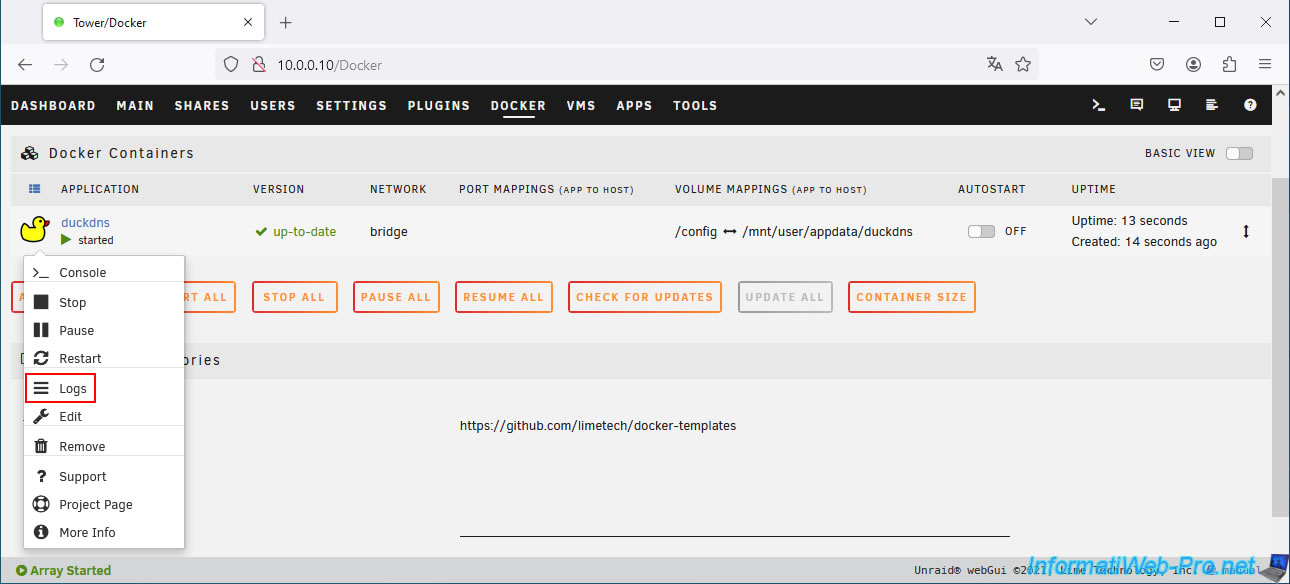
On your Unraid server, go to the "Docker" tab, click on the "duckdns" icon, then click on: Edit.
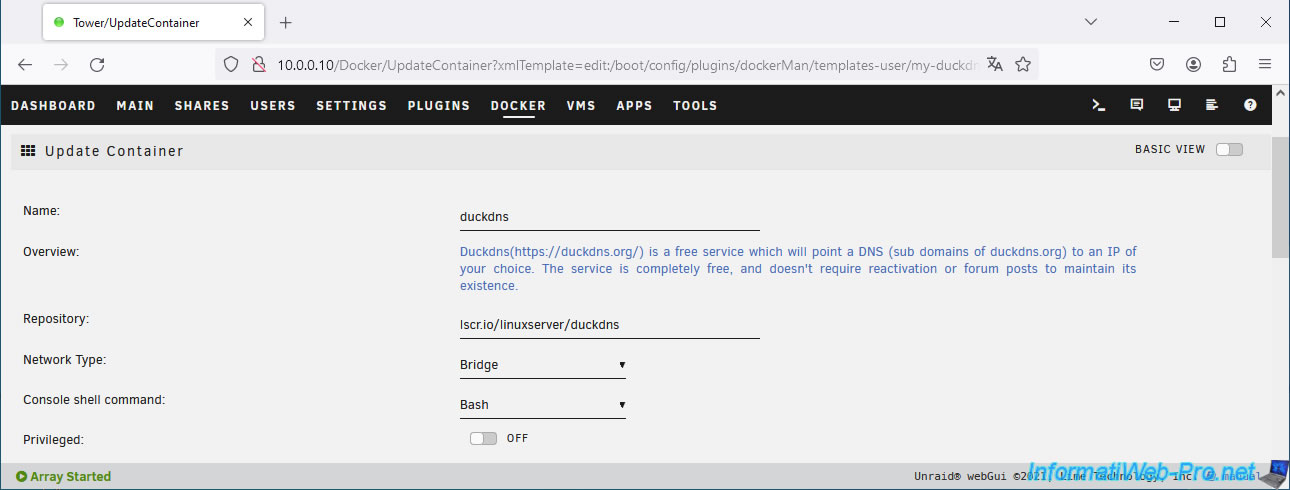
The Duck DNS client (duckdns) "Update Container" page appears.
In the "SUBDOMAINS" box, add your new subdomain created at Duck DNS, separating your subdomains each time with a comma.
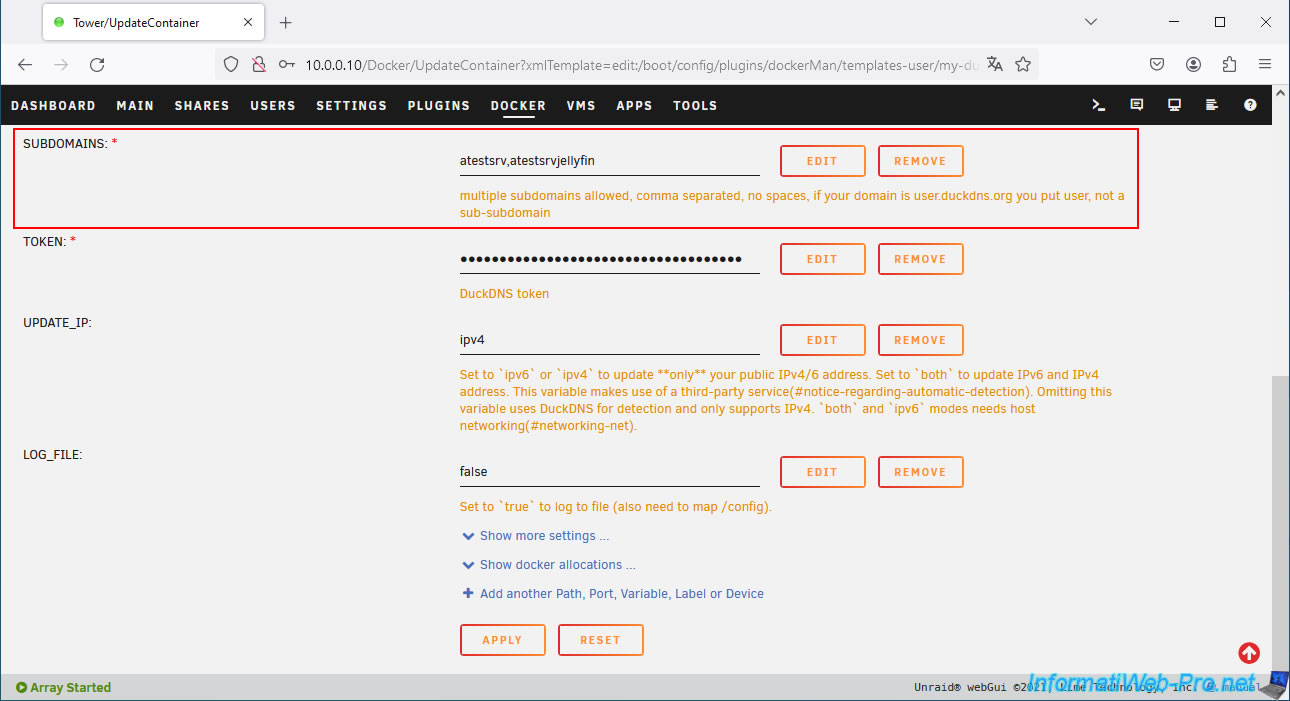
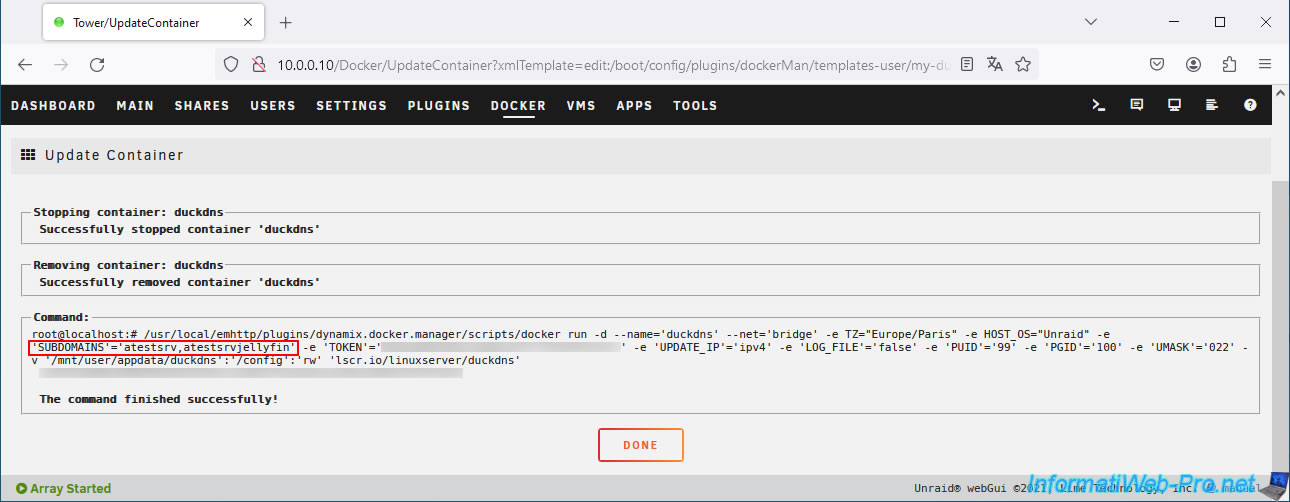
Wait while your Duck DNS client configuration updates, then click: Done.
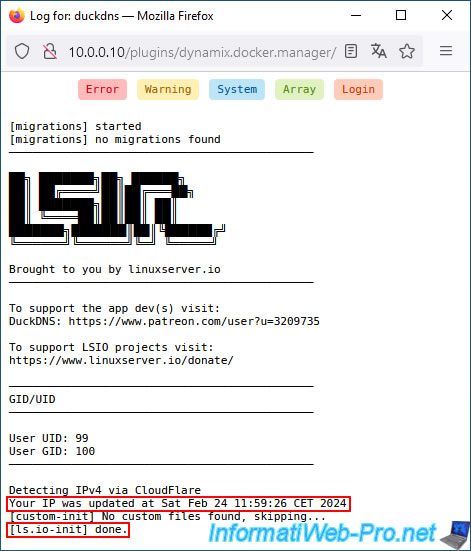
Check the "duckdns" logs by clicking on its icon, then on: Logs.
As expected, your IP address has been automatically updated on your subdomains created at Duck DNS.
Then the message "[ls.io-init] done" will appear.
If no errors or warnings appear, your configuration is correct.
3. Use the same Docker network as the reverse proxy (swag)
To get started, install Jellyfin by referring to our tutorial: Unraid 6.9.2 - Docker - Install a media server (Jellyfin).
Then, for the installation of the "swag" reverse proxy using subdomains created at Duck DNS, refer to steps 1 to 4 of our tutorial: Unraid 6.9.2 - SWAG - Use a DDNS client (Duck DNS).
Once the Jellyfin and "swag" containers are created and configured, you will need to modify the network used by your container (in this case: jellyfin) so that it uses the same network as your reverse proxy (swag).
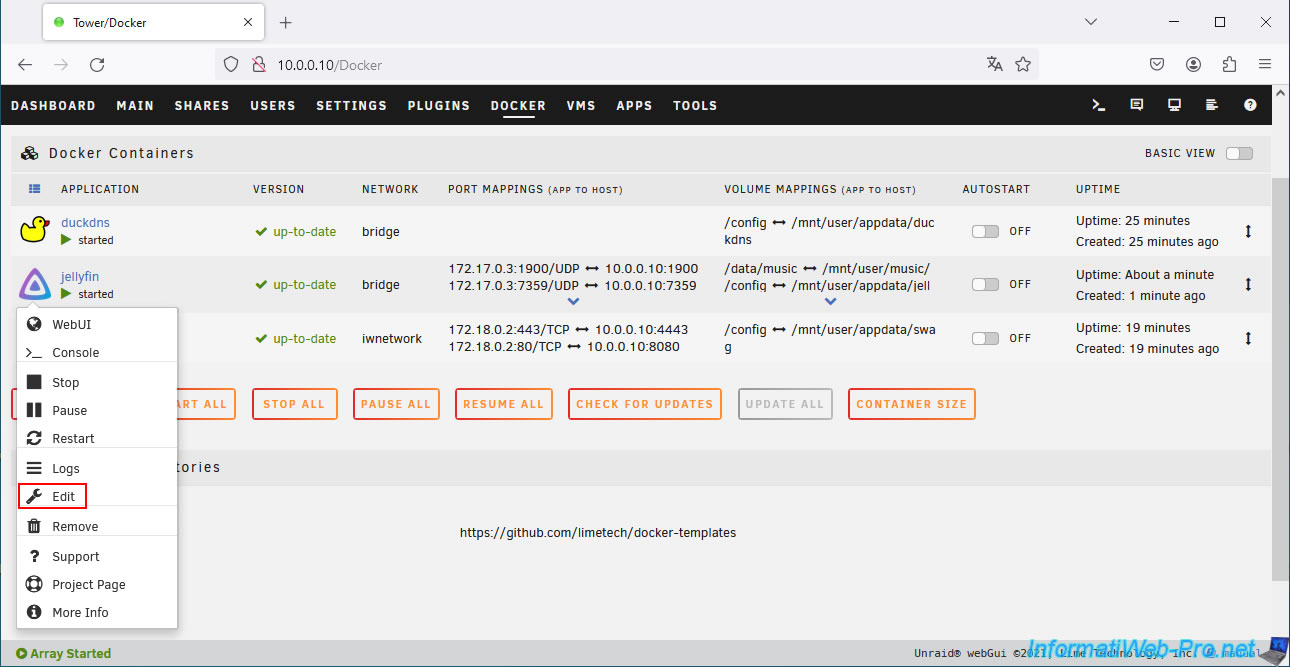
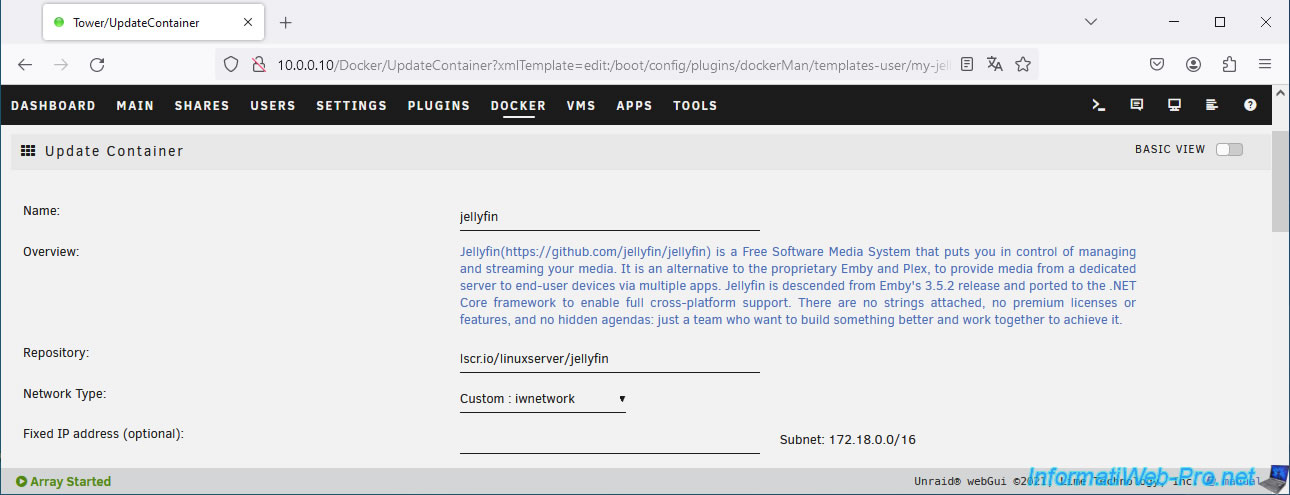
To do this, click on the "jellyfin" icon, then on: Edit.
On the "Update Container" page that appears, select your custom network (Custom: iwnetwork) for the "Network Type" parameter.
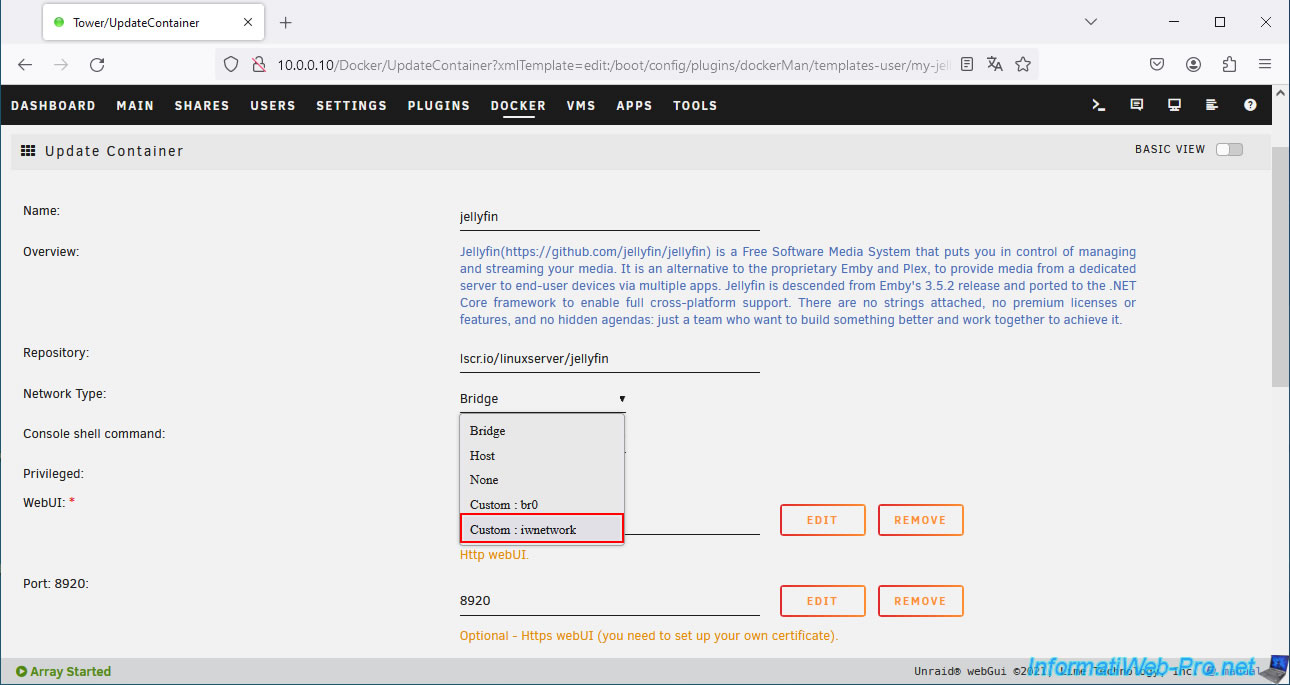
Now, "jellyfin" will use the same network as your "swag" reverse proxy.
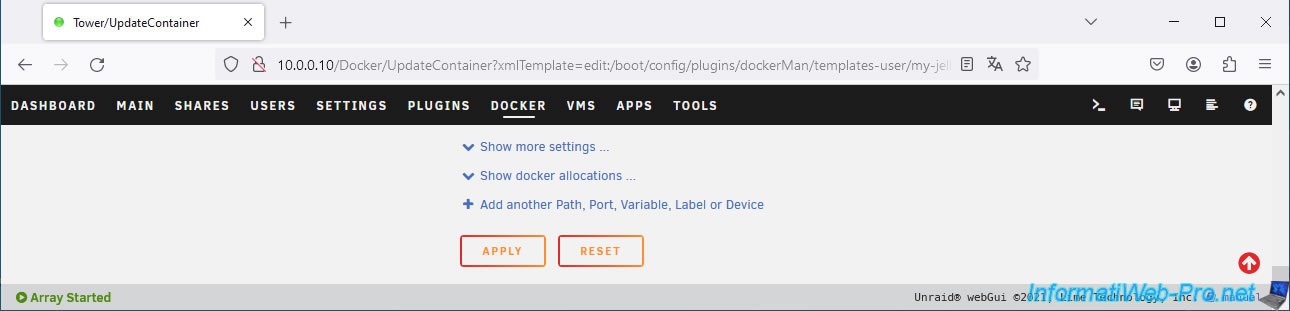
At the bottom of the page, click: Apply.
Once your container configuration is updated, click: Done.
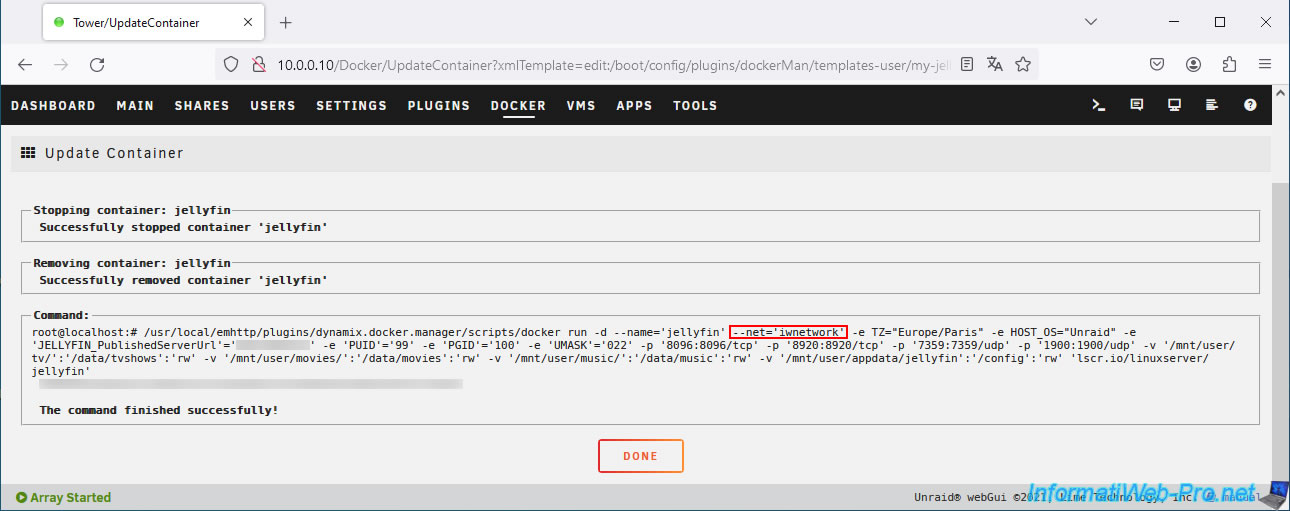
Now, your "jellyfin" container uses the same network as your "swag" reverse proxy.

4. Add the configuration for Jellyfin on the reverse proxy (swag)
So that you can access your service (in this case: Jellyfin) via your "swag" reverse proxy, you must create the relevant configuration file based on the one pre-configured for this service.
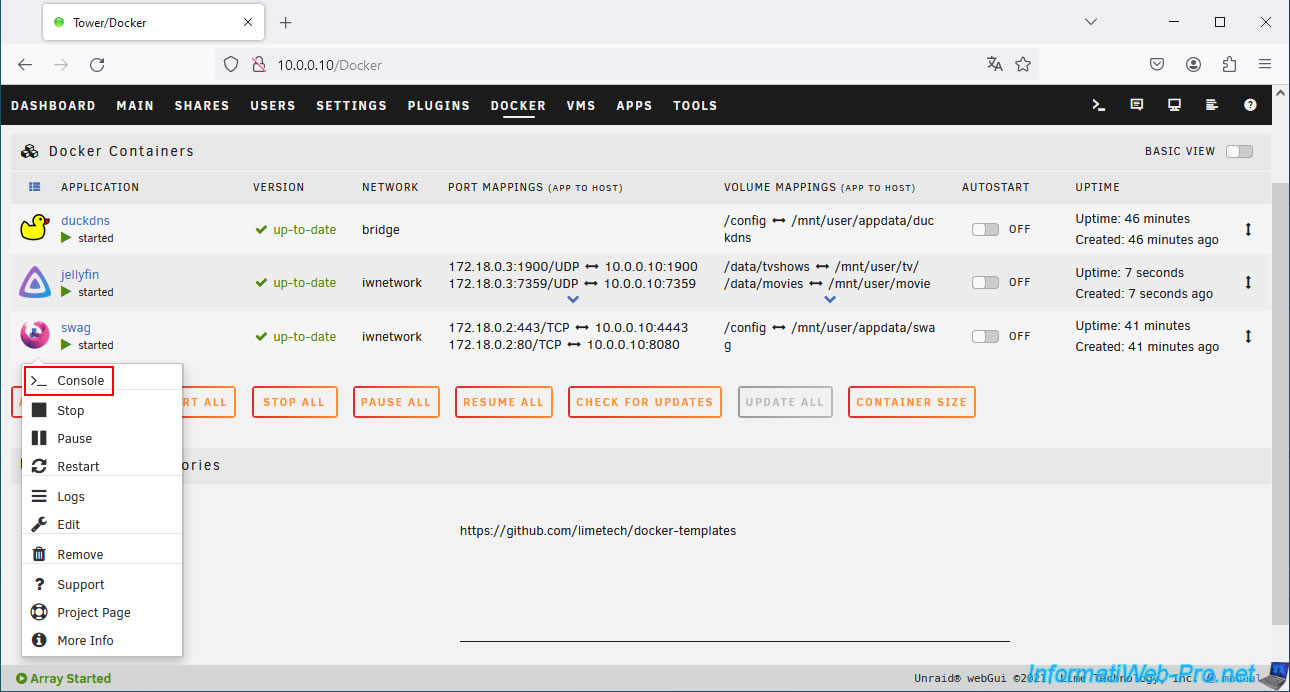
To do this, click on the "swag" icon, then on: Console.
Go to the "/config/nginx/proxy-confs" folder and locate the pre-configured template to use the desired service via a subdomain.
Bash
cd /config/nginx/proxy-confs/
ls
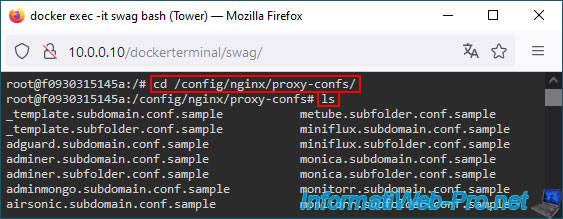
For Jellyfin, you must type these commands:
Bash
cp jellyfin.subdomain.conf.sample jellyfin.subdomain.conf
nano jellyfin.subdomain.conf
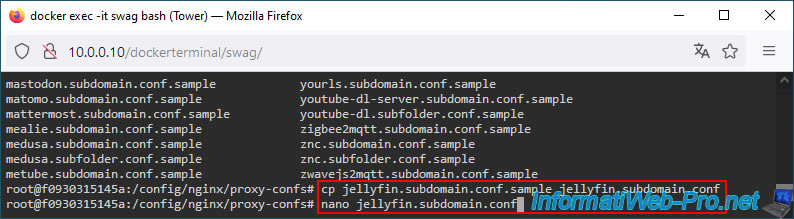
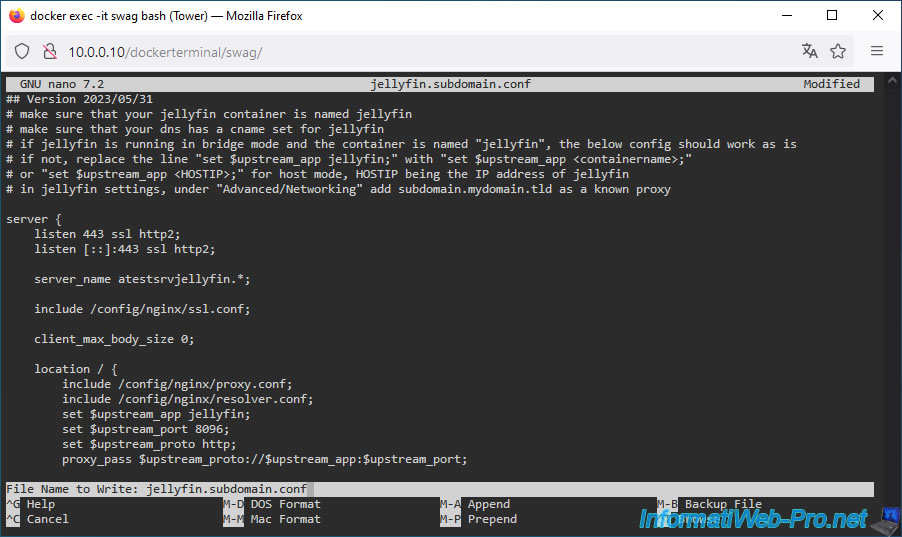
As you can see, by default, swag expects you to use a "jellyfin" subdomain to access your "Jellyfin" service.
Plain Text
# make sure that your dns has a cname set for jellyfin.
...
server_name jellyfin.*;
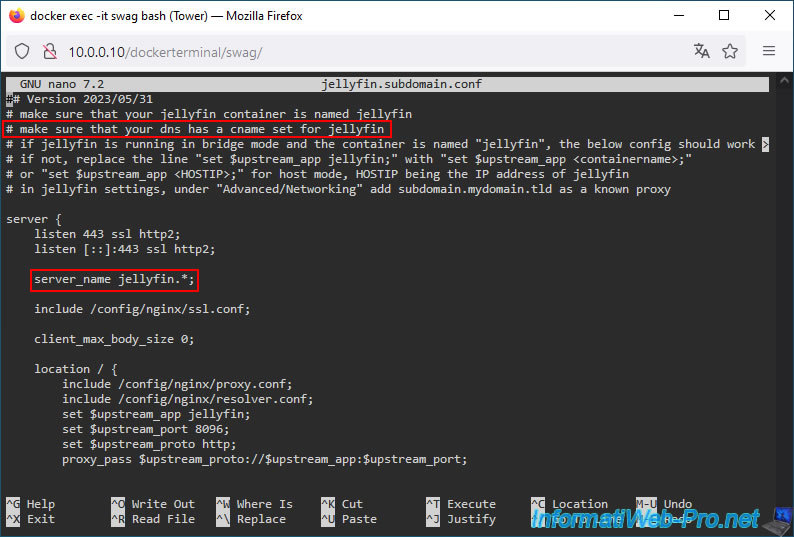
Change the value of the "server_name" statement to indicate the subdomain created at Duck DNS for Jellyfin in your case.
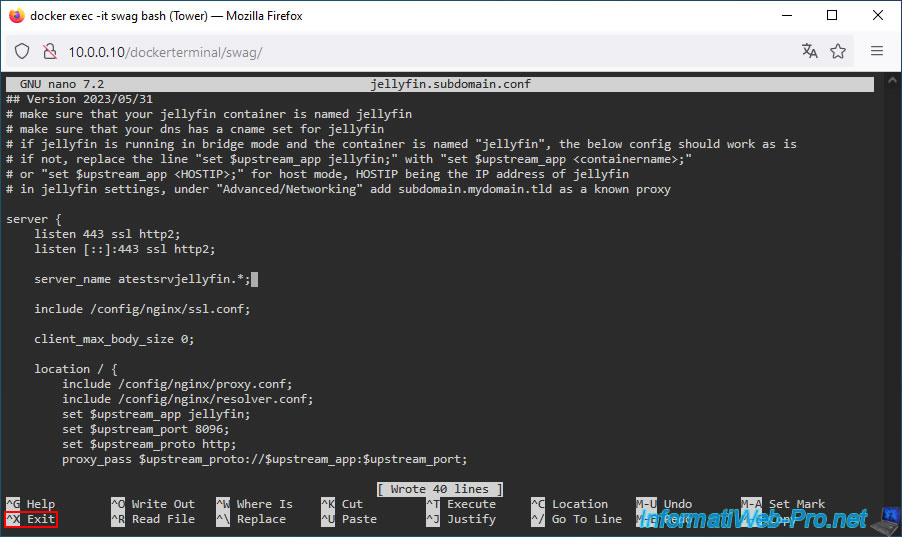
In our case, it gives this.
Plain Text
server_name atestsrvjellyfin.*;
Once this line has been modified, press the "CTRL+O" keys to save the changes.
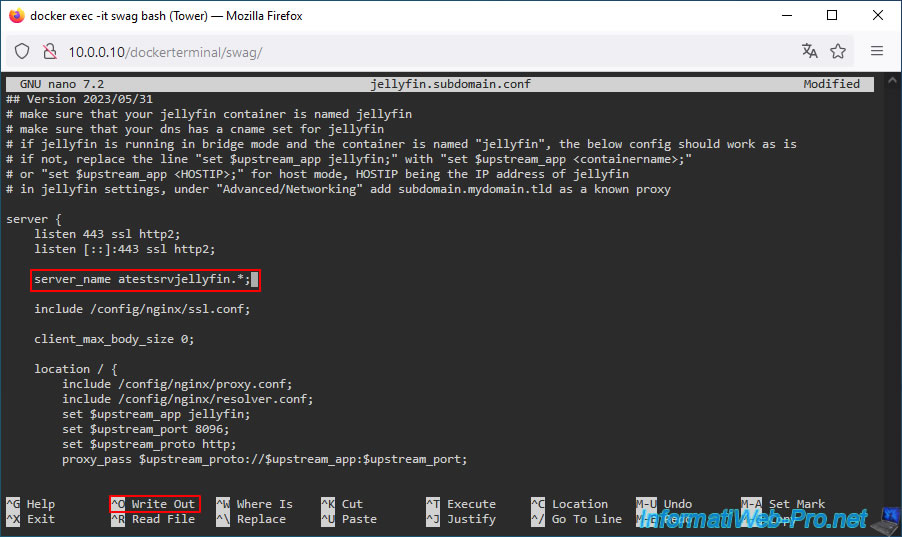
Press Enter to confirm saving the changes.
Finally, press the "CTRL+X" keys to exit the "nano" text editor.
Warning : as you can see in the comments at the beginning of this configuration file, swag tells you that you will need to modify the Jellyfin configuration so that Jellyfin knows that a proxy can be used to access it.
But, you will see how to do it in this tutorial.
Share this tutorial
To see also
-
NAS 12/4/2025
Unraid 6.9.2 - Define a private static IP address
-
NAS 4/15/2026
Unraid 6.9.2 - Docker - Install a file server (Nextcloud)
-

NAS 3/18/2026
Unraid 6.9.2 - Fixing common problems
-
NAS 7/1/2026
Unraid 6.9.2 - SWAG - Use a personal domain with a dynamic WAN IP
You must be logged in to post a comment