Boot on an USB key from a virtual machine with VMware Workstation 17
- VMware
- 14 July 2023 at 18:03 UTC
-

- 2/2

4. Use the USB key as a physical disk
Another tip for booting to a bootable USB key is to configure your virtual machine to use your physical USB key as if it were a physical hard drive.
Thus, your virtual machine will see a VMware virtual hard disk connected to a controller natively supported by VMware Workstation Pro.
Which will fix the problem.
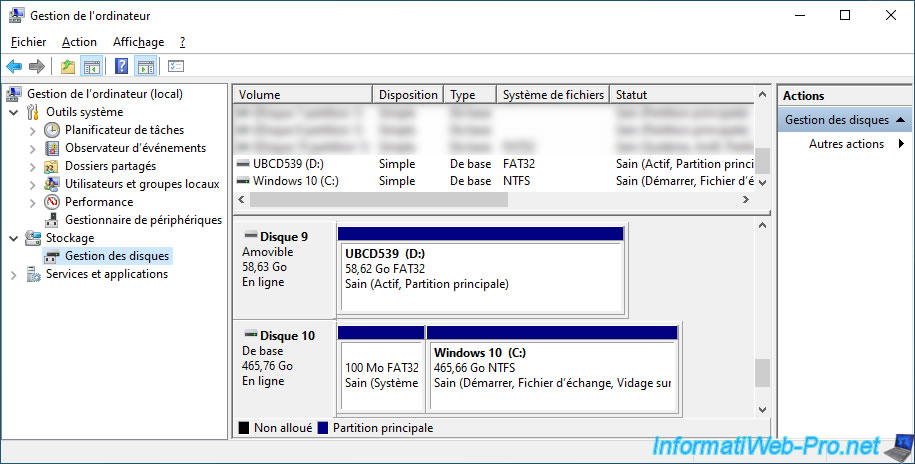
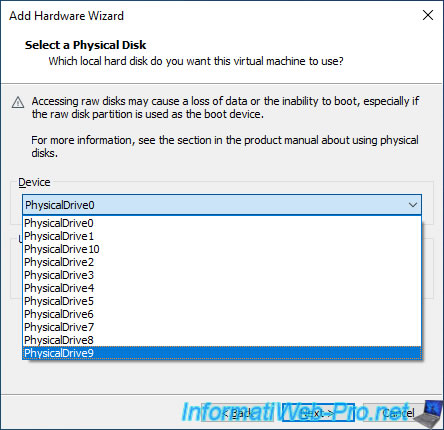
However, before you can use this technique, you need to know what number Windows has currently assigned to your USB key.
In our case, it has the number 9.
Warning : the number assigned to an USB key may change each time you disconnect and reconnect it.
Moreover, once the USB key is disconnected, the ".vmdk" file generated to link the virtual hard disk and the physical USB key will no longer be valid.
It will therefore be necessary to delete this fake virtual hard disk and recreate it by adding your USB key again as a physical disk in the virtual hardware of your virtual machine.
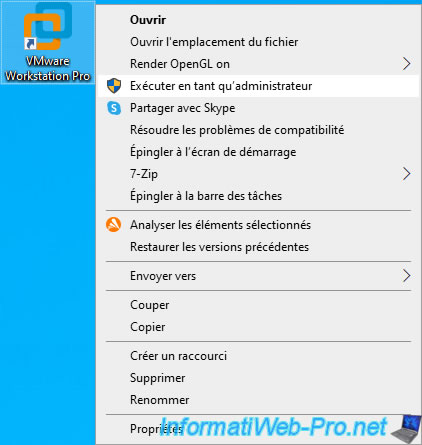
Since Windows 10, sometimes a rights issue occurs when trying to add a physical disk to a virtual machine.
To solve the problem, just launch VMware Workstation Pro as an administrator (rather than waiting for the add virtual hardware wizard to prompt you).
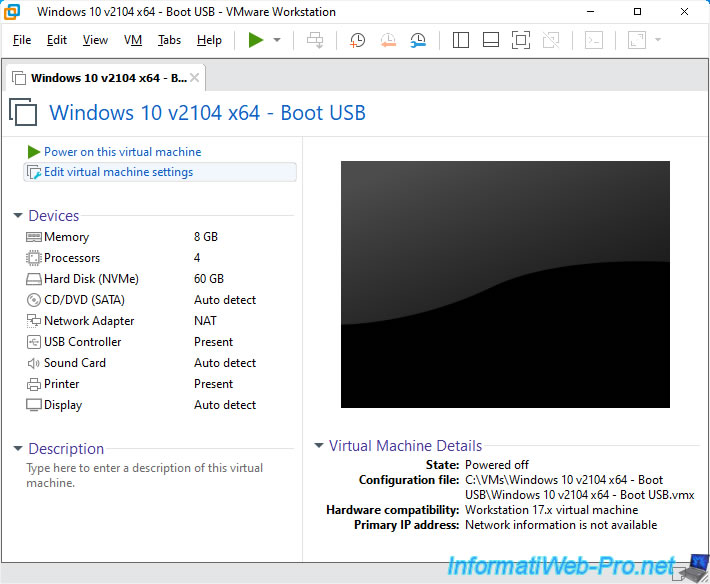
Select your virtual machine and click on : Edit virtual machine settings.
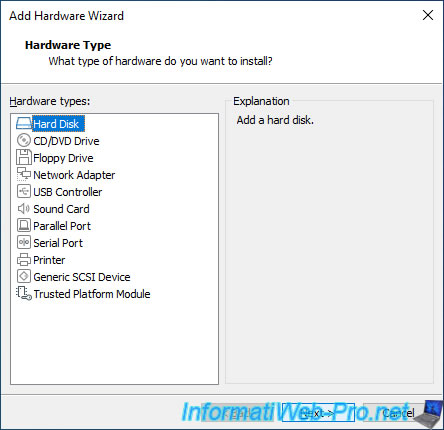
Click on the "Add" button at the bottom of the window.
Choose the "Hard Disk" option and click Next.
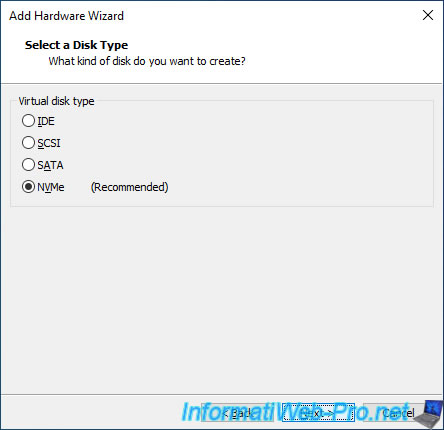
Leave the disk type recommended by the wizard.
Note that this choice varies depending on the guest operating system.
This allows you to use the type that will be natively supported by it.
Select "Use a physical disk (for advanced users)" and click Next.
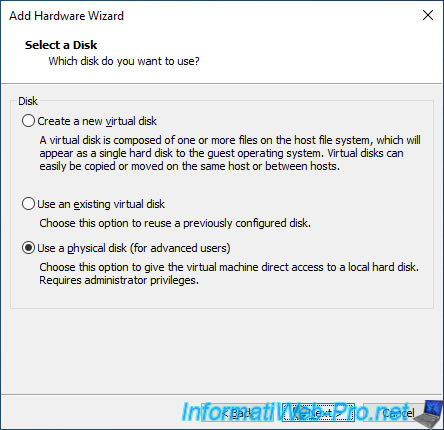
As explained previously, since Windows 10, sometimes a permission problem occurs at this step.
Hence the benefit of having run VMware Workstation Pro as an administrator previously to avoid this error.
Plain Text
Failed to load partitions for device \\.\PhysicalDrive0:
Insufficient permissions to access file.

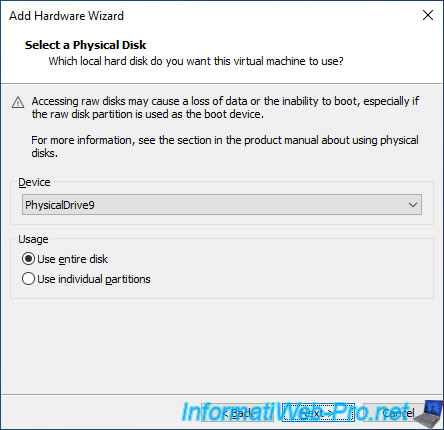
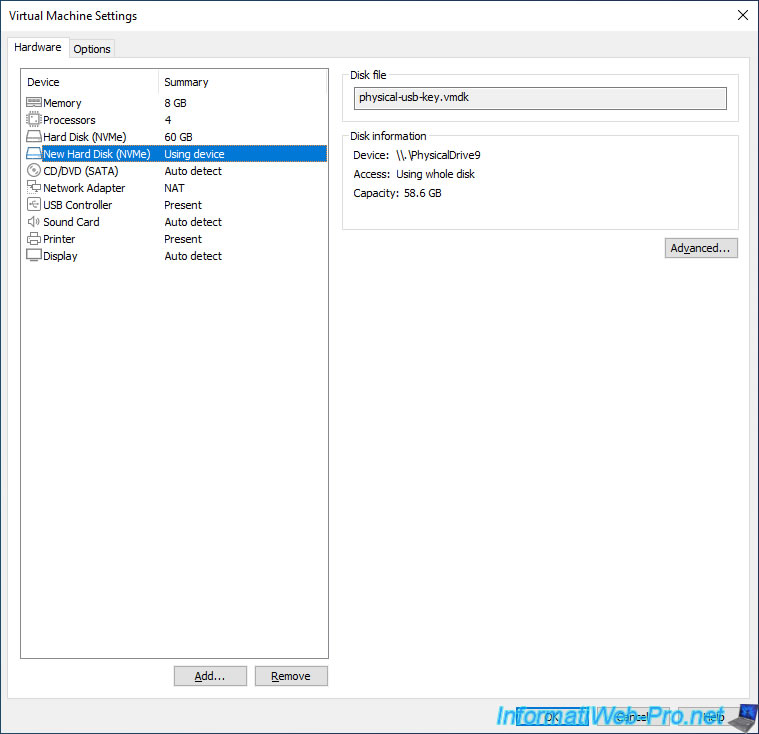
Select the physical disk (PhysicalDriveX) whose number corresponds to the number of your USB key (seen previously thanks to Windows disk management).
Select the "Use entire disk" option so that the entire USB key is seen (including its boot sector which is at the beginning of the USB key).
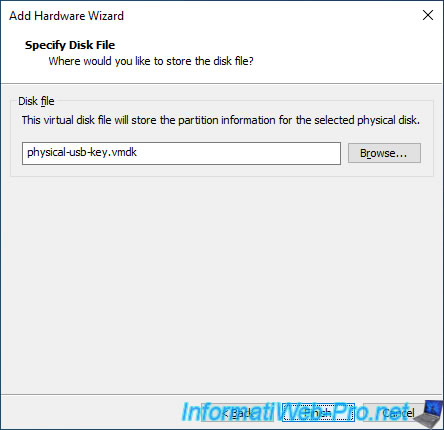
Indicate under which name the corresponding ".vmdk" file will be created and click on Finish.
Note that this will be a small file containing only the information allowing VMware to know which physical disk of the host it should use.
The operating system will then see a VMware virtual hard disk whose contents will virtually match the contents of the physical USB key.
As you can see, a new virtual hard disk is added and VMware Workstation Pro tells you that the device is: "\\.\PhysicalDriveX".

To boot to your USB key, you need to know how the virtual hard drive you just added is referenced.
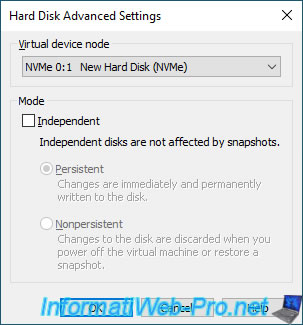
To better understand this, start by selecting the hard disk where the operating system is installed and click on : Advanced.
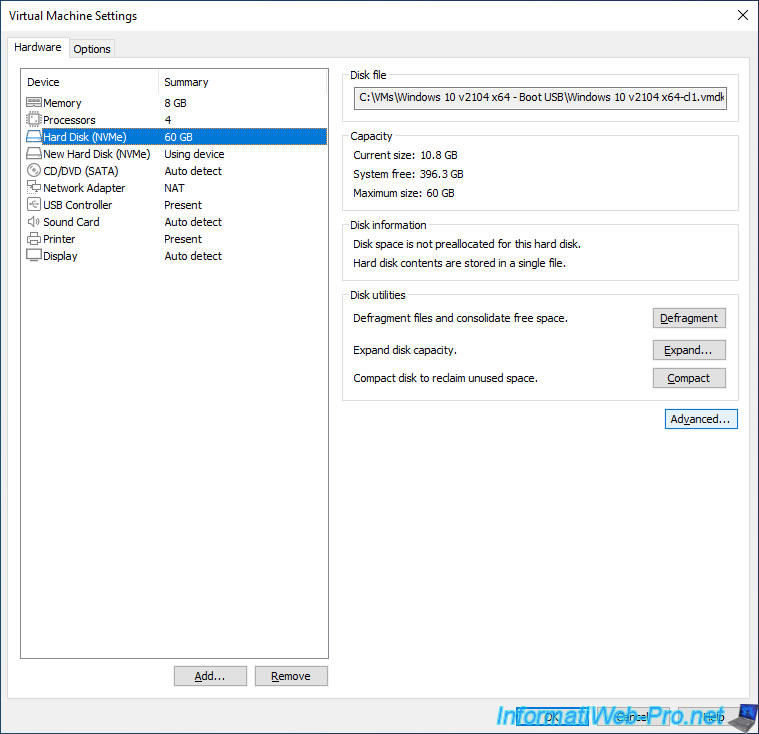
As you can see, in the case of our Windows 10 virtual machine, this 1st hard drive is connected to the NVMe controller at position 0:0.
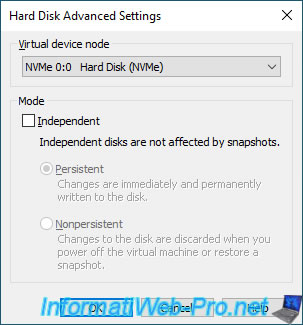
Select the virtual hard disk corresponding to your physical USB key and click again on : Advanced.
As you can see, this virtual hard disk is connected on the NVMe controller at position 0:1.
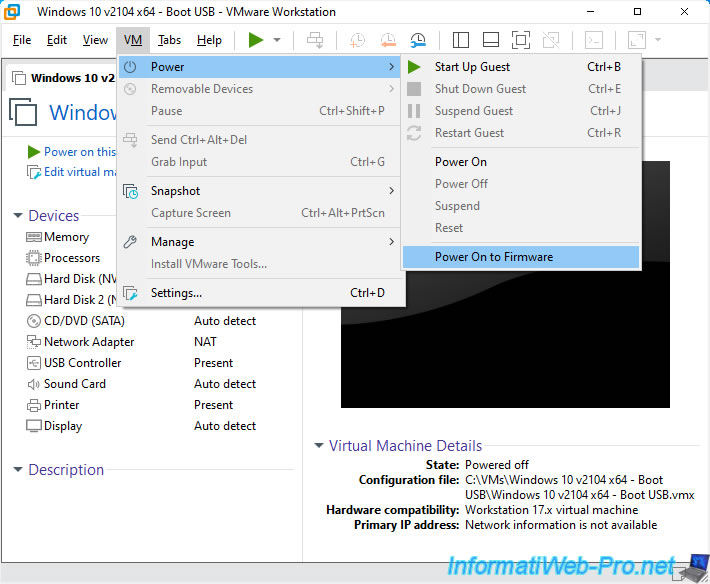
Start your virtual machine on its BIOS by clicking on : VM -> Power -> Power On to Firmware.
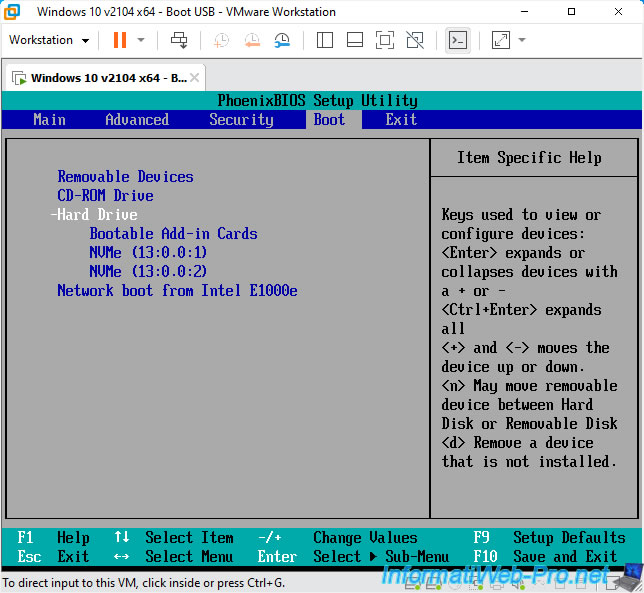
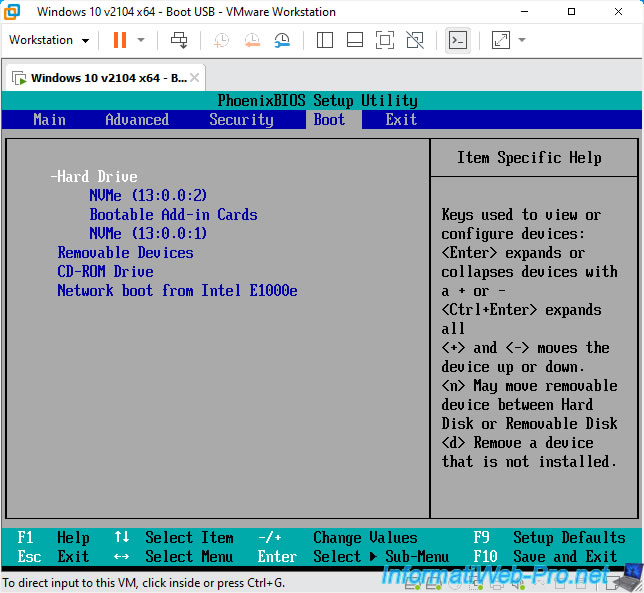
Go to the "Boot" tab of the PhoenixBIOS, select the "Hard Drive" option and press Enter to display its contents.
As you can see, there are 2 NVMe devices of which only the number at the end changes.
In other words :
- NVMe (13:0.0:1) : corresponds to the 1st virtual hard disk (where the OS is located) whose position was "0:0" previously.
- NVMe (13:0.0:2) : corresponds to the new virtual hard disk (whose content is virtually that of your USB key) whose position was "0:1" previously.
Move the "Hard Drive" option up to the top by selecting it, then pressing "+".
Next, place the option corresponding to the virtual hard disk corresponding to your USB key (in our case : the "NVMe (13:0.0:2)" option) at the top of the list.
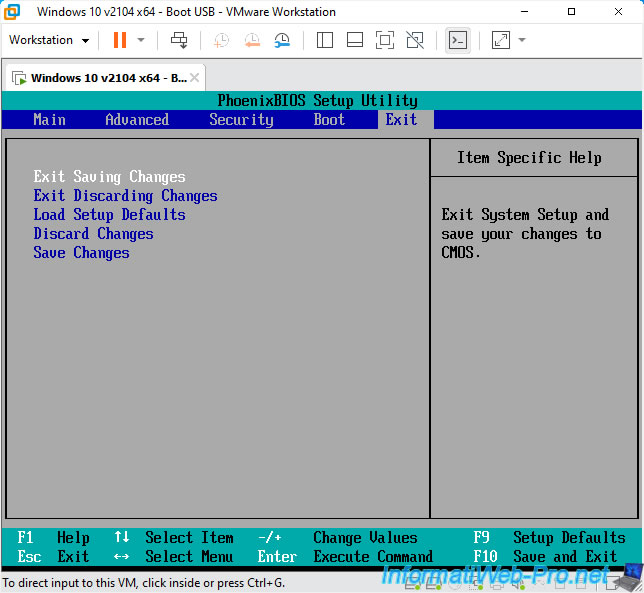
Finally, go to the "Exit" tab and use the "Exit Saving Changes" option.
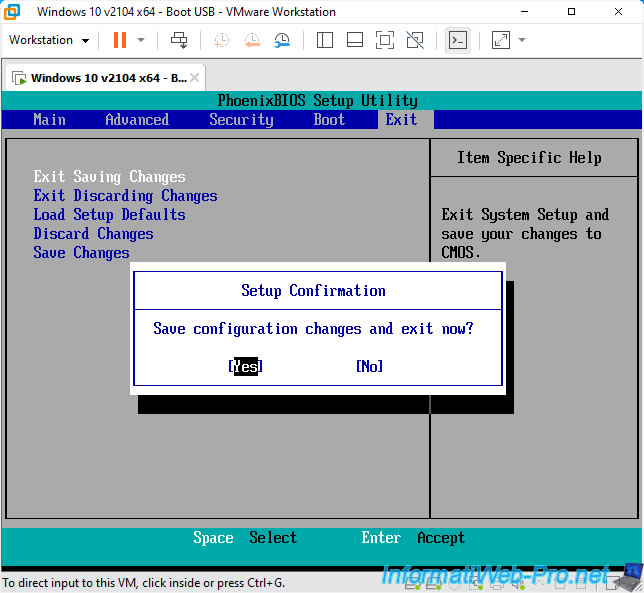
Confirm saving changes by answering "Yes".
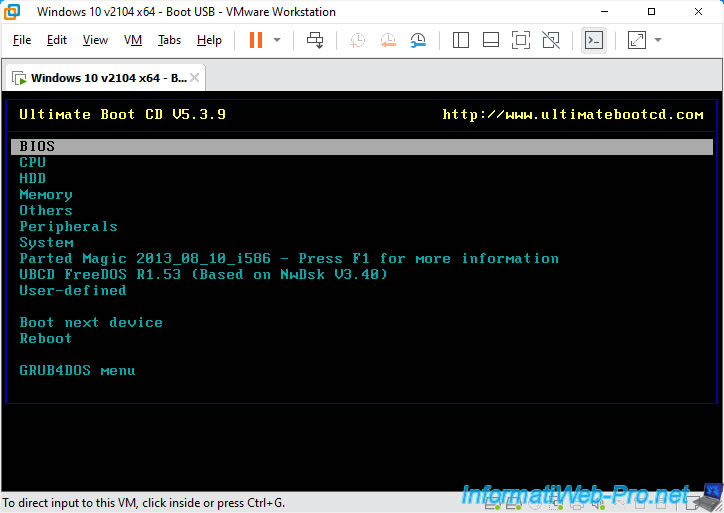
As expected, the virtual machine will start on your USB key.
5. Boot to USB device from UEFI firmware
If your bootable USB supports booting in EFI mode, then make sure your virtual machine is configured to use EFI firmware and click : VM -> Power -> Power On to Firmware.
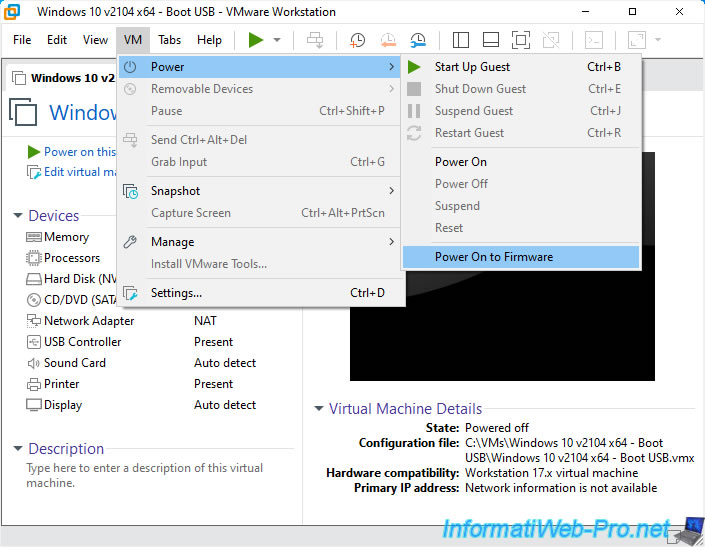
The EFI firmware of your VMware virtual machine will appear.
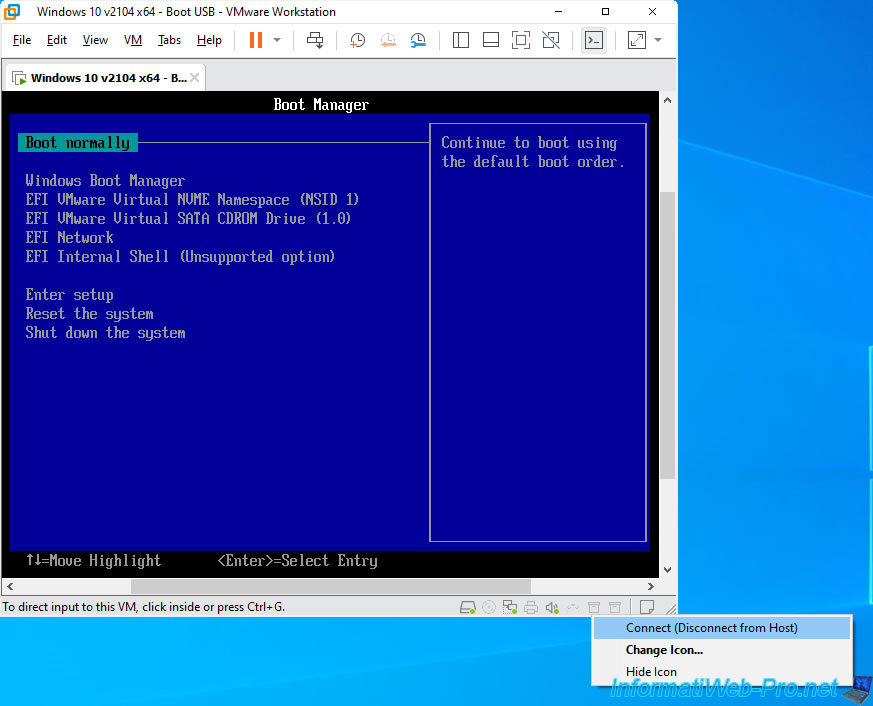
Connect your bootable USB key to your virtual machine by clicking on the icon corresponding to your USB key (at the bottom of the window), then by clicking on : Connect (Disconnect from Host).
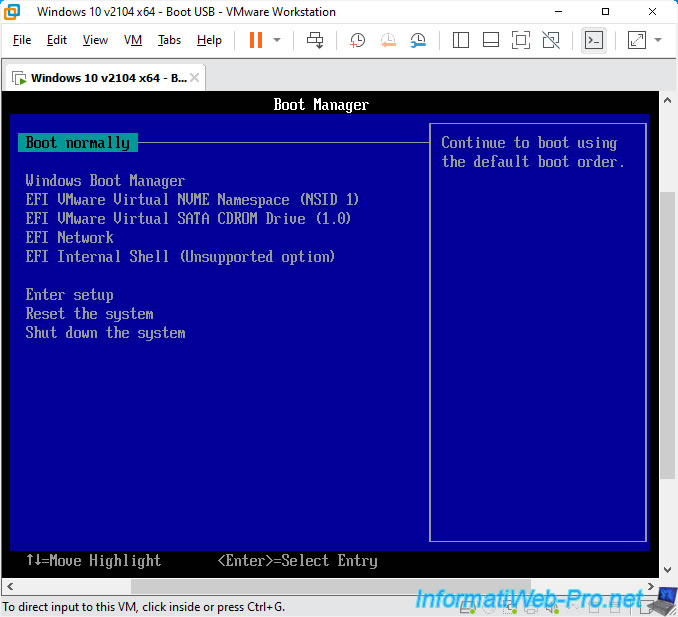
For the bootable USB key that you have just connected to your virtual machine to appear, select the "Enter setup" line and press Enter.
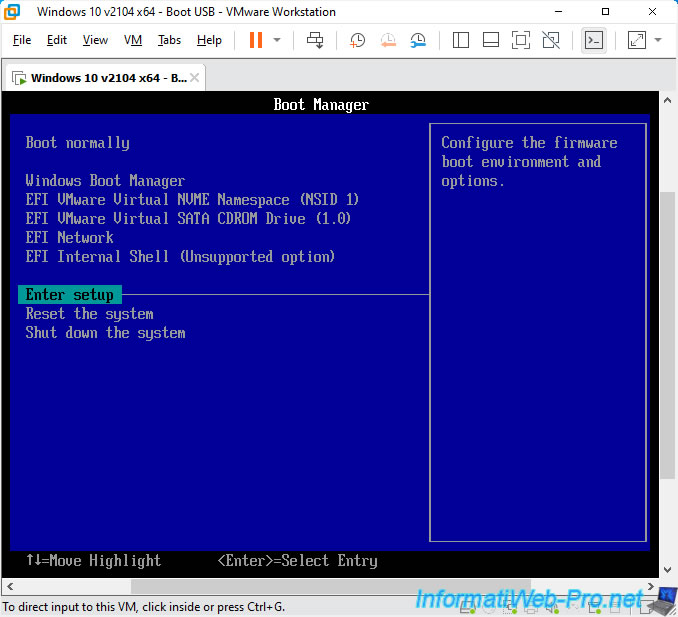
Then, return to the main menu by pressing "Esc".
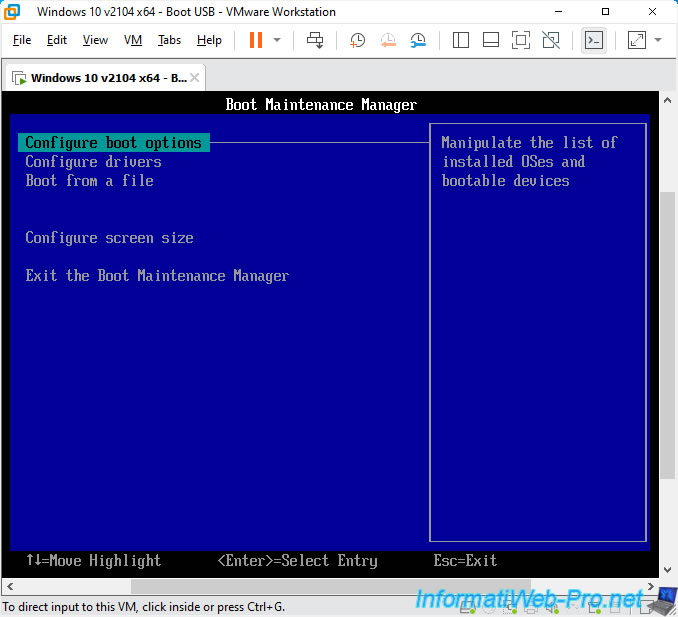
Select the "EFI USB Device" option that appears and press Enter.
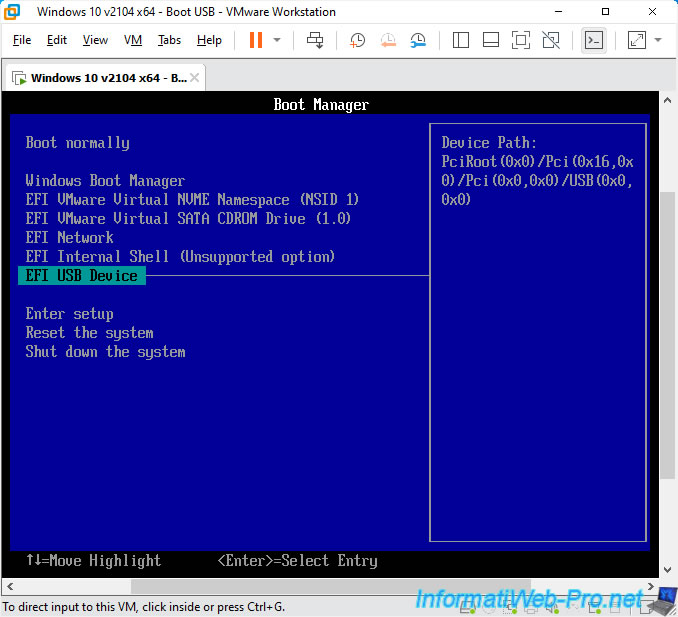
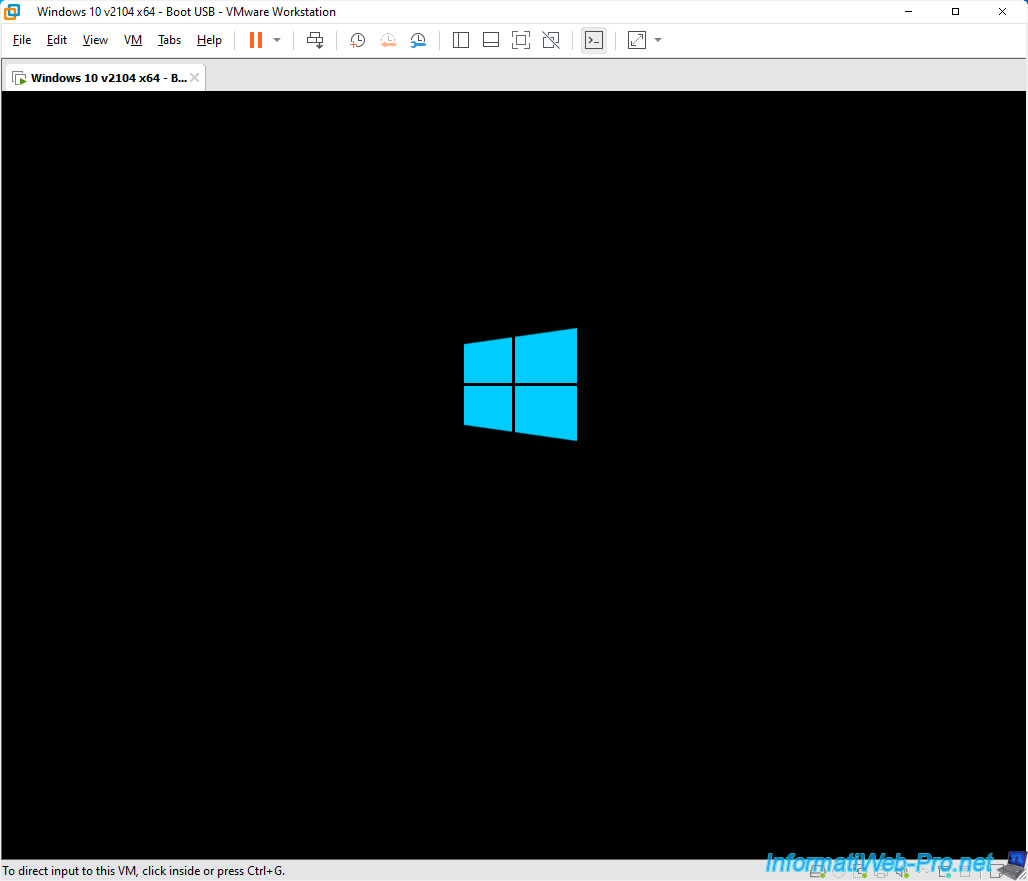
As expected, your virtual machine boots on your bootable USB key.
Share this tutorial
To see also
-

VMware 3/16/2013
VMware Workstation - Boot a VM on the BIOS / EFI firmware
-

VMware 2/7/2020
VMware Workstation 15 - Installation on Linux
-

VMware 12/24/2021
VMware Workstation 15 - Slice the virtual hard disk of a VM
-

VMware 12/10/2021
VMware Workstation 15.5 - Convert a Virtual PC virtual machine to a VMware VM
No comment