Virtualize Unraid 6.9.2 with VMware Workstation 17.5.1
- VMware
- VMware Workstation
- 11 December 2025 at 08:45 UTC
-

- 2/5

3.2. Add missing SATA virtual hard drives for Unraid array
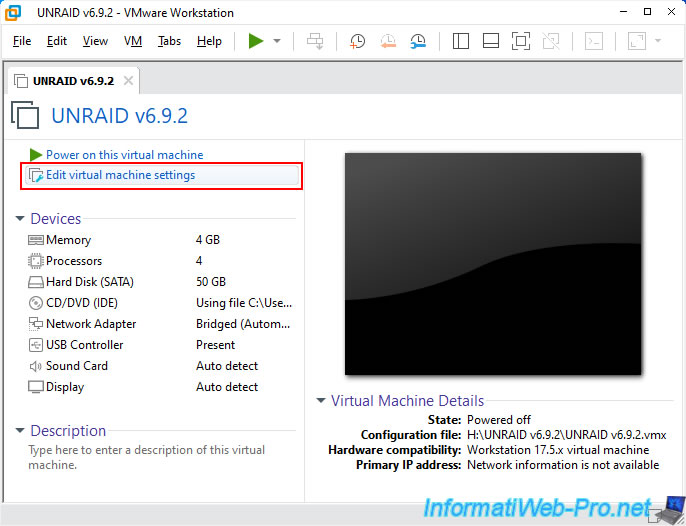
Before starting your virtual machine, click on: Edit virtual machine settings.
Click on "Add" (at the bottom of the window).
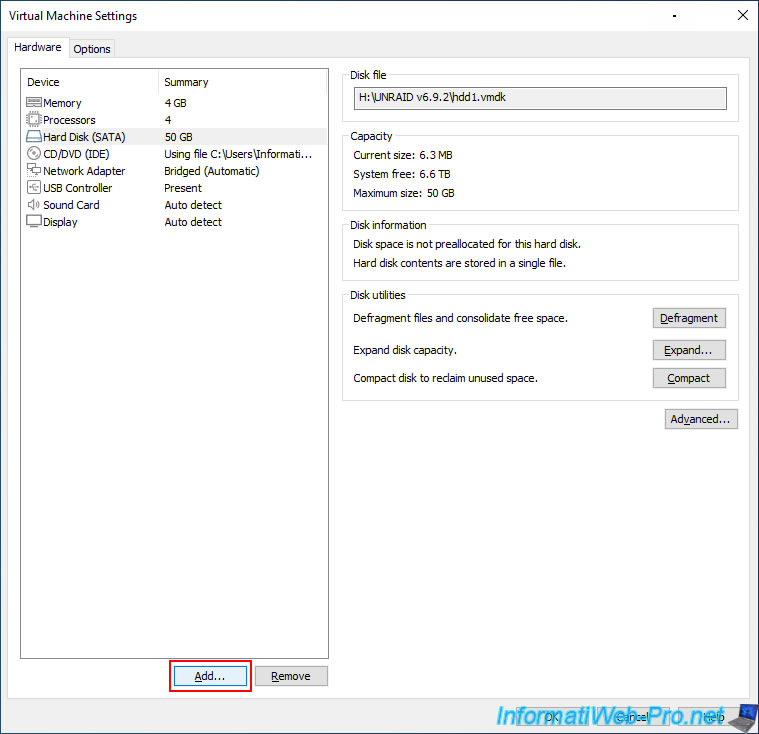
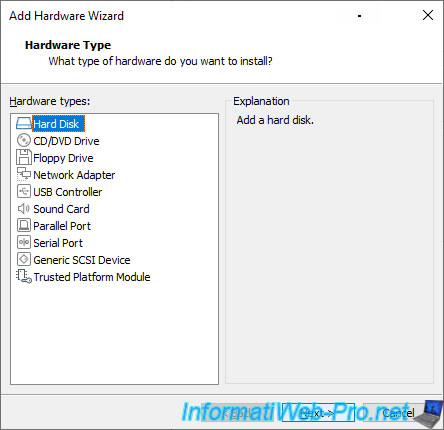
Select "Hard Disk" and click Next.

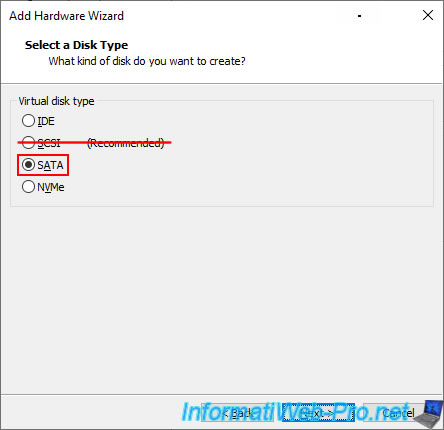
Select "SATA" as the virtual hard drive type (as you did when creating your virtual machine).
Note: as a reminder, SCSI drives are not recognized by Unraid.
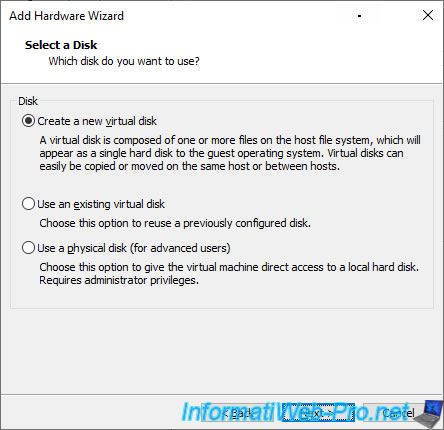
Select "Create a new virtual disk" to create a new virtual hard disk.
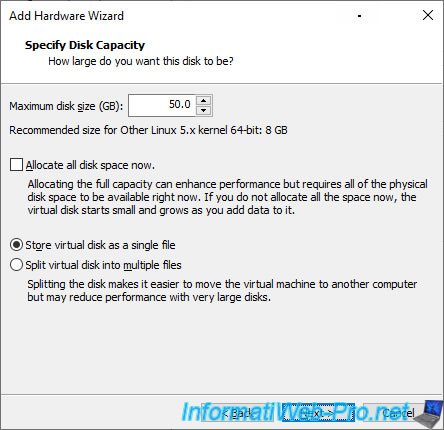
Specify the same capacity (size) for this new virtual hard drive and click Next.
In our case: 50 GB.
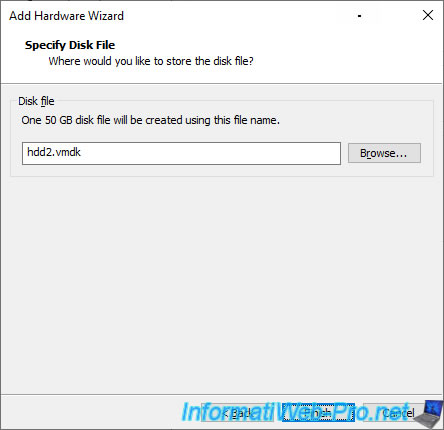
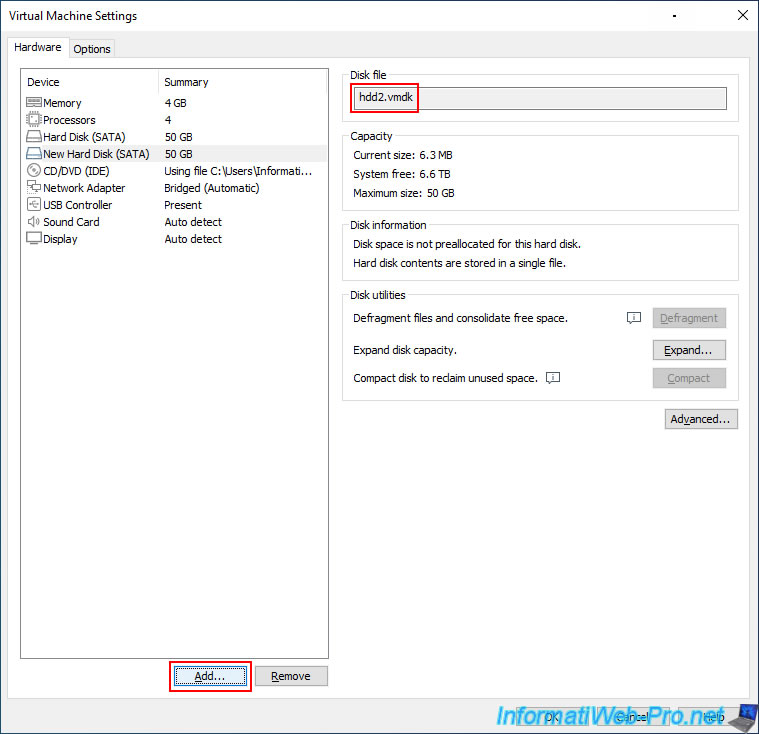
Specify "hdd2.vmdk" for this 2nd virtual hard disk.
Your second virtual hard drive has been created.
Click "Add" again to add the third virtual hard drive to the Unraid array.
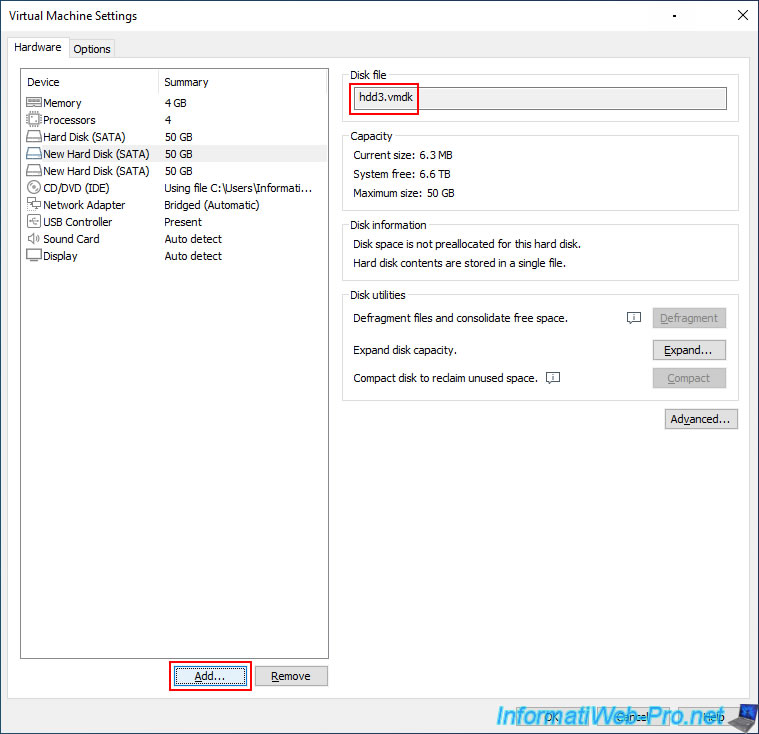
Create a new SATA virtual hard disk with the same capacity (size) as the other 2 virtual hard disks, and specify "hdd3.vmdk" for the file name.

Your third virtual hard drive has been created.
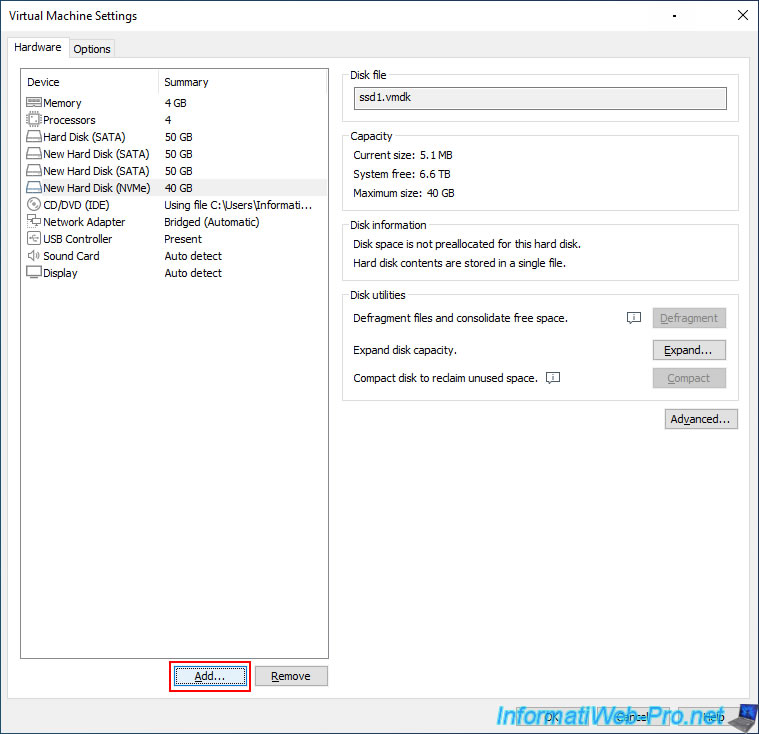
Click "Add" again to add the two virtual SSDs for the Unraid cache.
3.3. Add NVMe Virtual SSDs for Unraid Cache
In Unraid, you can configure a device pool, which, by default, will be named "cache."
For this cache, you can use a single disk or multiple disks. Since this is a cache, you're expected to use SSDs (although this isn't mandatory).
We'll therefore use virtual hard drives connected via NVMe (which is the connection used by new SSDs that you can add directly to a motherboard).
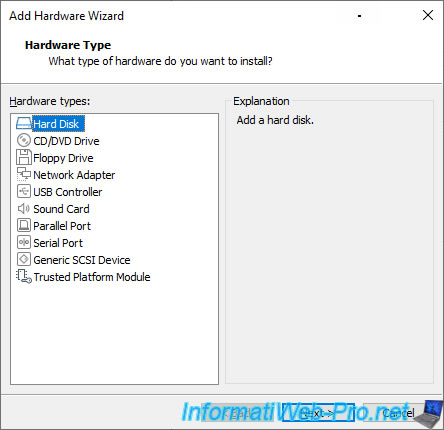
In the "Add Hardware Wizard" window, select "Hard Disk".
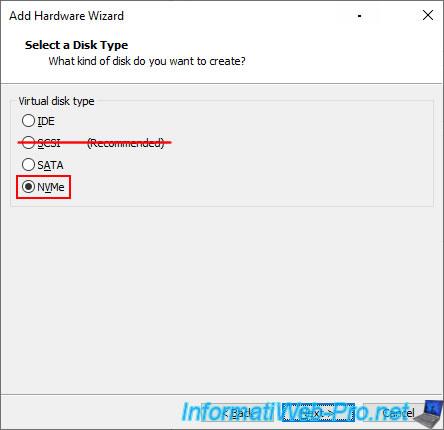
Select "NVMe" (to simulate the use of an SSD).
Note: SCSI virtual hard drives are not supported by Unraid.
Select "Create a new virtual disk" to create a new virtual hard disk.

Indicate the capacity (size) you require.
Note: this size may differ from the size specified for your SATA hard drives.
However, it must be identical for all virtual SSDs you create.

This time, specify "ssd1.vmdk" as the file name.
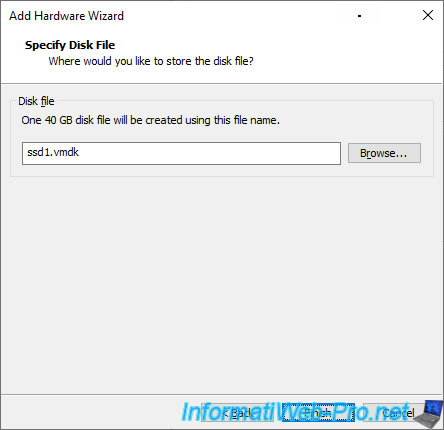
Your first virtual NVMe SSD appears.
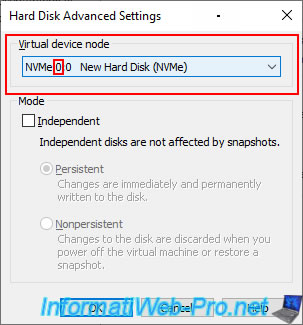
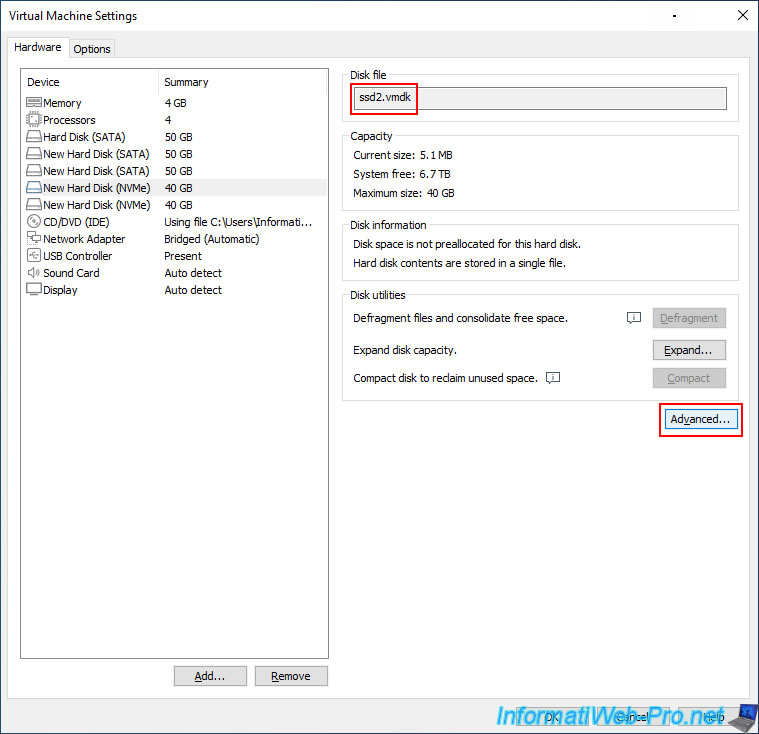
Click the "Advanced" button for this virtual NVMe SSD.
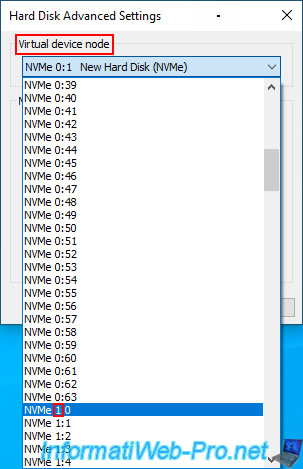
Note: according to our tests, Unraid only recognizes one NVMe SSD per controller.
It is therefore necessary to manually modify the position of each virtual NVMe SSD.
Note that this issue does not occur for SATA virtual hard drives.

In the "Virtual Device Node" section, you can see that it is connected by default at the "0:0" position.
You can leave this value for the first virtual NVMe SSD.
Note: each virtual NVMe SSD must be connected to a different NVMe controller. The first digit must therefore be different for each virtual NVMe SSD used.
For example: 0:0, 1:0, 2:0, ...
If you connect multiple virtual NVMe SSDs to the same NVMe controller (0:0, 0:1, 0:2, ...), Unraid will only recognize one per NVMe controller.
Then, click "Add" to add the 2nd NVMe virtual SSD.
Select "Hard Disk" again.
Select "NVMe" again (to simulate using an SSD).

Specify "ssd2.vmdk" as the file name.

Your second virtual SSD has been created.
Click "Advanced" to change its location on the NVMe controllers.
For this second virtual SSD, in the "Virtual Device Node" section, select the "NVMe 1:0" position.
This will ensure your virtual SSDs are connected to the "0:0" and "1:0" positions.
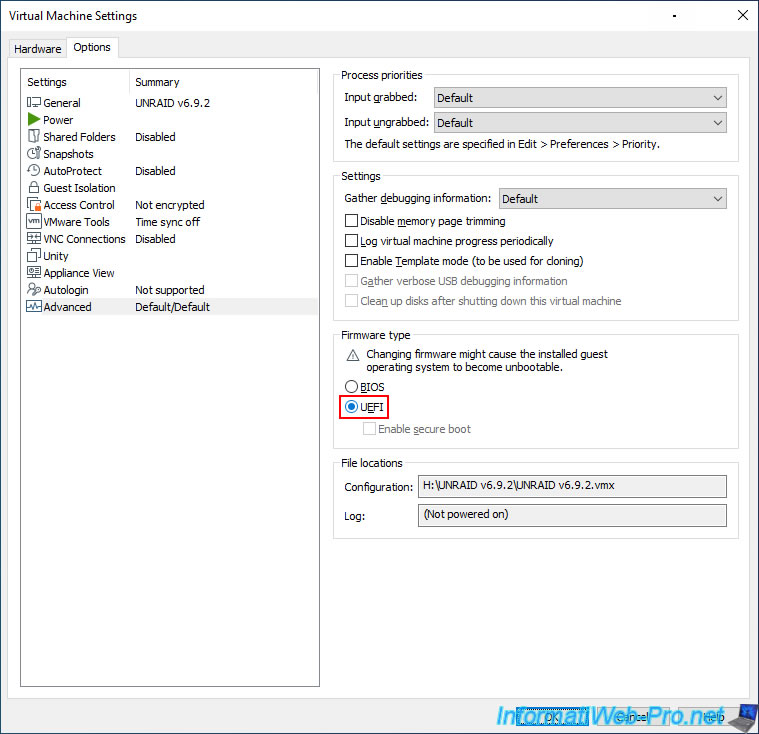
3.4. Configure the VM to boot in UEFI mode
If you enabled UEFI support when creating your Unraid USB key (by checking the "Allow UEFI Boot" box), you will need to configure your virtual machine to boot in UEFI mode.
To do this, go to the "Options" tab, then "Advanced" and select "Firmware type: UEFI".
Now, click OK.
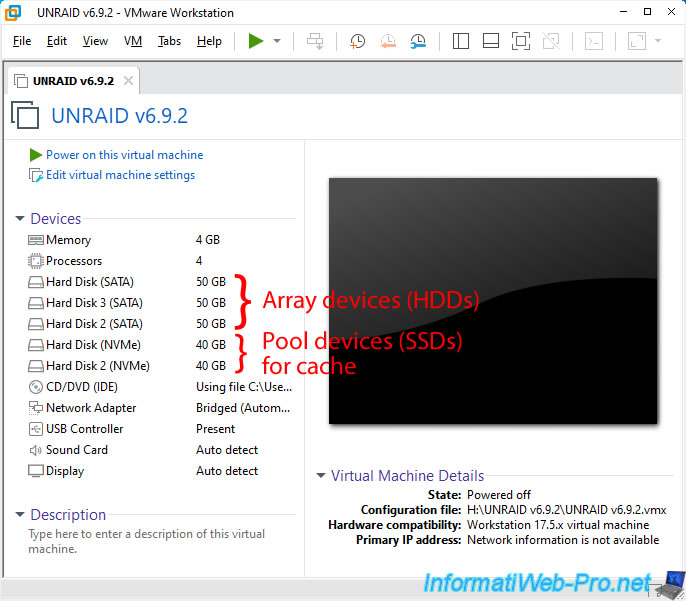
The configuration of your virtual machine appears, including:
- the three SATA virtual hard drives for the Unraid array.
- the two NVMe virtual SSDs for the Unraid cache.
Share this tutorial
To see also
-

VMware 1/31/2020
VMware Workstation 16 / 15.5 - Virtualize Windows XP to make it fluid
-
VMware 6/16/2023
VMware Workstation 17 / 16 - Enable Jumbo frame support
-
VMware 11/12/2025
VMware Workstation 17.5.1 - Virtualize VMware ESXi 7.0
-
VMware 1/27/2020
VMware Workstation 9 - Manage your VMs from a web interface
No comment