- VMware
- 03 December 2021 at 09:52 UTC
-

- 1/2

Most of the time, tutorials on the Internet explain how to connect a physical (real) USB key to a virtual machine for use from the virtual machine.
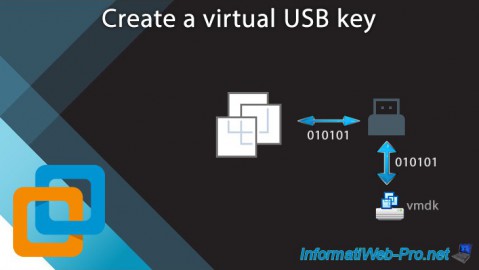
However, we recently noticed that it was possible to create virtual USB keys (in the form of ".vmdk" files) that we can then plug into our virtual machine.
The virtual machine will therefore think that it's an USB key, whereas in reality it will be a simple VMDK file on the host PC which will be plugged in connected to the virtual USB 2 (EHCI) controller of the virtual machine.
This tutorial will therefore allow you to test different programs that require an USB key without having to buy or use a real USB key.
Thus, in case of problem, your real USB key will not be in danger.
Warning : since version 16.2.1 of VMware Workstation Pro, a restriction has been added to the configuration file (.vmx) of new virtual machines.
This prevents you, by default, from connecting USB devices from the VMware Workstation Pro window.
It is therefore necessary to disable this restriction by following our tutorial "VMware Workstation 17 / 16 - Unable to connect an USB key to a VM (solution)" so that the virtual USB key can be connected to your virtual machine.
- Create a virtual USB key using the VMware Virtual Disk Manager
- Configure the virtual machine
- USB key recognized in the virtual machine
- Create the file system on the virtual USB key
- Virtual USB key test
- Automatic change of the virtual USB key identifier (ID)
- Rename the .vmdk file
- Convert and/or change the uuid of the .vmdk file
1. Create a virtual USB key using the VMware Virtual Disk Manager
In the VMware Workstation folder, you will find a "vmware-vdiskmanager.exe" executable file which corresponds to : VMware Virtual Disk Manager.
This small utility allows you to create virtual disks in vmdk format.
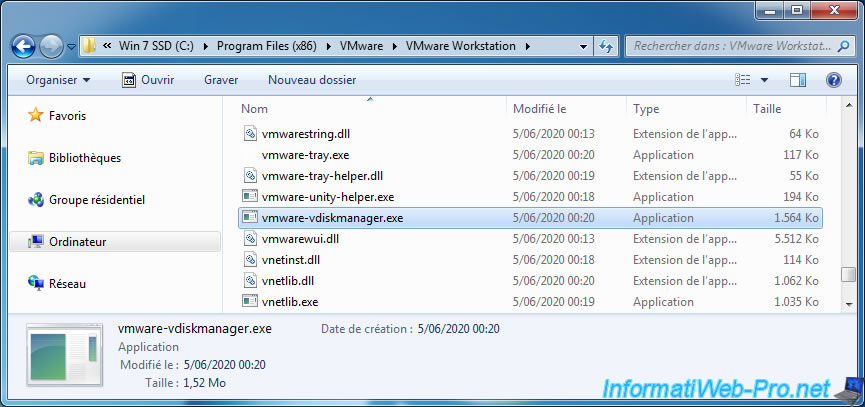
To use it, open a command prompt (cmd) and navigate to the VMware Workstation folder.
Generally, VMware Workstation Pro is installed in 32-bit (x86).
Batch
cd "C:\Program Files (x86)\VMware\VMware Workstation"
Warning : starting with VMware® Workstation Pro 26H1, VMware Workstation Pro is a 64-bit (x64) program.
Therefore, the command to use is now the one below.
Batch
cd "C:\Program Files\VMware\VMware Workstation"
Then, to create the virtual disk, we will use this "vmware-vdiskmanager.exe" program.
To know all the parameters available for this "VMware Virtual Disk Manager" program, run this program without parameter from the command prompt (cmd) or refer to the "Running the VMware Virtual Disk Manager Utility" (page 217) section of the VMware Workstation 6.0 user manual.
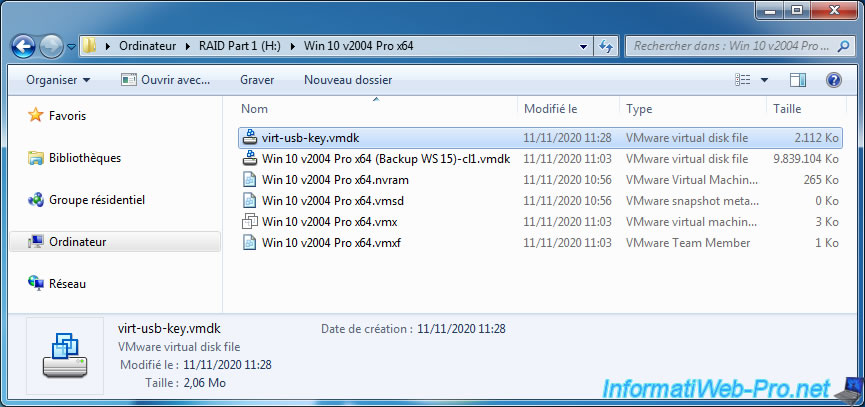
For this tutorial, we are going to create a 16 GB USB key for our "Win 10 v2004 Pro x64" virtual machine.
For that, we will use the command below, of which here are the explanations :
- -c : allows you to create a new virtual disk
- -a buslogic : allows you to specify the type of adapter to use. In our case : buslogic (BusLogic SCSI adapter)
- -s 16GB : allows you to specify the maximum size of the virtual disk to create (in MB or in GB)
- -t 0 : allows you to specify the type of virtual disk to create. 0 = dynamically sized virtual disk in one file.
So, its size will increase depending on the data you store inside and you will only have one ".vmdk" file for this virtual disk. - "H:\...\virt-usb-key.vmdk" : indicates the location and name of the vmdk file that will be created on the host PC
Batch
vmware-vdiskmanager.exe -c -a buslogic -s 16GB -t 0 "H:\Win 10 v2004 Pro x64\virt-usb-key.vmdk"
Once the command is executed, this will be displayed in the console.
Note : you can ignore the error about "VixDiskLib ... PhoneHome library". This message is not supposed to appear and is due to an oversight on the part of a VMware developer.
Also, this error no longer appears with recent versions of VMware Workstation Pro.
Plain Text
VixDiskLib: Failed to initialize PhoneHome library.
Creating disk 'H:\Win 10 v2004 Pro x64\virt-usb-key.vmdk'
Virtual disk creation successful.
Note: in some cases (perhaps depending on the version of VMware Workstation Pro used), an error may appear regarding OpenSSL.
OpenSSL allows you to manage SSL certificates and is not necessary for creating your virtual USB key.
So you can safely ignore the error below if it also appears in your case.
Plain Text
SSLConfigLoad: Failed to load OpenSSL config file.
2. Configure the virtual machine
To attach the virtual USB key to your virtual machine, you will need to modify its associated ".vmx" file, as this is not possible from the VMware Workstation GUI.
To start, stop your virtual machine (if it's not already done) and close the "VMware Workstation" window where your virtual machine appears.
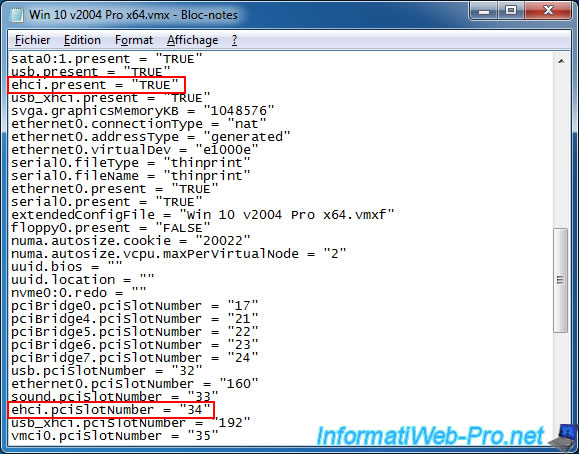
In the ".vmx" file of the VM, check that these lines are present :
Plain Text
ehci.present = "TRUE"
ehci.pciSlotNumber = "xx"
Informations :
- "xx" represents a number that can vary from a virtual machine to another virtual machine.
- ehci stands for Enhanced Host Controller Interface and stands for USB 2.0 controller.
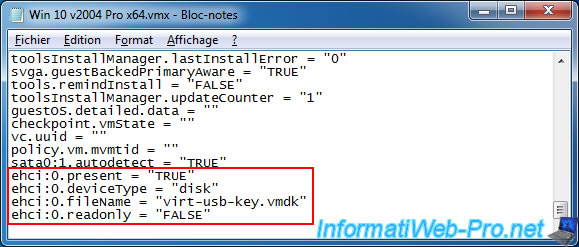
In the VM's ".vmx" file, add this :
Plain Text
ehci:0.present = "TRUE"
ehci:0.deviceType = "disk"
ehci:0.fileName = "virt-usb-key.vmdk"
ehci:0.readonly = "FALSE"
Source : Virtualizing a physical USB (boot) drive | VMware vSphere - Broadcom
Once the ".vmx" file of your virtual machine has been modified, double-click on it so that VMware Workstation uses the new settings there.
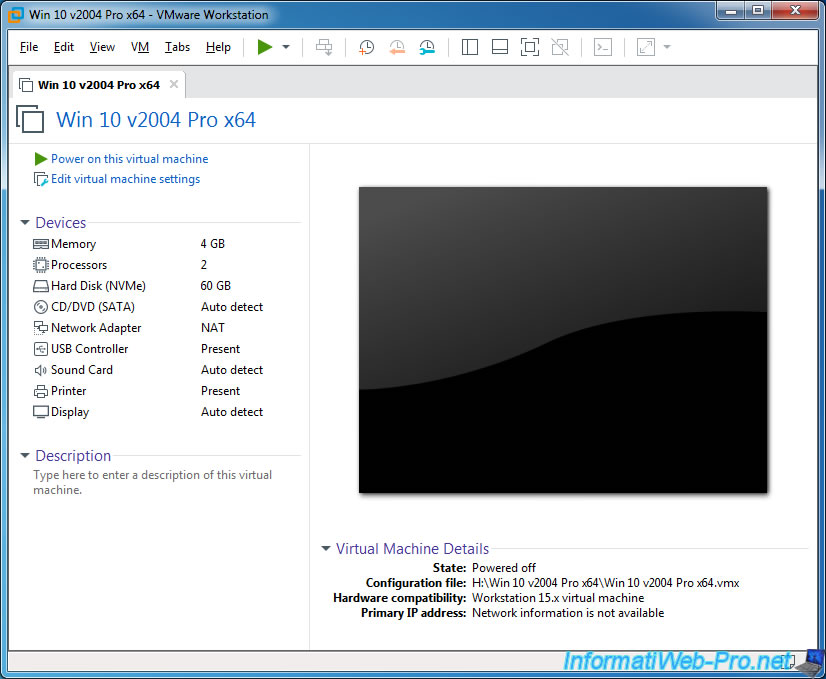
As you can see, your virtual USB drive doesn't appear here.
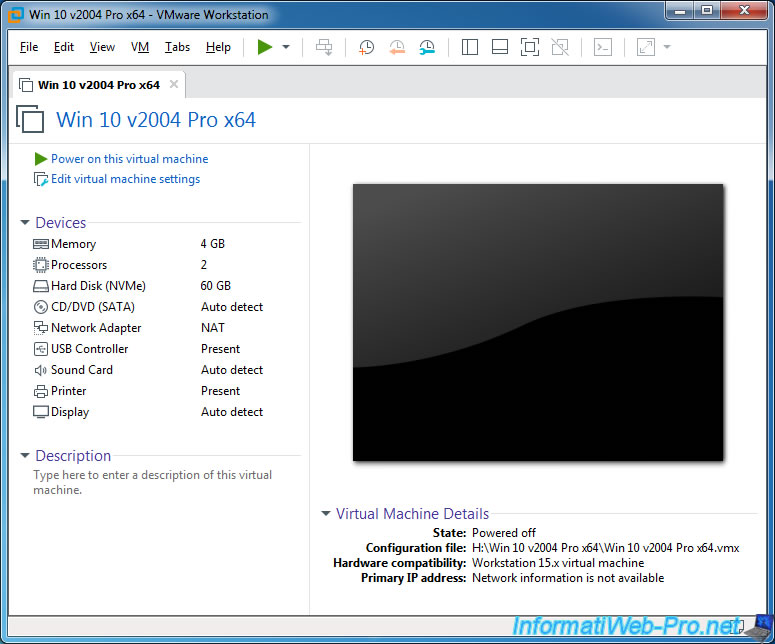
And it doesn't appear in its virtual hardware either, since it's not normally offered.
3. USB key recognized in the virtual machine
Although nothing appears in your virtual machine information, you will see informations displayed after the virtual machine is started.
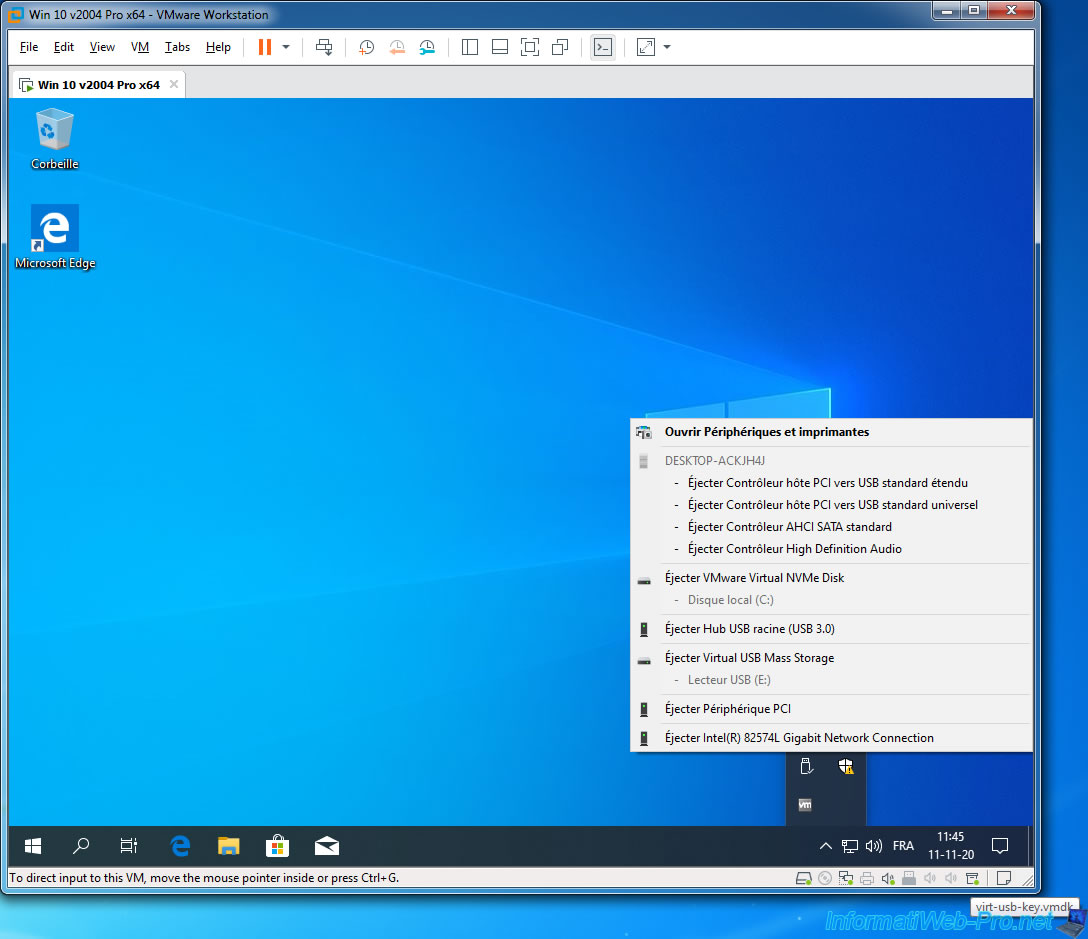
- at the bottom right of the VMware Workstation window, you will see that a "virt-usb-key.vmdk" USB device is connected to your virtual machine
- on Windows 10 (as a guest OS), you will see that a "Virtual USB Mass Storage" device is present and that it contains an USB drive
Important : if your virtual USB key does not appear in the guest operating system (Windows in this case) or at the bottom right of the VMware Workstation Pro window, make sure that the USB device restriction is not is not enabled.
Indeed, since version 16.2.1 of VMware Workstation Pro, you cannot, by default, connect USB devices to your new VMs.
To disable this restriction, refer to our tutorial cited in the warning at the very beginning of this tutorial.
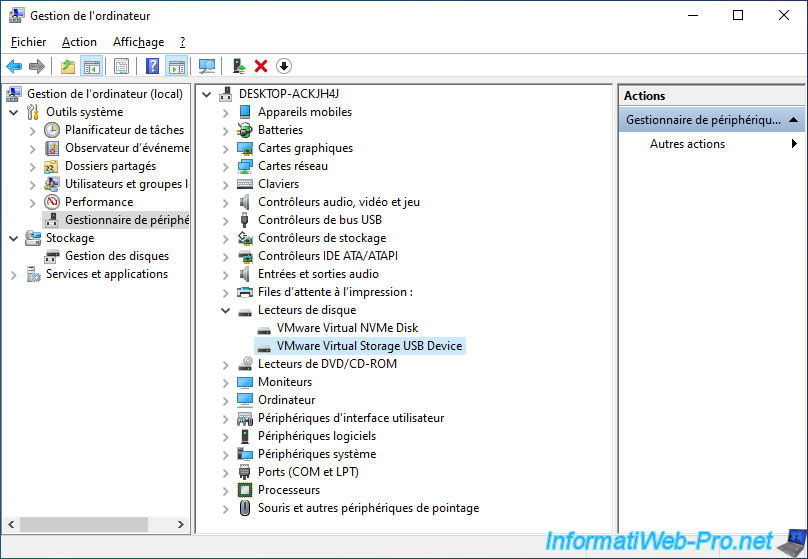
If you open the Device Manager, you will see your virtual USB key appear in the "Disk drives" section with the "VMware Virtual Storage USB Device" name.
4. Create the file system on the virtual USB key
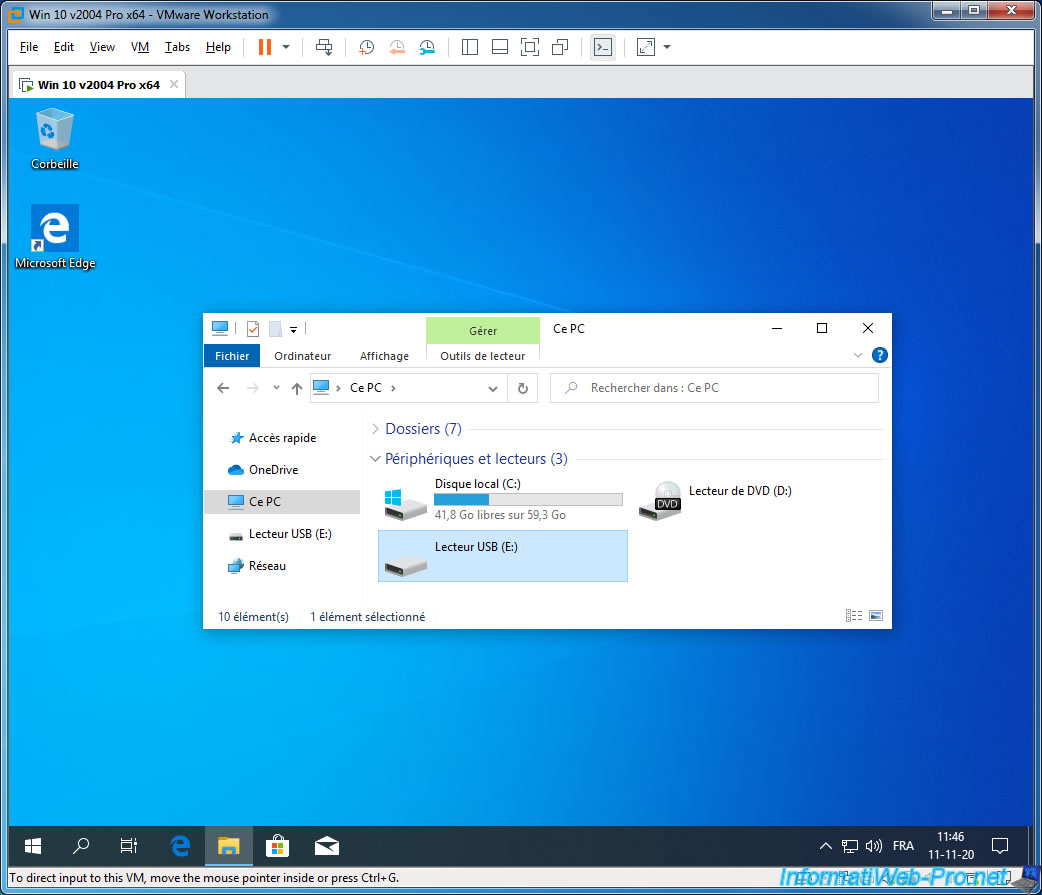
When you create a virtual disk with the utility of VMware, it doesn't contain a file system (such as : FAT32, NTFS, ...) by default.
The USB drive therefore appears in the file explorer of the guest OS, but it can't be used for the moment.
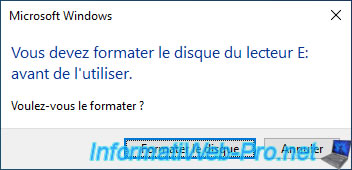
To format it (and therefore create a file system on it), double-click on it.
Windows will tell you that you need to format the drive disk before using it.
Click on "Format disk".
Change the file system to use if you want, then click : Start.
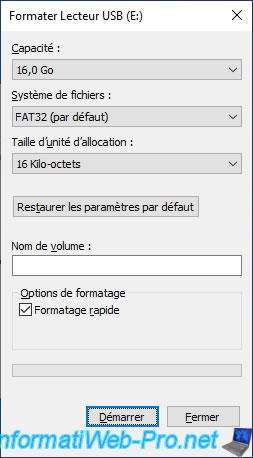
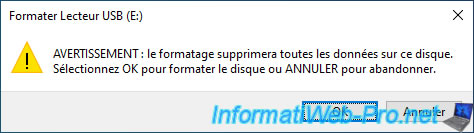
Confirm the formatting of the drive by clicking OK.
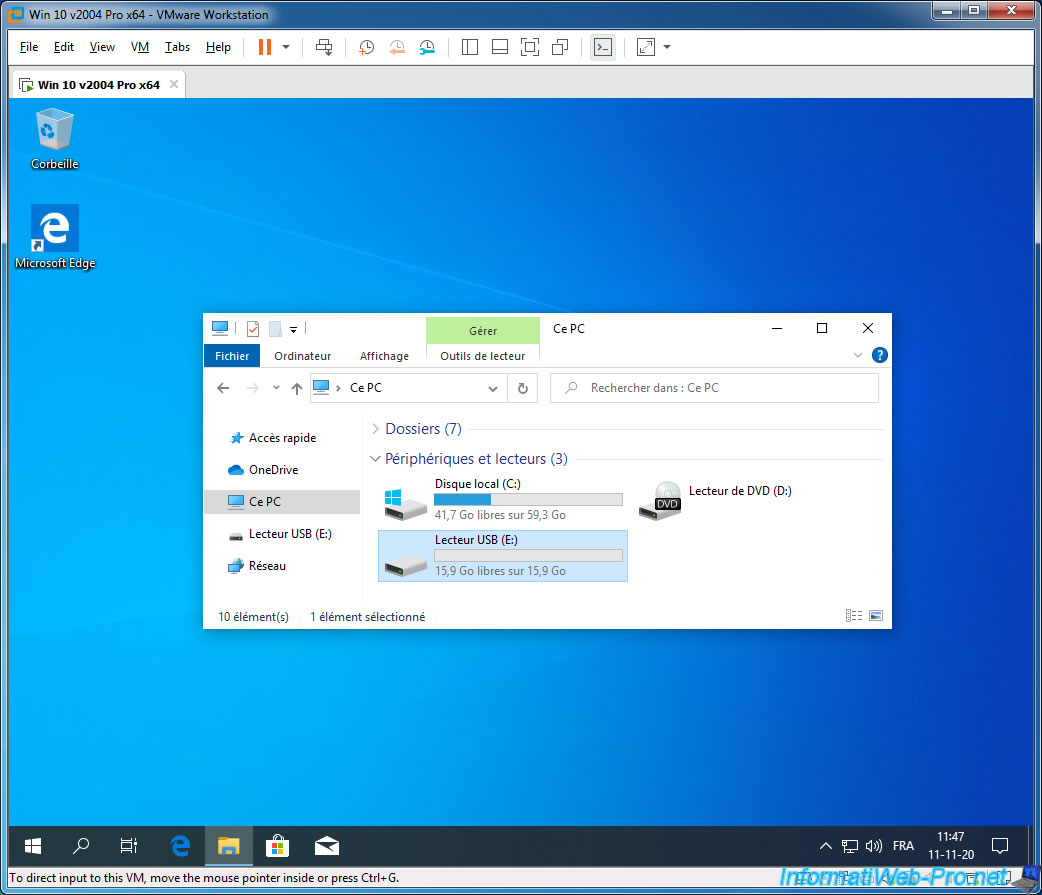
Formatting is complete.

Now, our USB drive is available and has a size of 16 GB.
Share this tutorial
To see also
-

VMware 3/16/2013
VMware Workstation - Boot a VM on the BIOS / EFI firmware
-

VMware 2/7/2020
VMware Workstation 15 - Installation on Linux
-

VMware 12/24/2021
VMware Workstation 15 - Slice the virtual hard disk of a VM
-

VMware 12/10/2021
VMware Workstation 15.5 - Convert a Virtual PC virtual machine to a VMware VM
I just want to add.
If you get the "failed to create partition" error when working with it inside the VM, simply make it a deletable disk on the host.
vmware-vdiskmanager.exe -D "c:\%path%\virt-usb-key.vmdk"
You must be logged in to post a comment