Create snapshots of a VMware Workstation 16 or 15 virtual machine (VM) to quickly restore its state
- VMware
- 21 February 2020 at 15:43 UTC
-

- 2/3
2. Snapshot management
As you can see, snapshots are very handy, but that does not stop there.
Indeed, you can also save different nested states of a single virtual machine.
Here is a small example.
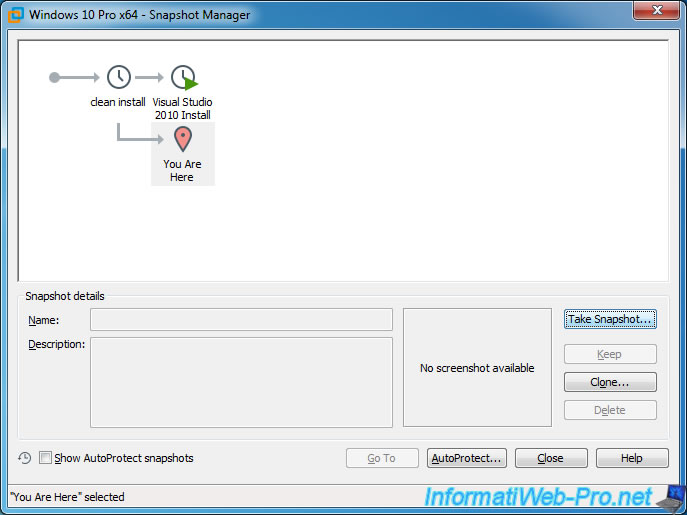
To begin, click on the 3rd icon dedicated to snapshots to open the Snapshot Manager.
![]()
For now, we have a single snapshot "clean install" that allows you to restore the virtual machine to the state it was after installing Windows 10 and VMware Tools.
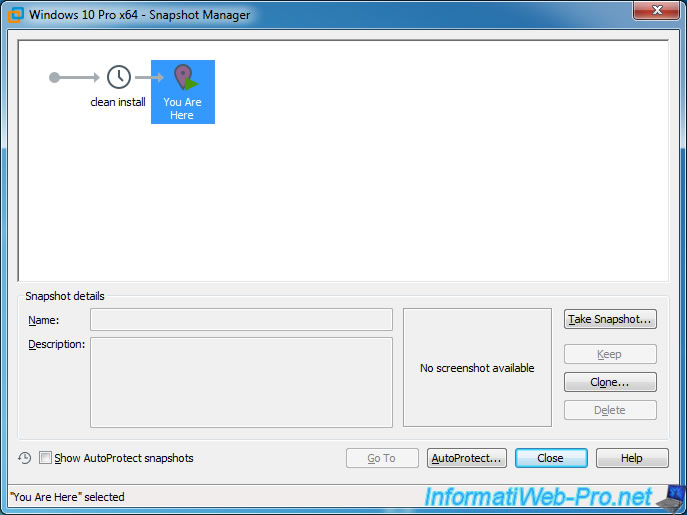
Assuming you don't know which version to use for a sophisticated program (which takes a long time to install), you will begin by installing a version of this program, and then perform some tests.
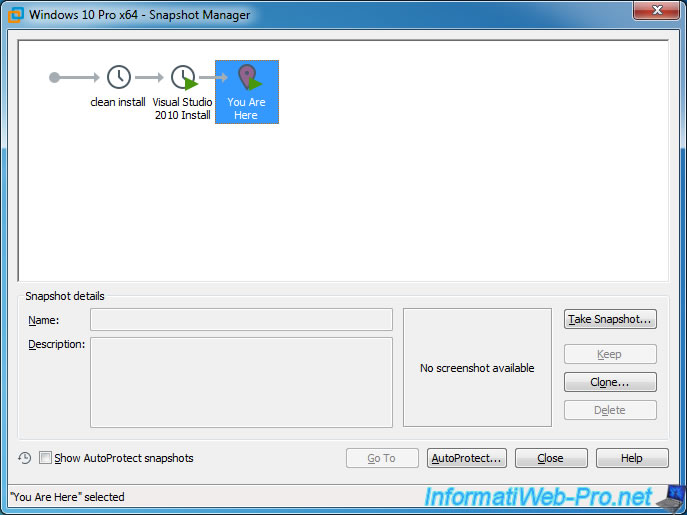
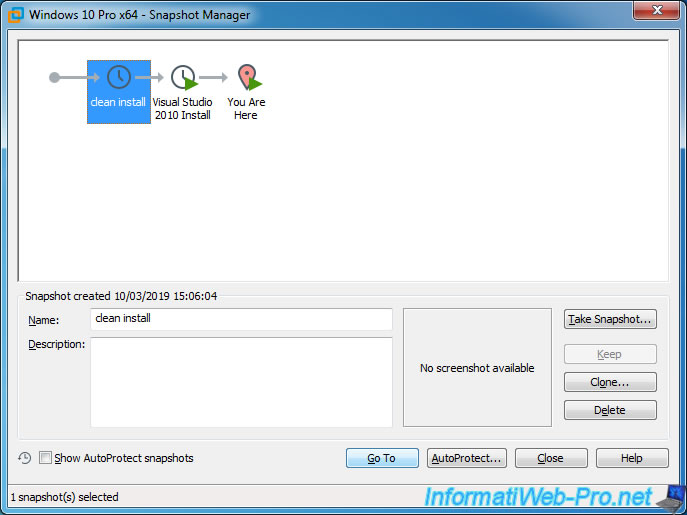
Then, as you are not completely convinced, you restore the virtual machine to its original state (before the program is installed) by selecting the snapshot "clean install" and then clicking : Go To.
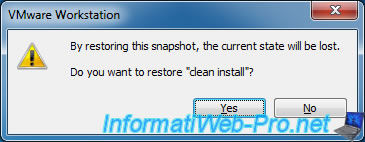
You confirm the restoration of this snapshot.
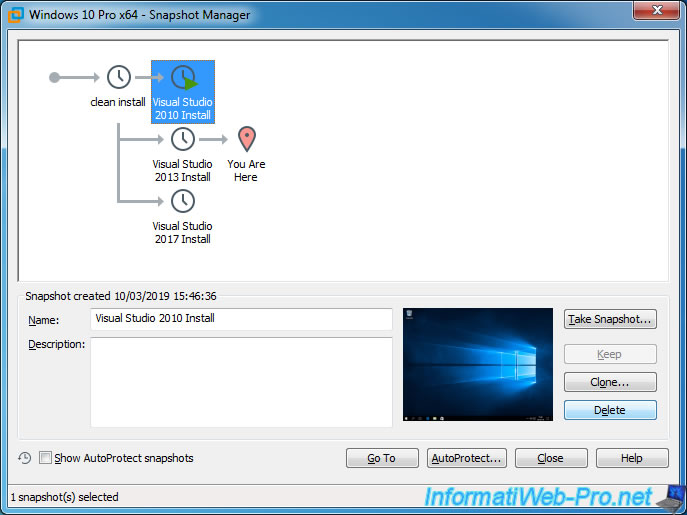
As you can see, you now have 2 different backups :
- the clean install of Windows 10 (from which you will be able to use now)
- installation of the Visual Studio 2010 program
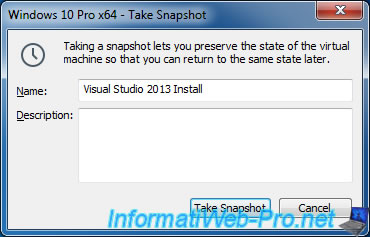
You install the 2013 version of this program, and then you create a new snapshot.
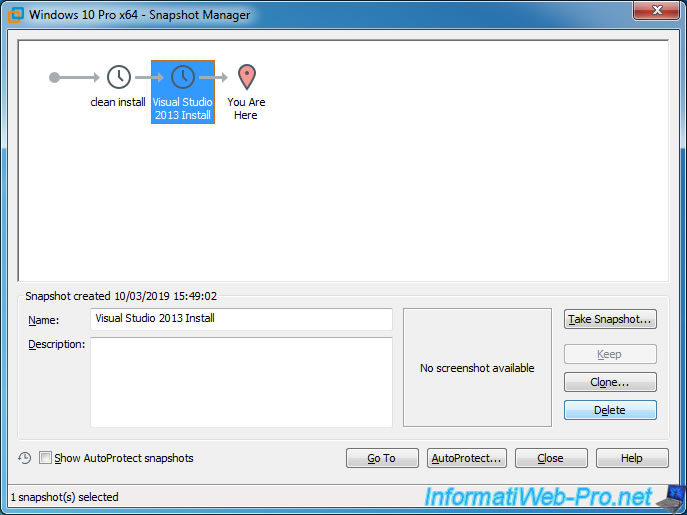
You specify "Visual Studio 2013 Install" for the name of the snapshot for example.
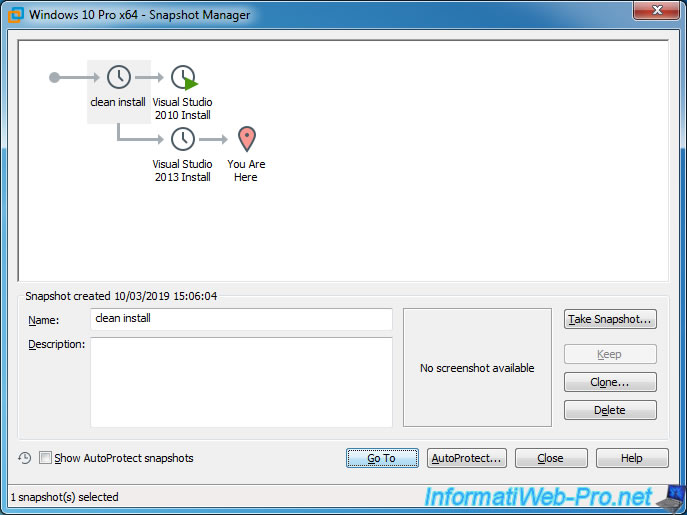
Then, you are still not convinced, but you still keep the 2 other versions already installed and saved in different snapshots.
You return to the clean installation of Windows 10 by clicking again on the "clean install" snapshot, then on : Go To.
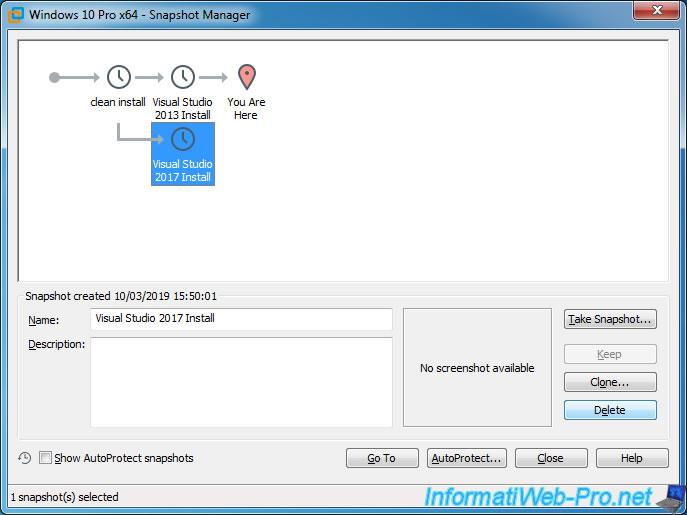
You install the new version 2017 of this program, then you save its installation by creating a snapshot again.
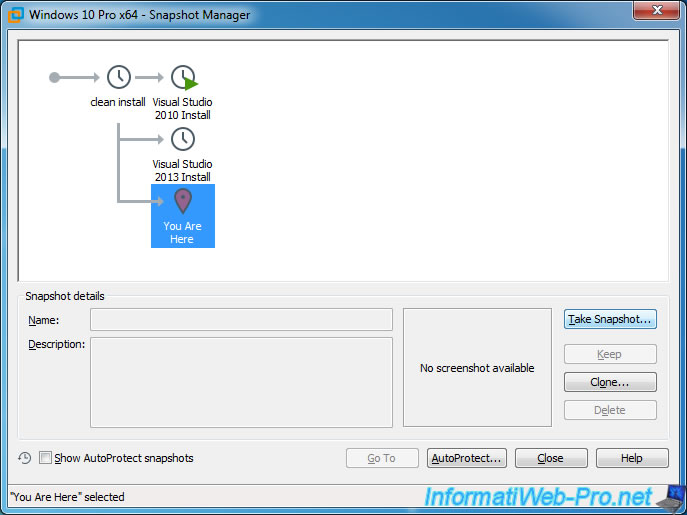
You name it : Visual Studio 2017 Install.
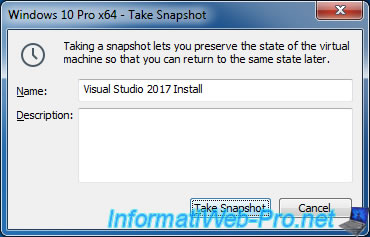
Finally, after having tested these different versions, you find that the 2013 version works better than the others and/or is better adapted to what you wish to do.
As a result, you select the "Visual Studio 2013 Install" snapshot and click "Go To".
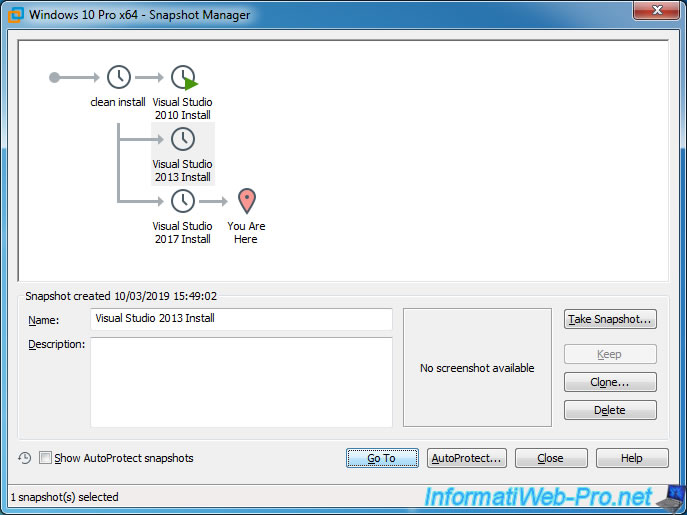
You confirm that you want to return to this state of the virtual machine.
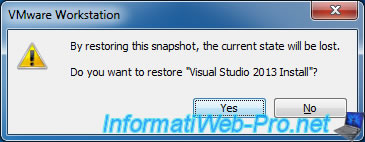
And magically, Visual Studio 2013 reappears in the virtual machine without you having to reinstall it again.
This saves you time.
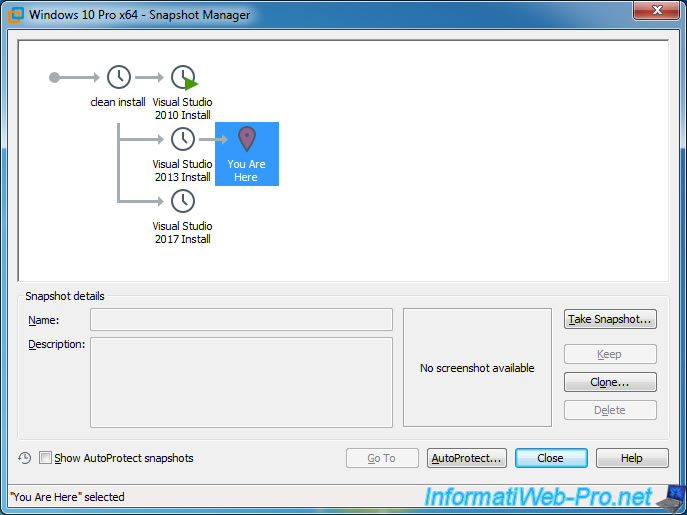
Since you are sure that you will not need the other versions tested previously, you decide to delete them to recover space on the physical hard disk of the host PC.
Indeed, although these versions are not currently accessible from the guest OS, the data created and saved in these different snapshots still take up space on the physical hard drive.
If you are sure you do not need it anymore, do not hesitate to delete it.
To do this, select the old snapshots (Visual Studio 2010 Install and Visual Studio 2017 Install in this tutorial) and click Delete.
Now, you have 3 states left :
- clean install : the clean installation of Windows 10
- Visual Studio 2013 Install : Windows 10 with Visual Studio 2013 installed cleanly
- You Are Here : the current state of the virtual machine with Windows 10, Visual Studio 2013 and any changes you made after creating the "Visual Studio 2013 Install" snapshot
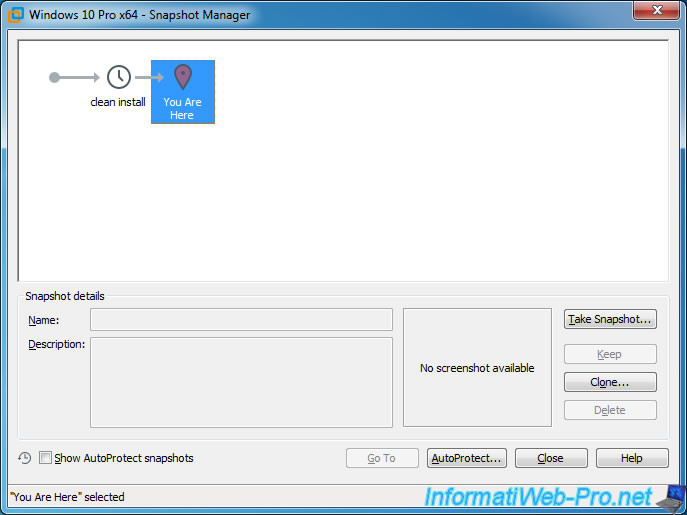
Note that if you remove the "Visual Studio 2013 Install" snapshot, you will not lose the current state of your virtual machine.
This will only recover the space released in the meantime. (For example, files created after the creation of the snapshot "clean install", but which are currently deleted in the current state of the virtual machine.)

Finally, you will have (in this case), Windows 10, Visual Studio 2013, changes made after its installation and a "clean install" snapshot to restore the clean installation of Windows 10 at any time if necessary.
Share this tutorial
To see also
-
VMware 3/16/2013
VMware Workstation - Boot a VM on the BIOS / EFI firmware
-
VMware 2/7/2020
VMware Workstation 15 - Installation on Linux
-
VMware 12/24/2021
VMware Workstation 15 - Slice the virtual hard disk of a VM
-
VMware 12/10/2021
VMware Workstation 15.5 - Convert a Virtual PC virtual machine to a VMware VM

No comment