- VMware
- 18 September 2020 at 18:08 UTC
-

- 1/2

When you want to change the boot order of a virtual machine with VMware Workstation, you have several possibilities.
In addition, the EFI interface is not as easy to use, compared to the conventional BIOS.
Note that the EFI firmware and the LEGACY BIOS used by VMware Workstation for virtual machines are identical on VMware ESXi.
If you want to change the boot order from this EFI firmware or from the LEGACY BIOS of a virtual machine present on a VMware ESXi hypervisor, you can therefore also refer to the tutorial below.
- Change the boot order in BIOS mode
- Change the boot order in UEFI mode (EFI firmware)
- Change the boot order by modifying the vmx file
1. Change the boot order in BIOS mode
If your virtual machine uses a BIOS and not the UEFI, changing the boot order is very easy.
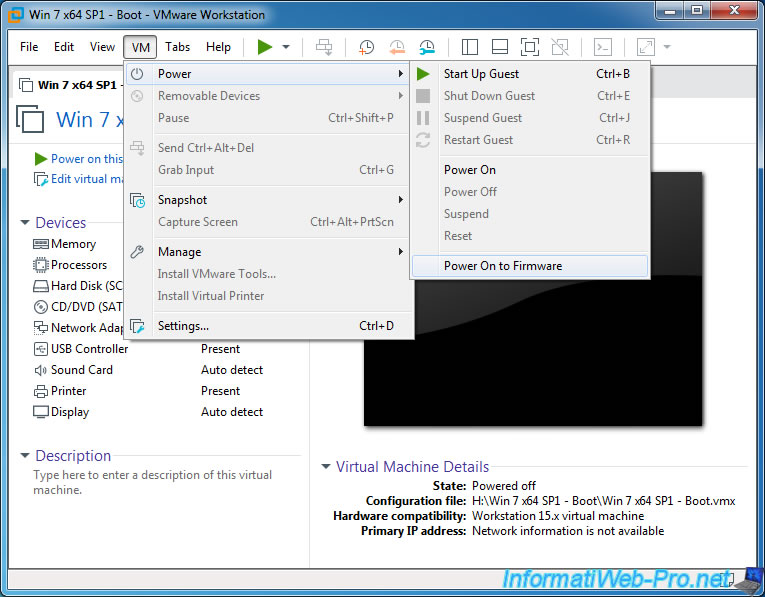
Click on : VM -> Power -> Power On to Firmware.
Go to the "Boot" tab and change the order of the desired devices :
- the floppy drive appears as "Legacy Floppy Drives" under "Removable Devices" when there is a floppy drive in your virtual machine
- virtual hard disks appear as "VMware Virtual ... Hard Drive ..." under "Hard Drive"
- the CD drive appears as "CD-ROM Drive"
- the network boot (PXE) appears as "Network boot from Intel/AMD ..."
To change the order of a device, select it with the arrows on the keyboard, then use the "+" and "-" keys to move the selected option up or down.
The one at the top is the priority for others.
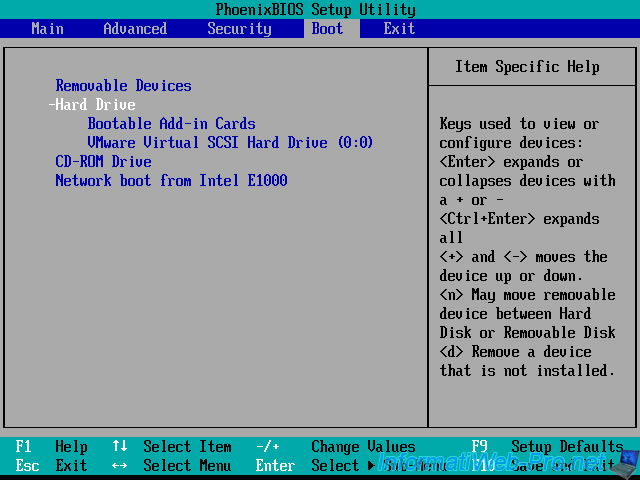
Then, press F10 to save the changes and confirm by pressing Enter.

2. Change the boot order in UEFI mode (EFI firmware)
2.1. Change the boot order from the EFI firmware
If you have created a virtual machine with EFI firmware (for example with Win 8, 8.1 or 10 as guest OS) to take advantage of secure boot, for example, you will see that changing the boot order is a little more complicated.
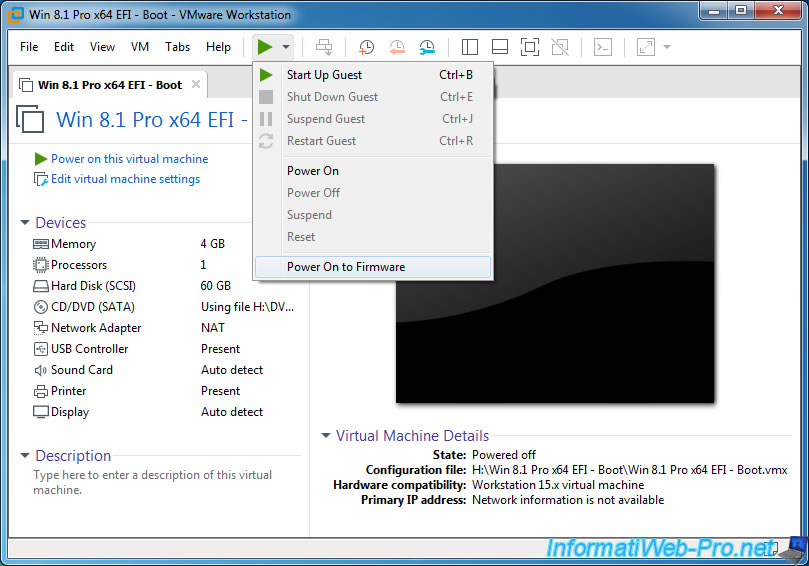
Boot your virtual machine on its EFI firmware by clicking on : Power On to Firmware.
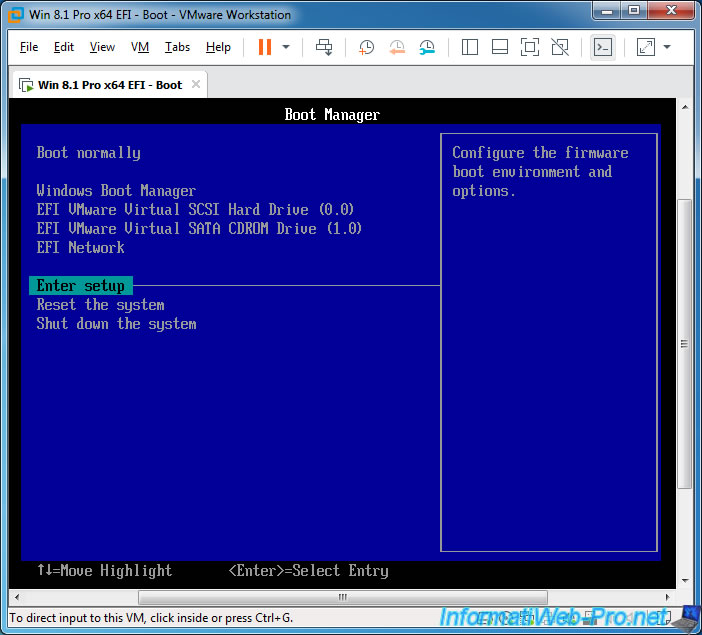
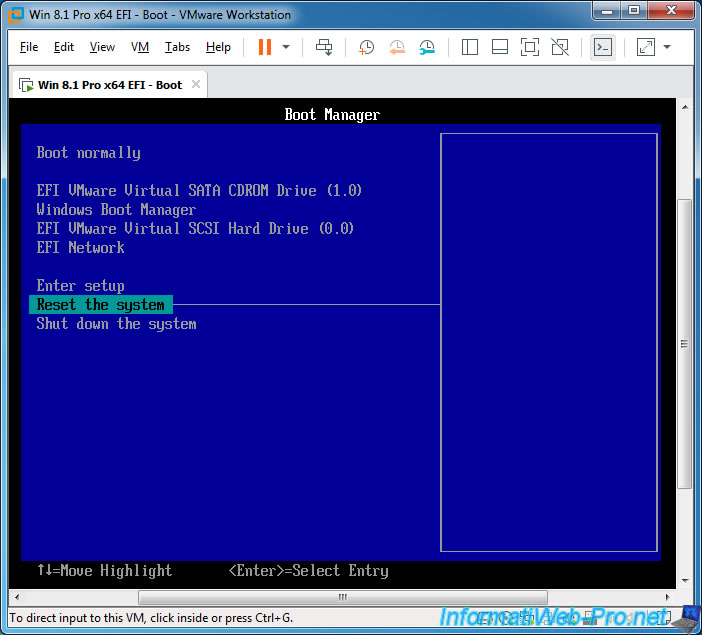
Instead of arriving on a very simple PhoenixBIOS, you arrive on an EFI Boot Manager.
Here, you have the option of booting directly on the desired device by selecting it with the arrows, then pressing Enter.
- Boot normally
- Windows Boot Manager : boot on the Windows installed in the virtual machine
- EFI VMware Virtual SCSI Hard Drive (0.0) : boot to the virtual SCSI hard drive connect to position 0.0 of the virtual SCSI controller
- EFI VMware Virtual SATA CDROM Drive (1.0) : boot to the virtual SCSI CD/DVD drive. If there is an EFI compatible CD/DVD in this virtual CD/DVD drive.
- EFI Network : boot on the network in EFI mode
The other options available are :
- Enter setup : to configure the EFI firmware and also the boot order in EFI mode
- Reset the system : to restart the virtual machine
- Shut down the system : to turn off the virtual machine
Select the "Enter setup" option and press Enter.
Select "Configure boot options" and press Enter.
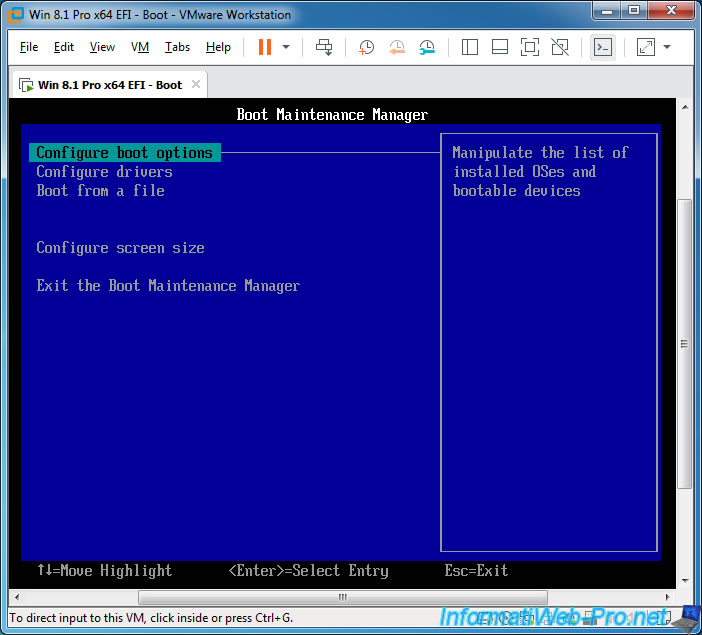
Select "Change boot order" and press Enter.
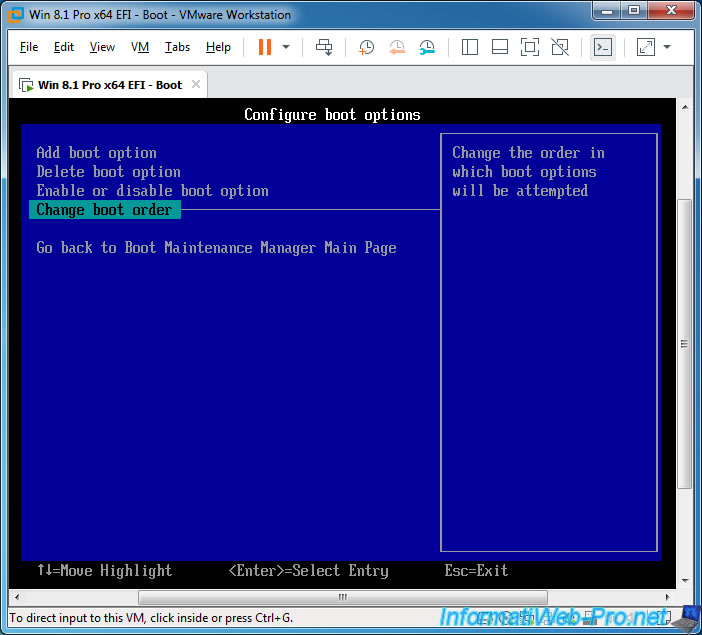
By default, all boot options are selected. Press Enter to be able to change the EFI boot order.
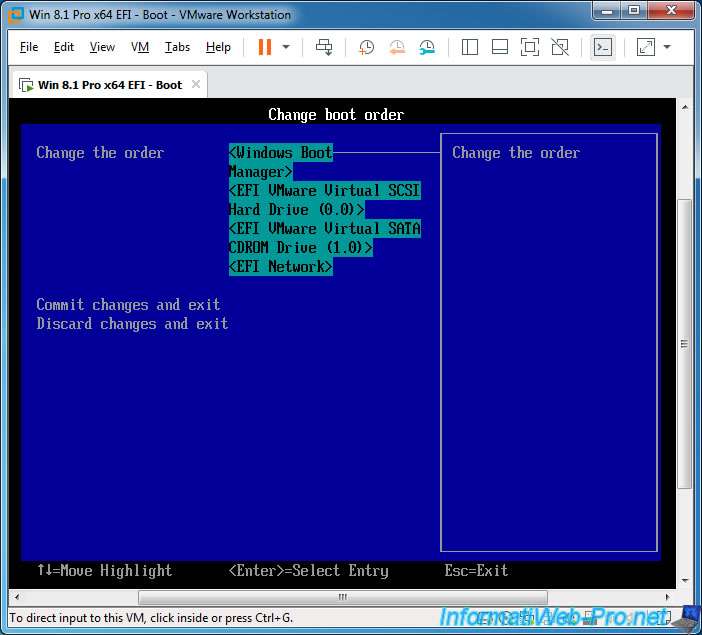
A small frame appears in the middle of the screen.
Select the device you want to move using the arrows on the keyboard.
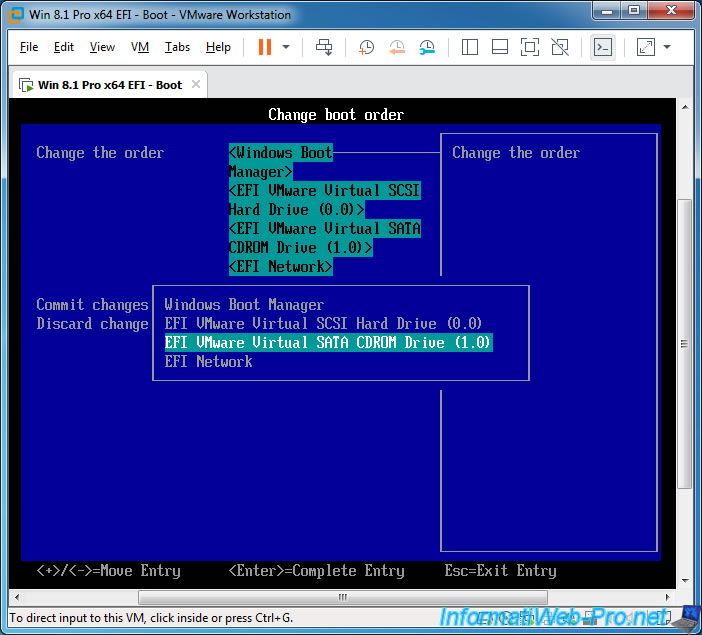
Then, use the "+" and "-" keys to move this option up or down.
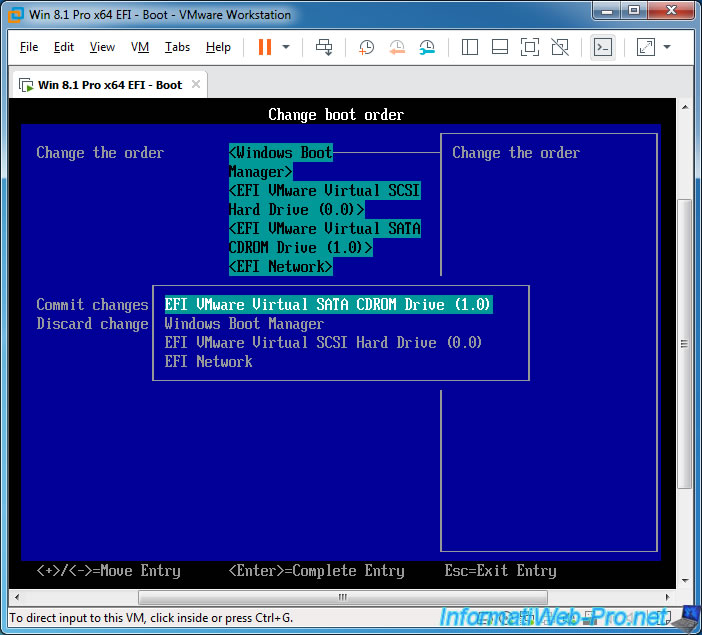
In our case, we moved the virtual CD/DVD drive to the top of the list.
Then, press Enter to make this frame disappear.
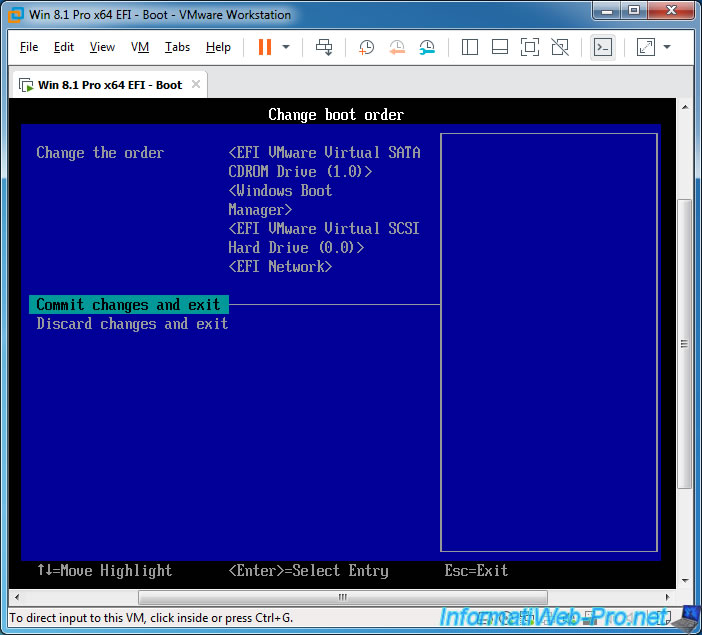
Select "Commit changes and exit" and press Enter to save the changes.
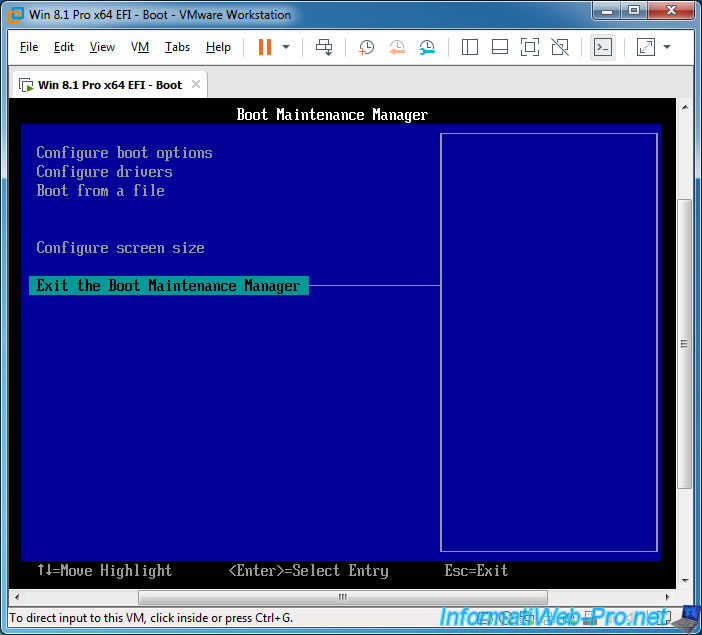
Select "Exit the Boot Maintenance Manager" and press Enter.
And restart your virtual machine by selecting "Reset the system", then pressing Enter.
Share this tutorial
To see also
-

VMware 3/16/2013
VMware Workstation - Boot a VM on the BIOS / EFI firmware
-

VMware 2/7/2020
VMware Workstation 15 - Installation on Linux
-

VMware 12/24/2021
VMware Workstation 15 - Slice the virtual hard disk of a VM
-

VMware 12/10/2021
VMware Workstation 15.5 - Convert a Virtual PC virtual machine to a VMware VM
You must be logged in to post a comment