- Windows Server
- iSCSI
- 28 June 2019 at 11:01 UTC
-

- 1/2

On Windows Server, it's possible to create iSCSI servers that can be used from other servers running Windows Server or Linux, but also from virtualization servers (like Citrix XenServer, for example).
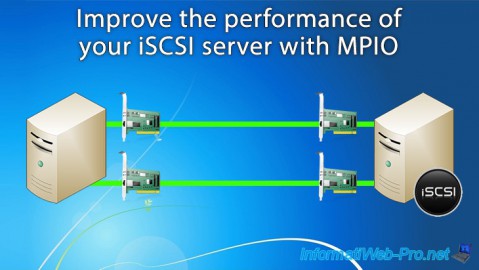
However, to prevent your iSCSI servers and their dependencies from becoming inaccessible, we recommend that you use MPIO and enable support for iSCSI.
- What is MPIO ?
- Configuration used
- Installing and configuring the iSCSI server
- iSCSI client configuration for MPIO
- Installation and activation of MPIO for iSCSI
- MPIO options for iSCSI
- iSCSI disk access test
1. What is MPIO ?
The MPIO allows you to connect to a server (for example : an iSCSI server) via multiple paths to obtain fault tolerance and/or to distribute the network load via different paths.
It depends on the option you choose at the end of the tutorial (in the properties of the iSCSI Initiator -> Devices -> MPIO -> Load Balancing Policy).
2. Configuration used
For this tutorial, we will use 2 servers running Windows Server 2012 with 2 network cards on each server.
The first server will act as an iSCSI server and the other one as an iSCSI client.
2.1. Configuring the iSCSI server
The 1st network card will be connected to the LAN and will have this configuration :
- IP : 10.0.0.101
- Mask : 255.255.255.0 (it's not an error, it's only to avoid a conflict with the other network card)
- Gateway : 10.0.0.1
- DNS : 10.0.0.1 and 8.8.8.8 (the 2nd DNS server is optional)
The 2nd network card will be connected to a switch to communicate with the client, even if the network card connected to the LAN fails.
- IP : 10.0.10.11
- Mask : 255.255.255.0
- No gateway, because this is not necessary in this case, and there is no gateway in this case on this subnet.
2.2. Configuring the iSCSI client
The 1st network card will be connected to the LAN and will have this configuration :
- IP : 10.0.0.102
- Mask : 255.255.255.0
- Gateway : 10.0.0.1
- DNS : 10.0.0.1 and 8.8.8.8 (the 2nd DNS server is optional)
The 2nd network card will be connected to a switch to communicate with the client, even if the network card connected to the LAN fails.
- IP : 10.0.10.12
- Mask : 255.255.255.0
3. Installing and configuring the iSCSI server
To install the iSCSI server, refer to step 1 of our tutorial : Install and configure an iSCSI server and an iSCSI client
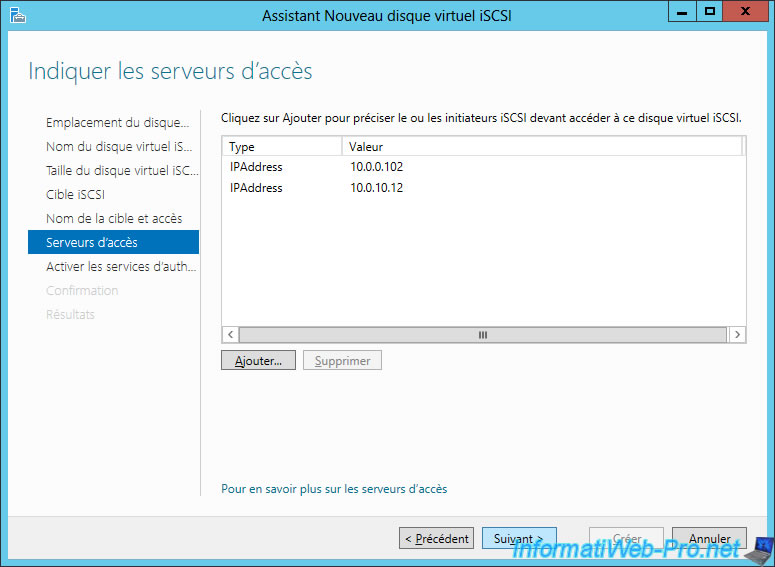
Then, when configuring the iSCSI virtual disk (explained in the tutorial mentioned above), don't forget to allow the IP addresses of your client.
In our case, this iSCSI client (iSCSI initiator) has the following IP addresses :
- 10.0.0.102
- 10.0.10.12
4. iSCSI client configuration for MPIO
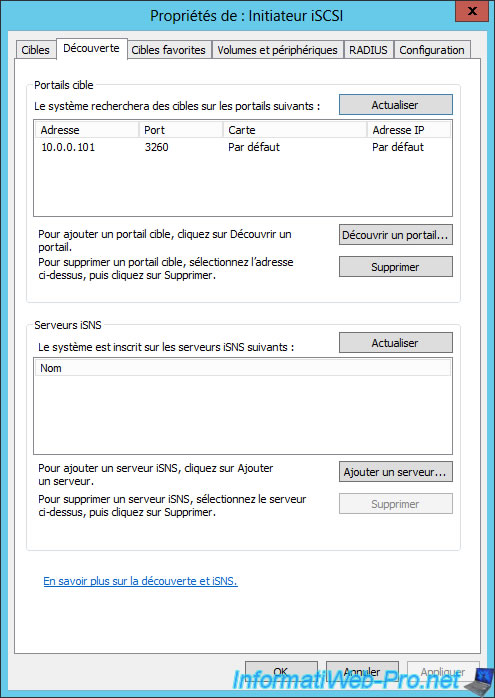
On the client PC, run the "iSCSI Initiator" program and go to the "Discovery" tab.
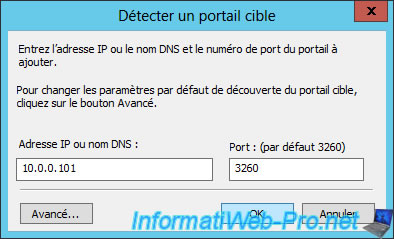
Then, click on "Discover Portal".
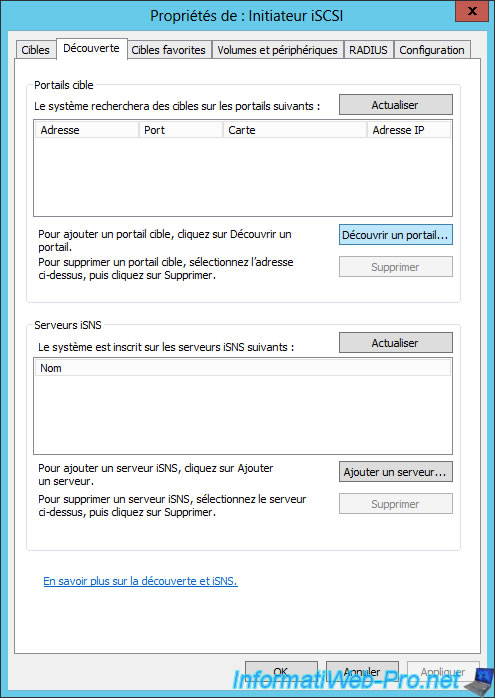
Enter one of the IP addresses of your iSCSI server.
In our case, we used the IP address of the network card connected to the LAN.
The target portal is displayed.
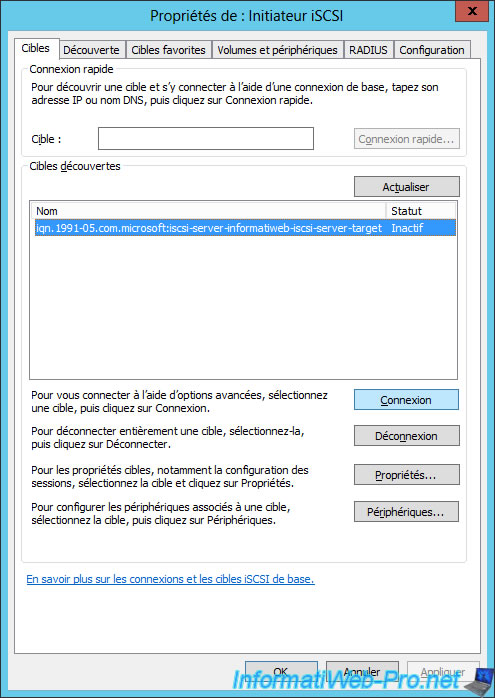
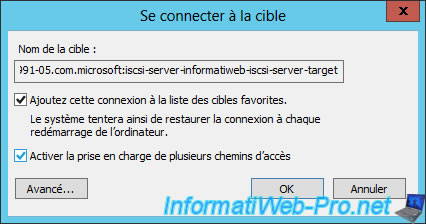
In the "Targets" tab, you should see a target.
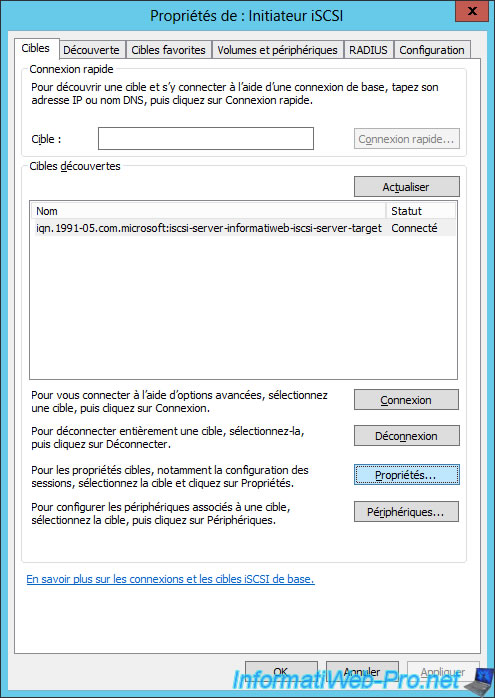
Select it and click on "Connect".
Check the "Enable multi-path" box and click Advanced.

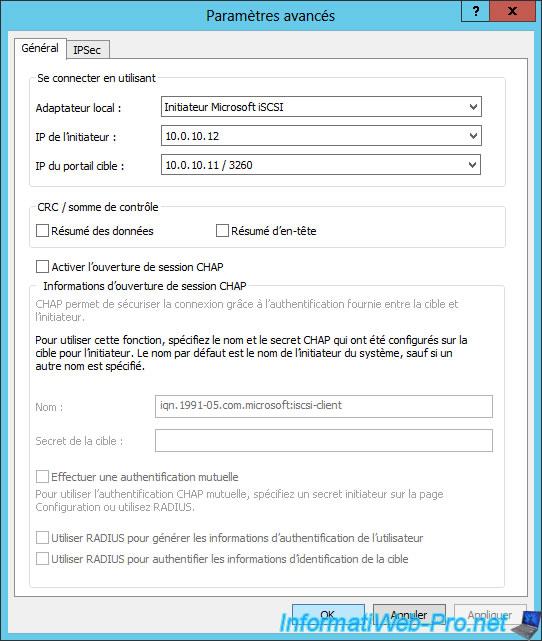
At the top, select :
- Local adapter : Microsoft iSCSI Initiator
- Initiator IP : 10.0.0.102
- Target portal IP : 10.0.0.101 / ...

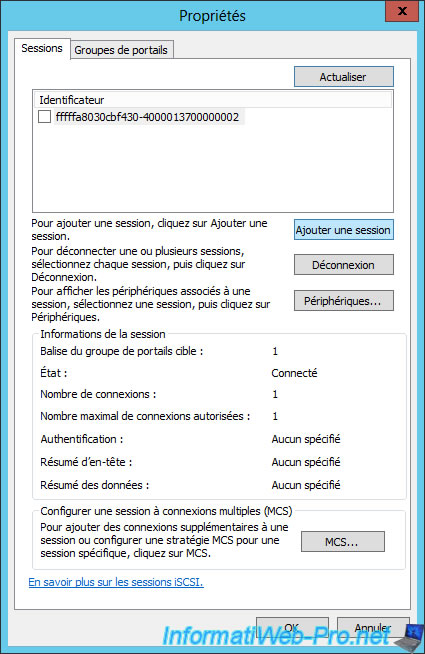
At the moment, our client PC is connected to the server with one path (the LAN).
To take advantage of the MPIO and thus connect to the server via several paths, we will have to add the 2nd possible path.
To do this, click this time on "Properties".
Click on "Add session".
Check the "Enable multi-path" box and click Advanced.
Select :
- Local adapter : Microsoft iSCSI Initiator
- Initiator IP : 10.0.0.12
- Target portal IP : 10.0.0.11 / ...
In other words, the IP addresses corresponding to the other network card. Which defines another path.
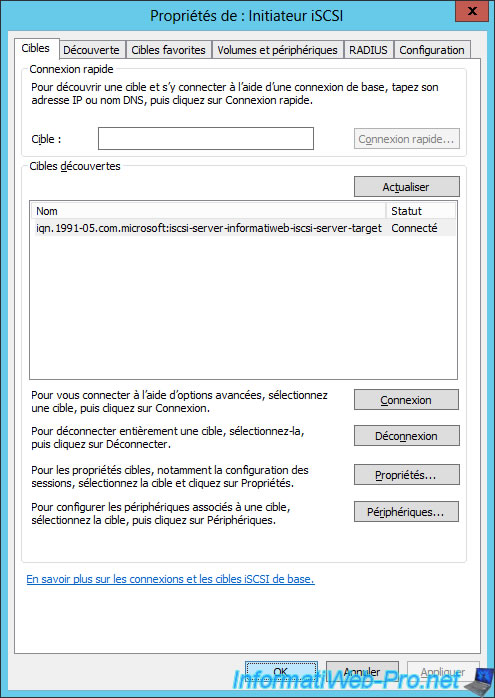
Now, you see 2 sessions appear.
In other words, the client PC is connected to your iSCSI server via 2 paths.

Share this tutorial
To see also
-
Windows Server 4/29/2017
WS 2012 - Install an iSCSI server and an iSCSI client
-
Windows Server 5/7/2017
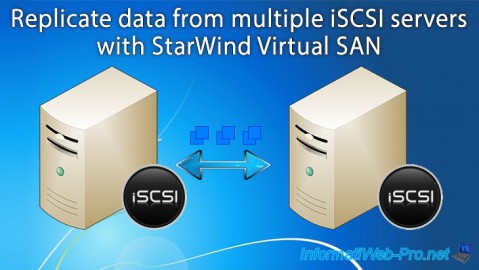
WS 2012 - Replicate data iSCSI data with StarWind Virtual SAN
You must be logged in to post a comment