Create a new virtual network (port group, vSS virtual switch, ...) on VMware vSphere 6.7
- VMware
- VMware vCenter Server (VCSA), VMware vSphere
- 16 August 2024 at 11:17 UTC
-

- 2/2
3. Edit a virtual standard switch (vSS)
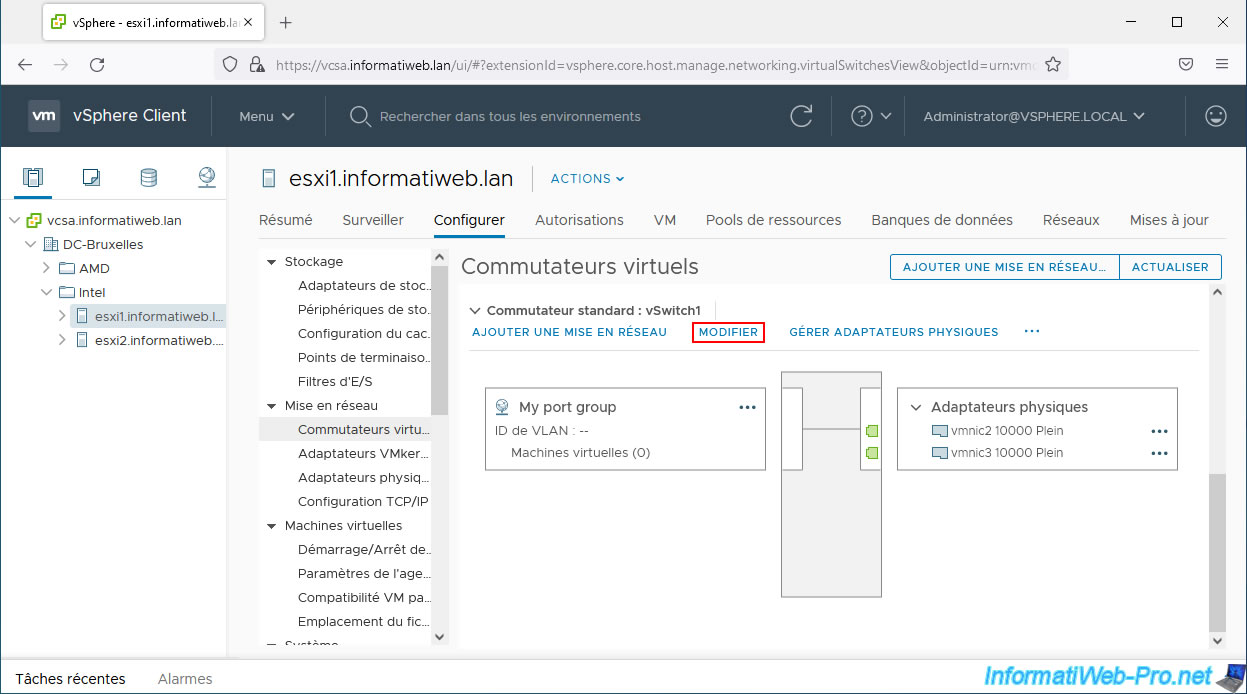
To change the settings of a virtual standard switch (vSS) from the VMware vSphere Client, simply click "Edit".
In the "Properties" section of the "Change Settings" window that appears, you will find:
- Number of Ports: the number of ports present on this standard virtual switch.
However, as noted in the official VMware documentation, this number of ports varies dynamically for reasons of optimizing host resources on your VMware ESXi hosts.
This is because the more ports there are on a virtual switch, the higher the system resource utilization will be. - MTU (bytes): maximum size of network frames that can pass through this standard virtual switch.
To use Jumbo frames, specify a size greater than 1500 bytes (default).

In the "Security" section, you will find 3 security settings:
- Promiscuous mode: indicates whether your virtual machines should receive all network frames (Accept) or only those intended for them (Reject) for security reasons.
- MAC address changes: indicates whether the guest operating system of a virtual machine can modify the MAC address of its network card in software (Accept) or not (Reject).
- Forged transmits: indicates whether outgoing frames (coming from your virtual machines) whose source MAC address is different from the "physical" one should be ignored (lost) or not.
If you choose "Accept", no filtering will be applied and therefore no frames will be lost.

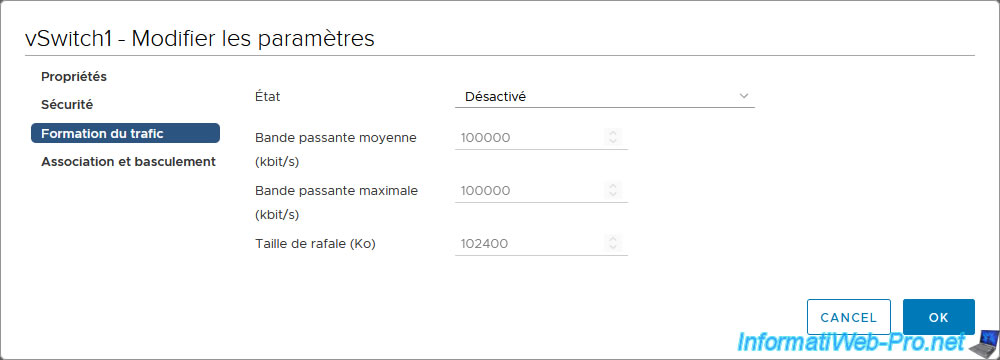
In the "Traffic Shaping" section, you will be able to enable and configure network bandwidth throttling if you wish.
Warning : network bandwidth throttling will only be applied to outgoing traffic since it is a standard virtual switch (vSS) in this case.
For more information about the security and traffic shaping settings available on a virtual standard switch (vSS), refer to our tutorial: VMware ESXi 6.7 - Create a new virtual network.
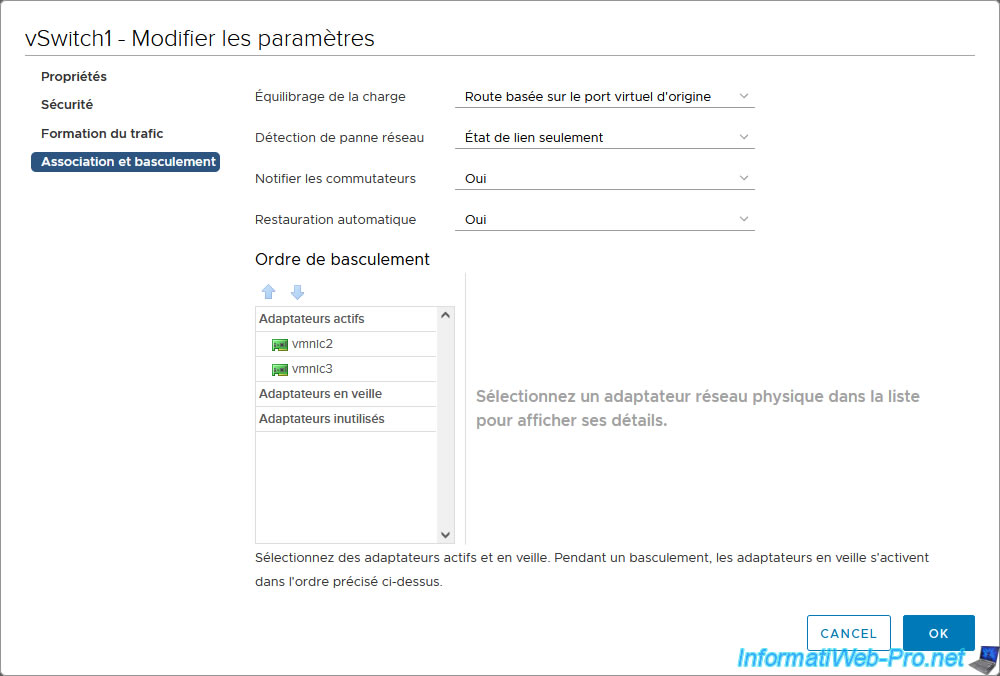
In the "Teaming and failover" section, you can choose how load balancing should be carried out, how network link failures should be detected, ... using the settings:
- Load balancing
- Network failure detection
- Notify switches
- Fallback
- Failover order
To learn more about these settings, refer to the "4. Associate network adapters (NIC Teaming)" section of our VMware ESXi 6.7 article about networking basics.
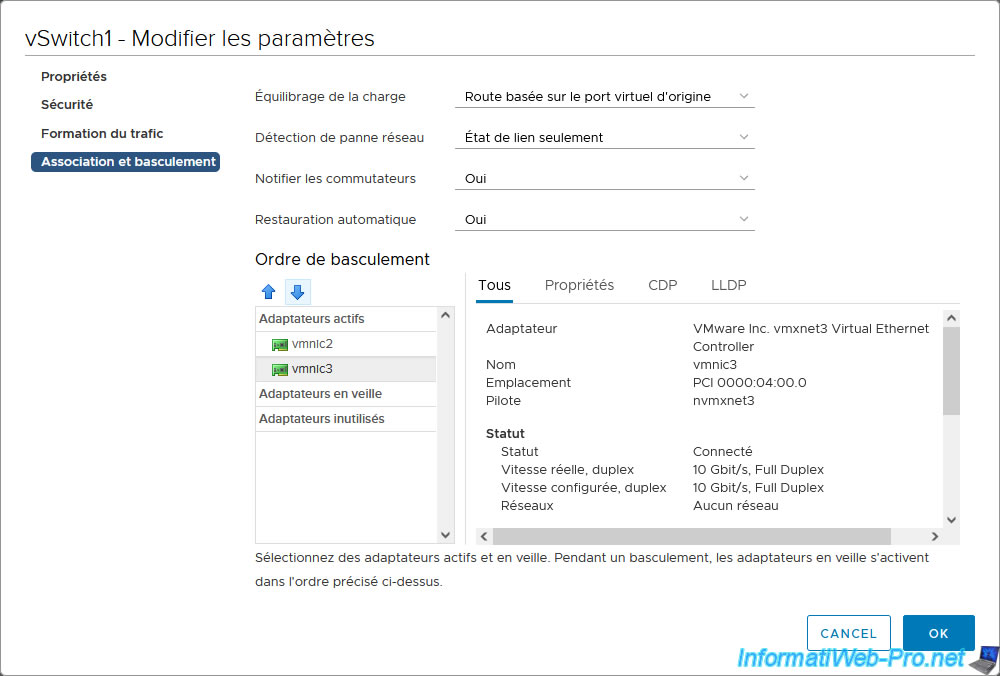
As you can see from the failover order, all network adapters are active adapters by default.
Which means they will all be used and therefore provides fault tolerance, as well as network load balancing.
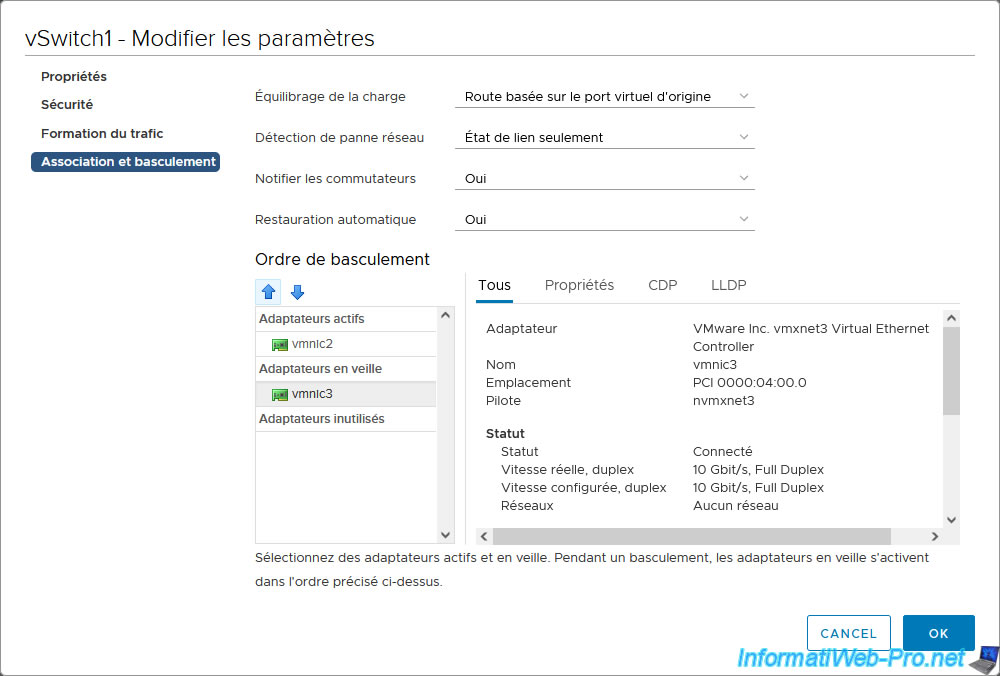
To have a network adapter used only for fault tolerance, select it and click the "down" arrow.
Now, the desired network adapter appears in the list of standby adapters.
Which means that it will only be used if one of the active adapters fails. Which corresponds to fault tolerance.
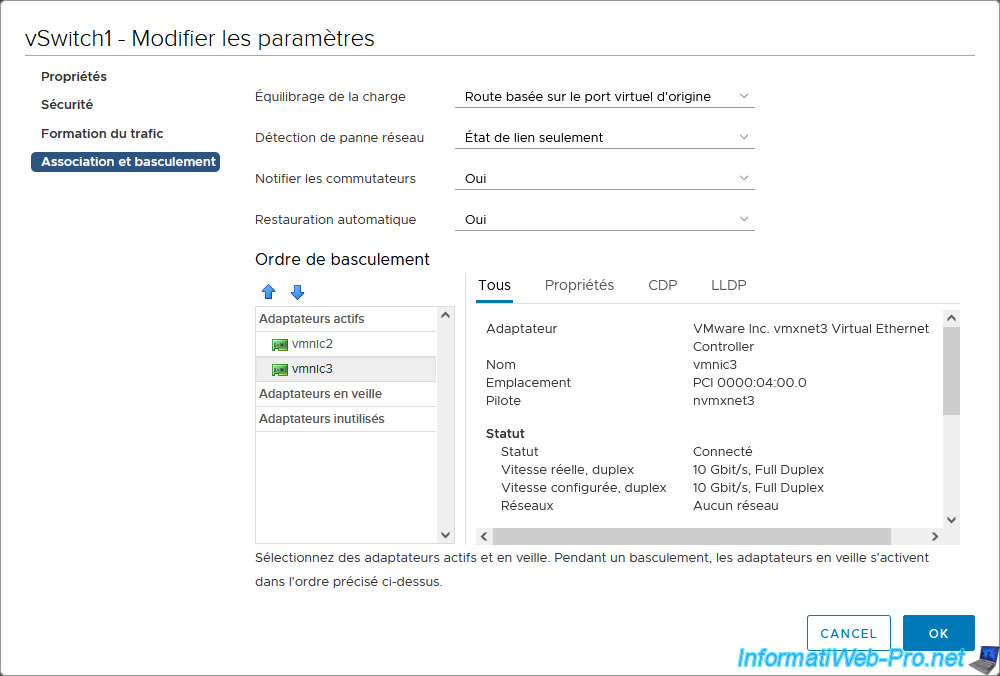
To make a standby adapter active again, select it and click the "up" arrow.
This reappears in the list of active adapters.
4. Edit a port group
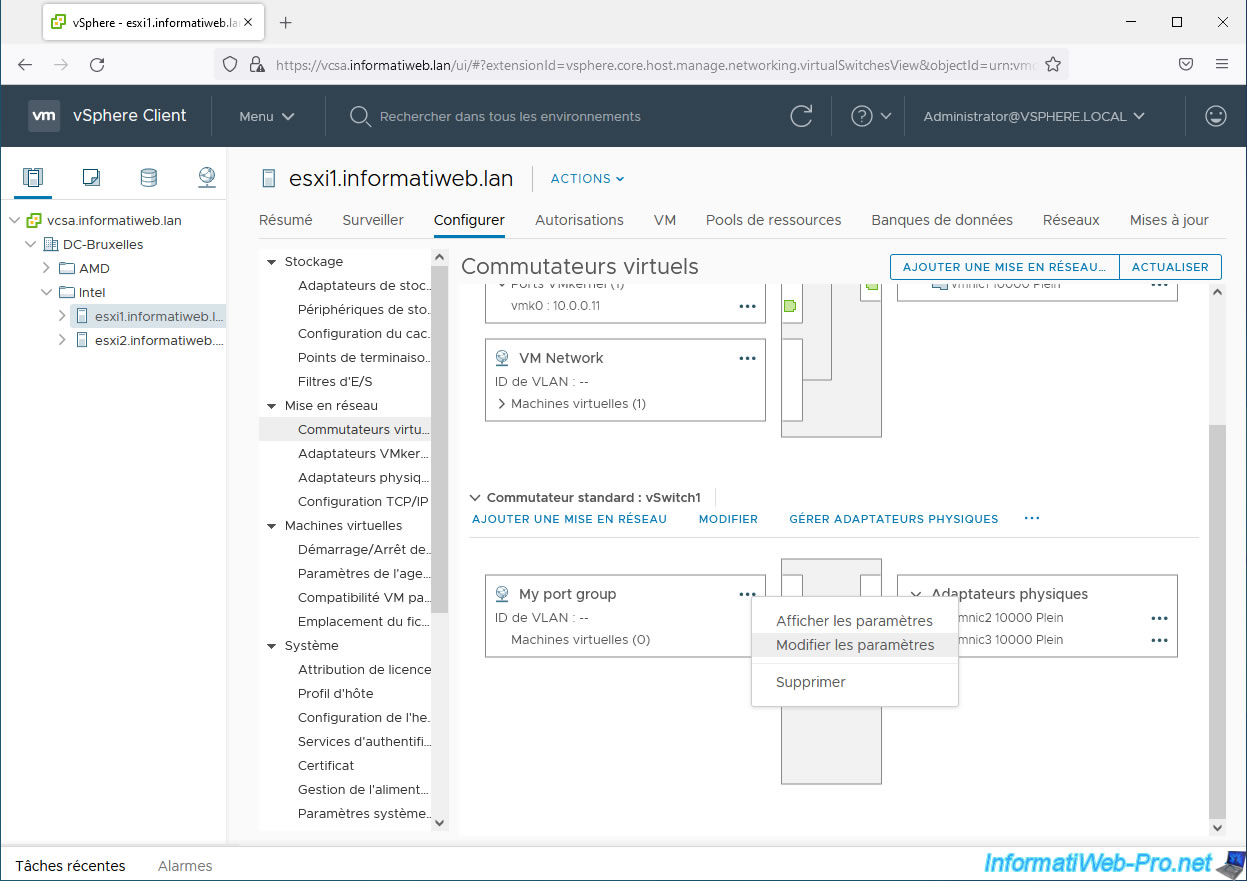
To edit a port group, click the "..." icon to the right of it and click "Edit Settings".
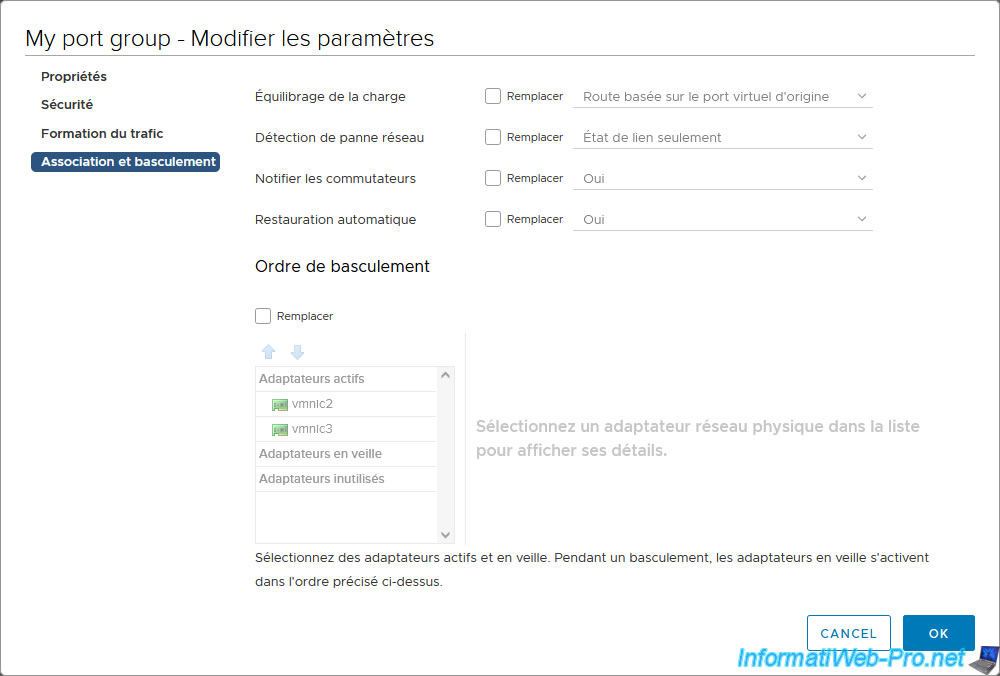
In the "[port group name] - Edit Settings" window that appears, you can change :
- Network Label: the name of this port group.
- VLAN ID: set the VLAN ID to use for this port group (rather than the entire virtual switch).

For your port group, you will find the same settings (Security, Traffic shaping, and Teaming and failover) as for your virtual standard switch (vSS).
As you can see, their values are inherited by default from the virtual switch on which your port group is located.
Since the settings of a port group are the same as standard virtual switches, please refer to the explanation given previously for the standard virtual switch.


5. Connect a virtual machine to your new port group
Now that you have created your new standard virtual switch and port group, simply edit the configuration of the virtual machines you want to connect to it.
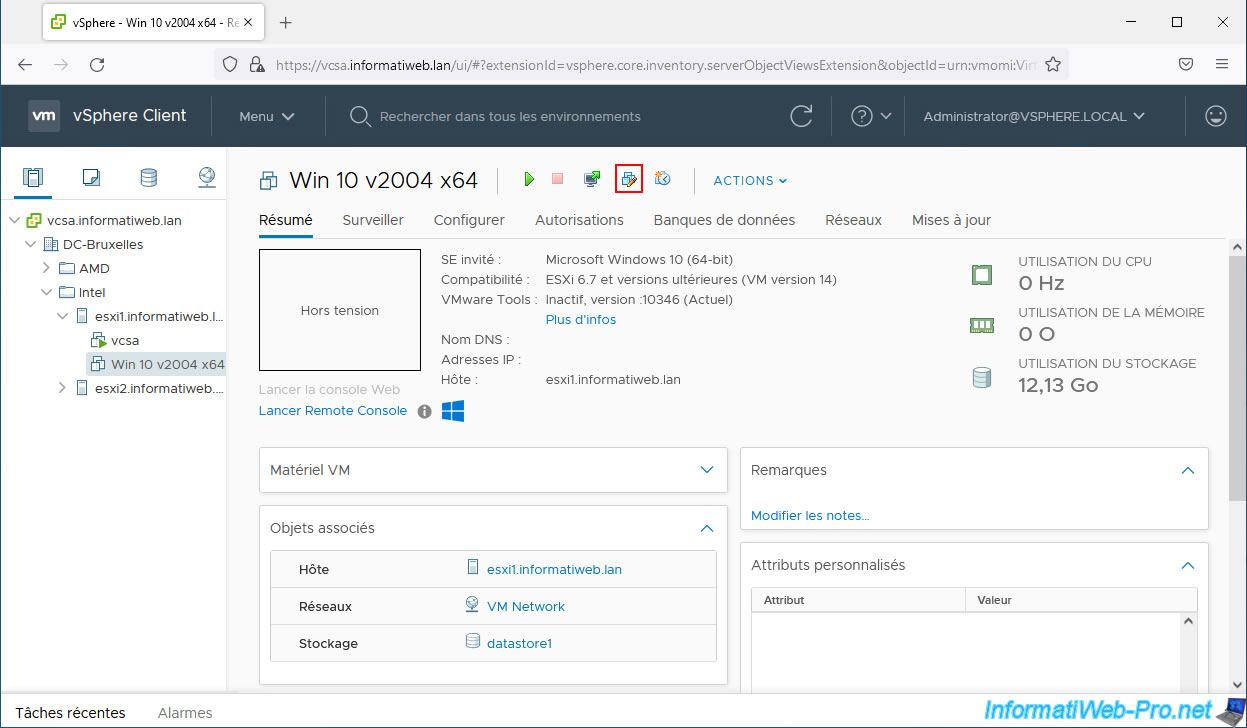
In your virtual machine's settings, click the name of the network its network adapter is currently connected to and click Browse.
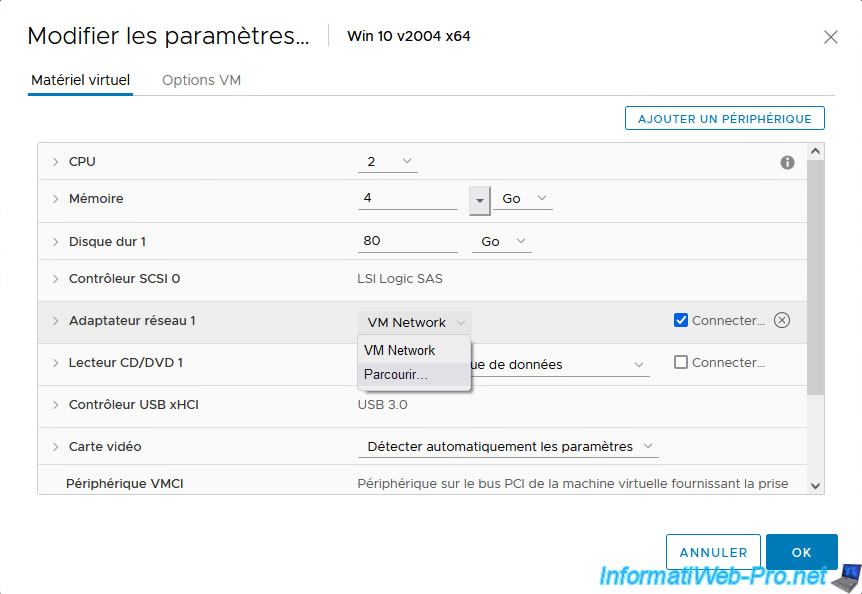
In the "Select Network" window that appears, select your new port group and click OK.
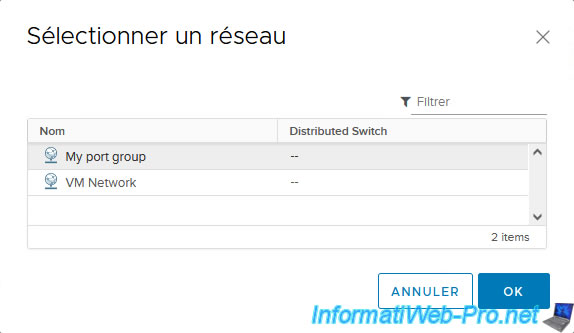
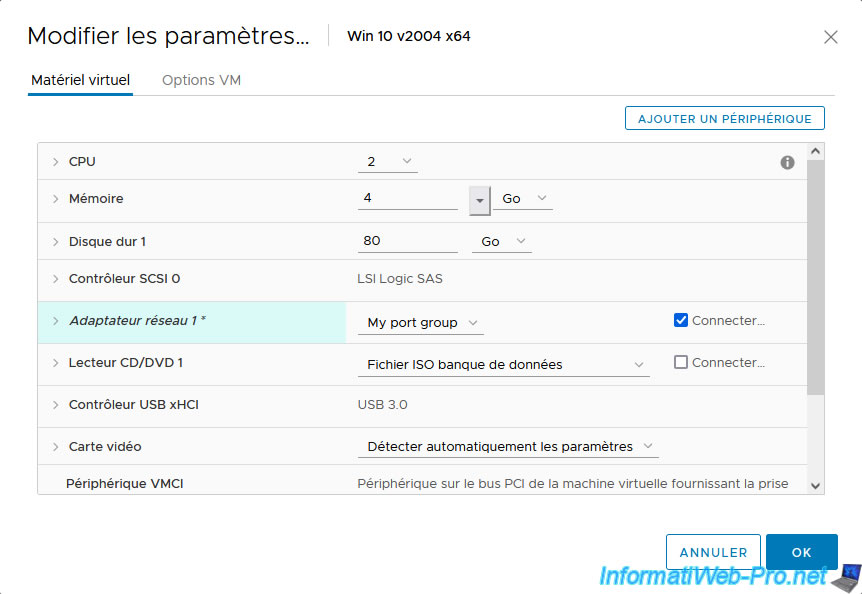
The name of your new port group appears for your virtual machine's network adapter.
Click OK.
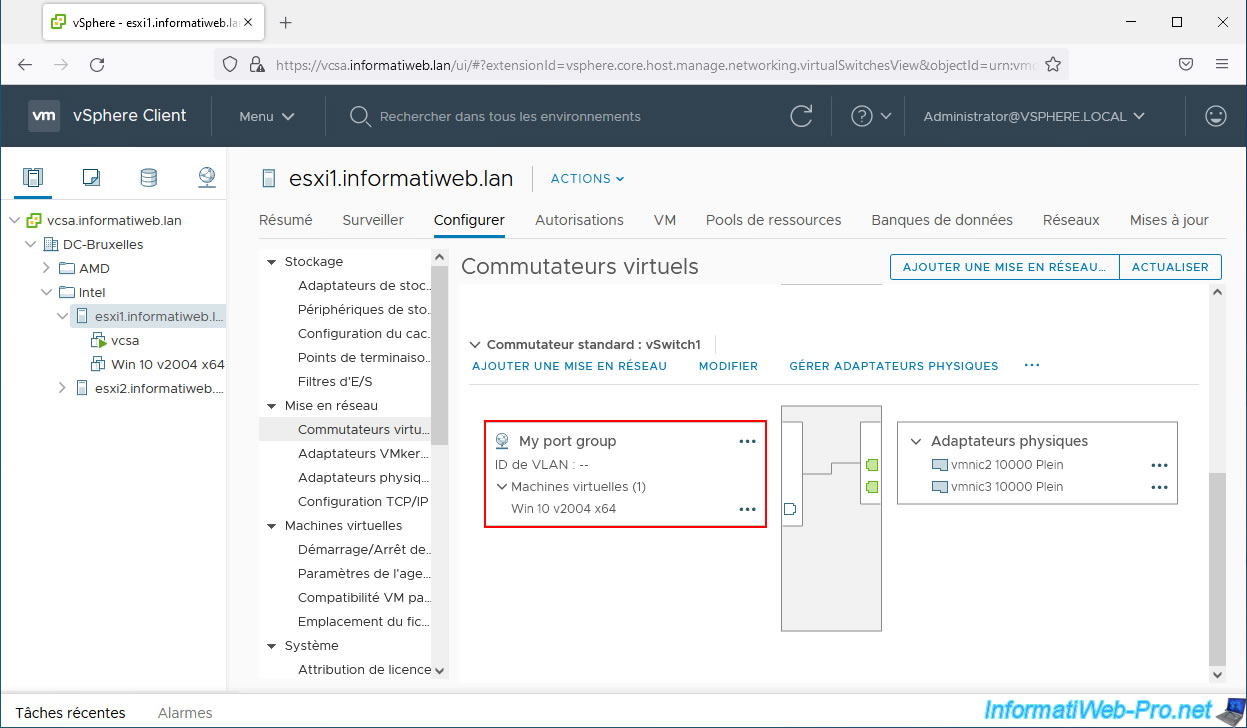
If you select the VMware ESXi host on which the virtual machine you just modified is located and you return to "Configure -> Networking -> Virtual switches", you will see its name appear in the list of connected virtual machines to your new port group.
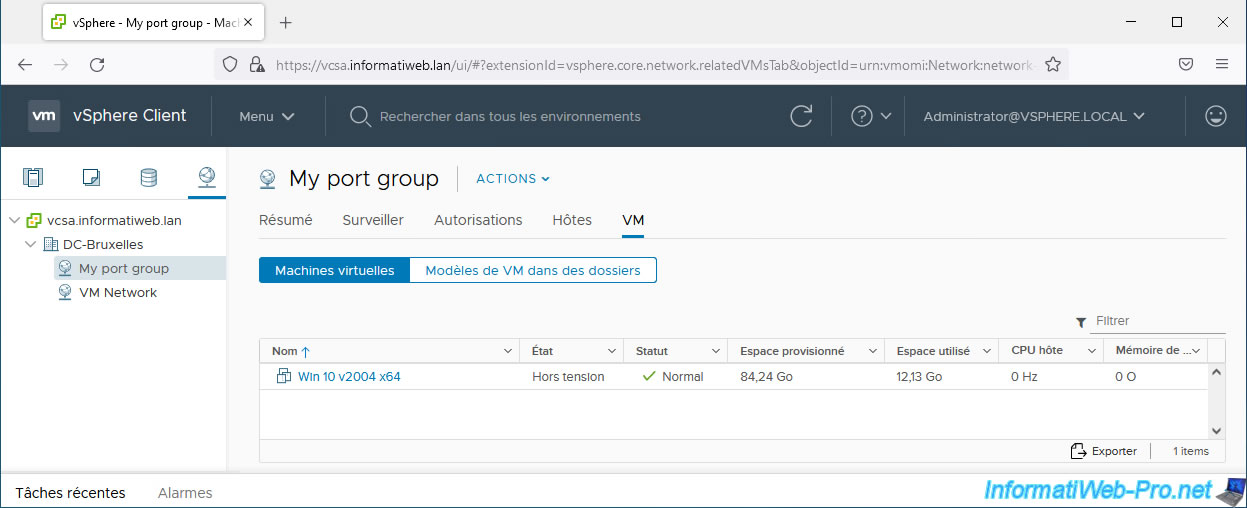
In the VMware vSphere Client, you can also see the list of virtual machines connected to a port group by going to the "Networking" tab, select the desired port group, then go to the "VMs" tab.
Note that all virtual machines configured to use this port group will appear, even if some of them are powered off.
Share this tutorial
To see also
-

VMware 6/17/2022
VMware ESXi 7.0 / 6.7 - Change the complexity required for passwords
-
VMware 2/21/2024
VMware vSphere 6.7 - Deploy VCSA (vCenter Server Appliance)
-
VMware 7/12/2024
VMware vSphere 6.7 - Install and use the VMRC console
-

VMware 7/26/2024
VMware vSphere 6.7 - Join the hypervisor to an Active Directory domain

No comment