- VMware
- 16 August 2024 at 11:17 UTC
-

- 1/2

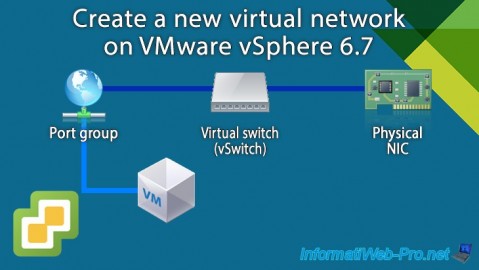
As you already know, the network of your VMware ESXi hosts is made up of several layers.
If necessary, refer to our article: Understand the basics of network management on VMware ESXi 6.7.
In this tutorial, you will see how to create a new virtual network (in other words: a port group and a standard virtual switch) from the VMware vSphere Client of your VMware vCenter Server (VCSA).
- Current network configuration
- Add a new virtual network (port group and virtual switch)
- Edit a virtual standard switch (vSS)
- Edit a port group
- Connect a virtual machine to your new port group
1. Current network configuration
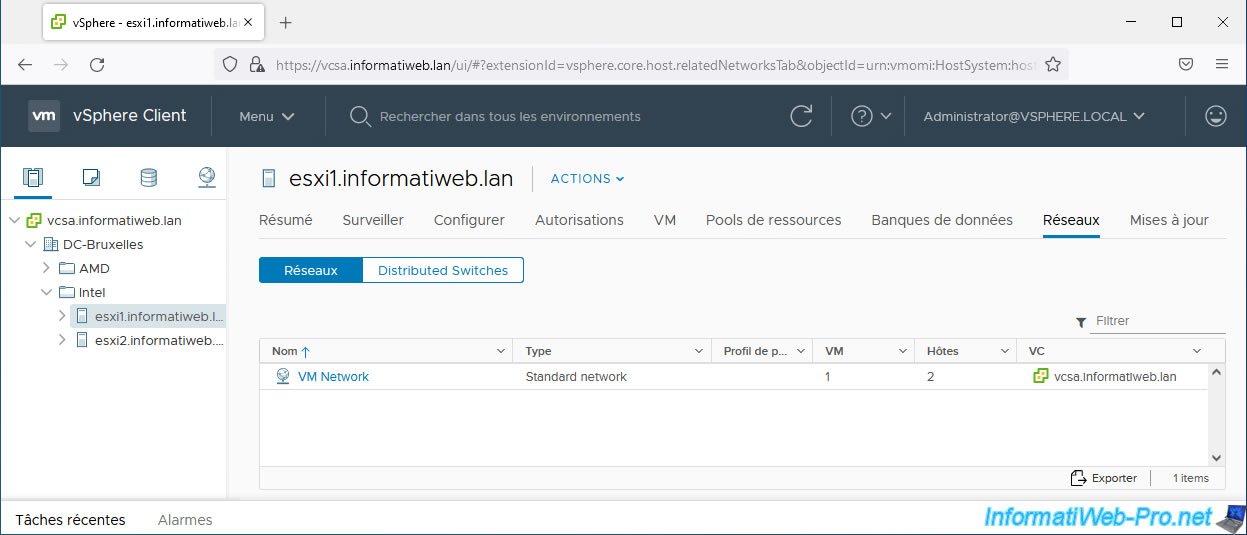
If you select one of your VMware ESXi hosts and go to the "Networks" tab, you will see that a "VM Network" virtual network already exists on it.
This virtual network "VM Network" corresponds to the group of ports of the same name automatically created during the installation of your VMware ESXi hypervisor and to which your virtual machines are connected by default.
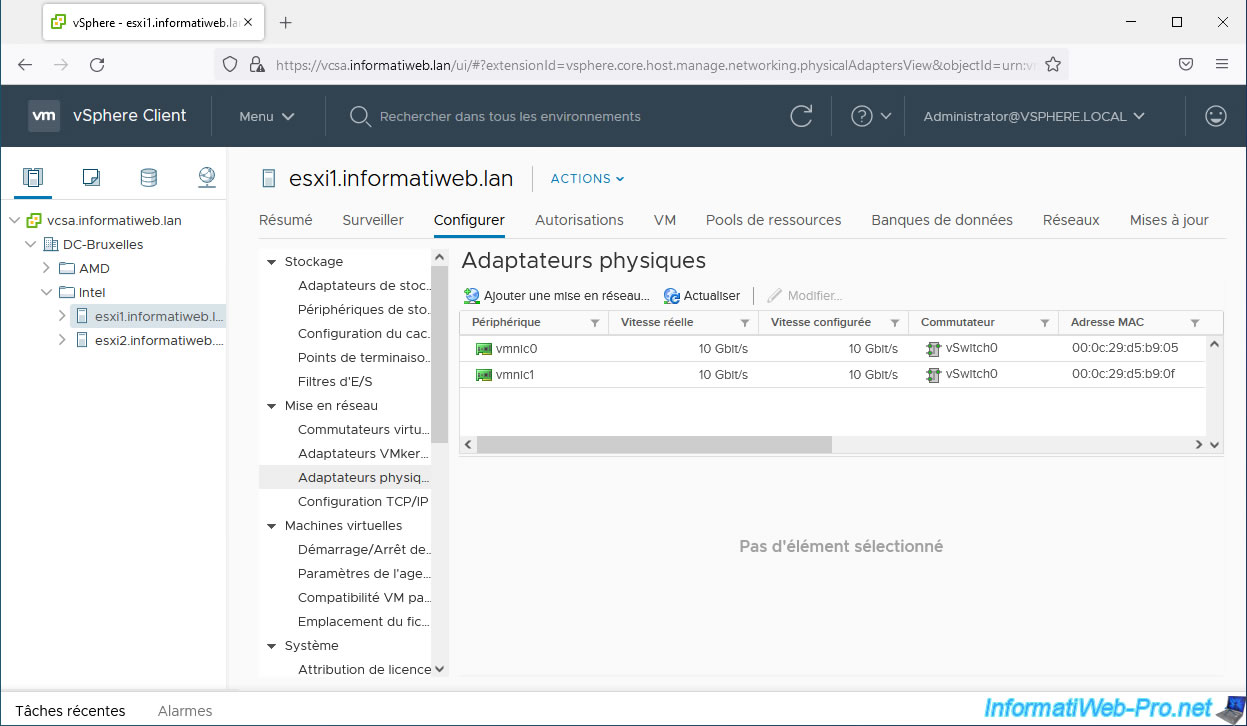
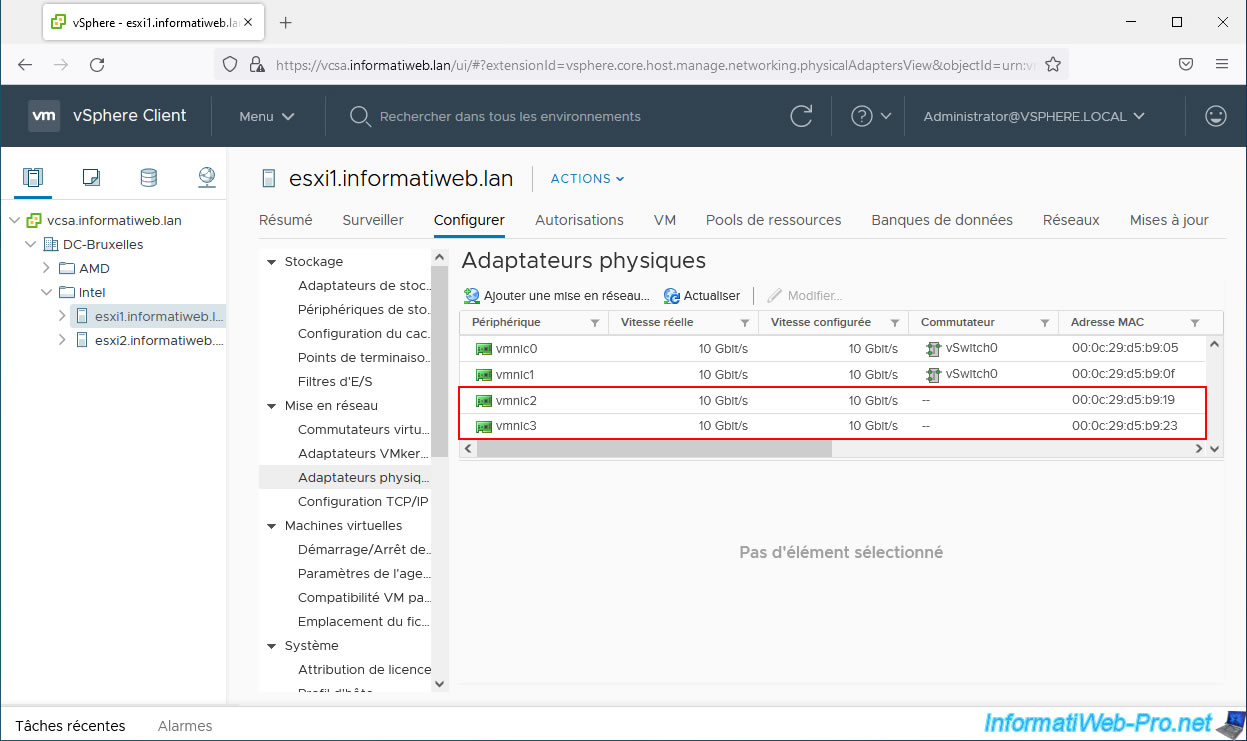
As you can see, at the moment our VMware ESXi host "esxi1" has 2 physical network cards (physical adapters).
You can see this by selecting your VMware ESXi host, then going to: Configure -> Networking -> Physical Adapters.
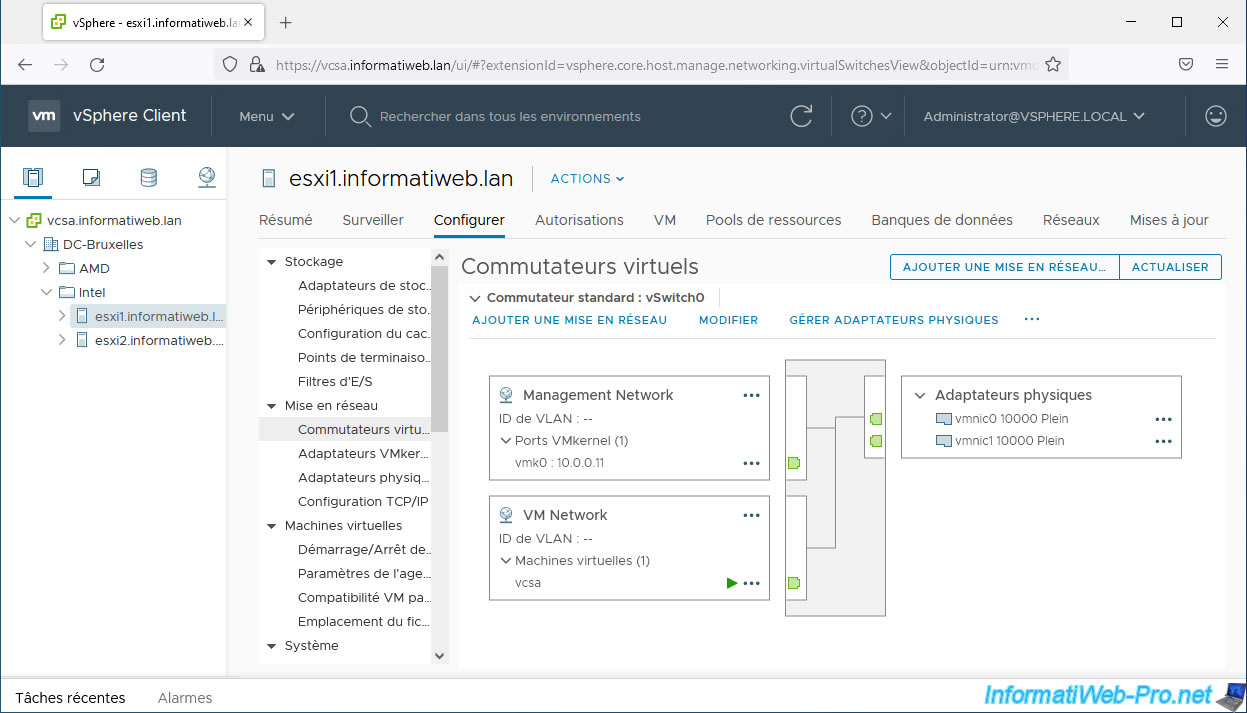
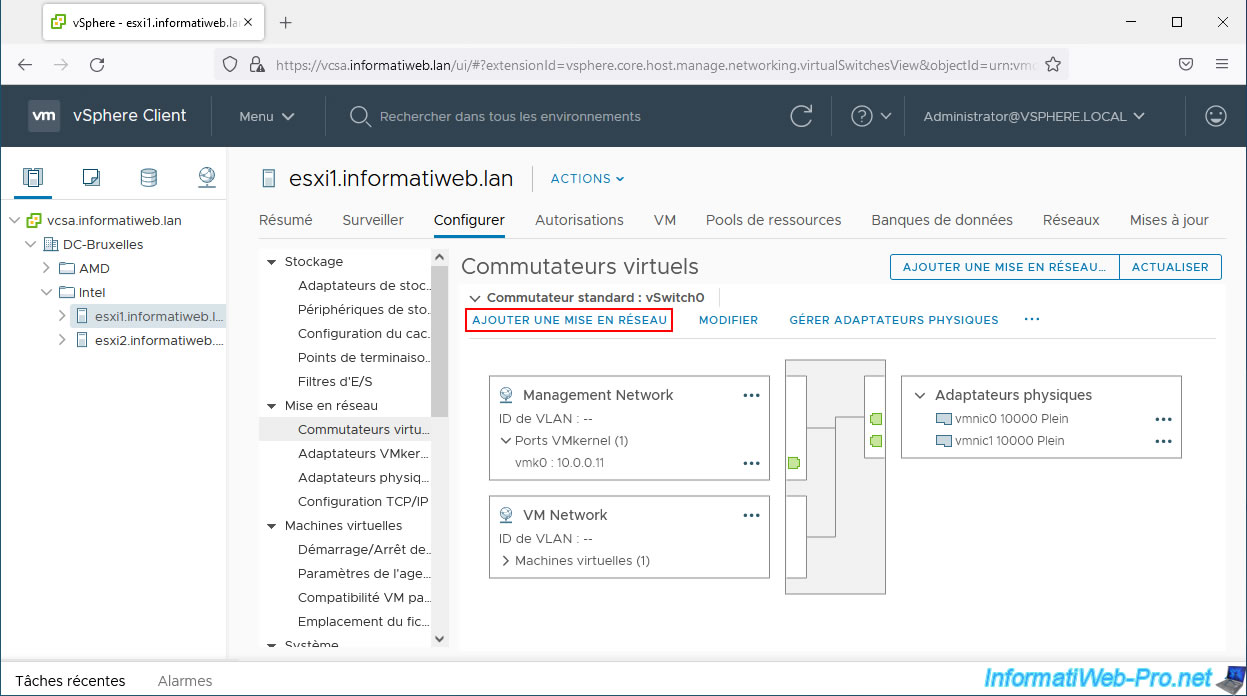
If you go to "Configure -> Networking -> Virtual Switches", you will see that by default, your host already has:
- a virtual switch named vSwitch0
- a "VM Network" port group which allows your virtual machines to access the network and also the Internet.
You can also see the name of the virtual machines that are connected to it, even if they are turned off at the moment. - a "Management Network" port group that allows you to manage your VMware ESXi host from the network using the VMkernel "vmk0" port configured by default.
- 2 physical adapters (physical network cards) in our case. But only one by default.
The second physical adapter that we added to this virtual switch allows for fault tolerance and/or load balancing.
2. Add a new virtual network (port group and virtual switch)
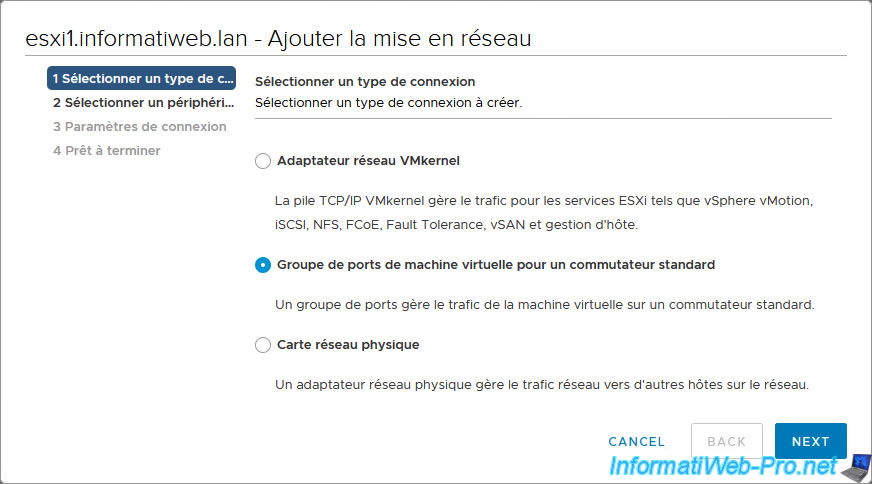
From the VMware vSphere Client, you can easily add a new virtual network by creating a new port group and a new standard virtual switch through a single wizard.
For this tutorial, we added 2 physical network cards to our server.
In the image below, these are the network cards: vmnic2 and vmnic3.
To add a new virtual network from the VMware vSphere Client, go to "Configure -> Networking -> Virtual Switches" and click: Add Networking.
In the "[VMware ESXi host name] - Add Networking" wizard that appears, select "Virtual Machine Port Group for a Standard Switch" and click Next.
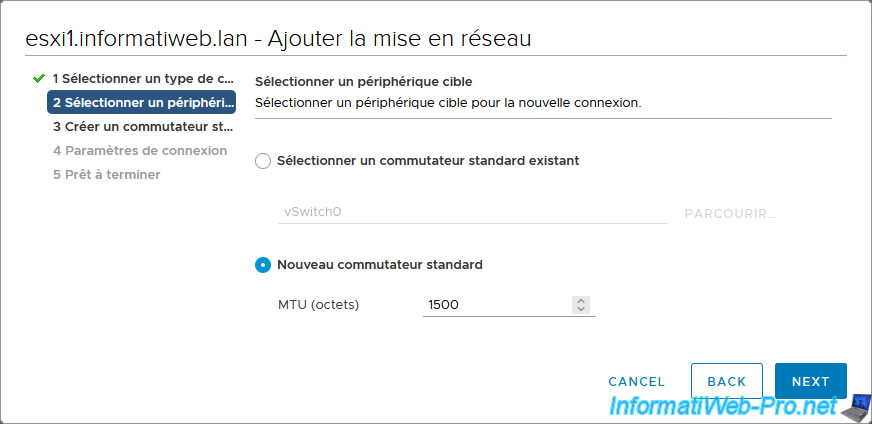
When you add networking, you can choose to use an existing standard switch or create a new one.
In this case, we will create our new port group on a new standard switch (vSS) and we will assign our 2 new physical network cards to it in the next step of the wizard.
By default, the MTU (Maximum Transmission Unit) of a standard switch is 1500 bytes.
To be able to use jumbo frames, you will need to specify a value greater than 1500 bytes.
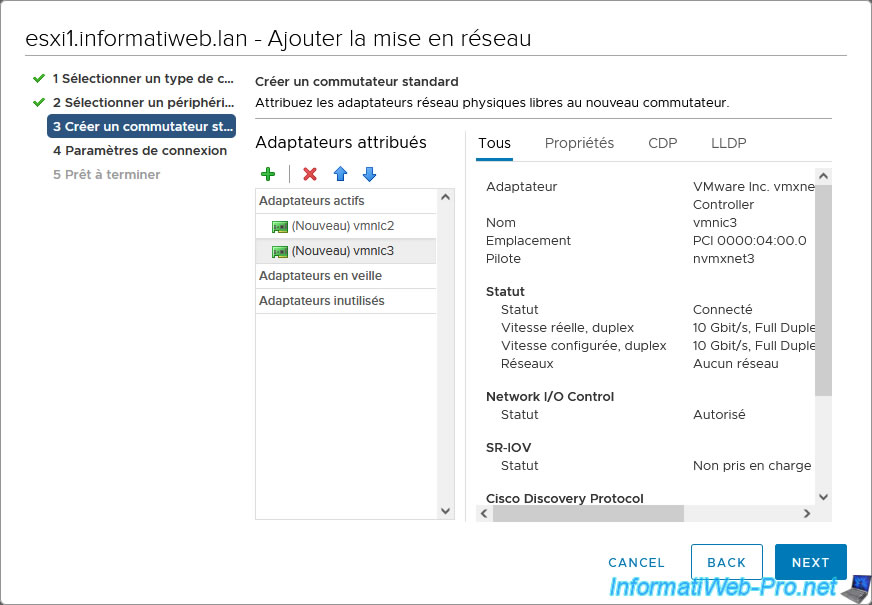
In the "Create a standard switch" step that appears, click on the "+" icon to add a physical network card (physical network adapter) to it.
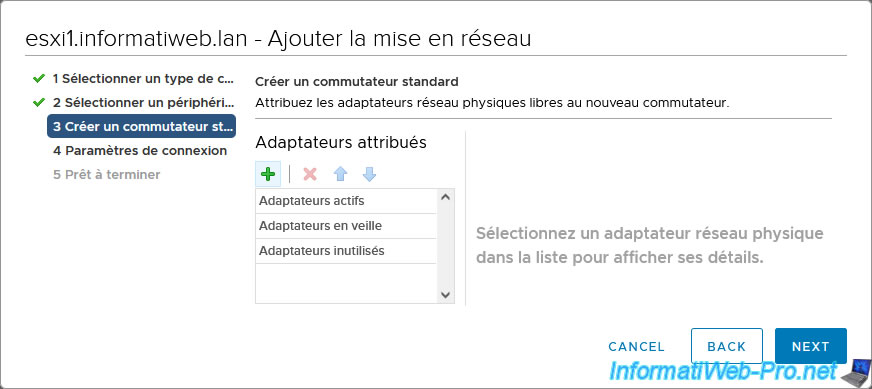
The list of network adapters (physical network cards) not used on your VMware ESXi host appears.
Select the network adapter you want to add to this standard switch and click OK.
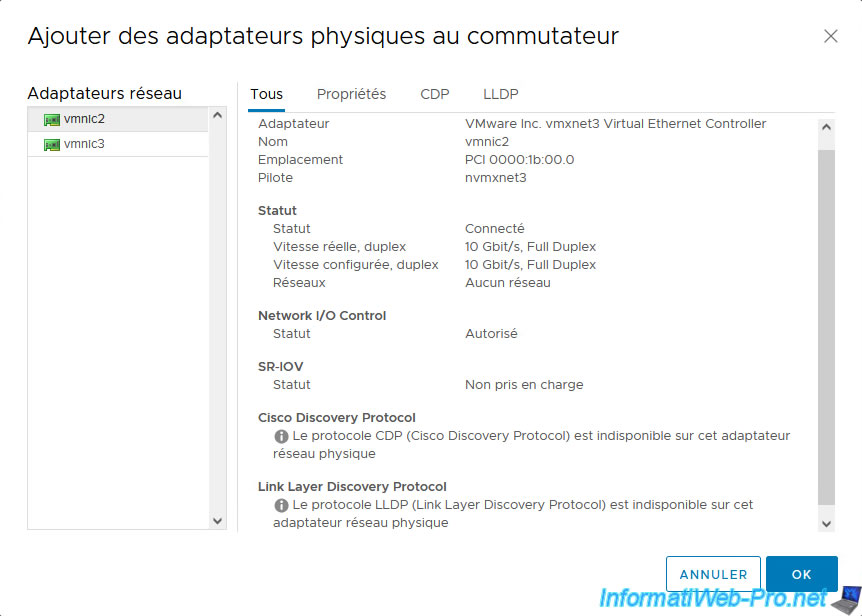
When you select a network adapter, several information about it appear:
- Adapter: name of the network adapter (physical network card).
In this case, these are virtualized VMware ESXi hypervisors. Hence the fact that these are "vmxnet3" virtual network cards. - Name: name automatically assigned to this by VMware ESXi.
- Location: PCI address of the network adapter (physical network card).
- Driver: name of the driver used by VMware ESXi to use your network adapter (physical network card).
- Status: indicates whether the network cable is plugged in or not.
- Actual speed, Duplex: actual (theoretical) speed of this network adapter (physical network card), as well as Duplex mode used.
In the case of this "vmxnet3" network adapter, the theoretical speed is 10 Gbit/s in Full Duplex (therefore: up to 10 Gbit/s sending and receiving simultaneously). - Configured speed, Duplex: the speed and mode of configured Duplex.
By default, the information is the same. However, as you will have understood, you can restrict a network adapter by modifying its configuration from the list of physical adapters of your VMware ESXi host. - Networks: information about the IP addressing / subnet mask used for this network adapter.
- Network I/O Control - Status: indicates whether the use of the "vSphere Network I/O Control" component is authorized or not.
vSphere Network I/O Control allows you to allocate network bandwidth to mission-critical applications. - SR-IOV: SR-IOV stands for "single root I/O virtualization" and allows a physical network adapter (NIC) in this case to appear as multiple virtual network adapters on your VMware ESXi hypervisor.
This also allows the virtual machine to communicate directly with this device without going through the VMkernel. Which makes it possible to obtain better network performance in this case and therefore reduce latency at this level. - Cisco Discovery Protocol (CDP): a network discovery protocol that allows the vSphere administrator and Cisco switch administrator to know which ports are in use and other information, such as: Device ID, expiration time, and software version used.
However, this information can only be visible to these different administrators if the desired operating mode (listen, announce or both) is selected for the type of Cisco discovery protocol to be used on this vSphere virtual switch. - Link Layer Discovery Protocol (LLDP): the goal is very similar to the previous protocol, but this one only concerns vSphere administrators.
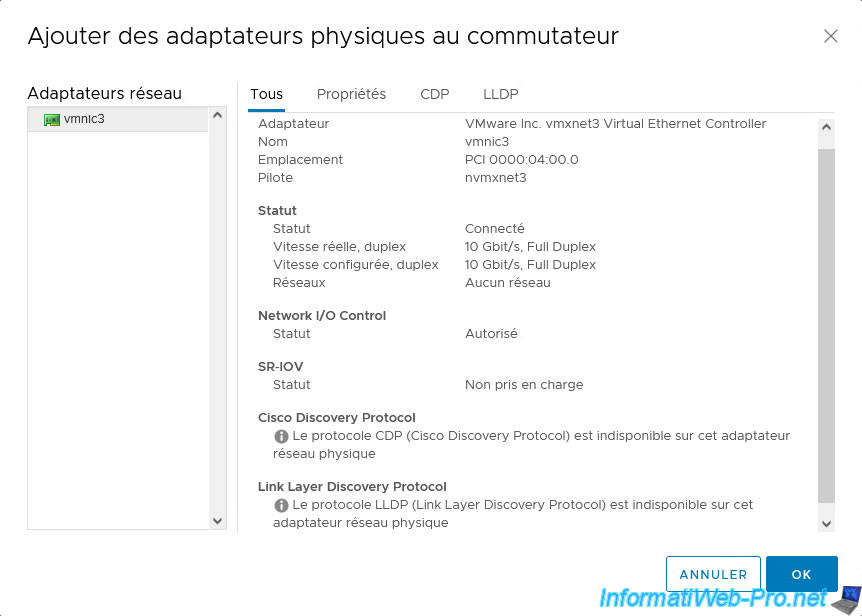
To achieve fault tolerance and/or perform load balancing, you can use one or more additional network adapters.
To do this, click on the “+” icon again.
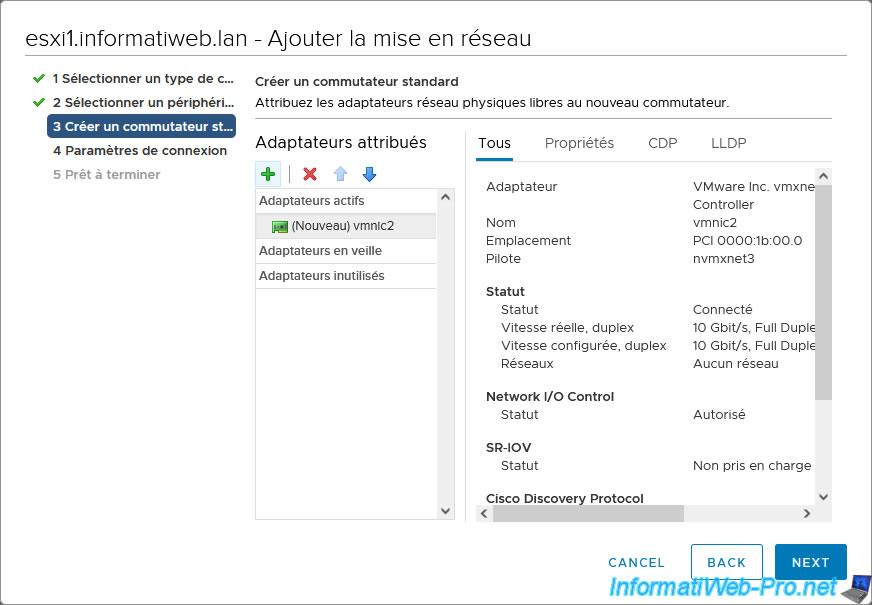
Select the network adapter to add to your new virtual switch and click OK.
The added network adapter appears.
Click Next.
Note: the information located on the right is the same as previously and the tabs simply allow you to filter the display of this information.
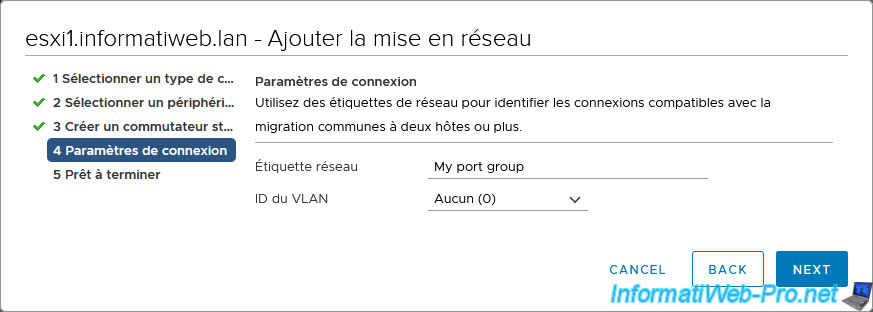
At the "Connection settings" step, you can specify:
- Network label: the name of the virtual network that will appear in the “VMware vSphere Client” client.
Which corresponds to the name of the port group which will also be visible in the web client of your VMware ESXi hypervisor. - VLAN ID: the VLAN ID to use if desired. This makes it possible to isolate several virtual machines by connecting some of them to one VLAN and others to another VLAN.
The advantage is to be able to isolate the network traffic of these virtual machines by using the same physical network link.
To not use VLANs, leave the "None (0)" option selected.
A summary of your standard virtual switch and virtual machine port group (or "virtual network") configuration appears.
Click Finish.
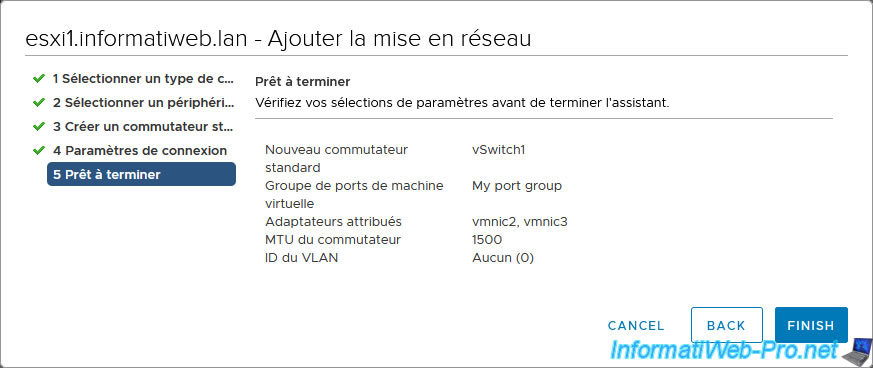
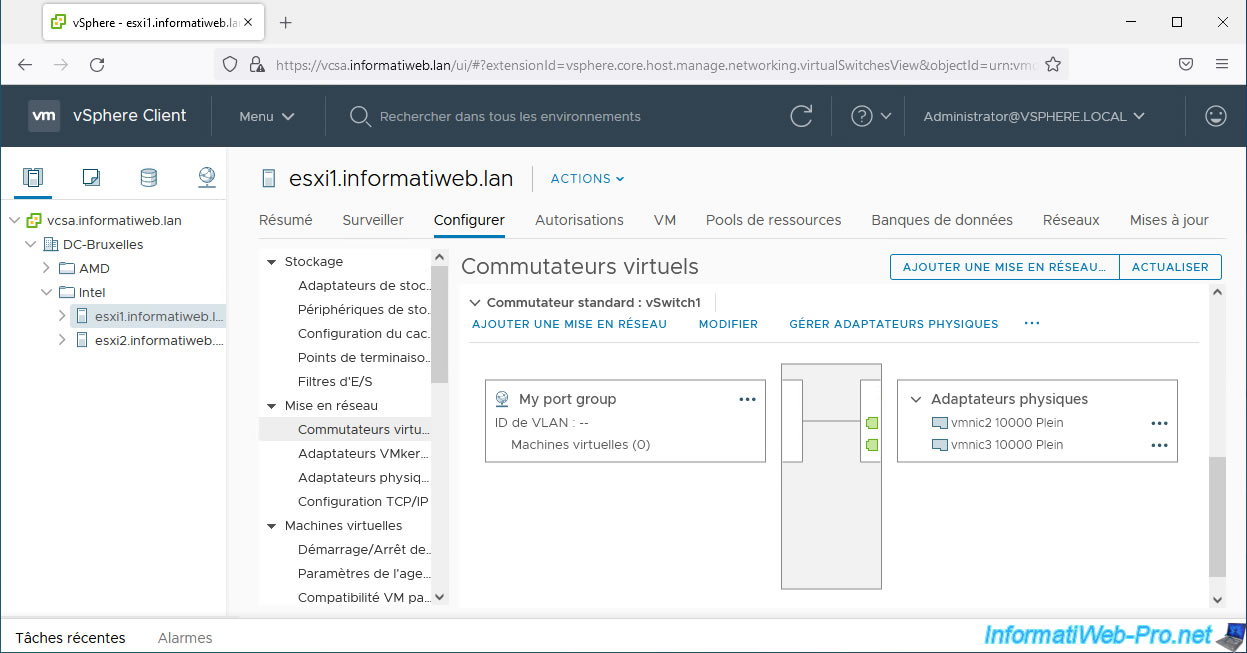
Your new virtual switch (in our case: vSwitch1) appears with:
- the port group you just created.
- the VLAN ID defined for this port group (if applicable).
- the list of virtual machines that are connected on this port group.
For the moment, this list is obviously empty. - the physical adapter(s) (physical network adapters) assigned to this standard virtual switch.
In our case: vmnic2 and vmnic3.
Share this tutorial
To see also
-
VMware 8/21/2024
VMware vSphere 6.7 - Add a VMkernel interface
-
VMware 8/2/2024
VMware vSphere 6.7 - Collect logs with SexiLog
-
VMware 8/9/2024
VMware vSphere 6.7 - Collect logs with VMware Aria Operations for Logs
-
VMware 1/10/2025
VMware vSphere 6.7 - Create a LACP link (LAG)
You must be logged in to post a comment