- VMware
- 28 September 2022 at 14:55 UTC
-

- 1/2

By default, you can create local user accounts and roles on your VMware ESXi hypervisor to grant permissions to them on various objects (host, virtual machines, ...) of it.
However, if you are in a Microsoft environment, you most likely have Active Directory infrastructure in your company network with users and groups already created.
Rather than also managing local user accounts on your VMware ESXi hypervisor, you can link it to your Active Directory infrastructure and thus grant permissions to various Active Directory users and/or groups.
- Advantages of joining your VMware ESXi hypervisor to an Active Directory
- Install an Active Directory domain controller
- Create the reverse DNS zone
- Synchronize the date and time of the hypervisor using the NTP protocol
- VMware ESXi hypervisor network configuration
- Configure the DNS server
- Configure the "ESX Admins" Active Directory group (optional)
- Join VMware ESXi to an Active Directory domain
- Configure permissions for Active Directory (AD) users
- Permissions test
1. Advantages of joining your VMware ESXi hypervisor to an Active Directory
Joining a VMware ESXi hypervisor to an Active Directory infrastructure will allow you to :
- connect to your VMware ESXi hypervisor with an account already in your Active Directory domain
- manage the configuration and security of your hypervisors by placing them in particular in organizational units (OU). Although the compatible options are obviously more limited than on Windows or Windows Server.
- use Active Directory authentication when using replication between different VMware ESXi servers.
Indeed, you will be able to connect to several VMware ESXi servers with the same Active Directory account. - manage permissions for users and/or groups created in your Active Directory infrastructure.
Adding permissions can therefore be much faster, since it will suffice to add the group directly in the permissions of VMware ESXi, rather than adding each user one by one.
2. Install an Active Directory domain controller
To get started, you will need an Active Directory domain controller.
To do this, refer to our "WS 2016 - AD DS - Create an Active Directory domain controller (new AD domain)" tutorial.
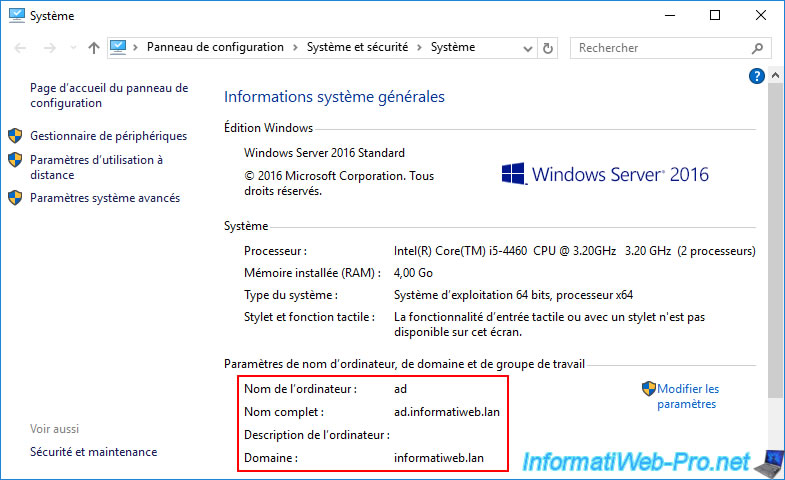
In our case, we have a domain controller (DC) whose NETBIOS name is "ad" and the Active Directory domain is "informatiweb.lan".
3. Create the reverse DNS zone
With VMware products, it's recommended that you also create the reverse lookup zone on your DNS server.
For example, with "VMware vCenter Server Appliance" (VCSA), if its installer is not able to know the associated DNS name (FQDN) from its IP address, the installation will fail.
Source : DNS Requirements for the vCenter Server Appliance and Platform Services Controller Appliance.
If your DNS server was installed automatically by installing the "Active Directory Domain Services" role, this zone doesn't exist by default.
So, you will have to create it.
To do this, refer to our procedure : Create a reverse lookup zone (IP address -> domain).
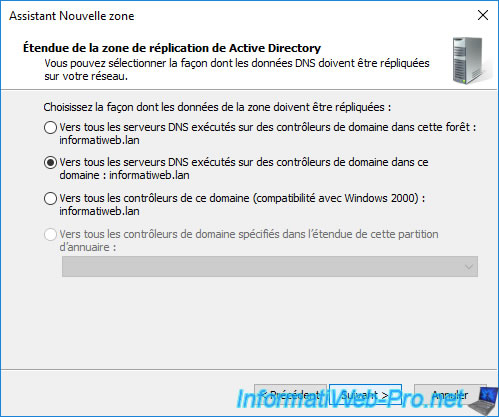
For the steps concerning the replication of this reverse DNS zone through the Active Directory, you can leave the options selected by default (if you don't know which option to select).
Once the reverse lookup zone is created, this is what you will have.
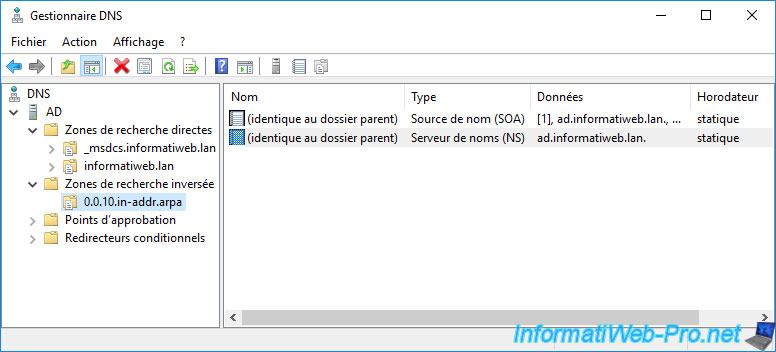
To have all reverse lookup zone pointers (PTRs) created for the DNS records in your forward lookup zone, double-click each one.
Note that you can only create pointers (PTRs) for DNS type "A" (IPv4) and "AAAA" (IPv6) records.
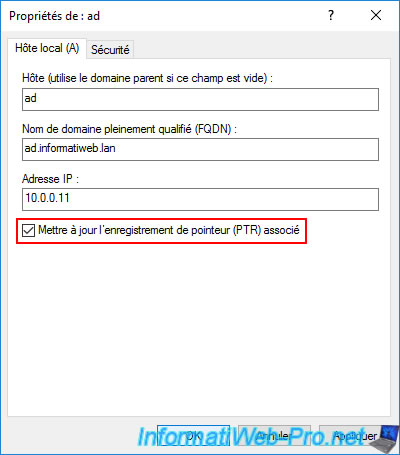
Check the "Update associated pointer (PTR) record" box and click OK.
If the box is already checked, uncheck this box, click "Apply", then check this box again and click OK.
Now, the associated pointer (PTR) has been created in the reverse lookup zone.
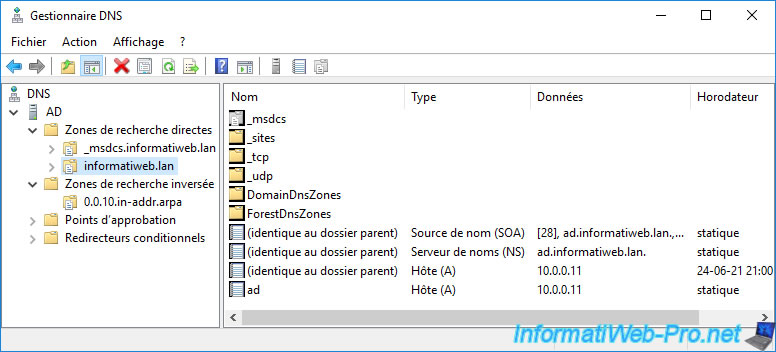
Now, the pointers corresponding to the type "A" or "AAAA" records of the forward lookup zone have been created in the reverse lookup zone.

4. Synchronize the date and time of the hypervisor using the NTP protocol
To avoid authentication problems, it's strongly recommended to synchronize the time of your hypervisor(s) with the NTP server present in your Active Directory infrastructure.
When you install Active Directory Domain Services (AD DS), a time server is automatically installed on your domain controller.
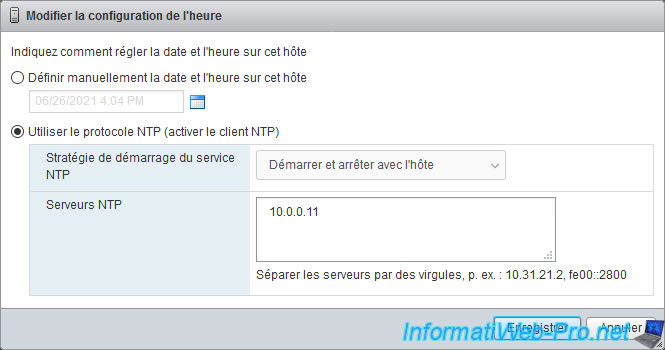
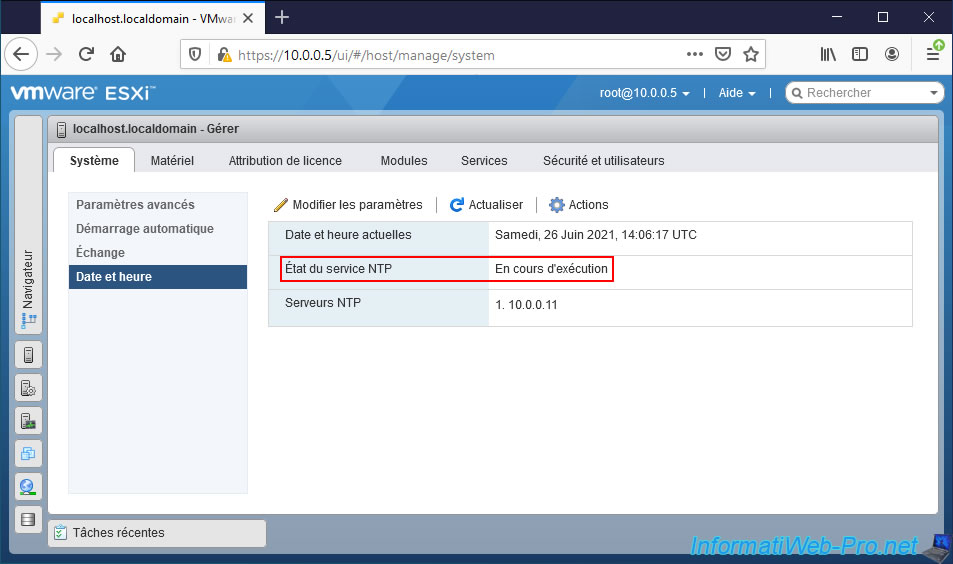
To configure the date and time synchronization of your VMware ESXi hypervisor with your NTP server, go to "Host -> Manage -> System -> Time & date" and click "Edit settings".
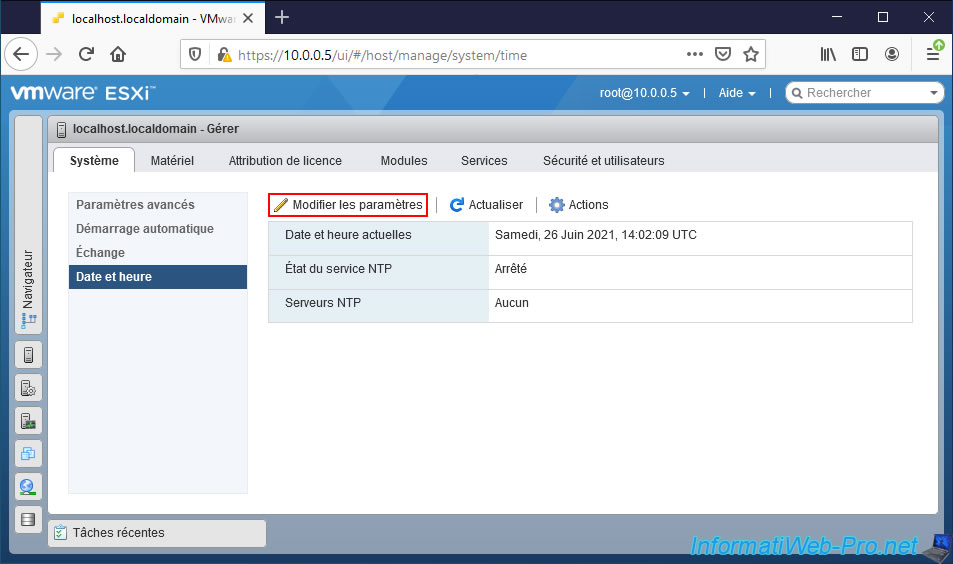
Select "Use Network Time Protocol (enable NTP client)", select "Start and stop with host" and specify the IP address of the domain controller in your Active Directory infrastructure, then click Save.
Important : if you have multiple domain controllers in your Active Directory infrastructure, be sure to provide the IP address of the domain controller with the "PDC emulator (Primary Domain Controller emulator)" FSMO role.
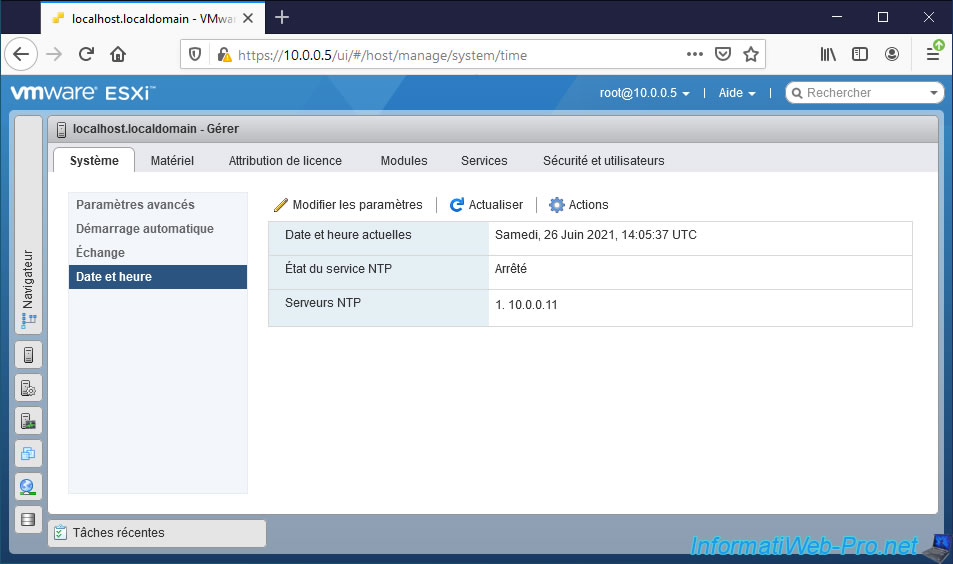
Once the IP address of the NTP server has been added, you will see it appear in the "NTP servers" line.
However, as you can see, the NTP service is currently stopped.
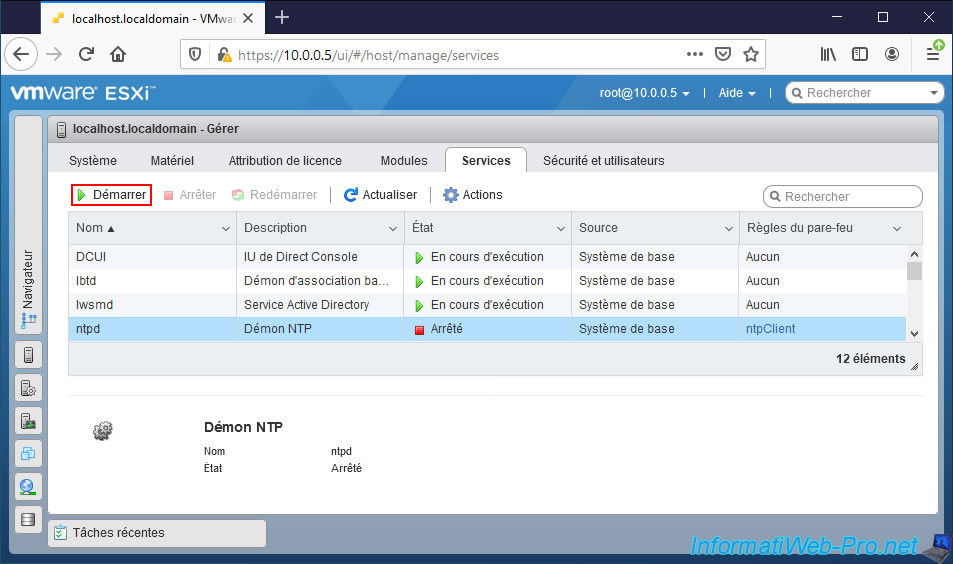
In order for your VMware ESXi hypervisor to automatically synchronize its clock from your NTP server, you will need to start the "ntpd" service (NTP Daemon) from the "Services" tab.
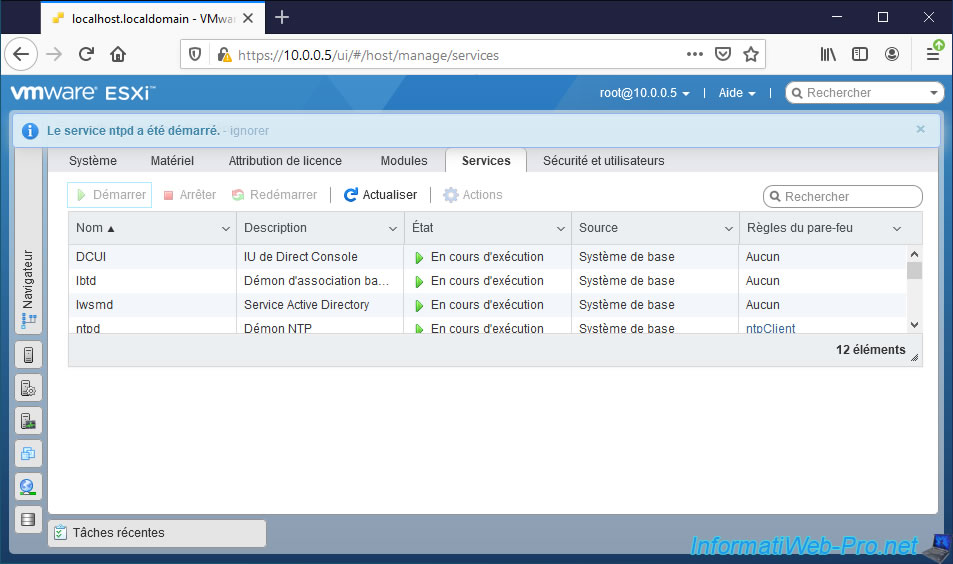
The "The service ntpd was successfully started" message appears.
Now, if you go back to the "System -> Time & date" tab, you will see that the NTP service is running.
5. VMware ESXi hypervisor network configuration
In order for your VMware ESXi hypervisor to find the Active Directory domain that you want to join, you must change the DNS configuration of it.
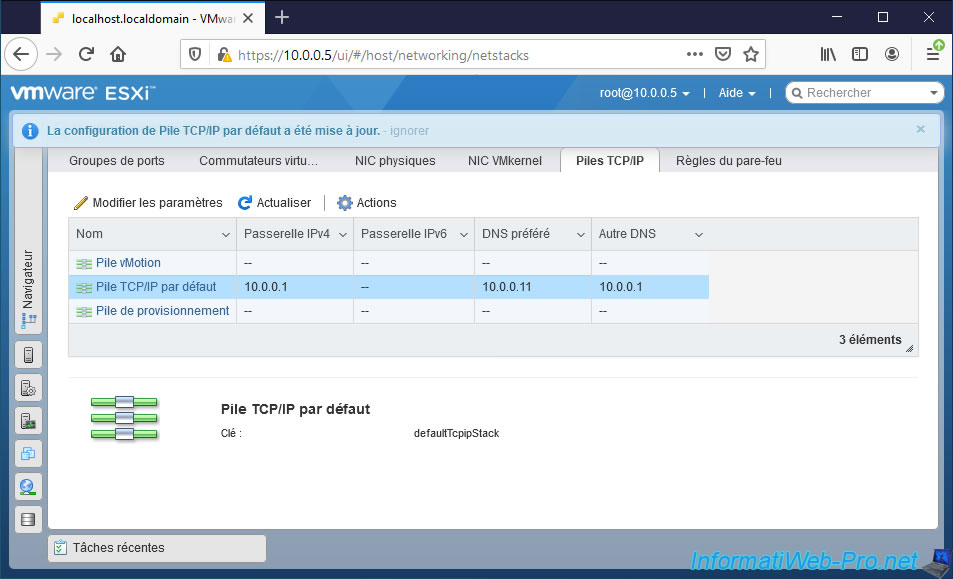
To do this, go to : Networking -> TCP/IP stacks.
Then, select the "Default TCP/IP stack" and click "Edit settings".
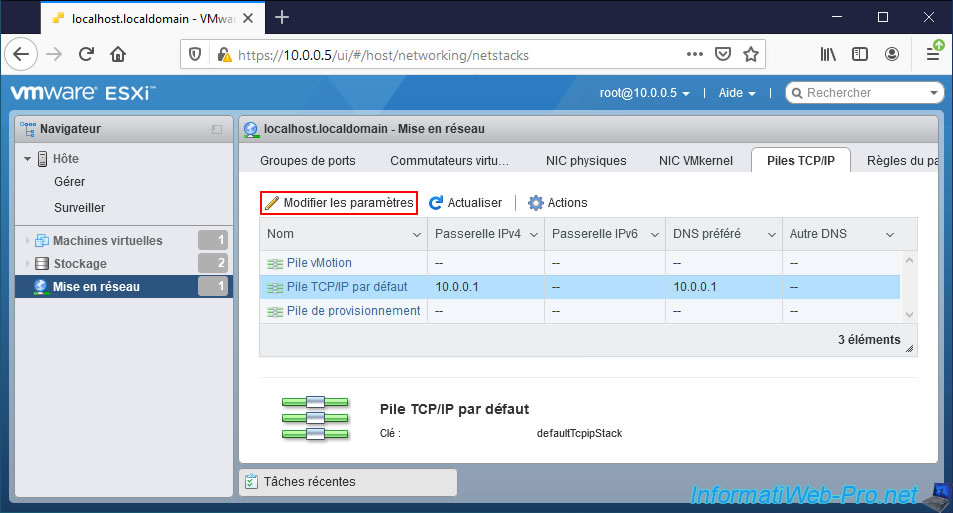
By default, your hypervisor host name is "localhost" and probably only one DNS server is configured.
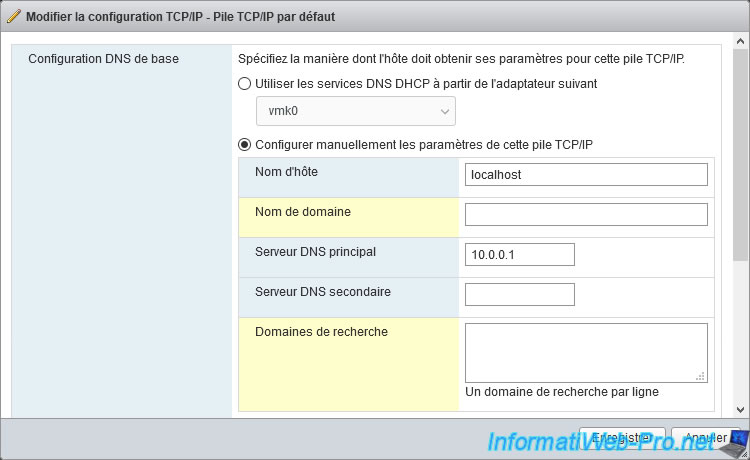
To join an Active Directory domain, edit the following information :
- Host name : enter "esxi" for example. This is the name under which your hypervisor will appear in different places (web interface of the hypervisor, computer account on the AD, as a subdomain in the address bar, ...).
- Domain name : the name of the domain that you will join later in this tutorial.
- Primary DNS server : IP address of your DNS server (usually it's on the same server as your domain controller) so that your hypervisor can know the IP address corresponding to the domain name you want to join.
- Secondary DNS server : the IP address of your router (for example) to resolve external domain names (present on the Internet).
- Search domains : indicates in which domain the short names will be searched. In other words, if your hypervisor tries to resolve the "esxi" short name, it will be able to find the corresponding IP address by automatically resolving the corresponding fully qualified domain name (DNS) (esxi.informatiweb.lan).
Then, click on : Save.
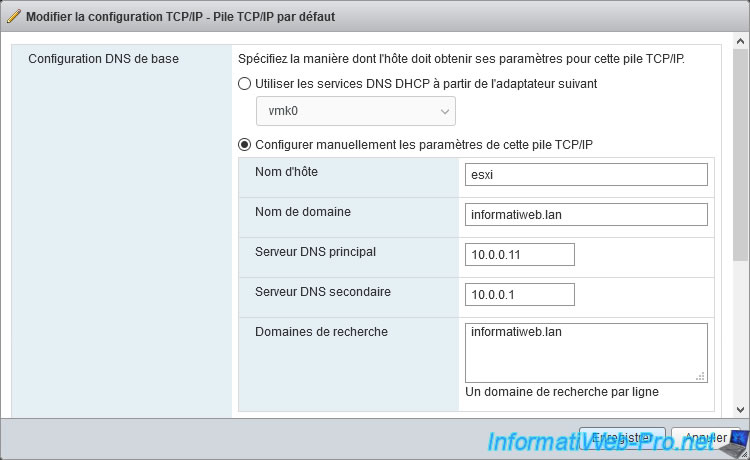
The "Successfully updated configuration for Default TCP/IP stack" message appears.
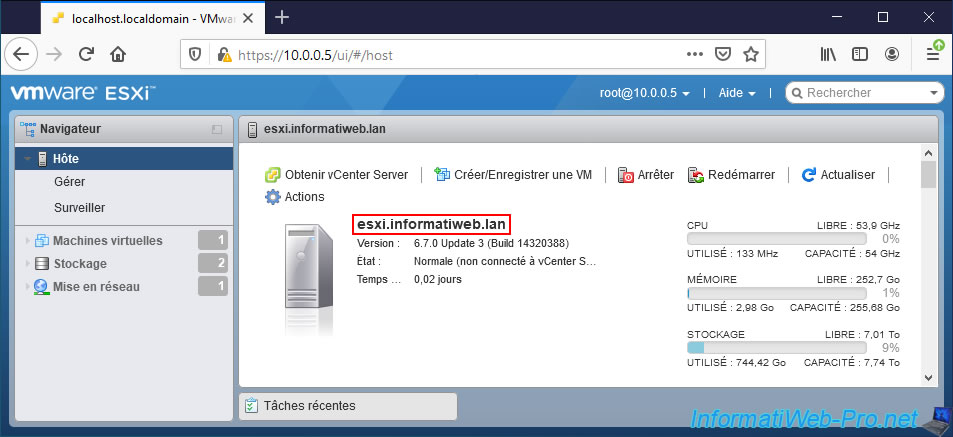
If you go to the "Host" menu, you will see that your hypervisor is now called "esxi.informatiweb.lan".
Note that if you refresh the page, this name will also appear in the tab name.
Share this tutorial
To see also
-
VMware 4/14/2023
VMware ESXi 6.7 - Best practices for creating a VM
-
VMware 2/17/2023
VMware ESXi 6.7 - Configure your virtual machines settings
-
VMware 6/2/2023
VMware ESXi 6.7 - Connect a smart card reader to a VM
-
VMware 10/19/2022
VMware ESXi 6.7 - DirectPath I/O (PCI passthrough)
You must be logged in to post a comment