Join the VMware ESXi 6.7 hypervisor to an Active Directory domain
- VMware
- 28 September 2022 at 14:55 UTC
-

- 2/2
6. Configure the DNS server
To be able to access your VMware ESXi hypervisor from its "esxi.informatiweb.lan" domain name, you will need to configure the corresponding "A" or "AAAA" DNS record on your local DNS server.
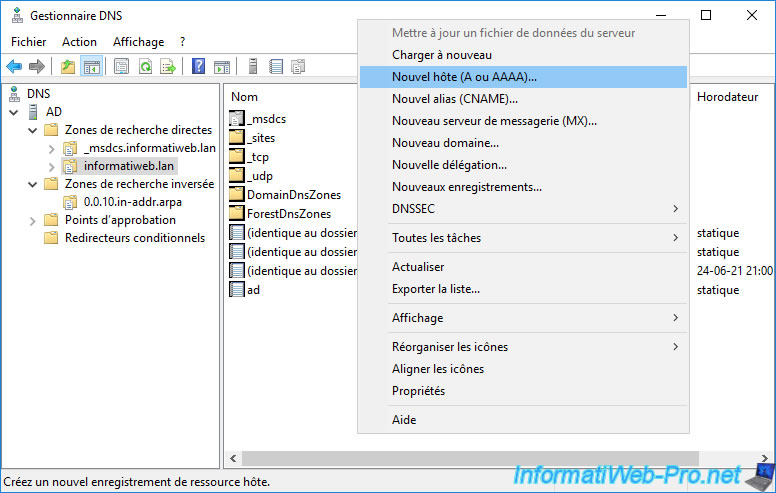
To do this, launch the "DNS" program (DNS Manager) and select your Forward Lookup Zone.
Then, in the right part, right click "New Host (A or AAAA)" in the empty space.
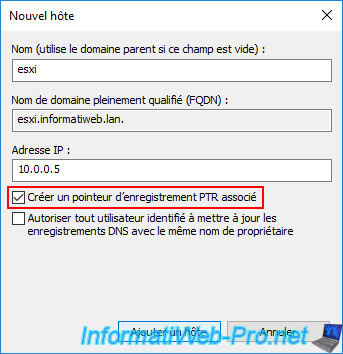
In the "New host" window that appears :
- enter the host name (short name) of your VMware ESXi hypervisor
- the fully qualified domain name (FQDN) will be updated in real time and will match the fully qualified domain name of your VMware ESXi hypervisor
- enter the IP address of your VMware ESXi hypervisor
- check the "Create associated pointer (PTR) record" box
- then, click on : Add Host
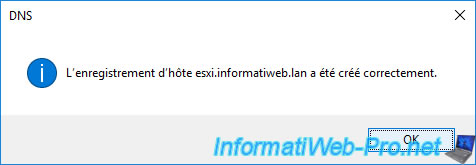
The host record esxi.informatiweb.lan was successfully created.
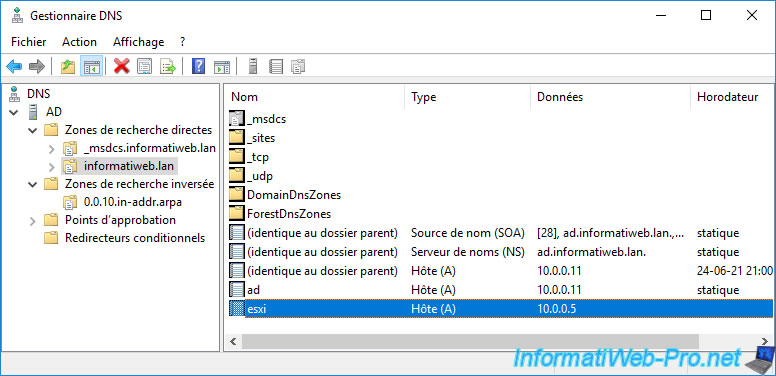
Your new DNS record will appear in your Forward Lookup Zone.
And its associated pointer will appear in the Reverse Lookup Zone.
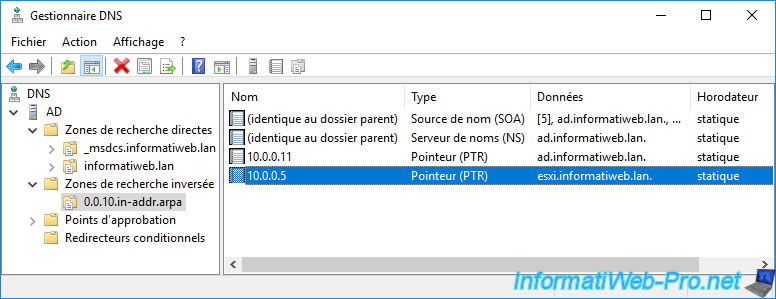
From a client PC configured with the IP address of your DNS server as the main DNS server, you can therefore also access your hypervisor by entering the "https: //esxi.informatiweb.lan/ui" address.
7. Configure the "ESX Admins" Active Directory group (optional)
By default, VMware ESXi is configured to grant "Administrator" rights to members of the "ESX Admins" Active Directory group if it exists.
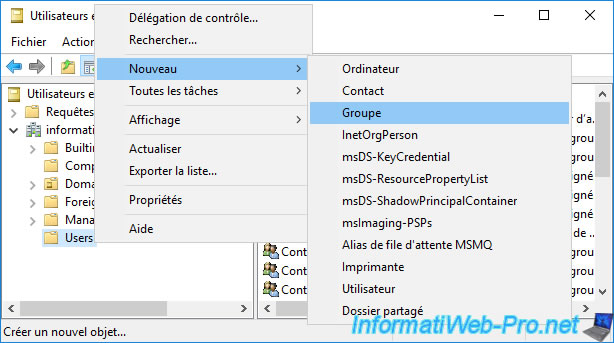
On your Active Directory domain controller, open the "Active Directory Users and Computers" console and right-click "New -> Group" on the "Users" folder (or on any organizational unit).
Note that this group can be created before or after joining your VMware ESXi hypervisor to an Active Directory.
Indeed, once joined to your Active Directory, your VMware ESXi hypervisor will periodically check the presence of this "ESX Admins" group on your Active Directory infrastructure.
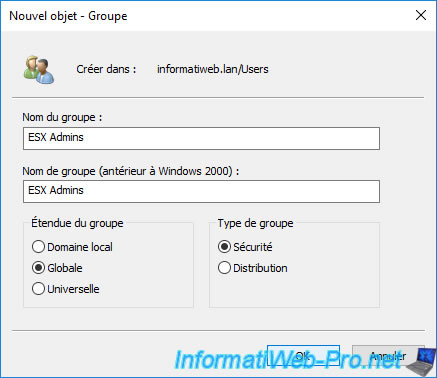
Specify "ESX Admins" for the group name and make sure to create a group of type "Security".
As previously stated, VMware ESXi looks for a group named "ESX Admins".
However, you can change this name in the advanced settings of your VMware ESXi hypervisor if you wish.
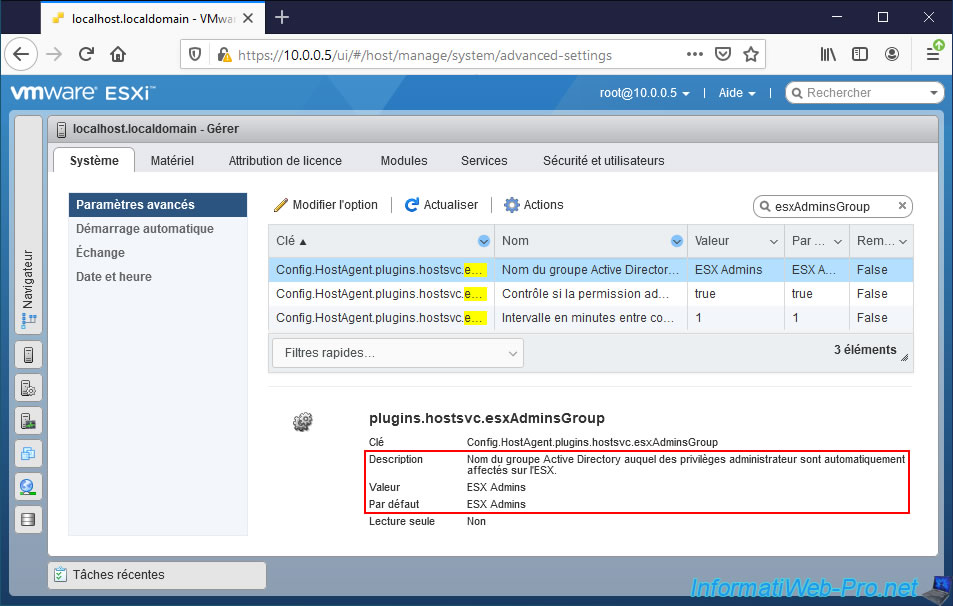
To do this, go to : Host -> Manage -> System -> Advanced settings.
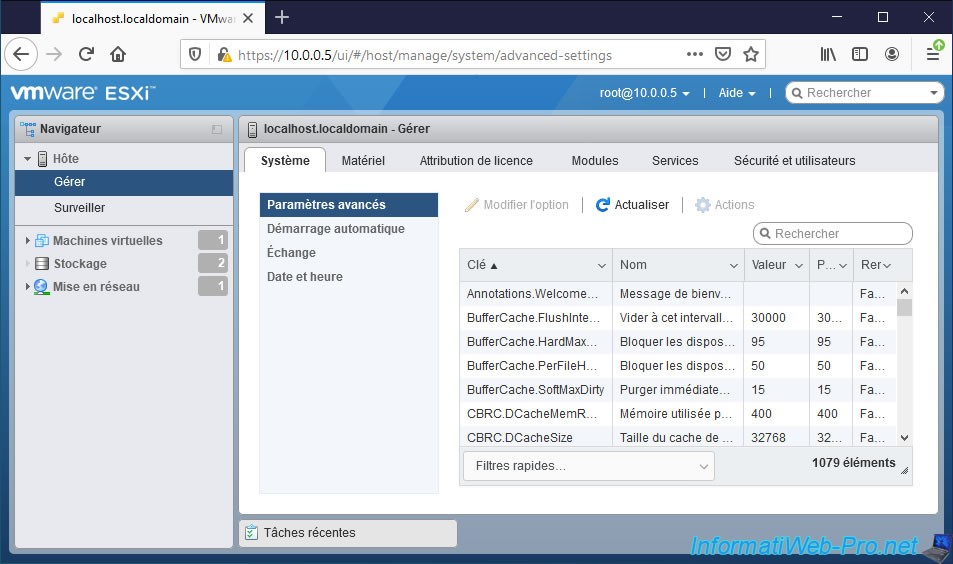
Type "esxAdminsGroup" in the search box and press Enter.
In the advanced settings that appear, select the "plugins.hostsvc.esxAdminsGroup" setting.
As you can see in the description of this advanced setting, this setting is used to define the name of the Active Directory group to which administrator privileges are automatically assigned on the ESX.
And as you can see, the default (or in other words the name of this group) is "ESX Admins".
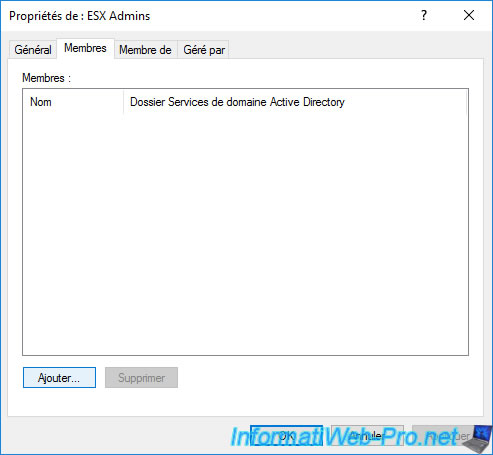
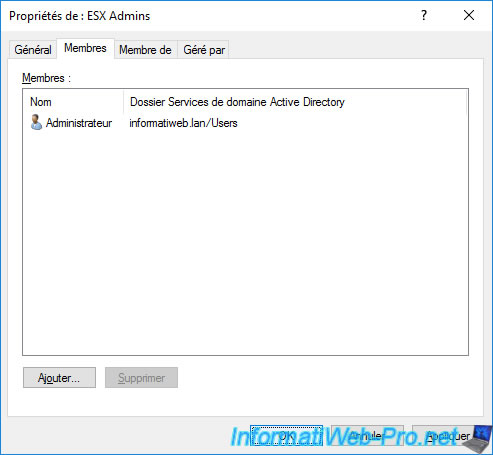
Double click on the created group and go to the "Members" tab.
Then, click on : Add.
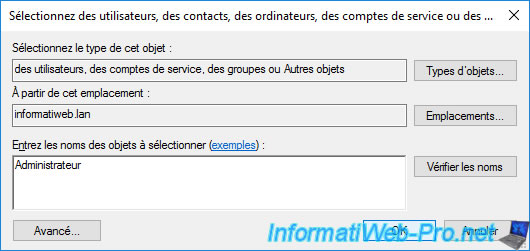
Specify the name of the user you want to add as an administrator of your VMware ESXi hypervisor and click OK.
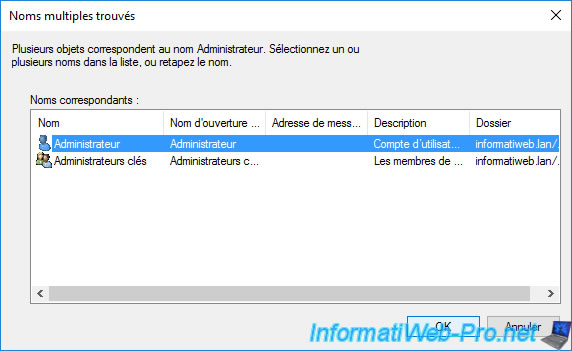
If more than one name is found on your Active Directory server, select the correct one and click OK.
This user has been added to the "ESX Admins" Active Directory group and will have administrator rights on your VMware ESXi hypervisor.
Add other users to this group if you want, then click OK.
8. Join VMware ESXi to an Active Directory domain
To join your VMware ESXi hypervisor to an Active Directory domain, go to : Host -> Manage -> Security & users -> Authentication.
Then, click on : Join domain.
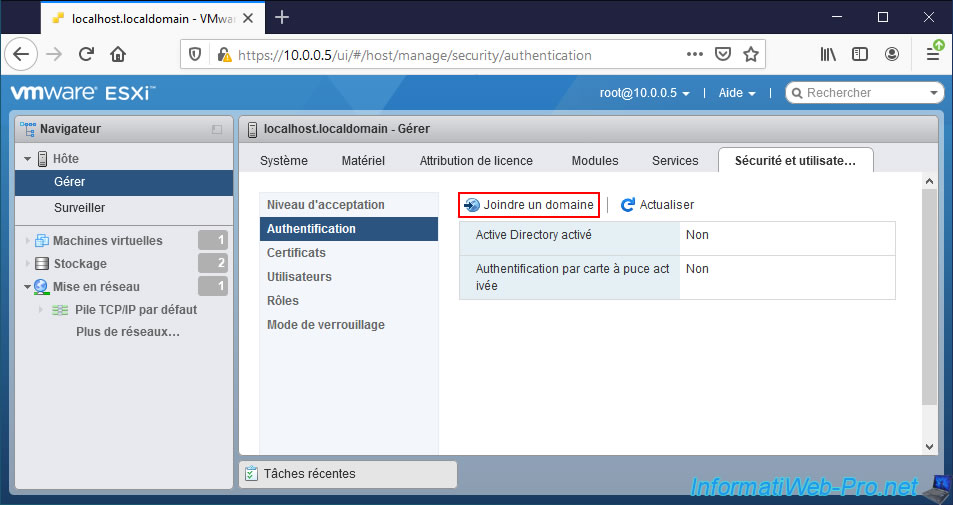
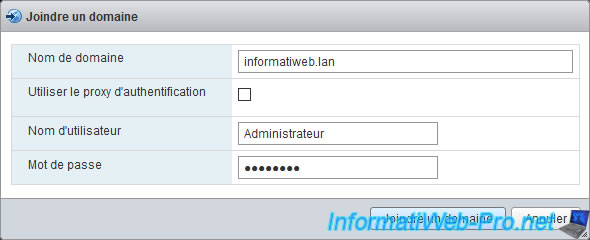
In the "Join a domain" window that appears, specify :
- Domain name : the name of the Active Directory domain to join
- User name : the name of the Administrator account of your domain
- Password : the password for this account
Note : the "Use authentication proxy" option allows you to use a vSphere Authentication Proxy server for authentication rather than using credentials (user name / password).
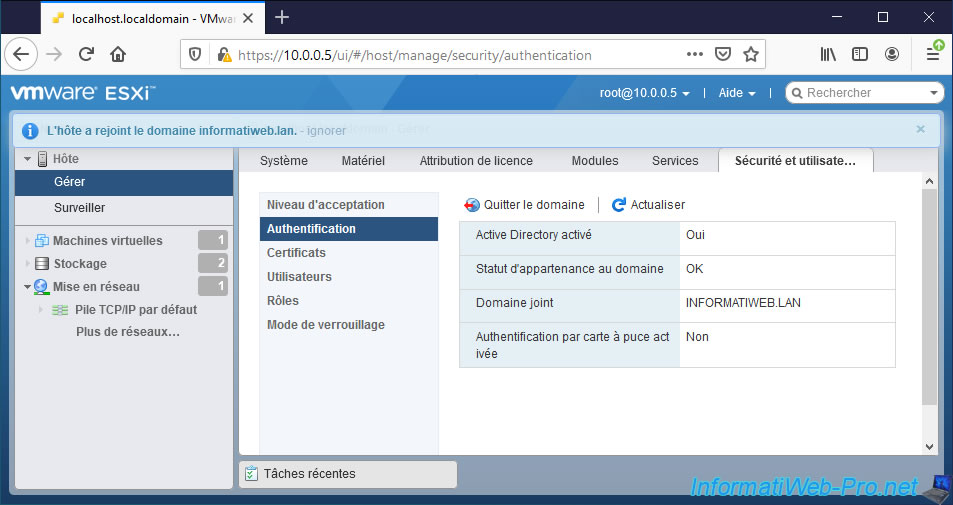
If the information provided is correct, the "The Host was successfully joined to the domain [AD domain name]" message will appear.
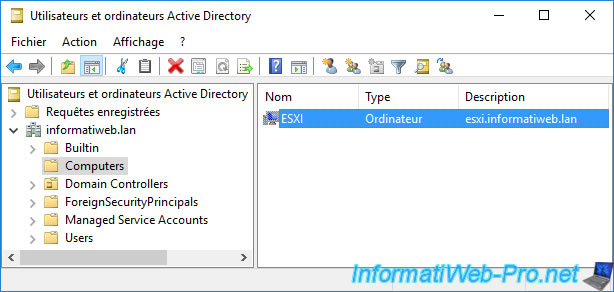
On your domain controller, you will see a new computer object appear with the name of your VMware ESXi server.
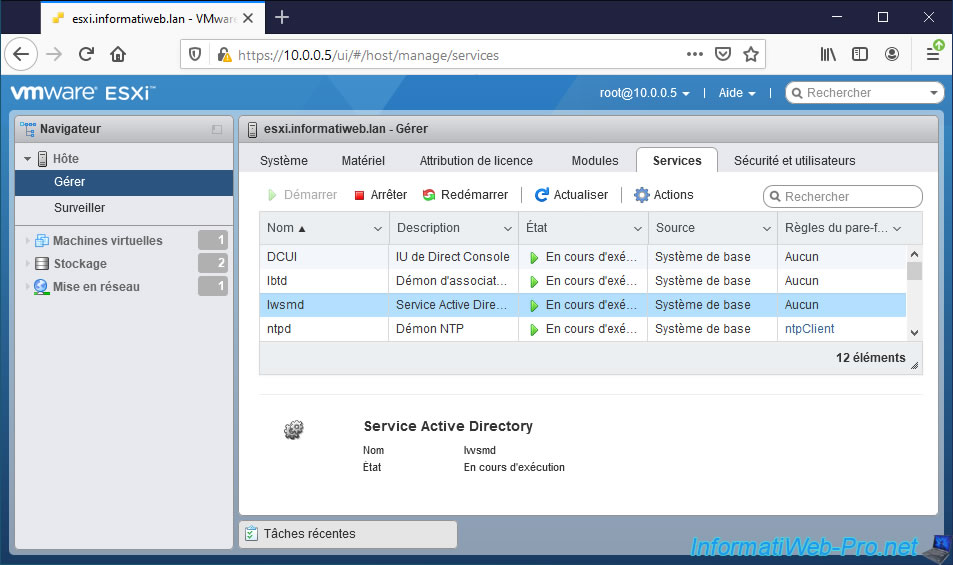
In the list of services, you will see that the "lwsmd" service (Active Directory Service) is started.
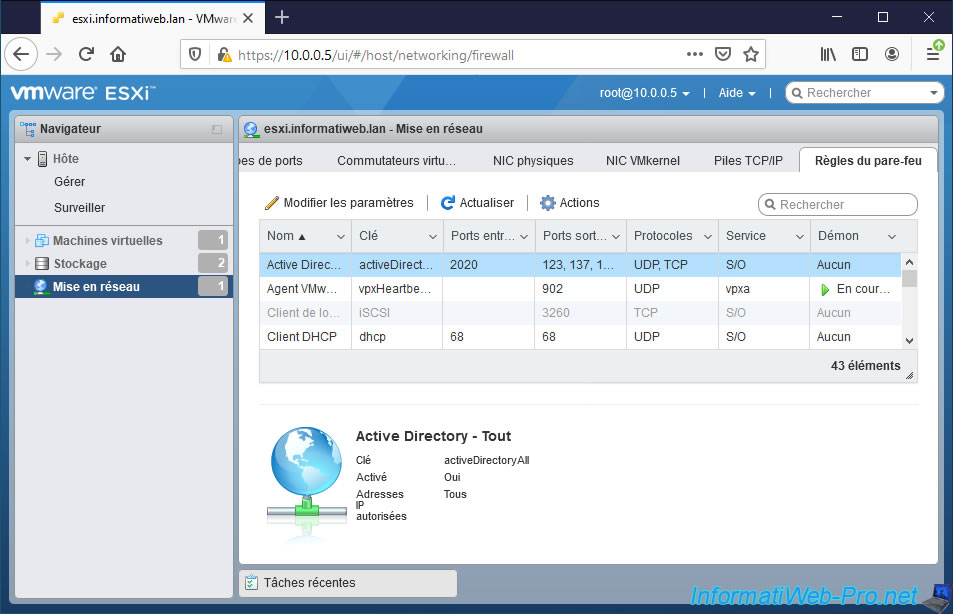
For your VMware ESXi hypervisor firewall, you will see that the "Active Directory All" rule has been enabled.
9. Configure permissions for Active Directory (AD) users
As explained in our "VMware ESXi 6.7 - Manage roles, users and permissions" tutorial, you can manage the permissions on different objects (host, virtual machines, storage, ...) of your VMware ESXi hypervisor.
In this case, we are going to manage the permissions on the host itself.
To do this, right click "Permissions" on the host.
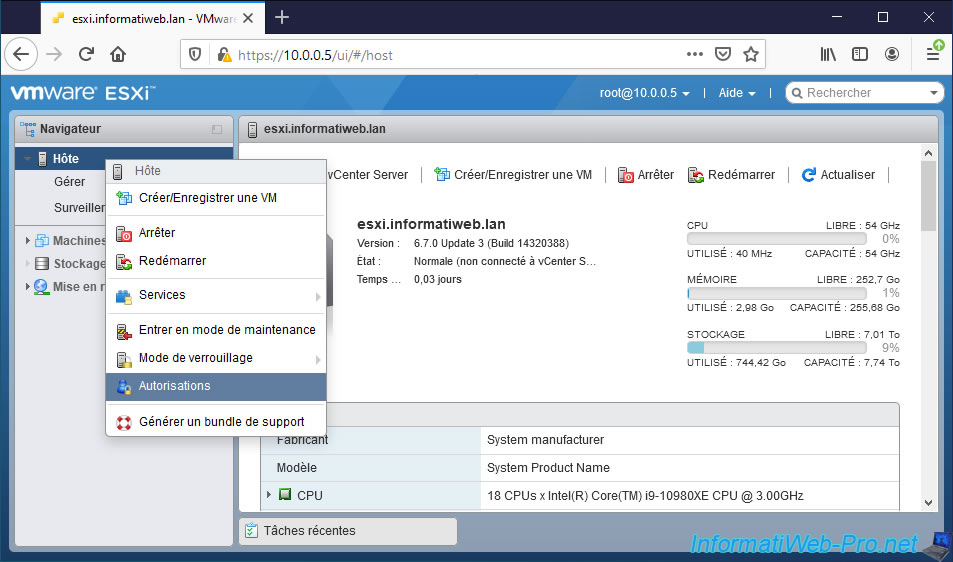
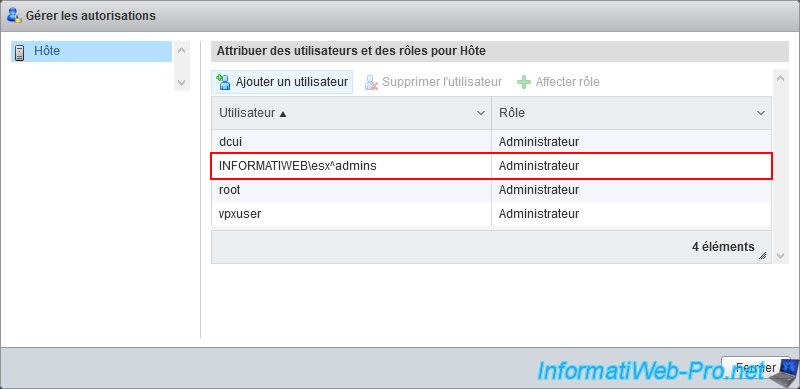
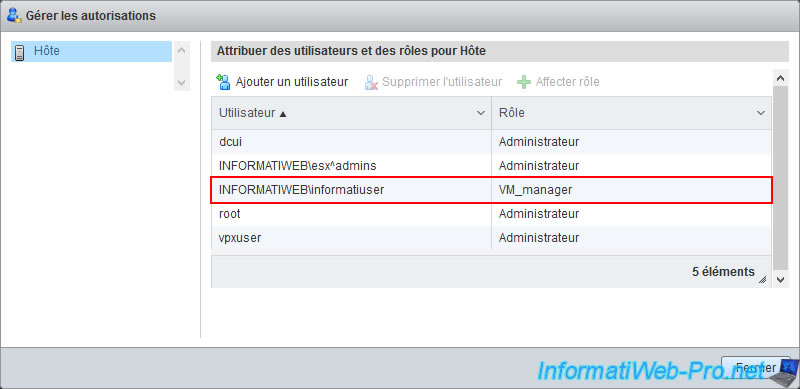
If you have previously created the "ESX Admins" group on your Active Directory domain controller, you will see that the members of this "esx^admins" group will have the "Administrator" role by default.
This allows them to grant them full access to your VMware ESXi hypervisor.
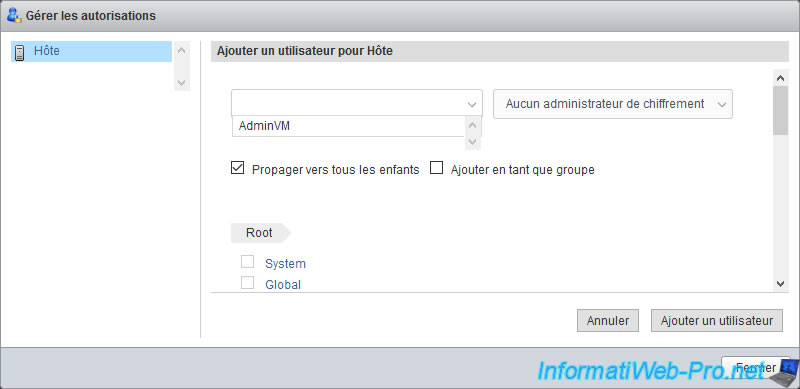
To add permission for an Active Directory user or group, click : Add User.
As you can see, in this web interface, VMware ESXi only lists local users.
Unlike the "VMware vSphere Client" thick client which displayed these informations before, but which no longer exists now because it has been replaced by this HTML 5 client (VMware Host Client).
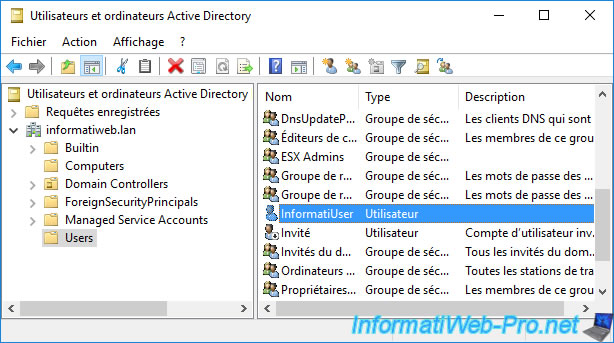
On our domain controller, we have created an "InformatiUser" user.
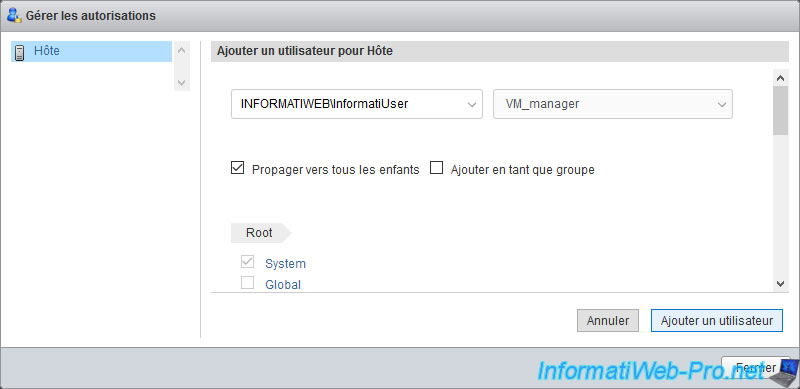
To add permissions to a user or group in your Active Directory, you will need to provide their full name using the format "[NETBIOS name of the Active Directory domain]\[user name]".
In our case, this gives : INFORMATIWEB\InformatiUser.
Then, select the role you want to assign it for the affected object.
In our case, we selected the "VM_manager" role that we created in our previous tutorial : VMware ESXi 6.7 - Manage roles, users and permissions.
Note : if it's an Active Directory group, check the "Add as group" box.
Then, click on : Add user.
The permission for your Active Directory user or group appears.
10. Permissions test
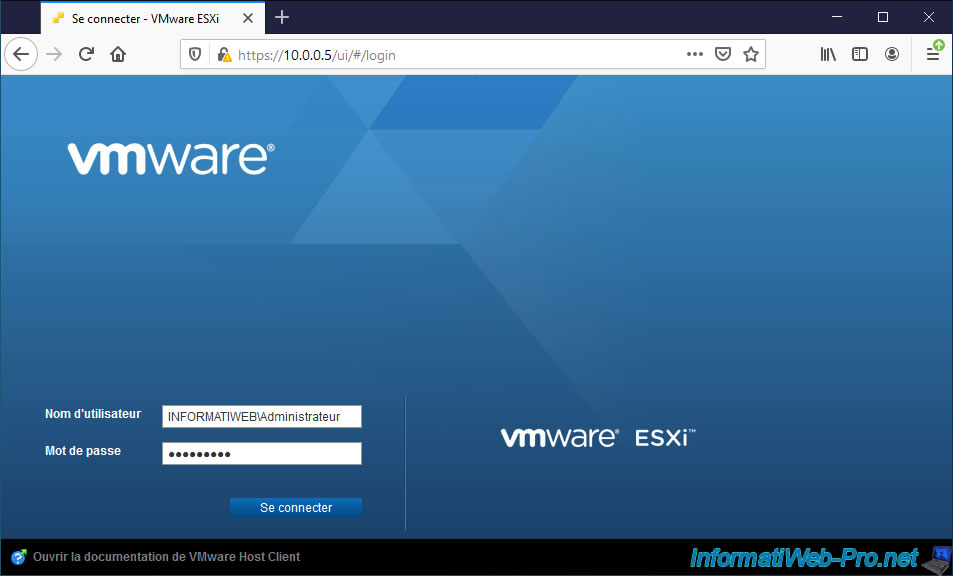
Log out and log in with an account that is in the "ESX Admins" group.
In our case, we connect with the "INFORMATIWEB\Administrator" Active Directory account.
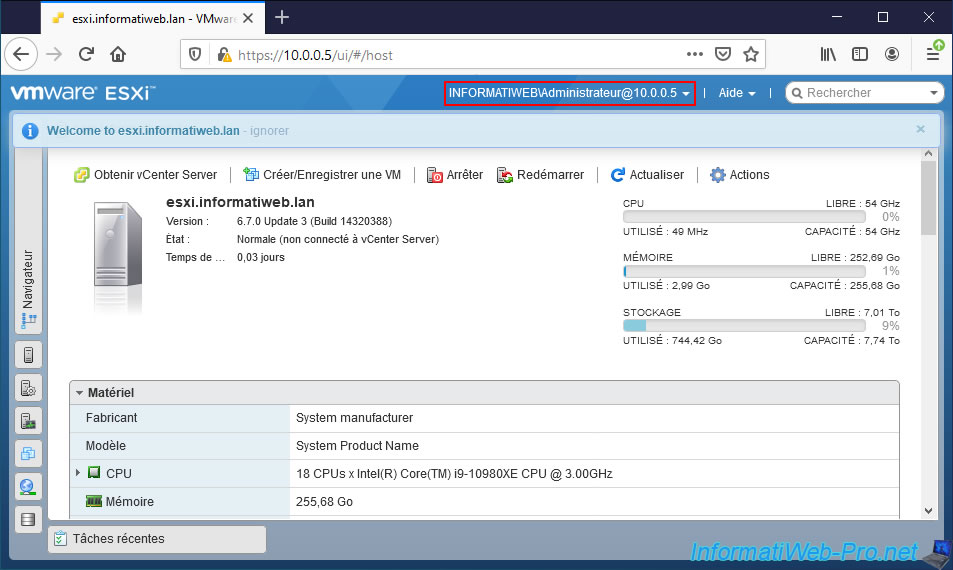
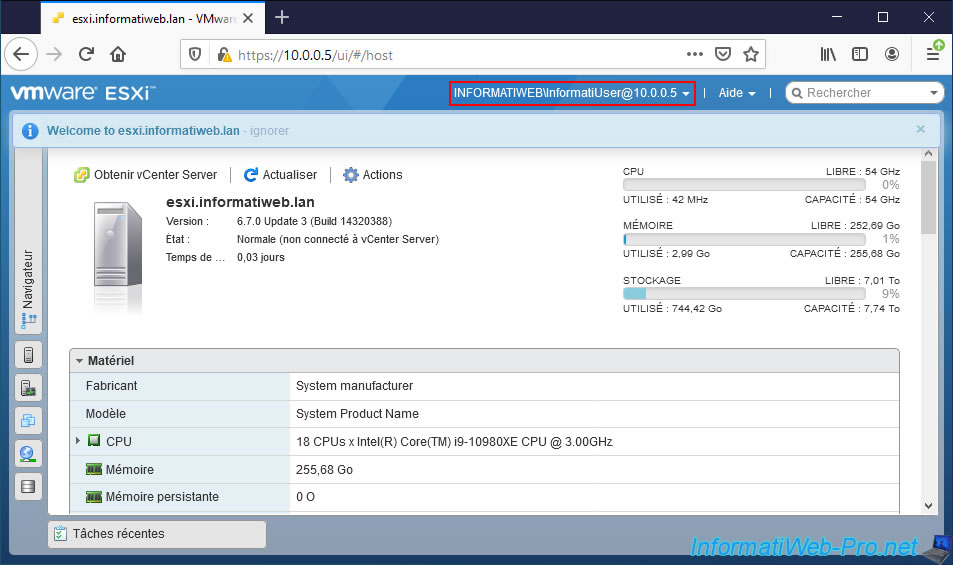
As expected, we have access to our VMware ESXi hypervisor with this user account.
As you can see at the top of the page.
Let's log out and log in with the user we've manually granted permissions to through our "VM_manager" custom role.
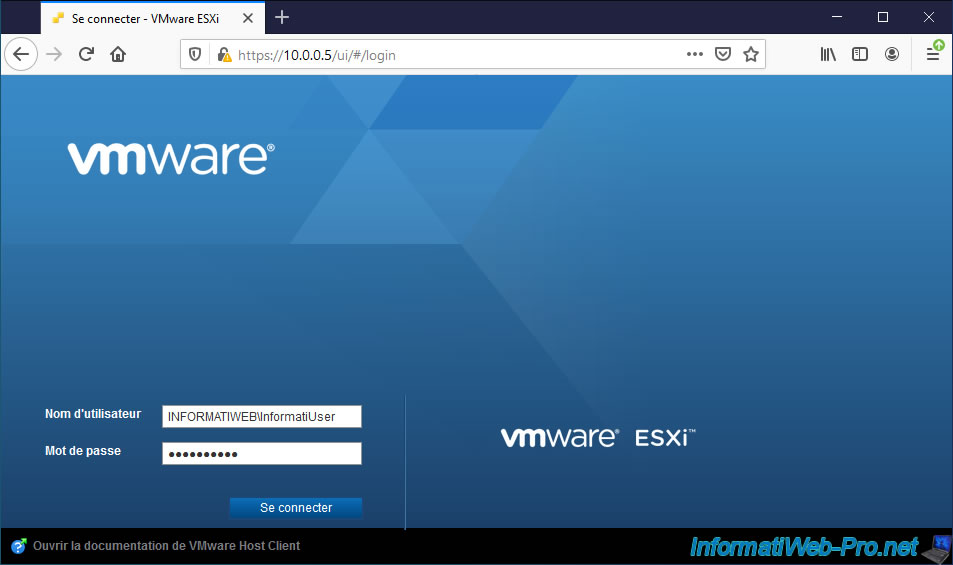
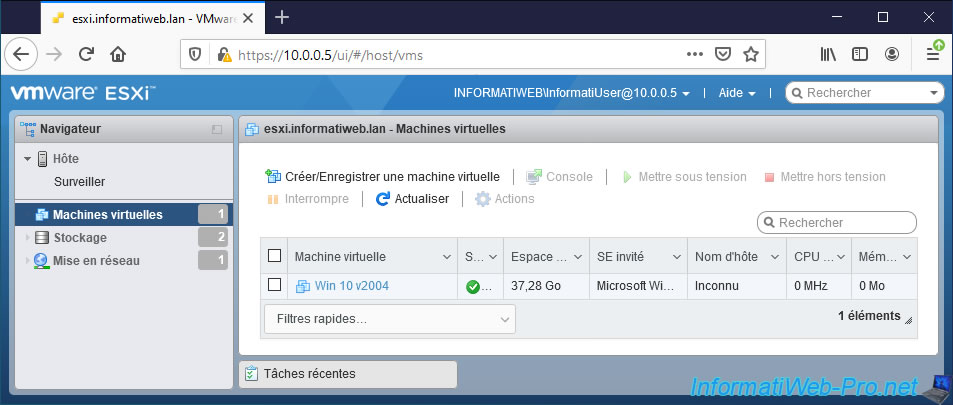
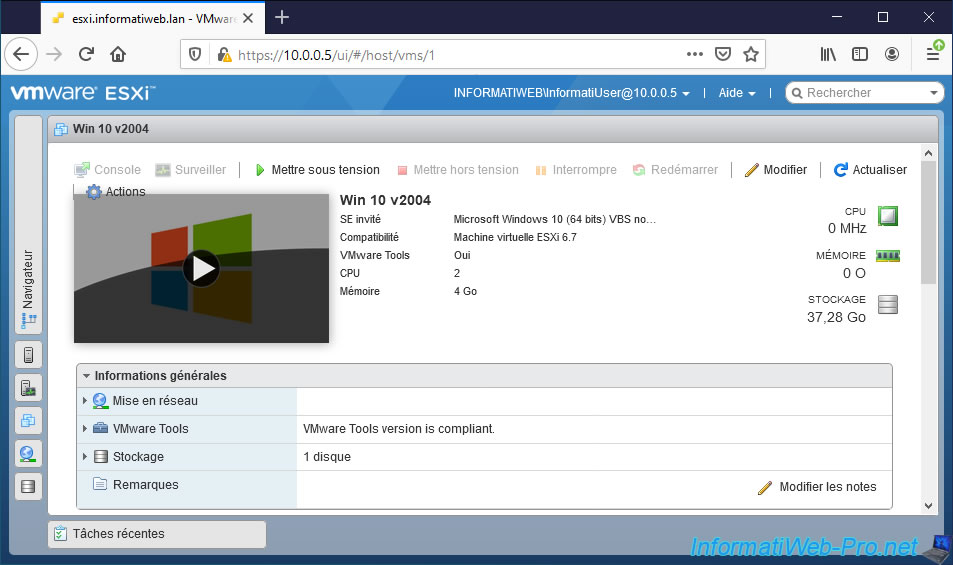
As expected, we also have access to our VMware ESXi hypervisor. But with limited rights.
Since our custom role allows us to manage virtual machines, we have the right to view the list of virtual machines present on this VMware ESXi hypervisor.
As well as managing these virtual machines.
Share this tutorial
To see also
-
VMware 4/14/2023
VMware ESXi 6.7 - Best practices for creating a VM
-
VMware 2/17/2023
VMware ESXi 6.7 - Configure your virtual machines settings
-
VMware 6/2/2023
VMware ESXi 6.7 - Connect a smart card reader to a VM
-
VMware 10/19/2022
VMware ESXi 6.7 - DirectPath I/O (PCI passthrough)

No comment