Hyper-V server and generation 1 and 2 virtual machine settings on WS 2012 R2 or WS 2016
- Microsoft
- 20 December 2019 at 10:07 UTC
-

- 2/4

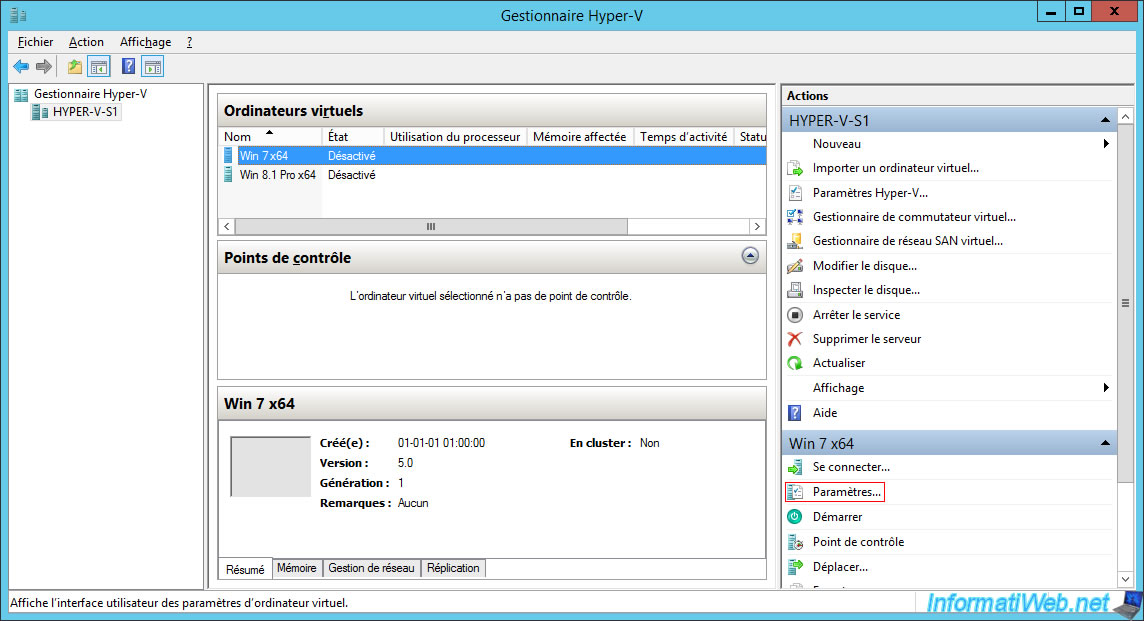
2. Generation 1 virtual machine settings
To access the settings of a virtual machine, select it in the Hyper-V Manager and click "Settings" in the right column.
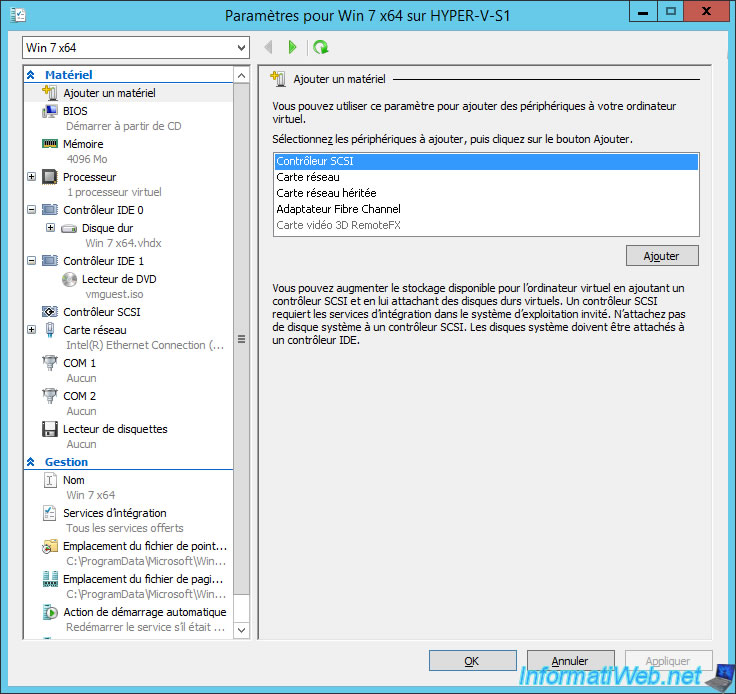
2.1. Add Hardware
For Generation 1 virtual machines, you can add this type of virtual hardware :
- SCSI Controller
- Network Adapter
- Legacy Network Adapter
- Fibre Channel Adapter
- RemoteFX 3D Video Adapter (if the "Remote Desktop Virtualization Host" is installed on the Hyper-V server and the Remote FX option is enabled in the "Physical GPUs" section of the Hyper-V server settings )
Note that the SCSI controller requires integration services to be installed in the guest operating system.
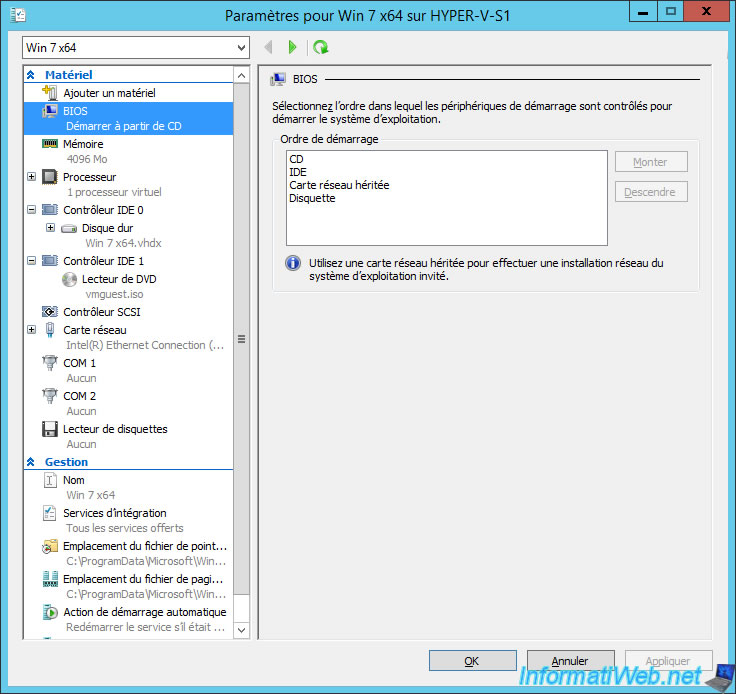
2.2. BIOS
Generation 1 virtual machines use a legacy BIOS.
In the "BIOS" section, you can configure the boot order of the virtual machine :
- CD : the virtual CD / DVD drive
- IDE : the virtual hard disk
- Legacy Network Adapter : to boot over the network (PXE)
- Floppy : to boot to a virtual floppy disk
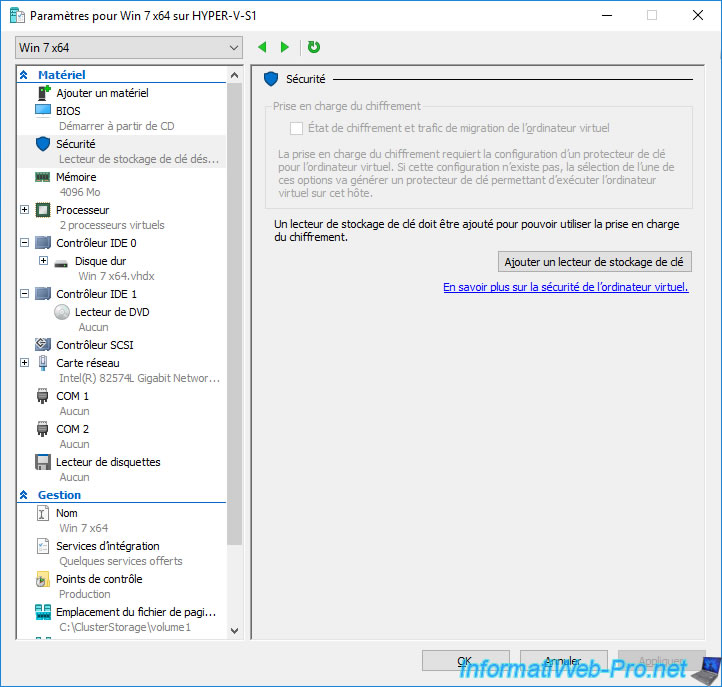
2.3. Security
Since Windows Server 2016, a new section called "Security" has appeared.
For generation 1 VMs, you will have the option to enable encryption of that VM (its data and state), as well as migration traffic from it.
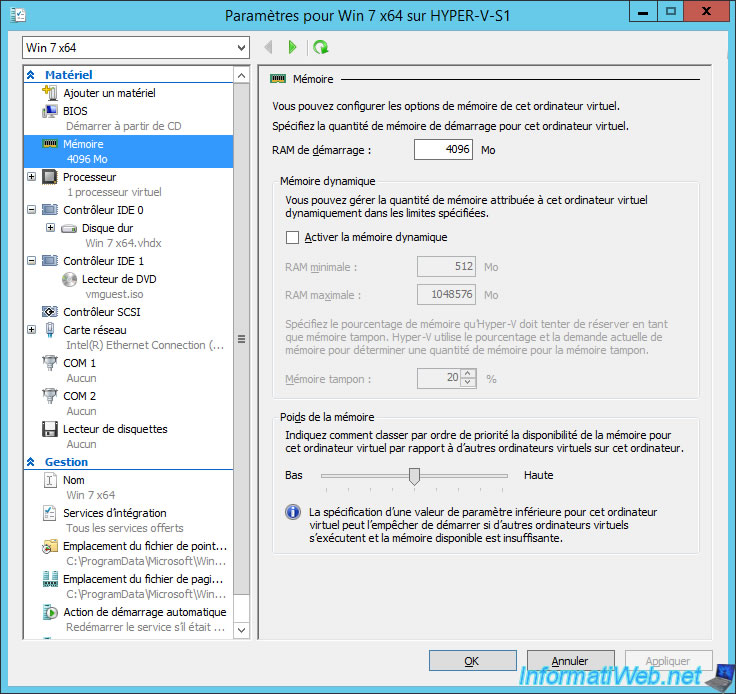
2.4. Memory
In the "Memory" section, you can adjust :
- the startup RAM that will be allocated to a virtual machine. If you don't use dynamic memory, it will be this amount of RAM that will be allocated in a fixed way.
- the dynamic memory that can be used by this virtual machine. This is useful when you have many virtual machines and most of them are running simultaneously.
- the memory weight : allows you to create a priority order for allocating RAM to your different virtual machines. In other words, in case of insufficient RAM, your Hyper-V server will know that it must allocate memory priority to a particular virtual machine.
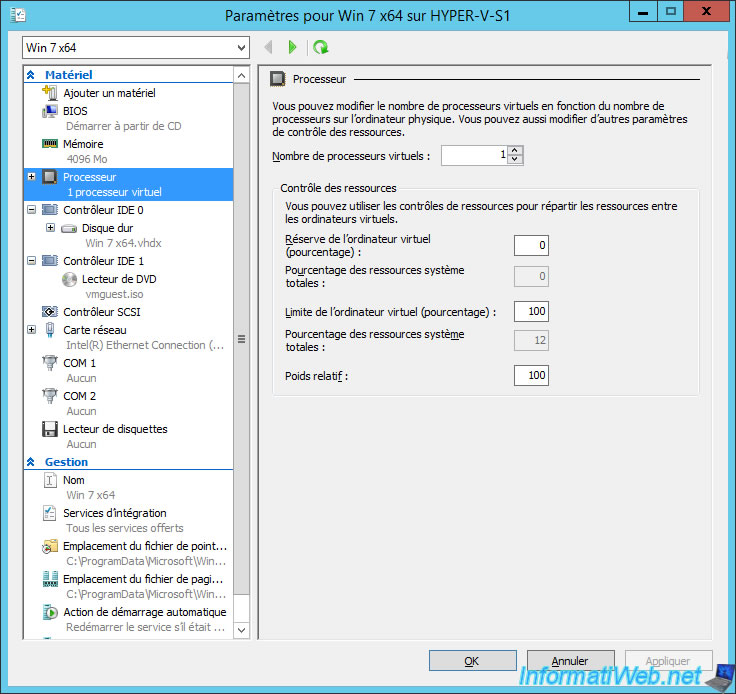
2.5. Processor
In the "Processor" section, you will be able to choose the number of virtual processors to allocate to this virtual machine.
You will also be able to control the use of the processor resources thanks to various setttings :
- Virtual machine reserve (percentage) : specifies the percentage of CPU resources that will be reserved for this virtual machine. This ensures that this percentage of CPU utilization can be used by the virtual machine.
- Virtual machine limit (percentage) : specify the maximum percentage of CPU resources that can be used by this virtual machine.
- Relative weight : this is a weight that will allow Hyper-V to know how to manage CPU resources.
The possible values for the relative weight vary between 1 and 10,000 and correspond to these priorities :
- relative weight of 200 = high priority
- relative weight of 100 = normal priority (default)
- relative weight of 50 = low priority
- a value between 1 and 10,000 allows you to manage priorities in a personalized way
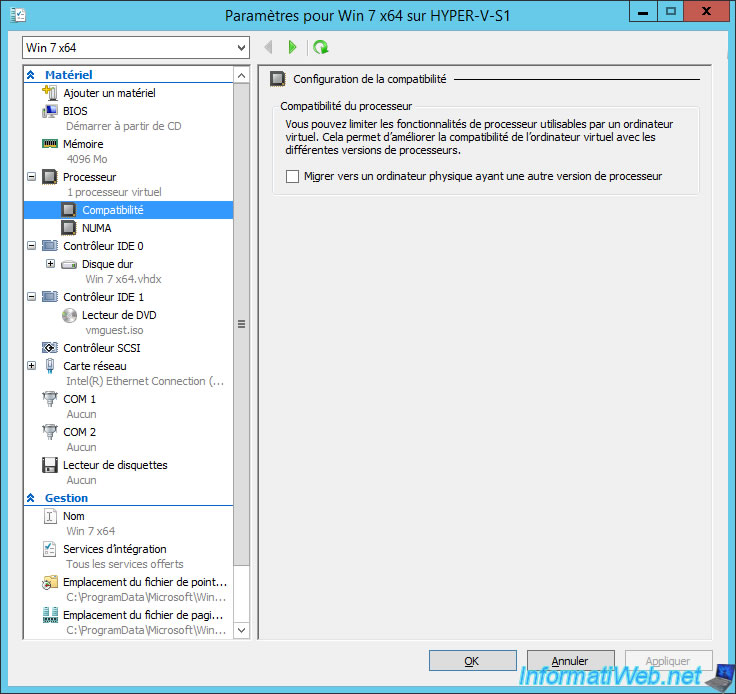
In the "Processor -> Compatibility" section, you can enable the "Migrate to a physical computer with a different processor version" option to ensure server processor compatibility for live migrations.
In fact, for a virtual machine to be dynamically migrated from one Hyper-V server to another, both servers must have the same processor or at least the same functionalities (mainly virtualization instructions).
However, when using servers with slightly different processors, this option makes them compatible with each other using "basic" instructions.
The only drawback is that it will affect the performance of your virtual machine.
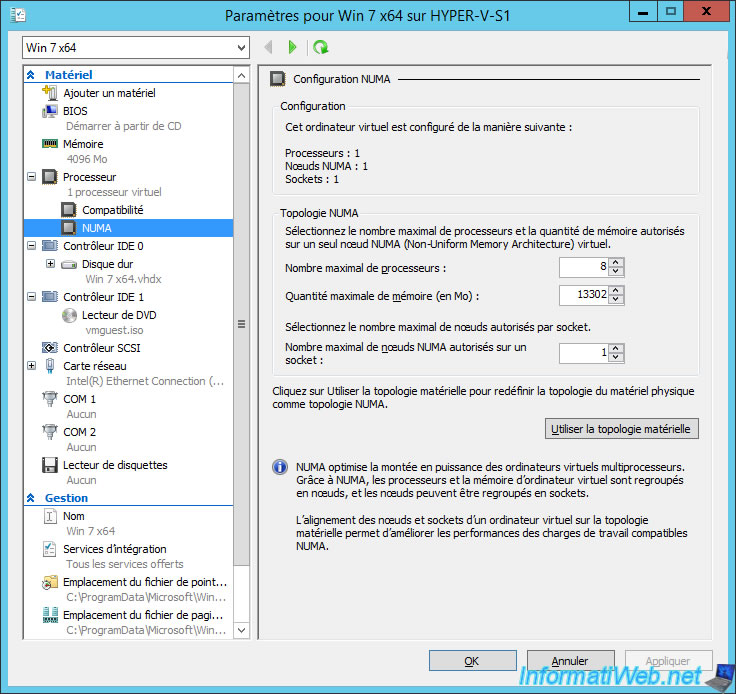
NUMA (Non-Uniform Memory Access) is a memory architecture shared by several logical processors.
For more information, see Microsoft's "NUMA – Understand it & its usefulness with Windows Server 2012" article.
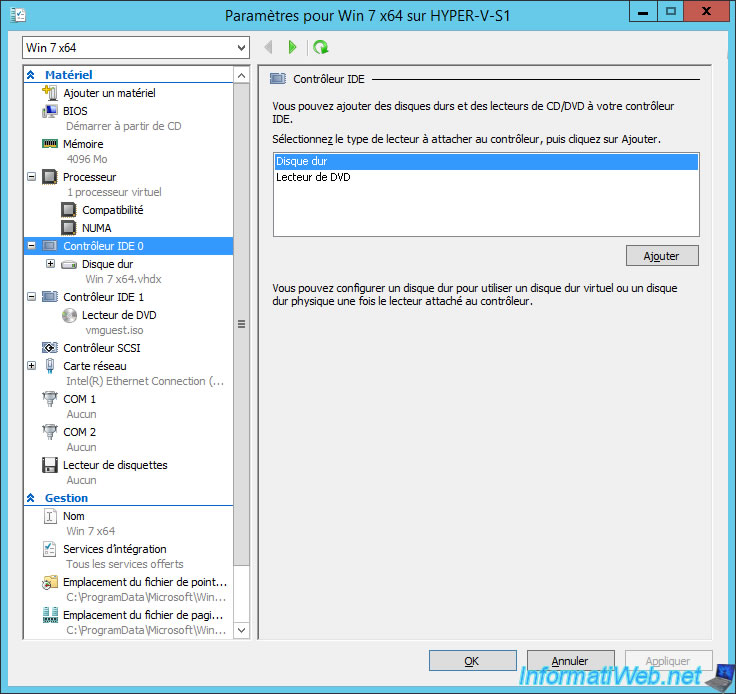
2.6. IDE controller
By default, when you create a virtual machine in Generation 1, it will have an IDE controller with a virtual hard disk and a virtual DVD drive.
On this IDE controller, you can add :
- virtual hard drives
- virtual DVD drives
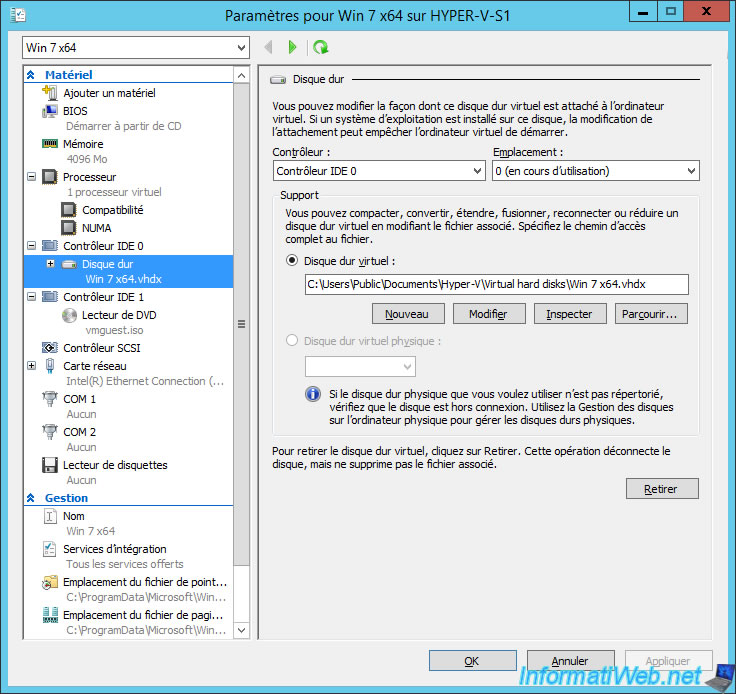
For each virtual hard disk attached to your virtual machine, you will be able to choose the controller on which to connect it, as well as its location on that controller.
You can also replace it with another virtual hard disk or use a physical hard disk as a virtual hard disk to increase virtual machine storage performance.
This is usually good for storing data from a database server, for example, that one would wish to virtualize without losing too much in performance.
By clicking "Inspect", you will be able to get information about the virtual hard disk, as well as its parent if it is a virtual hard disk in ".avhdx" format.
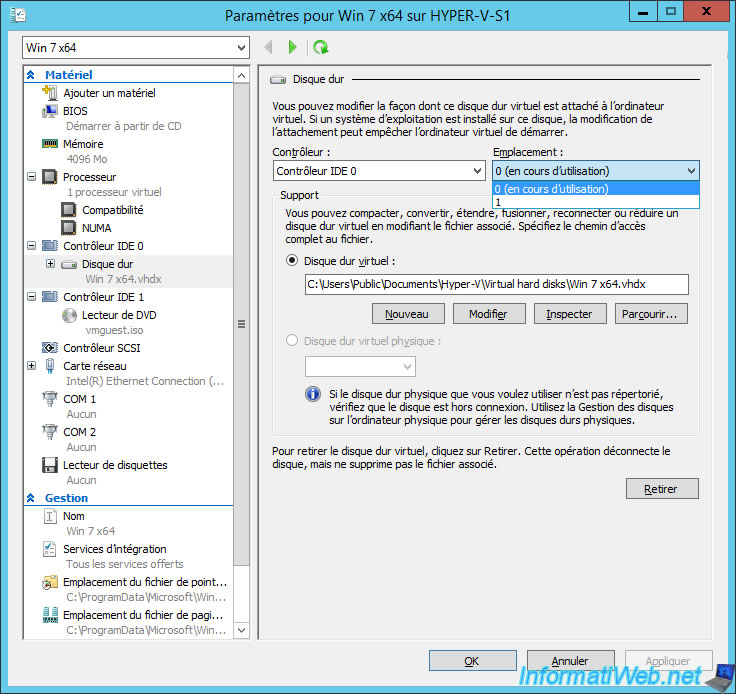
For the choice of location, Hyper-V respects the standards used.
In other words, for the IDE, you will only have 2 possibilities : master (0) and slave (1).
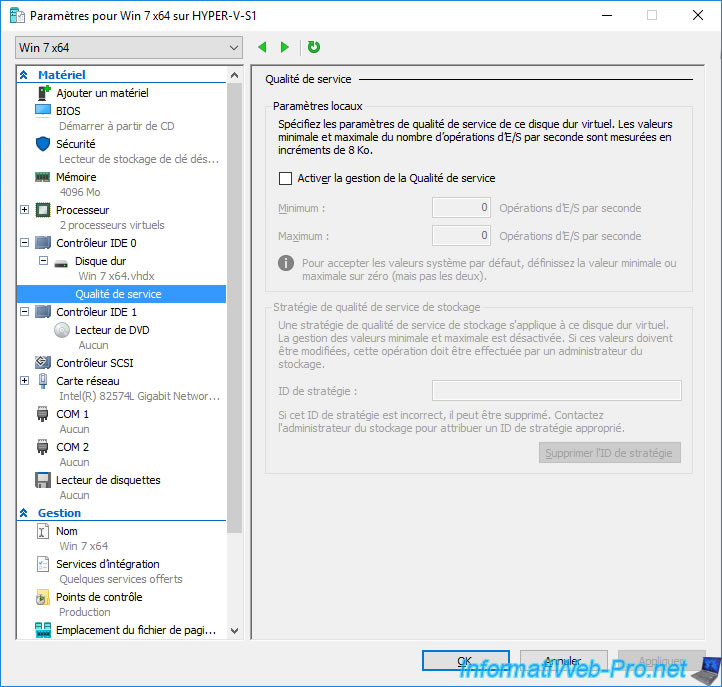
To prevent the physical hard disk from overwriting when virtual machines write large amounts of data to their virtual hard disk, you can limit the number of I/O (input/output) for each virtual hard disk.
For virtual hard disk sharing, you can allow simultaneous use of a single virtual hard disk by multiple virtual machines.
However, this feature is not available for virtual hard disks connected to an IDE controller.

Warning : since Windows Server 2016, the "Advanced Features" option has been renamed "Quality of Service", because the "Enable virtual hard disk sharing" option is no longer present there.
However, since Windows Server 2016, you have the possibility to create a new virtual hard disk format (VHD Set) which can be shared by several virtual machines thanks to a shared drive. Which was not the case before.
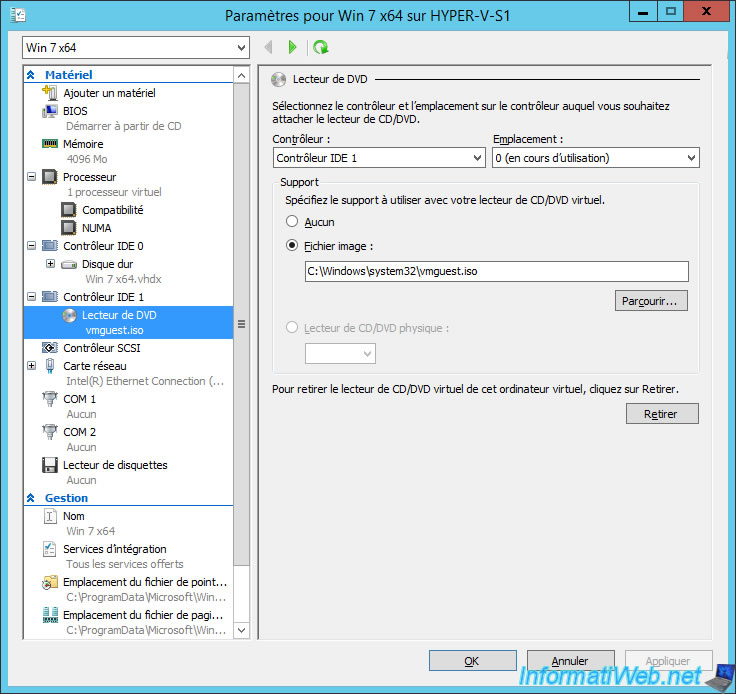
For the virtual DVD drive, you can also choose which controller and which slot to connect to.
Then, you can choose an iso file to insert into this virtual DVD drive or connect the physical CD/DVD drive of the server to the virtual DVD drive of the virtual machine.
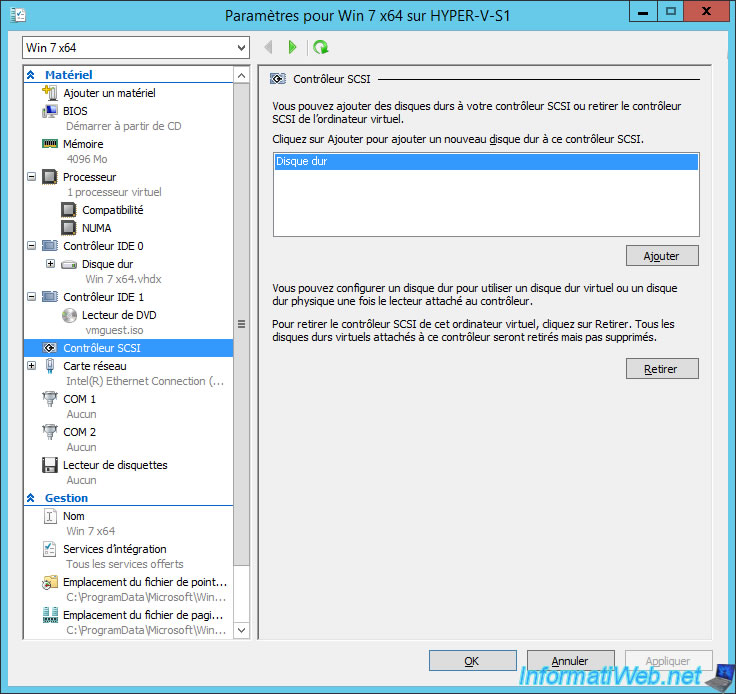
2.7. SCSI controller
By default, with Generation 1 virtual machines, a SCSI controller is present, but not used.
On this SCSI controller, you can add a virtual hard disk.
Since Windows Server 2016, you will also have the possibility to add a shared drive on this SCSI controller to use a virtual hard disk in VHDX or VHD Set (VHDS) format.
The VHD Set (VHDS) format appeared with Windows Server 2016 and is designed to be shared by multiple virtual machines.

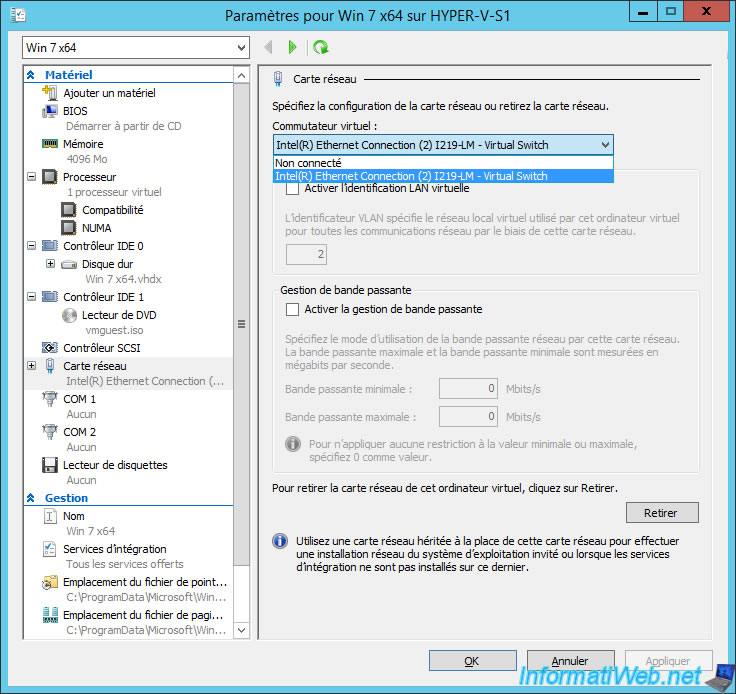
2.8. Network Adapter
In the "Network Adapter" section, you can choose which virtual network switch you want to connect to this virtual machine.
To disconnect from the network, simply select the "Not connected" option.
Although you can separate virtual machines by connecting them to different virtual switches, you can also use the VLAN system.
To do this, select the "Enable virtual LAN identification" check box and specify the same number for virtual machines that can communicate with each other.
To avoid saturating the network of your company and preventing a user to mass download on a virtual machine, you can enable bandwidth management.
This will allow you to specify the minimum and maximum bandwidth that the virtual machine will be able to use.
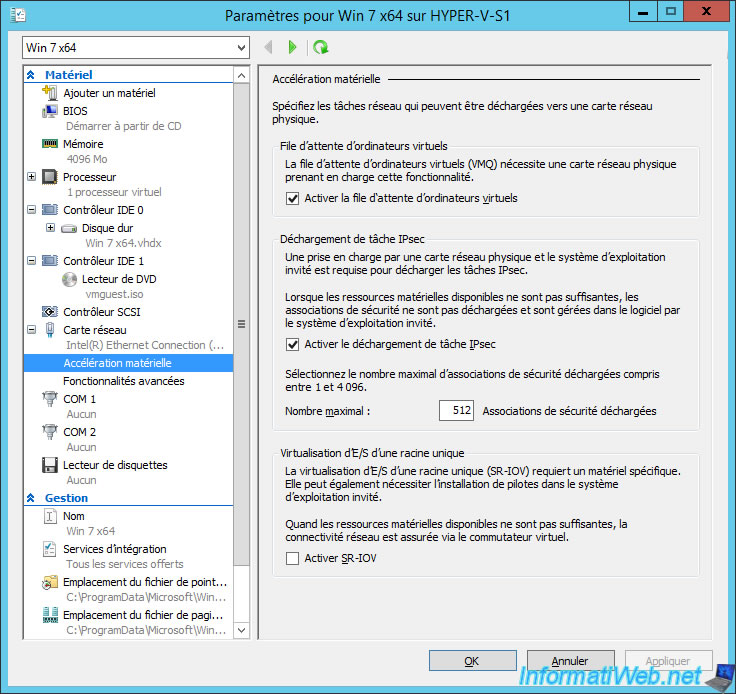
In the subsections available for each virtual network adapter, you will find hardware acceleration.
VMQ (Virtual Machine Queue) is a hardware virtualization technology that improves network performance (for TCP/IP, iSCSI, ...) of virtual machines.
The VMQ compatible network adapters can use DMA (Direct Memory Access) to forward incoming packets of the physical network adapter directly to the shared memory of a virtual machine.
However, this technology may have the opposite effect with some network cards (including 57712, 57800, 57810, and 57840 Broadcom cards).
Source : Microsoft forum
Enabling IPsec task offload allows you to offload the server processor from part or all of the IPsec compute work by passing it directly to a dedicated processor of a network adapter.
However, the guest operating system must support this feature for IPsec task offloading.
The single-root I/O virtualization (SR-IOV) allows you to connect a network adapter directly to a virtual machine (if your network adapter supports SR-IOV).
SR-IOV technology can greatly improve network performance, but this requires very specific hardware, as well as the necessary drivers in the guest operating system.
More info is available on Microsoft Docs.
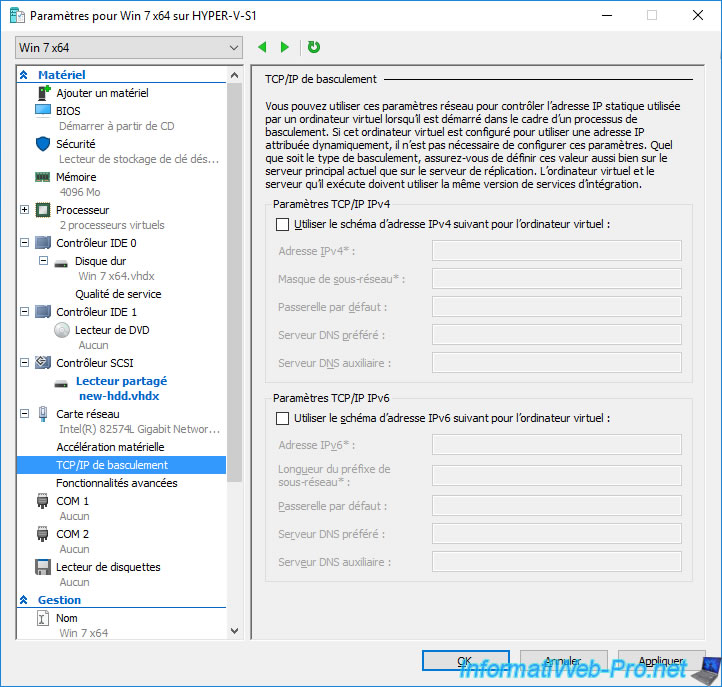
Since Windows Server 2016, you will find a "TCP/IP failover" section for your virtual network adapters.
In this "Failover TCP/IP" section, you can specify the IPv4 and/or IPv6 address that this virtual machine should use when it's switched to a replica server.
This makes it possible to solve IP addressing problems if the IP address range is different on the source site and the destination site.
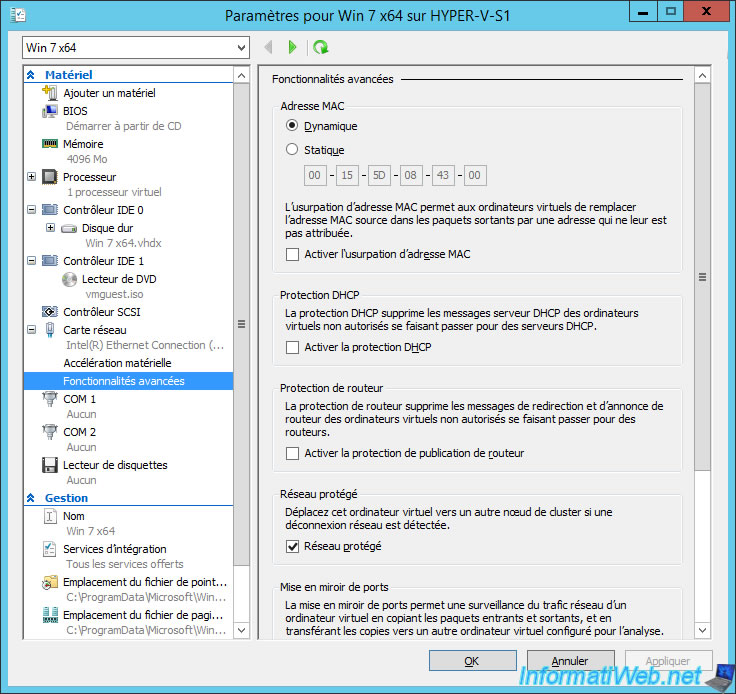
In the advanced features of virtual network adapters, you will find these options :
- MAC address : use a dynamic MAC address, a static MAC address (to use a custom MAC address) or enable MAC address spoofing.
MAC address spoofing allows virtual machines to change their MAC address from the guest operating system. - DHCP guard : this option blocks DHCP server messages for virtual machines that are not allowed to act as a DHCP server
- Router guard : this option is similar to the one above, except that it blocks the redirection and announcement messages that would be issued by virtual machines that are not allowed to act as a router
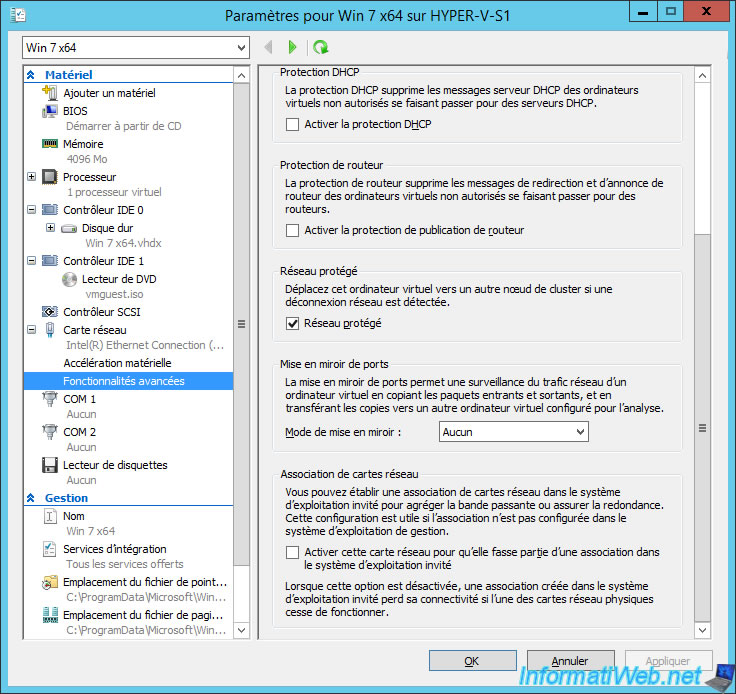
- Protected network : this option lets you move automatically a virtual machine to another node in your Hyper-V cluster (if you have one) if a network disconnection occurs.
- Port mirroring : this option copies incoming and outgoing packets from this virtual machine to another virtual machine configured to analyze them
- NIC Teaming : allows the network adapter to be part of a team in the guest operating system
Share this tutorial
To see also
-
Microsoft 9/6/2019
Hyper-V (WS 2012 R2 / 2016) - Create a generation 2 VM
-
Microsoft 8/10/2019
Hyper-V (WS 2012 R2 / 2016) - Install Hyper-V and create your first VM
-
Microsoft 11/8/2019
Hyper-V (WS 2012 R2 / WS 2016) - Automatically replicate virtual machines
-
Microsoft 11/15/2019
Hyper-V (WS 2012 R2 / WS 2016) - Automatically replicate virtual machines (securely)
No comment