- Microsoft
- 25 October 2019 at 09:42 UTC
-

- 1/2

On Windows Server 2012 or Windows Server 2016, you can manage the network of your virtual machines in Hyper-V with virtual switches.
- Default virtual switch
- Create virtual switches
- Improve network performance of the Hyper-V server and virtual machines
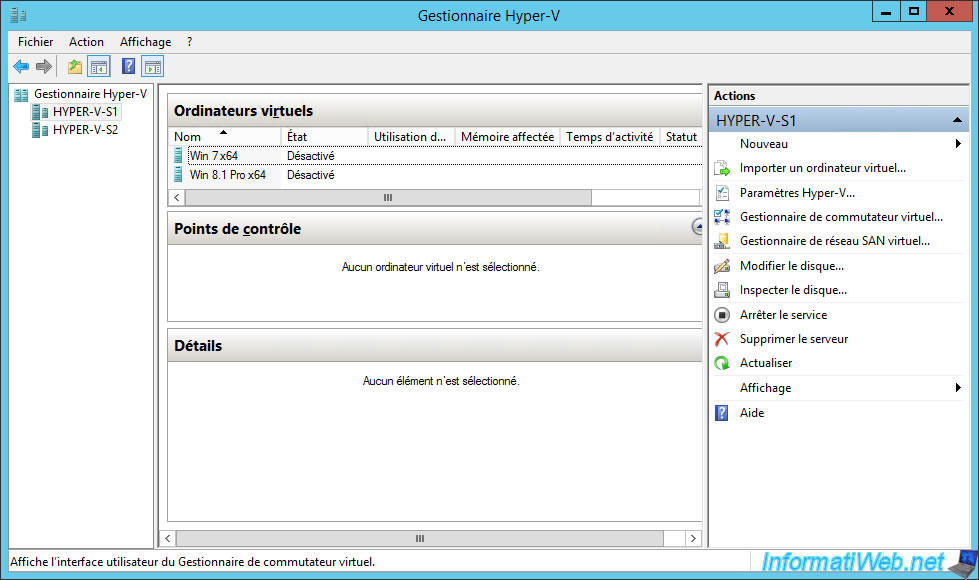
1. Default virtual switch
By default, Hyper-V creates a virtual switch connected to the default network adapter.
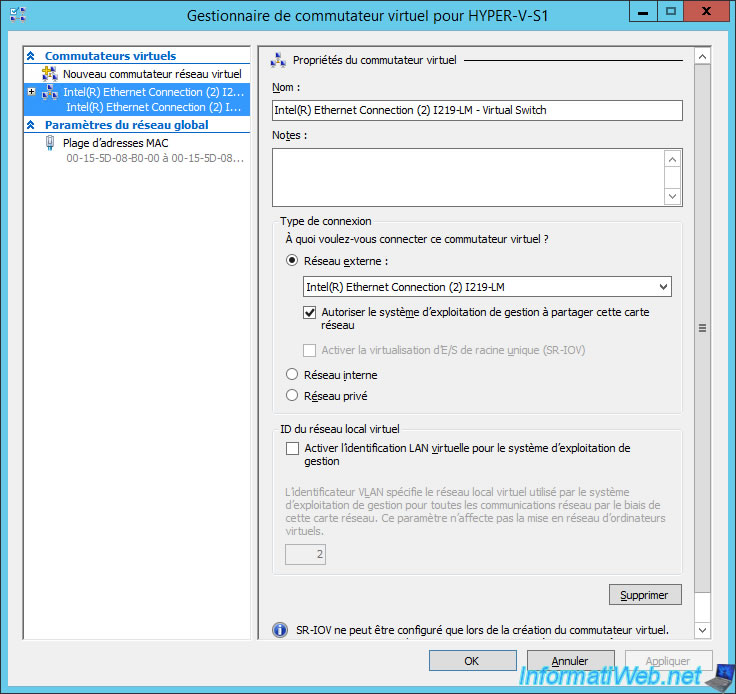
To manage the default virtual switch, select your Hyper-V server and click Virtual Switch Manager.
As you can see, the virtual switch is connected to the "External network" (the physical network to which your Hyper-V server is connected).
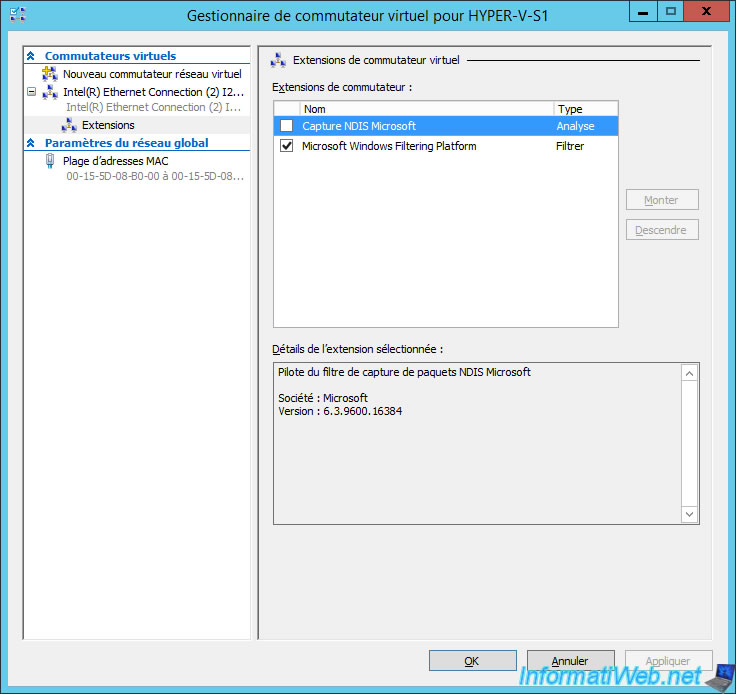
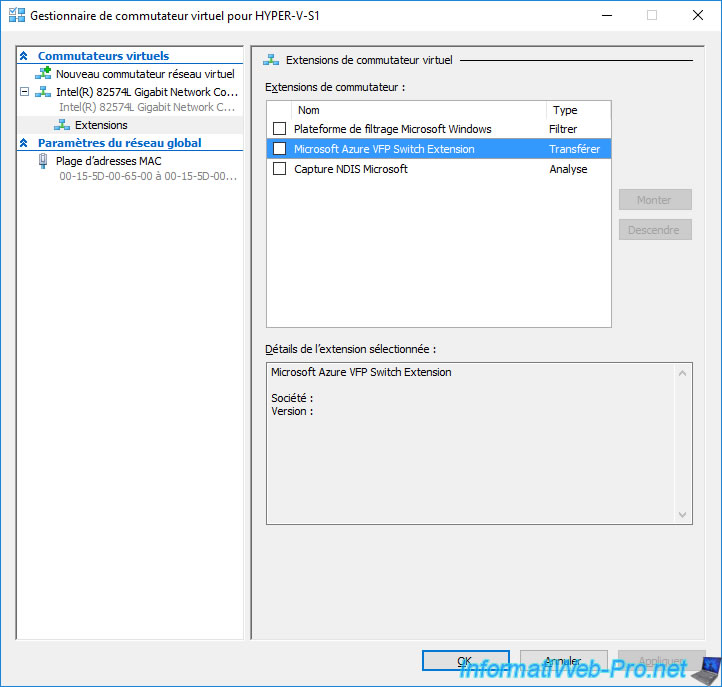
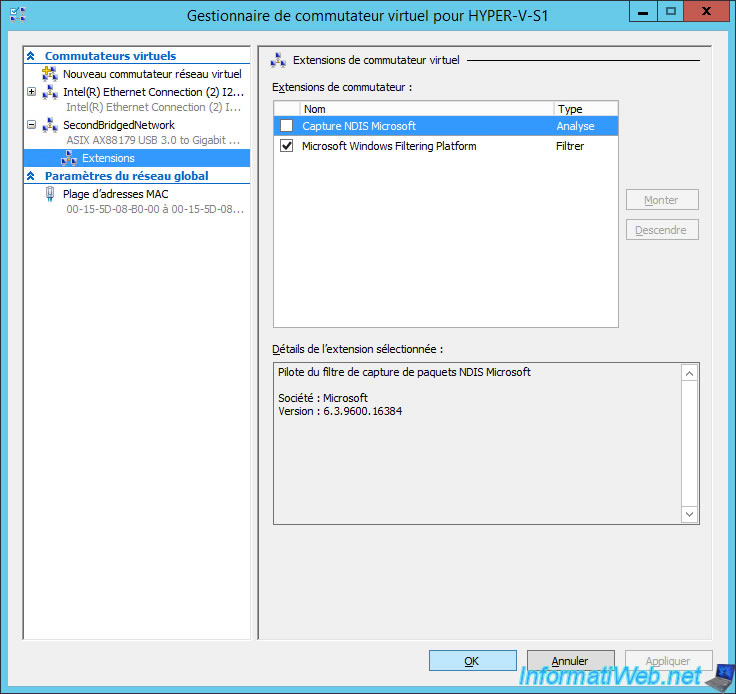
In the default extensions on Windows Server 2012, you will find :
- Capture NDIS Microsoft
- Microsoft Windows Filtering Platform
On Windows Server 2016, you will find a new virtual switch extension named : Microsoft Azure VFP Switch Extension.
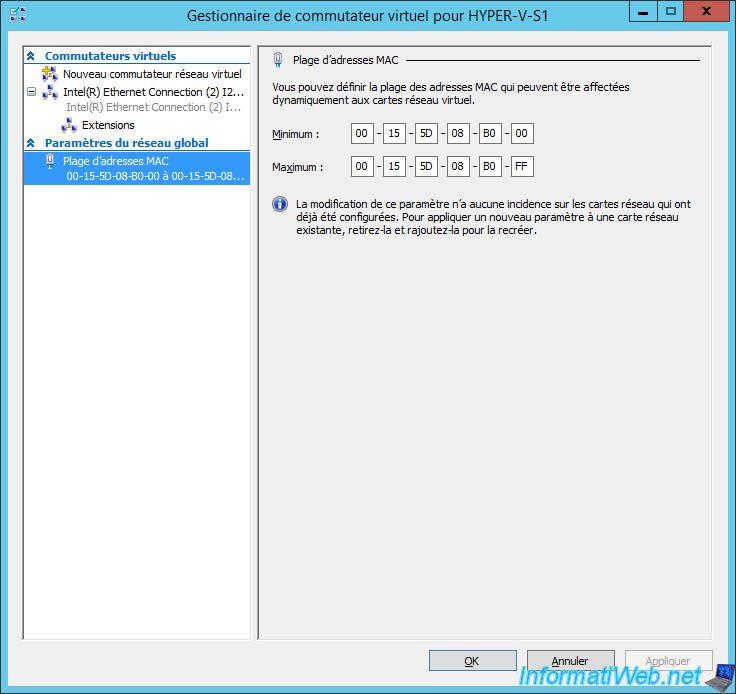
To manage network access (and/or security of it), you will be able to manage the range of MAC addresses to assign to the different virtual machines.
2. Create virtual switches
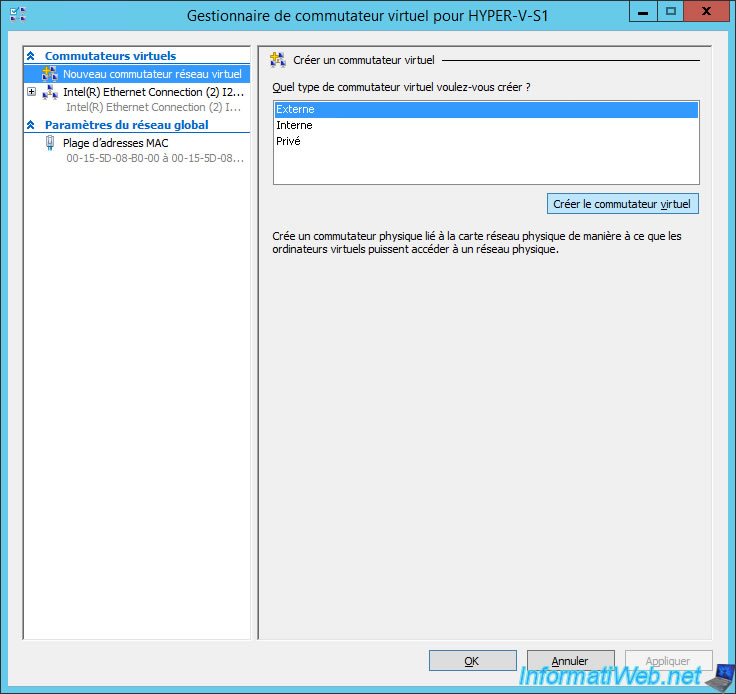
To create virtual switches, open the Virtual Switch Manager and click "New virtual network switch".
Then, you will need to choose the type of switch you want to create :
- External : connect virtual machines to the physical network. This corresponds to the "bridged mode" of VMware and the "bridged adapter" of VirtualBox.
- Internal : allows virtual machines to communicate with each other only (internally). It will therefore be impossible to access other physical computers in the network from virtual machines via this type of network.
However, with this type of network, your Hyper-V server will be able to communicate with your virtual machines. - Private : same as the "Internal" type, except that only virtual machines can communicate together.
Select the type of virtual switch to create, and then click : Create Virtual Switch.
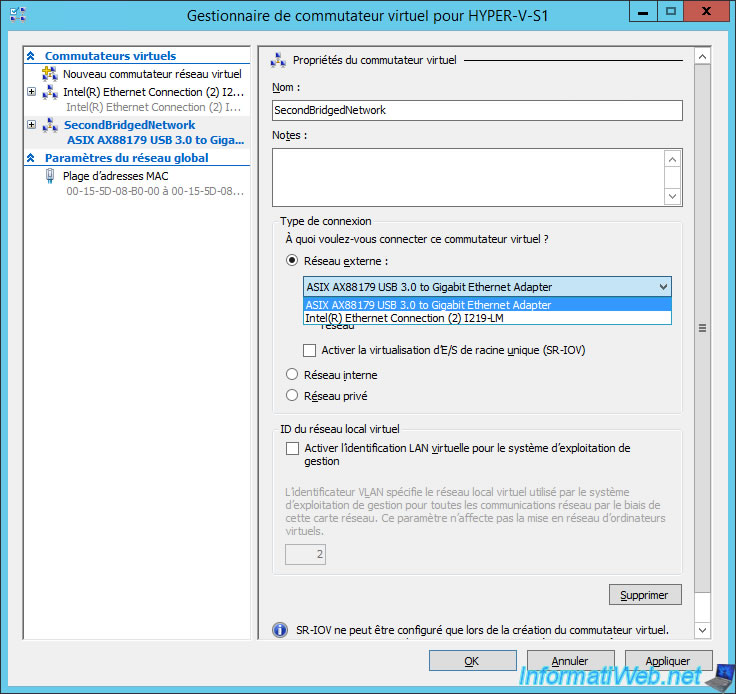
In our case, we have created a new external virtual switch that will connect virtual machines to our 2nd network (via the 2nd network card of our Hyper-V server).
Once created, you can change the connection type : external network, internal network or private network.
For virtual switches of type "External", you will be able to :
- choose on which network adapter will be connected this virtual switch
- allow management operating system to share this network adapter. In other words, if you check this box, your virtual machines and your Hyper-V server will be able to use this network card.
Otherwise, only your virtual machines will be able to use it.
Which means you will be able to access services hosted on a VM from your host PC and vice versa, since the host is also on the same IP network as your VMs connected to this virtual switch. - enable single-root I/O virtualization (SR-IOV) if supported by your network adapter (knowing that this is especially the case for professional network adapters)
- enable the virtual VLAN system by checking the "Enable virtual LAN identification for management operating system" box and choose which VLANs your virtual machines will be connected to.
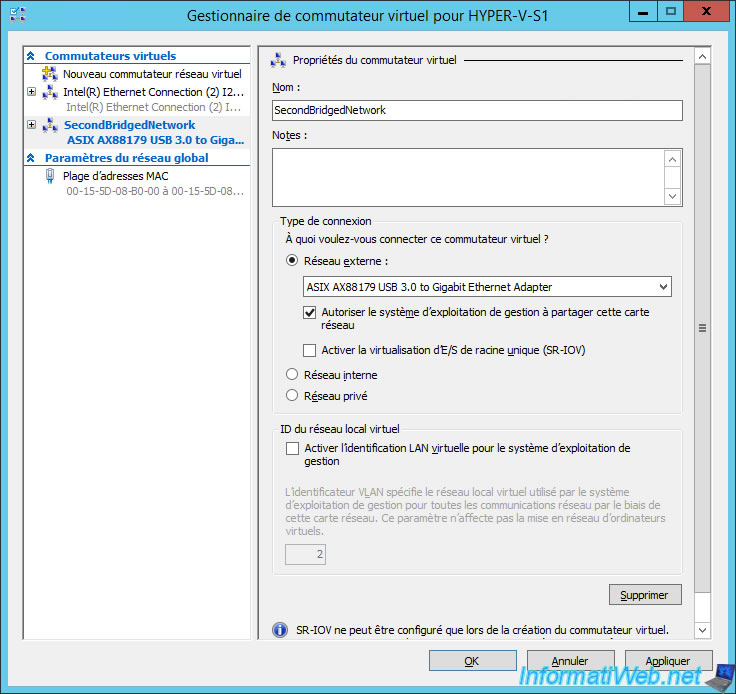
As you can see, our Hyper-V server has 2 physical network cards.
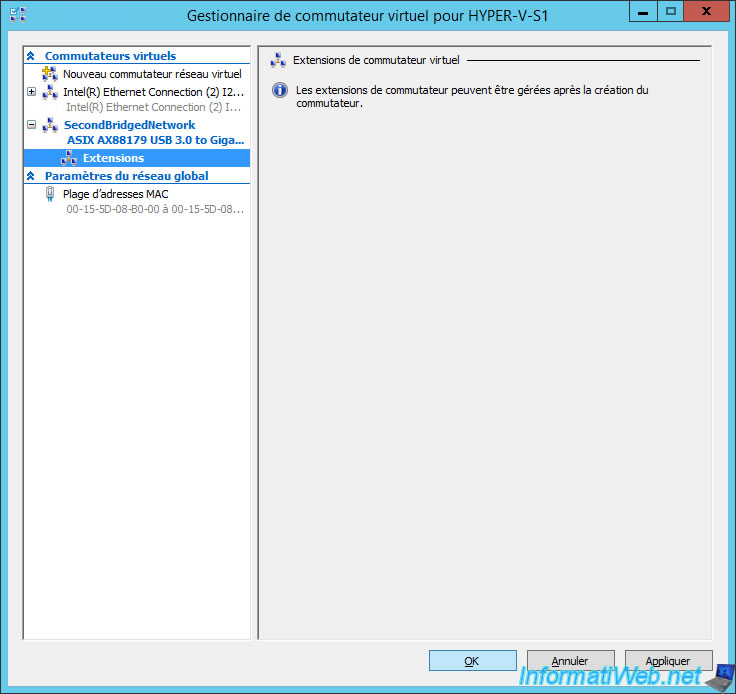
Note that managing switch extensions is only possible after creating the switch.
You will need to click OK to save the changes before you can access them for the new virtual switch.
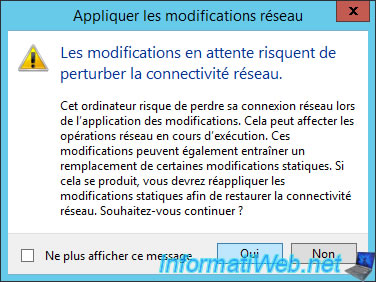
Depending on the settings used, this may cause a small network outage on your Hyper-V server.
In this case, Hyper-V will warn you. Click Yes.
For virtual switch extensions, you will find the same each time.
Share this tutorial
To see also
-
Microsoft 9/6/2019
Hyper-V (WS 2012 R2 / 2016) - Create a generation 2 VM
-
Microsoft 8/10/2019
Hyper-V (WS 2012 R2 / 2016) - Install Hyper-V and create your first VM
-
Microsoft 11/8/2019
Hyper-V (WS 2012 R2 / WS 2016) - Automatically replicate virtual machines
-
Microsoft 11/15/2019
Hyper-V (WS 2012 R2 / WS 2016) - Automatically replicate virtual machines (securely)
You must be logged in to post a comment