- Microsoft
- 04 October 2019 at 11:48 UTC
-

By default, when you create a virtual machine on your Hyper-V server, the wizard doesn't give you a choice and will create a dynamic virtual hard disk in VHDX format.
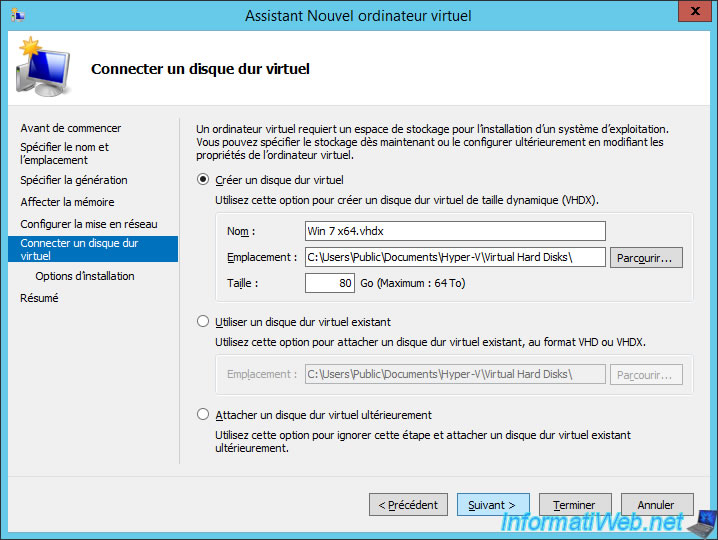
However, if you want to use another type of allocation (fixed, dynamic, ...) or another format (VHD / VHDX), you will need to create the virtual hard disk manually from the Hyper-V Manager.
1. Create a virtual hard disk
To do this, select the Hyper-V server on which you want to create your virtual hard disk and click "New -> Hard Disk" (in the right column).
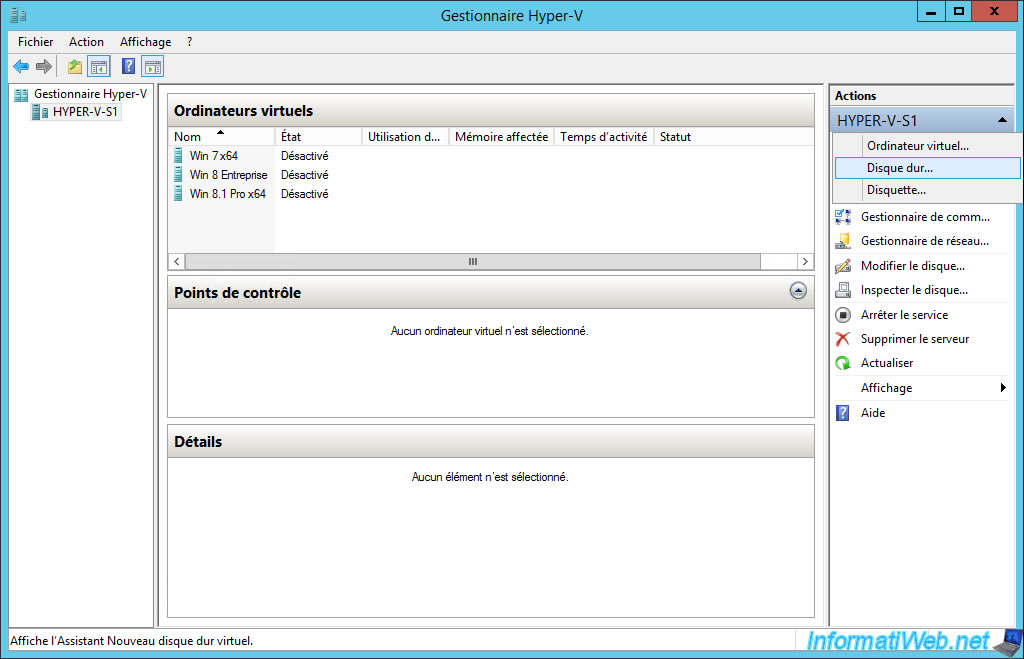
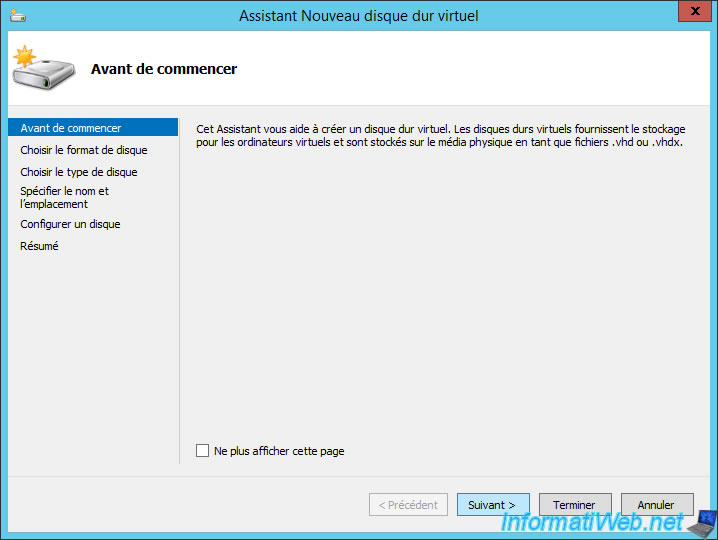
The New Virtual Hard Disk Wizard appears.
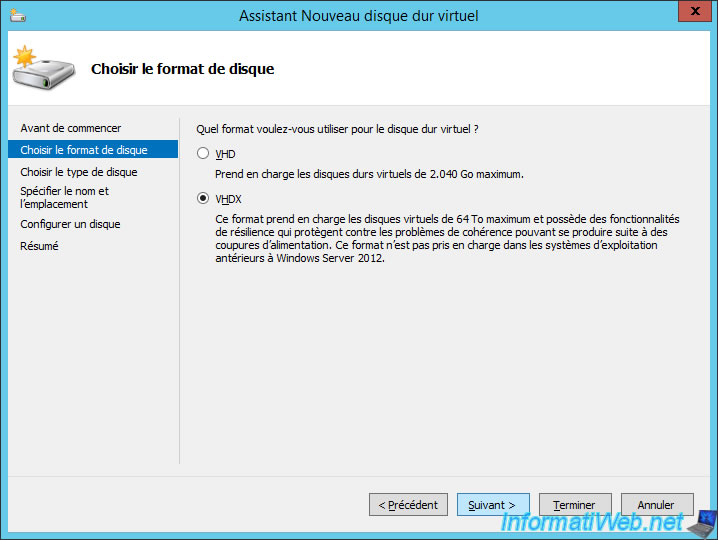
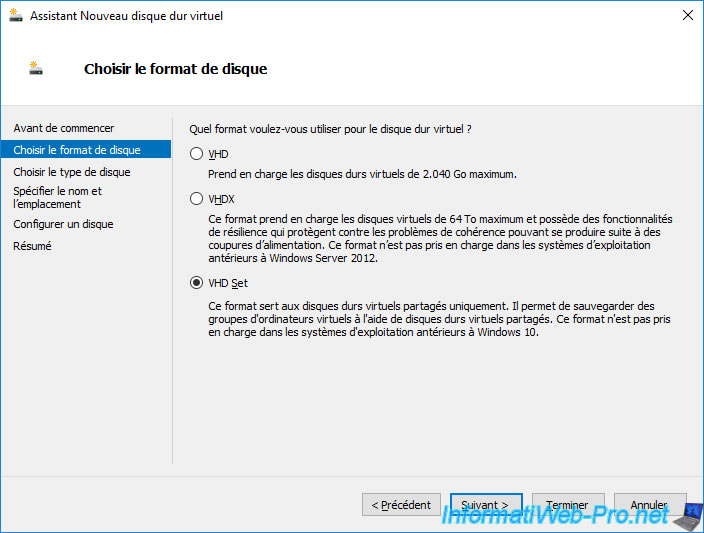
Choose the disk format to use :
- VHD : this format is limited to 2 TB (2040 GB) maximum
- VHDX : the new format that allows you to create virtual hard drives up to 64 TB and has interesting new features.
However, this format is not compatible with versions prior to Windows Server 2012.
Since Windows Server 2016, a new virtual hard disk format has appeared : VHD Set.
This new "VHD Set" format allows you to create shared virtual hard disks that can :
- be resized online
- be replicated by Hyper-V
- be part of checkpoints
Important : as specified by this wizard, this format is only supported by Windows 10 and later guest operating systems.
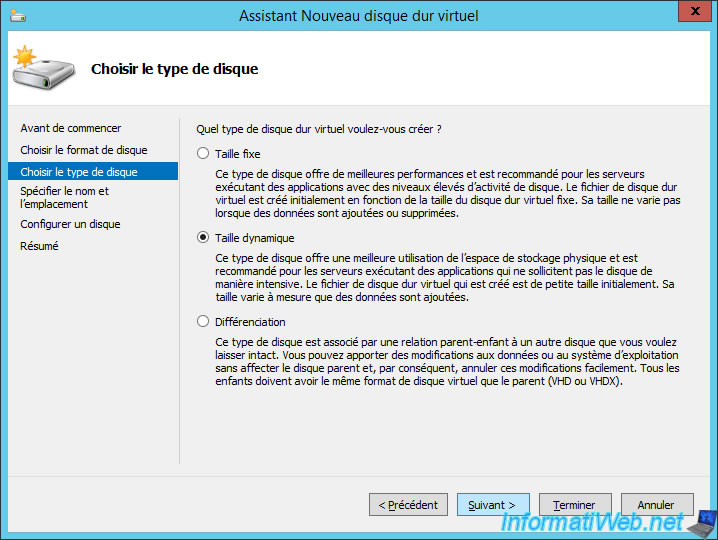
Select the type of disk to use :
- Fixed size : the VHD or VHDX file will take the desired maximum size directly on the Hyper-V server hard disk.
This type of disk provides better performance, but it may take time to create it depending on the desired maximum size. - Dynamically expanded : the VHD or VHDX file will grow over time depending on the amount of data that will be stored in this virtual hard disk.
- Differencing : it's a type used especially when you create snapshots (or checkpoints). When you use this type of disk, the new data will be stored in it instead of the parent disk.
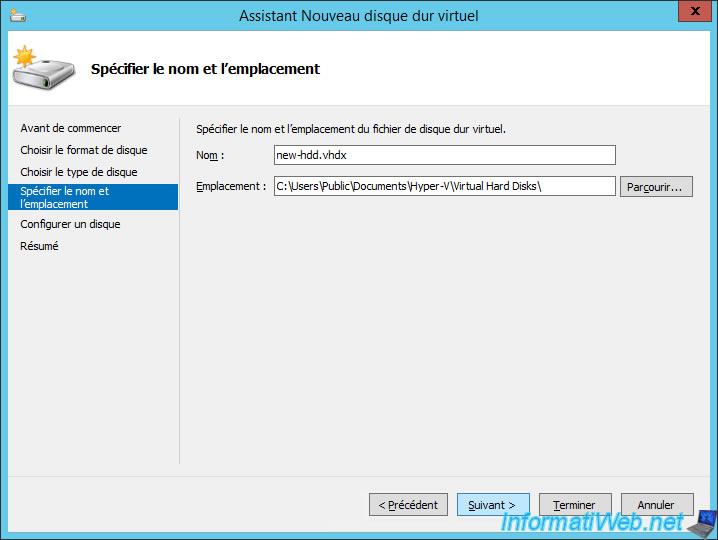
Provide a name for your virtual hard disk.
Note : by default, the virtual hard disk will be stored in the default folder specified in the settings of your Hyper-V server.
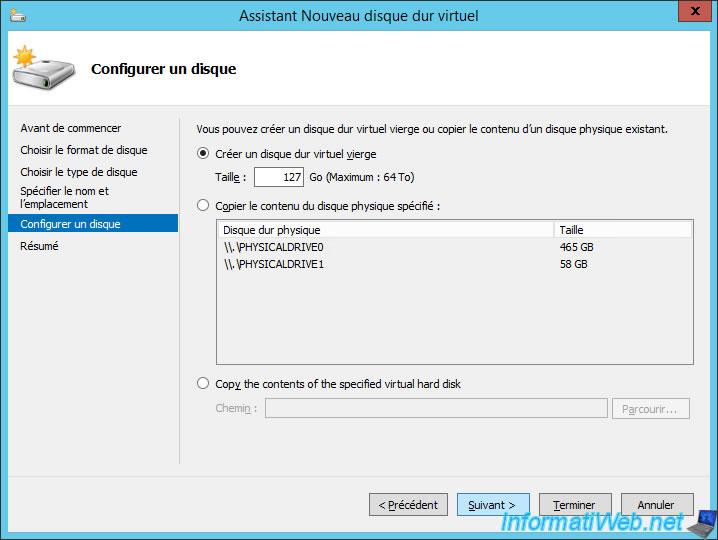
Specify the maximum size that the virtual hard disk can take.
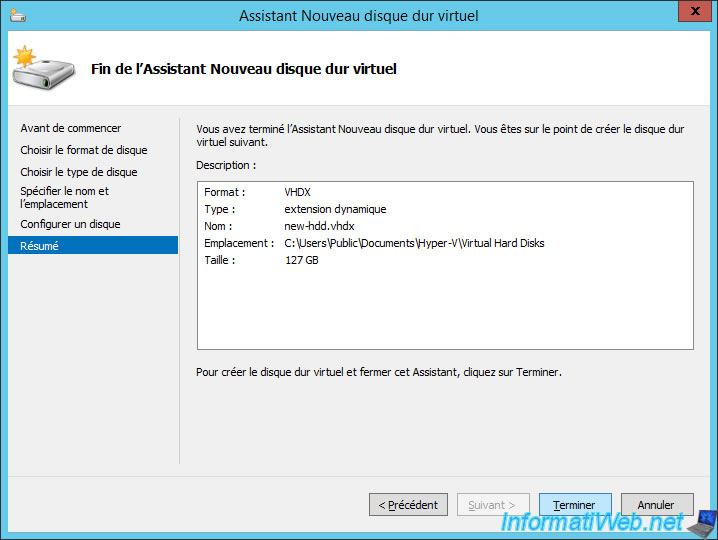
By default : the wizard offers a size of 127 GB.
A summary is displayed.
2. Link the virtual hard disk to a virtual machine
To get started, open the settings of the virtual machine to which you want link this virtual hard disk.
Then :
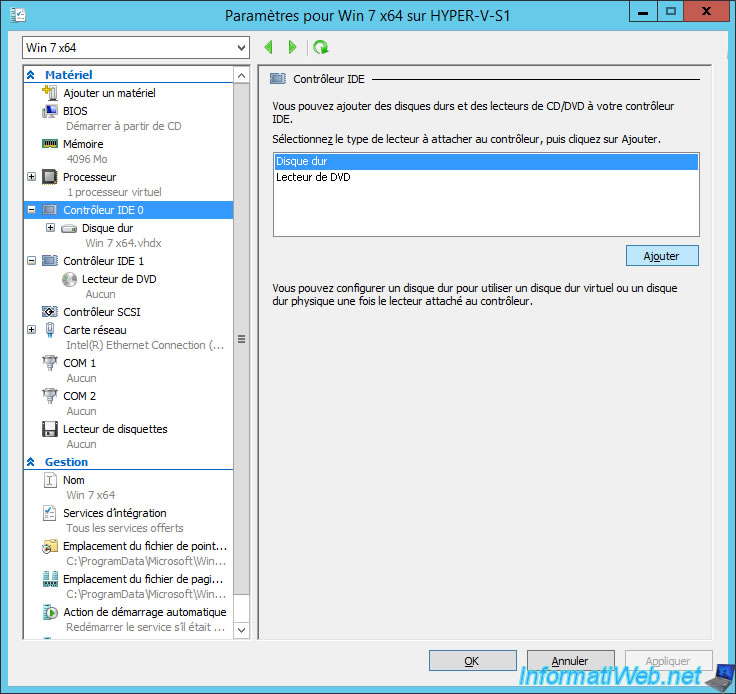
- click on the "IDE Controller 0" (or SCSI Controller if the guest operating system is compatible with this type of controller)
- select : Hard Drive
- click : Add
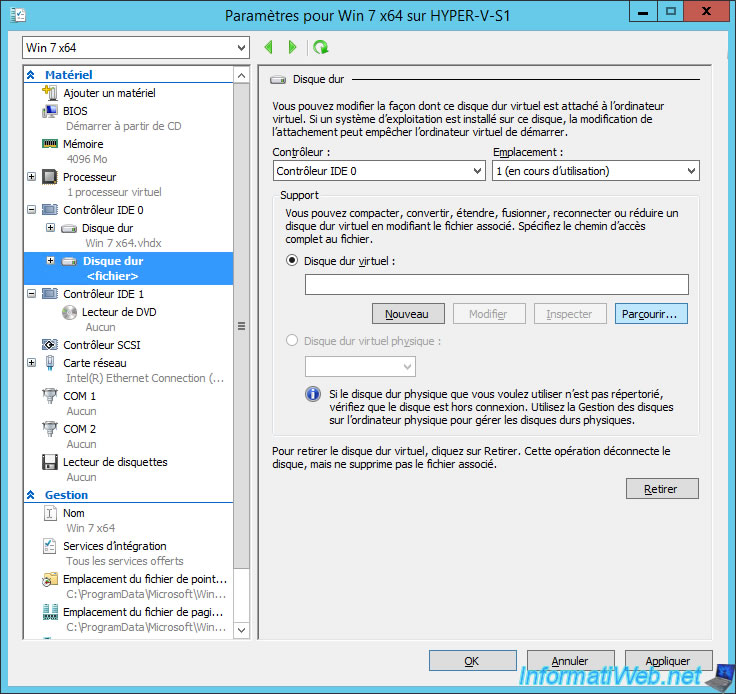
Select "Virtual hard disk" and click Browse.
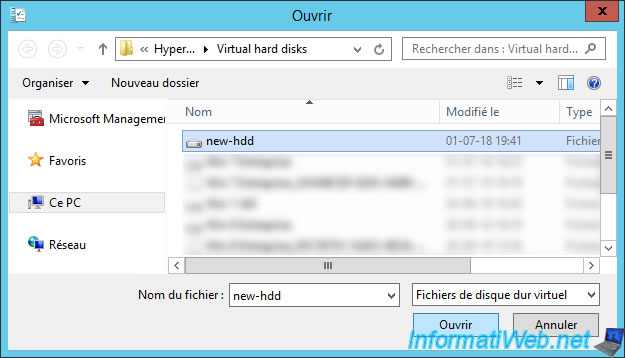
Select the previously created virtual hard disk and click Open.
Click OK.
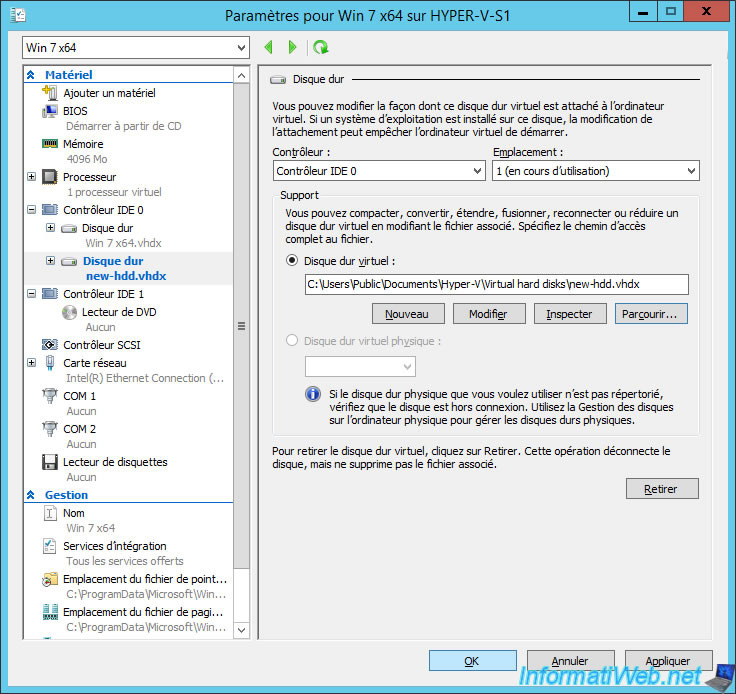
Now, don't forget to partition it into the guest operating system so you can store data there.
Share this tutorial
To see also
-

Microsoft 9/6/2019
Hyper-V (WS 2012 R2 / 2016) - Create a generation 2 VM
-
Microsoft 8/10/2019
Hyper-V (WS 2012 R2 / 2016) - Install Hyper-V and create your first VM
-
Microsoft 11/8/2019
Hyper-V (WS 2012 R2 / WS 2016) - Automatically replicate virtual machines
-
Microsoft 11/15/2019
Hyper-V (WS 2012 R2 / WS 2016) - Automatically replicate virtual machines (securely)


You must be logged in to post a comment