What is a certificate template, how to configure them and create new ones on Windows Server 2016 ?
- Windows Server
- 29 September 2023 at 11:07 UTC
-

- 2/3
5. Create a new certificate template
As explained previously, to create a new certificate template on Windows Server, you will need to base yourself on an existing certificate template.
Of course, you will base yourself on a certificate template that most closely matches what you need so that you have to modify as few settings as possible.
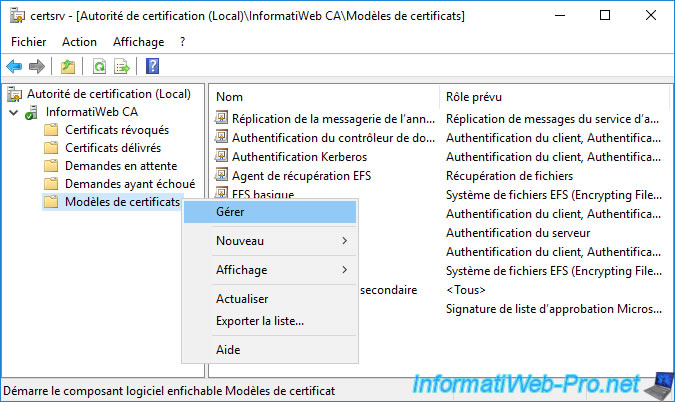
To do this, right-click "Manage" on "Certificate Templates".
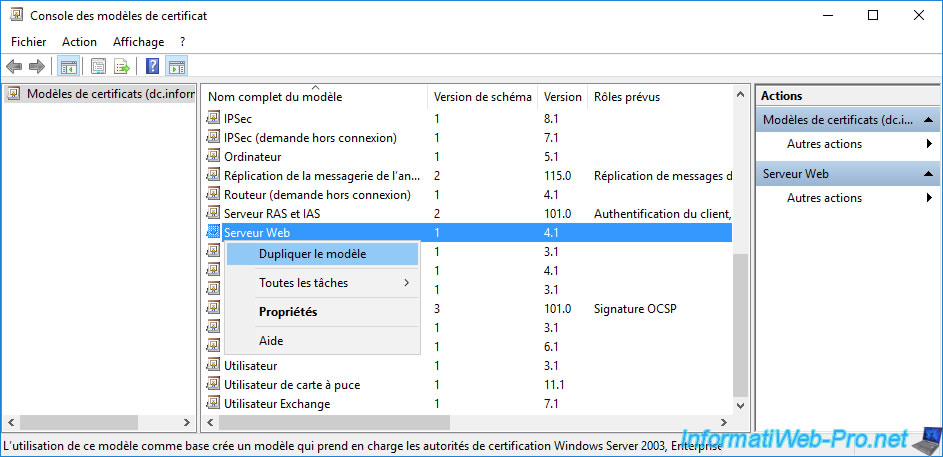
Then, right-click "Duplicate Template" on the certificate template you want to base it on.
In our case, we will base ourselves on the "Web Server" certificate model which is widely used.
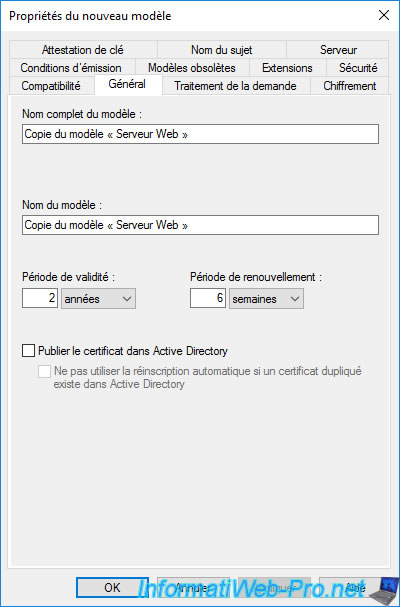
By default, the name of the new certificate template will be : Copy of "[source template name]".
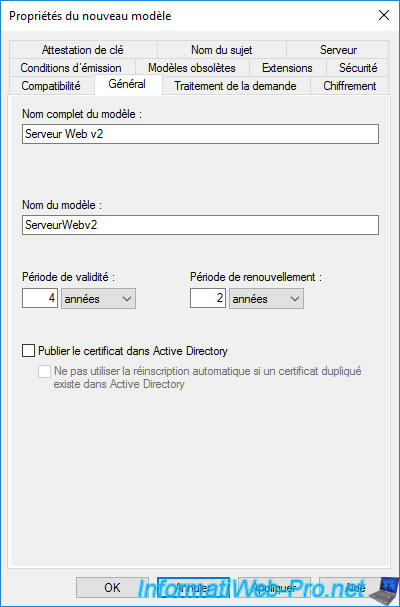
Change the display name of this new certificate template if desired.
In our case : Web Server v2.
Note that the template name will be based on the display name you provide.
If you want to change the validity or renewal period, remember that the renewal period must start after the 80% of the validity period of the certificate.
As explained previously in step "4. Certificate template settings" of this tutorial.
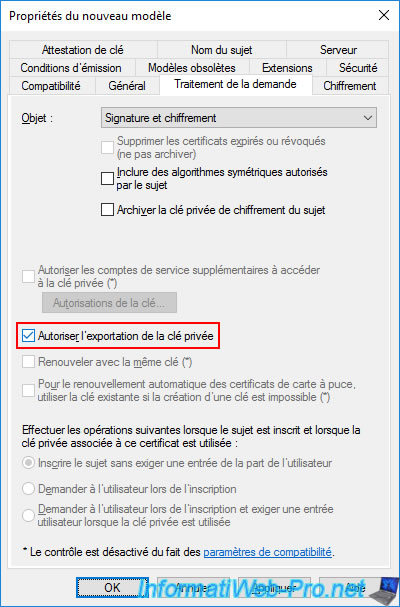
In the "Request Handling" tab, check the "Allow private key to be exported" box if you wish to be able to export the certificate, as well as its private key in ".pfx" format from the certificate store "Personal" where the certificate will be.
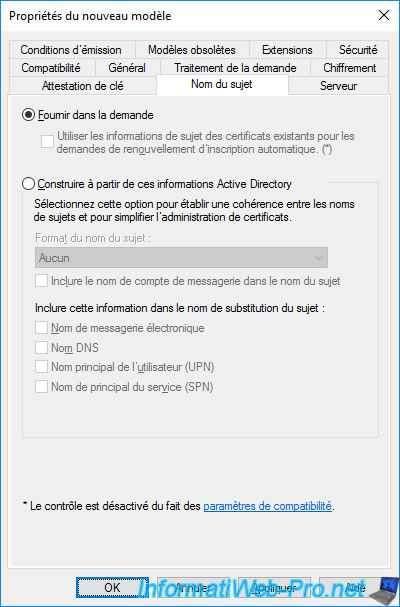
In the "Subject Name" tab, you will see that by default the user will be required to provide the information in the request.
Which is convenient if you generate your certificates from the server where the CA is installed.
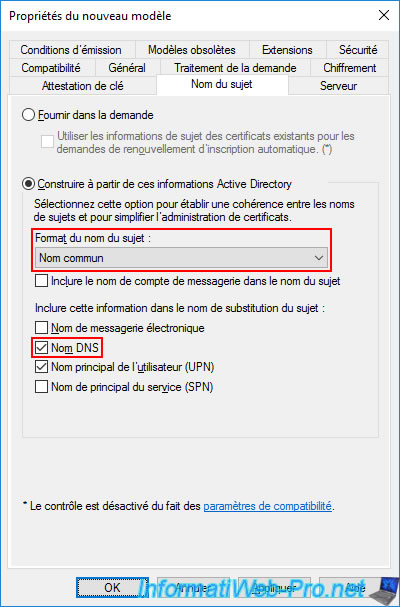
However, for security or convenience, you can choose the "Build from this Active Directory information" option, then select :
- Subject name format : Common name (CN)
- Include this information in alternate subject name : DNS name
Thus, when you request a certificate for a web server installed on a server linked to your Active Directory, the certificate generated will be automatically valid for the full name (DNS name) of this server.
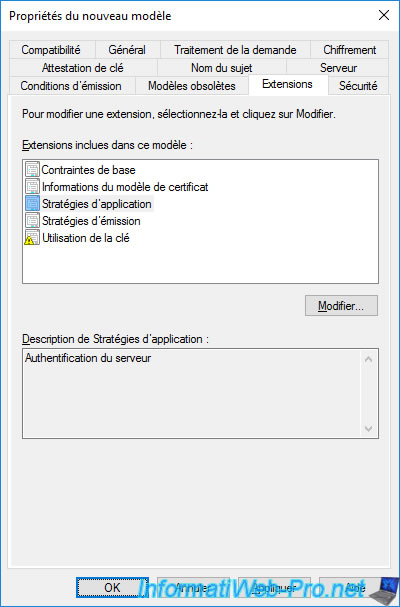
In the "Extensions" tab, you will see that the "Web Server" certificate template allows server authentication.
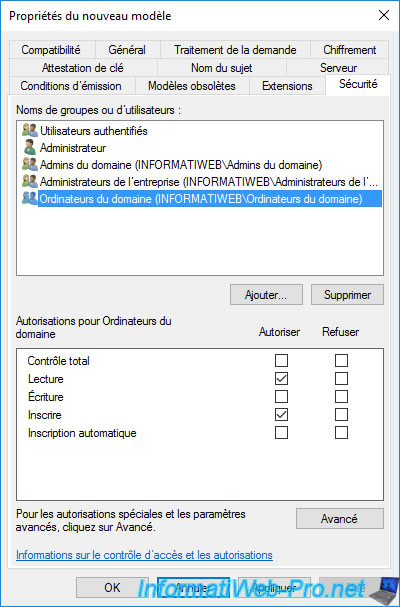
In the "Security" tab, you will see that the "Domain Admins" group (of which the domain "Administrator" account is a part) has the right to enroll certificates using this certificate template.
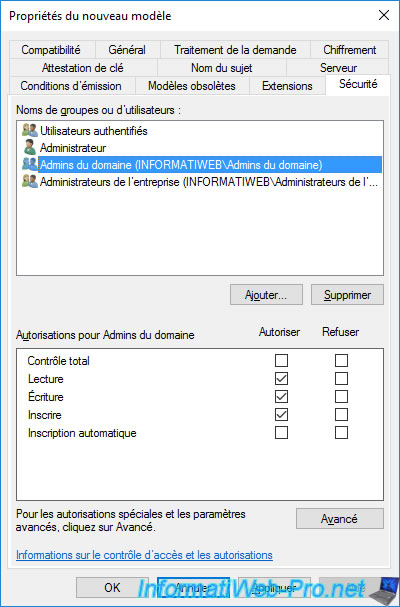
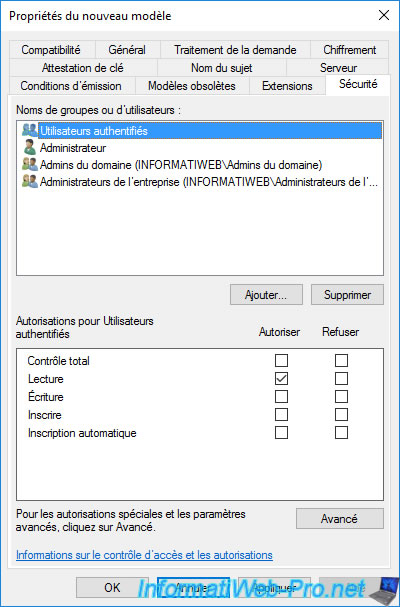
You will also see that authenticated users have read permission.
This allows you to see the certificate template from the "mmc" console or from the web interface of your certification authority (if it's installed).
Important : if you want to enroll (obtain) a certificate from the web server that you want to secure with a certificate using the "mmc" console, your computer must also be allowed to enroll certificates.
The right defined for your user account will not be sufficient.
To do this, click on : Add.
Source : Cannot create new certificates - Microsoft.
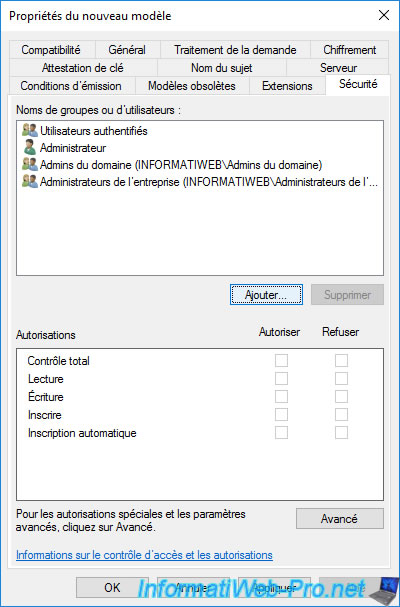
Click on: Advanced (to easily find "Computer" or "Group" type objects, for example).
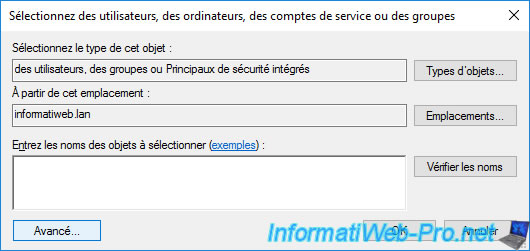
Click "Find Now" to display all users, groups, or built-in security principals available in your Active Directory domain.
To also display computers, you will need to add the "Computer" object type by clicking on "Object Types" (top right) and then search again.
For this tutorial, we'll simply allow all computers in the domain, for convenience.
Select the "Domain Computers" group and click OK.
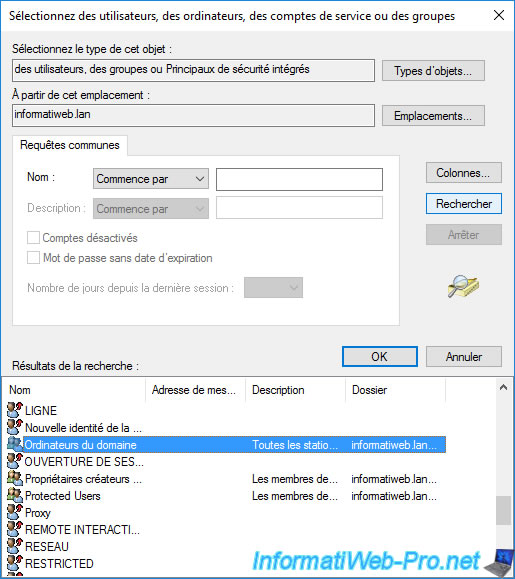
The "Domain Computers" group appears.
Click OK to add it to the certificate template.
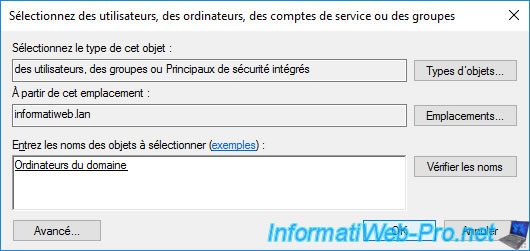
The added "Domain Computers" group appears in the "Security" tab of your new certificate template.
Select it and grant it the rights : Read and Write.
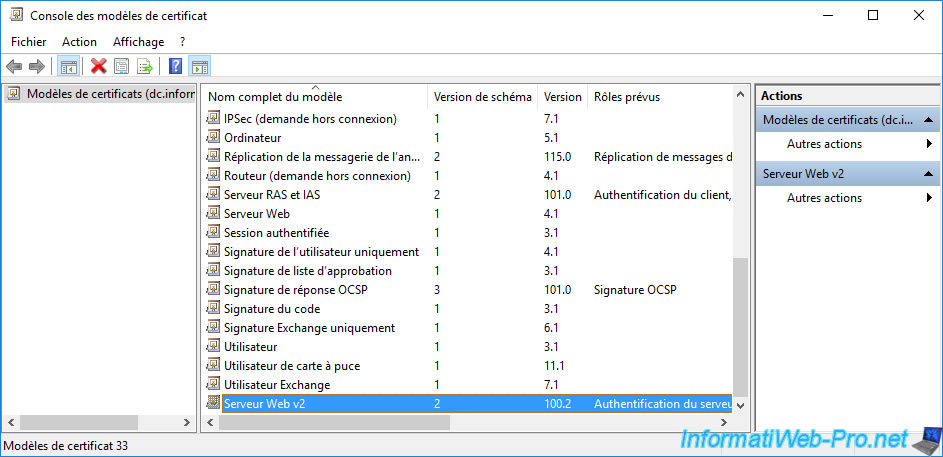
Then, click OK to save this new certificate template.
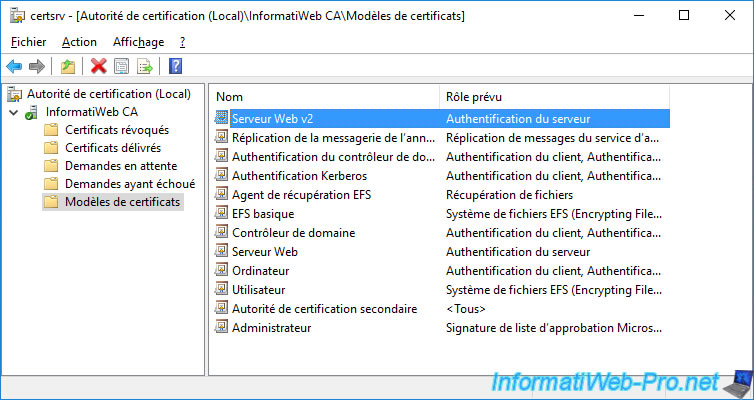
The new certificate template created appears in the list of certificate templates for your certification authority.
However, it's not yet visible on the servers and computers of your Active Directory domain.
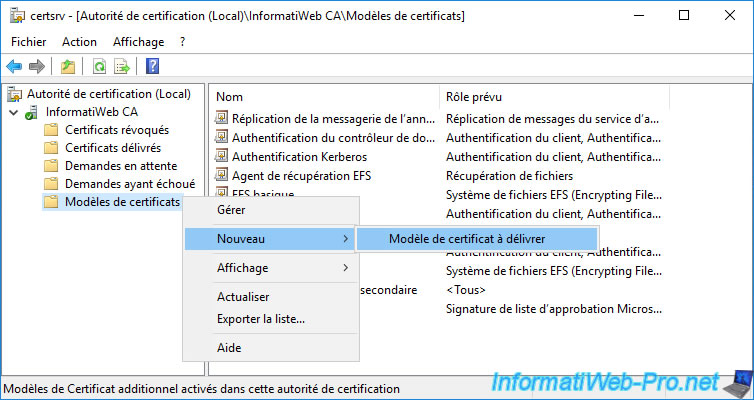
For this new certificate template to be visible on your other servers and computers, you must add it to the certificate templates to be issued.
To do this, right-click "New -> Certificate Template to Issue" on "Certificate Templates".
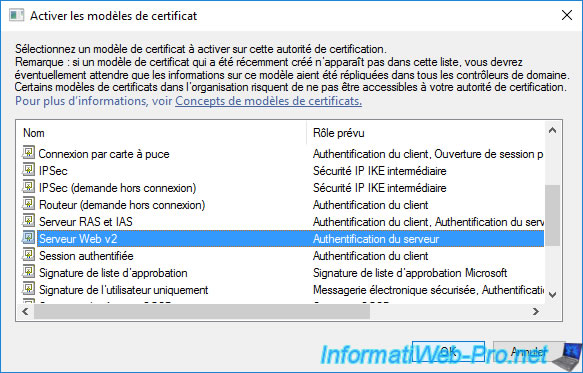
Select your new certificate template (in our case : Web Server v2) and click OK.
Your new certificate template appears.
6. Request a certificate for a web server (IIS)
For this tutorial, we will request a certificate for a web server on Windows Server.
6.1. Installing the web server (IIS)
To start, we installed a new server named "web" and linked it to our Active Directory domain.
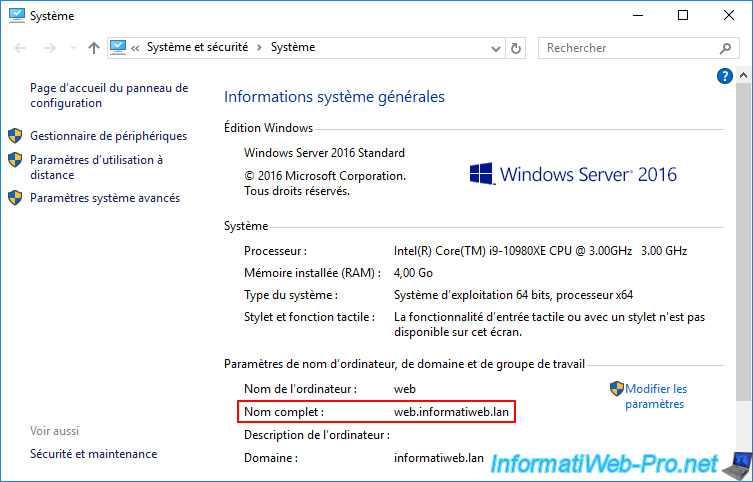
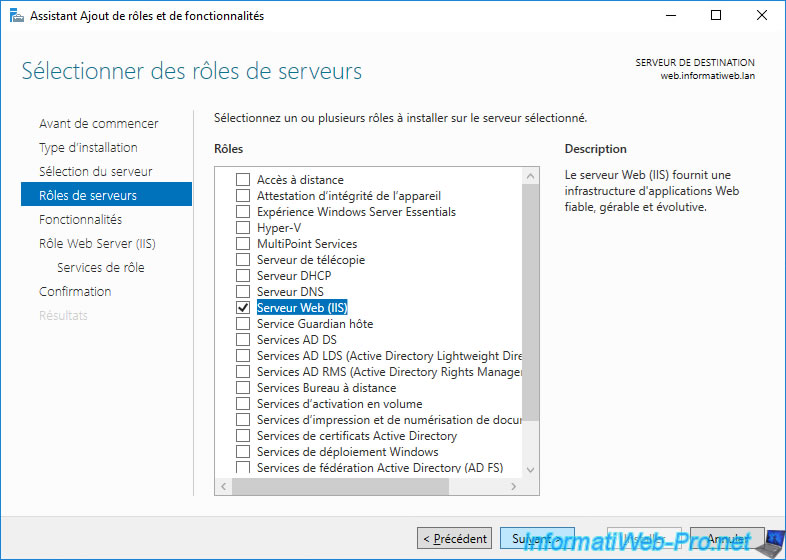
Then, we installed the "Web Server (IIS)" role on it leaving all the default settings.
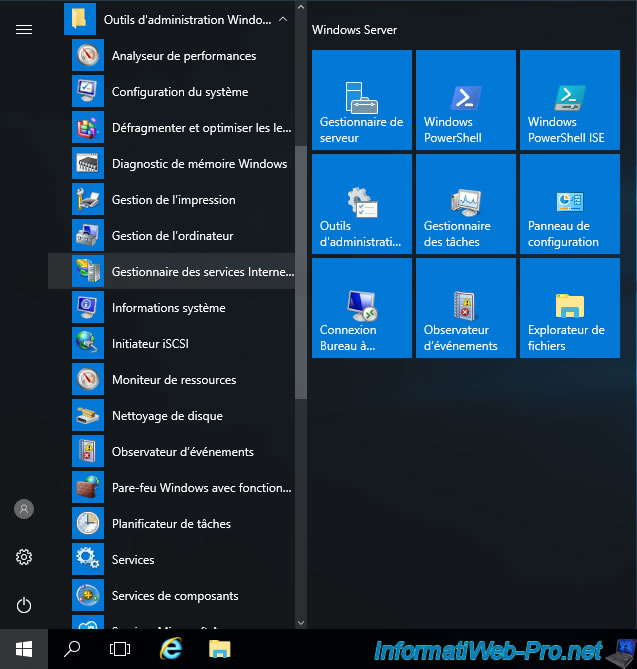
Once this role is installed, you will find the IIS Manager.
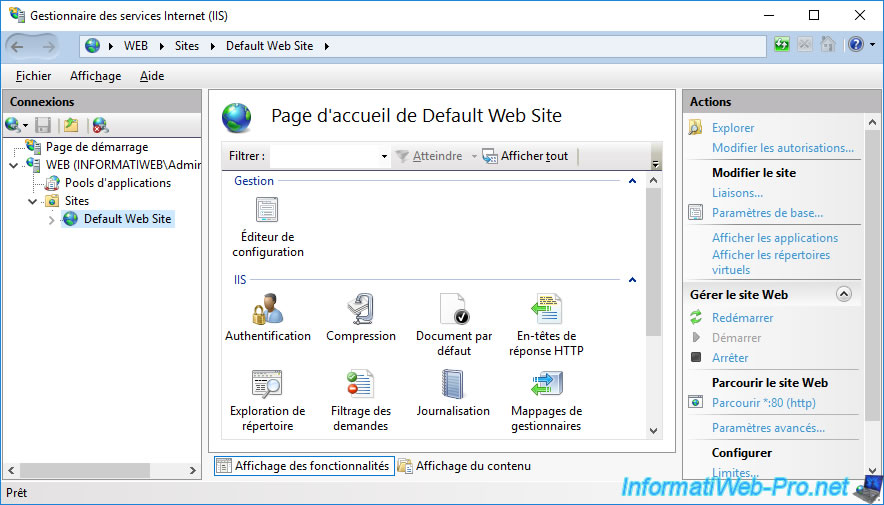
As you can see, a default website has already been created automatically when installing the "Web Server (IIS)" role.
Share this tutorial
To see also
-
Articles 1/26/2024
SafeNet Authentication Client (SAC) - Installation and overview
-
Articles 9/8/2023
What is encryption and how does it work ?
-
Windows Server 12/29/2023
WS 2016 - AD CS - Backup and restore a certificate authority (CA)
-

Windows Server 1/19/2024
WS 2016 - AD CS - Buy smart cards and log in via them

No comment