Manage EFS certificates in enterprise on Windows Server 2016
- Windows Server
- 02 December 2023 at 09:55 UTC
-

- 2/3

4. Add the option to encrypt or decrypt data from context menu
If you have ever used the EFS file system to easily encrypt data on a computer running Windows or a server running Windows Server, you may already know that it's possible to easily add an "Encrypt" or "Decrypt" option. in the context menu.
To do this, simply add a DWORD value to a specific location on your computer or server.
Given that in business, all your computers and servers are generally linked to an Active Directory domain, you can easily add this option to them by modifying the "Default Domain Policy" group policy object.
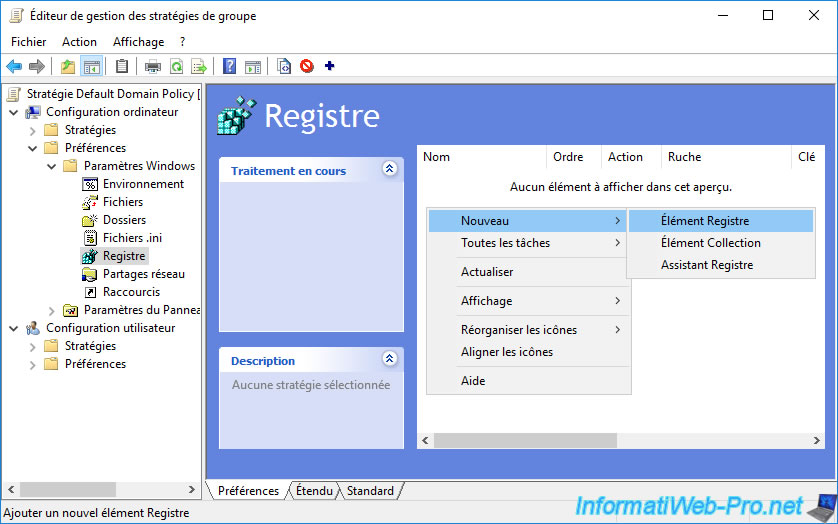
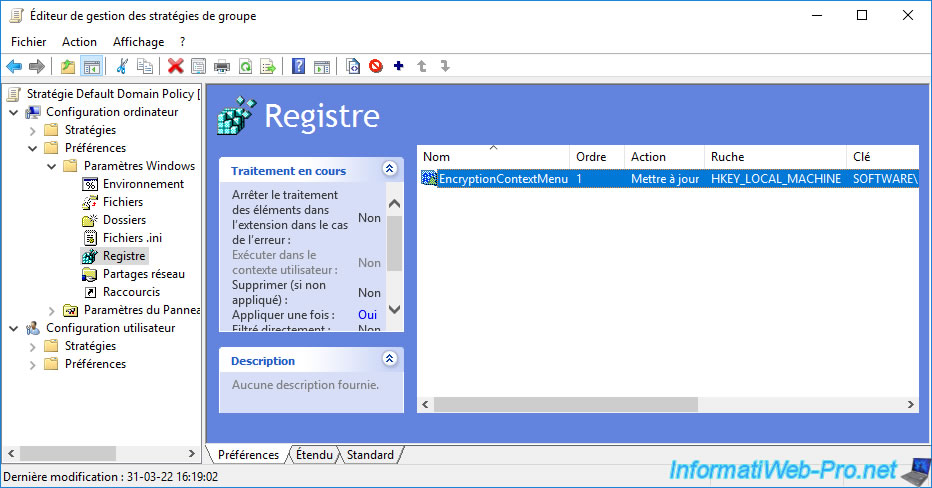
In the Group Policy Management Editor, go to : Computer Configuration -> Preferences -> Windows Settings -> Registry.
Then, right click "New -> Registry Item" on the right side.
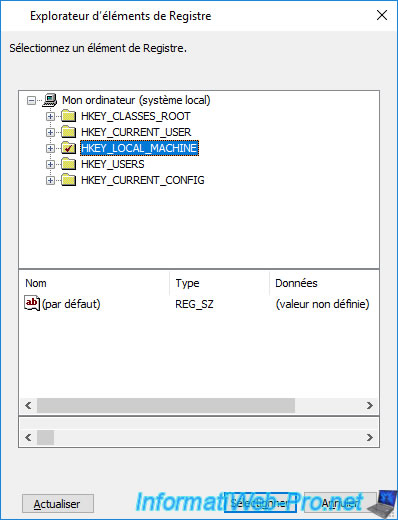
In the "New Registry Properties" window that appears, select "Hive : HKEY_LOCAL_MACHINE", then click the "..." button.

A "Registry Browser" window appears.
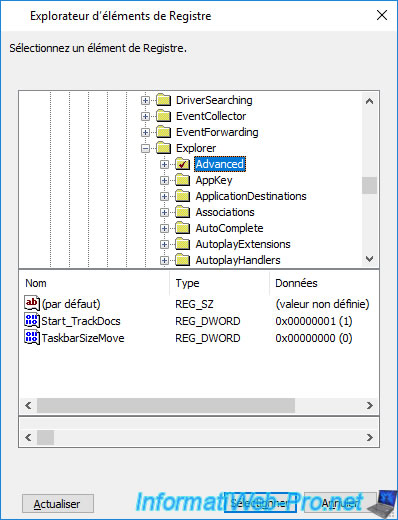
Go to "HKEY_LOCAL_MACHINE\SOFTWARE\Microsoft\Windows\CurrentVersion\Explorer" and select the "Advanced" folder.
Then, click Select.
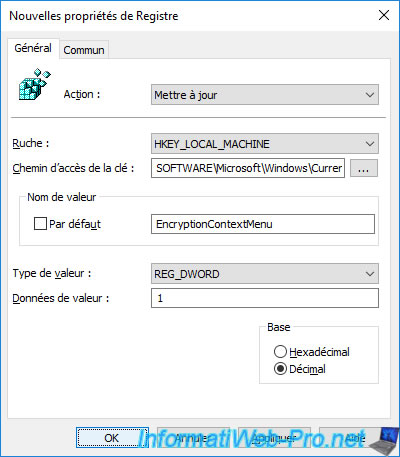
Then, specify :
- Value name : EncryptionContextMenu
- Value type : REG_DWORD
- Value data : 1
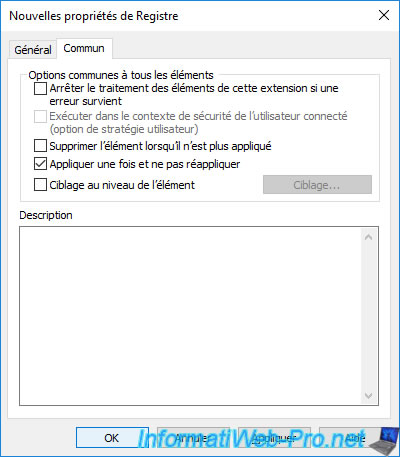
In the "Common" tab, you can check the "Apply once and do not reapply" box to avoid reapplying this setting unnecessarily each time the policy is updated (including when starting the computer or the server).
The newly added data appears.
5. Automatic enrollment of user certificates
As explained previously, your users need a certificate (based on the "Basic EFS v2" template in our case) to be able to encrypt and decrypt data on a computer or server.
If you don't configure auto-enrollment, the certificate will be requested from your CA when your users attempt to encrypt data for the 1st time.
In this case, there will be a slight delay between the time they attempt to encrypt a file and the time it's actually encrypted (you will see this by the yellow icon that will appear on it or by its name which will become green on previous versions of Windows).
To avoid this slight delay, and to also make it easier to share encrypted files through EFS, you will need to enable auto-enrollment of these certificates.
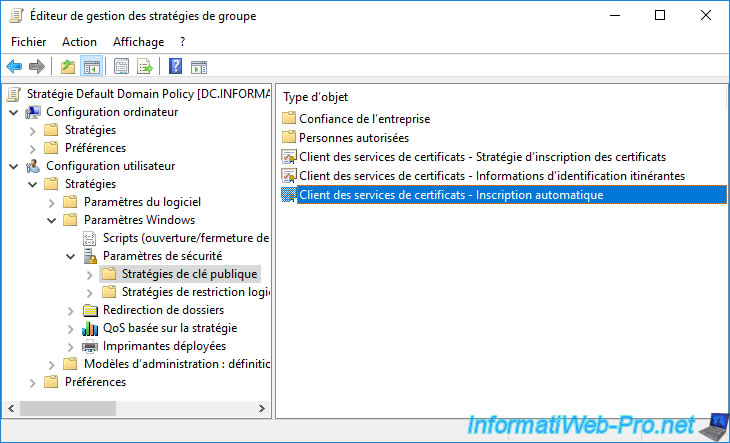
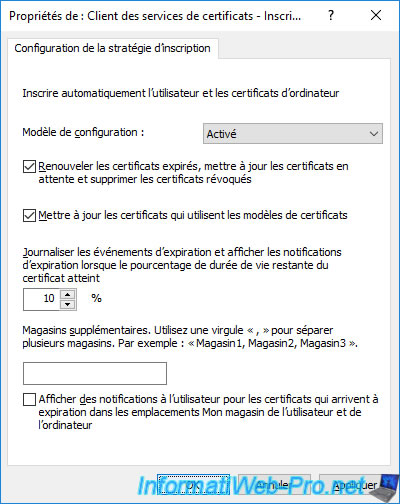
To do this, go to "User Configuration -> Policies -> Windows Settings -> Security Settings -> Public Key Policies" and double click on : Certificate Services Client - Auto-Enrollment.
By default, this setting is not configured.
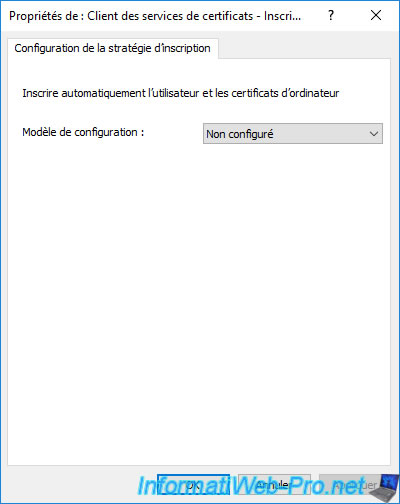
Select "Configuration Model : Enabled" to enable the automatic enrollment of user certificates and check the first 2 boxes :
- Renew expired certificates, update pending certificates ... : to also enable the renewal of these certificates and the deletion of those that have been revoked.
- Update certificates that use certificate templates : allows you to update a certificate using a certificate template that replaces another.
For example, in our case, we had specified that our new certificate template "Basic EFS v2" replaced the original "Basic EFS".
If a user already had a certificate based on the "Basic EFS" certificate template from our CA, it would be updated using our new "Basic EFS v2" certificate template.
The other options allow you to log events when certificates are about to expire, as well as display expiration notifications to the user when the lifetime drops below 10% if the last box "Display user notifications ..." is also checked.
6. Enrolled (issued) user certificate
6.1. View locally stored user certificate via mmc console
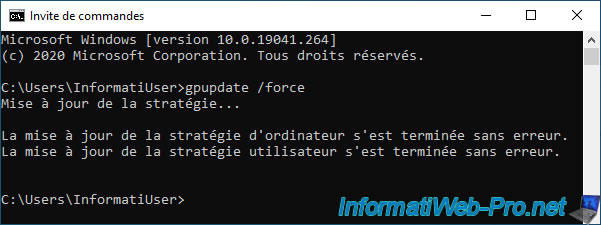
For the user certificate to be enrolled (issued) automatically from your certification authority, the policy of your computer or server must be updated for the "User" part.
To do this, just open a session for this user or close it and reopen it if it was already open before you configured the above settings.
Alternatively, you can also force the user policy update by opening a command prompt, then running the command :
Batch
gpupdate /force
Then, launch the "mmc" console.
Note : you can also launch the "certmgr.msc" file directly to see the user's certificates.
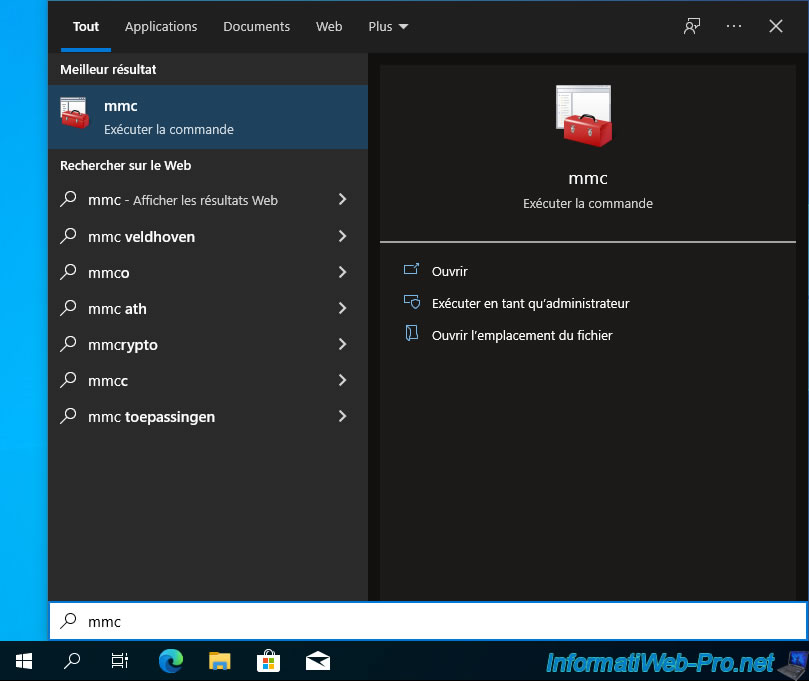
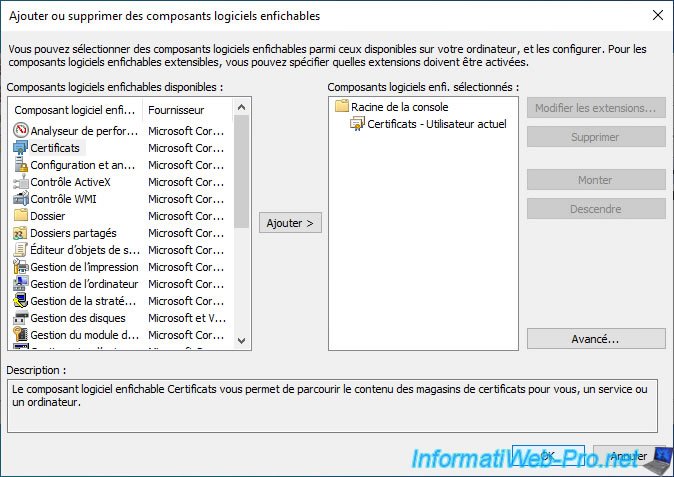
In the "mmc" console that appears, go to : File -> Add/Remove Snap-in.
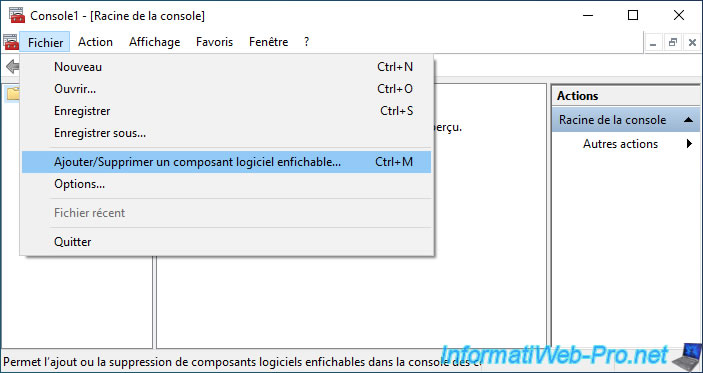
Select the "Certificates" component and click Add.
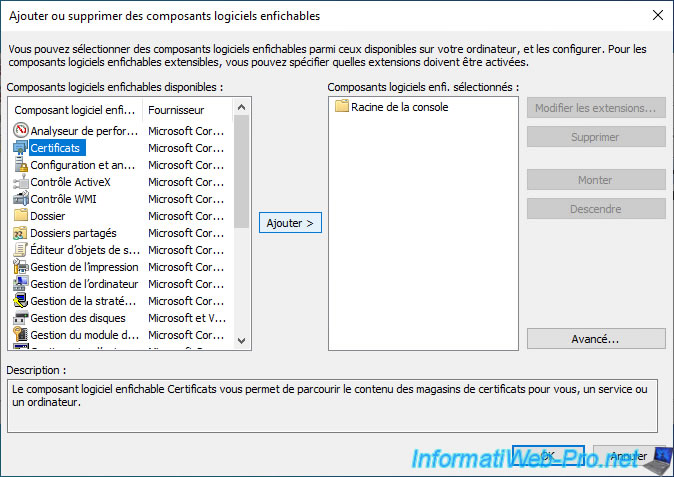
By default, the "Certificates" component will be added for the current user.
Click OK.
Note : if you have administrator rights on the current computer or server, the "mmc" console will ask you if you want to add it for your user account, for a service account or for a computer account.
Select the "My user account" option.
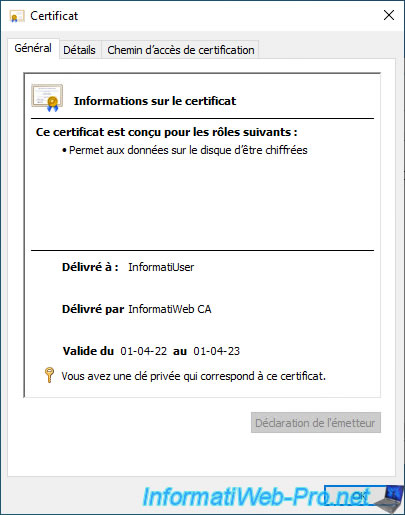
Go to "Certificates - Current User -> Personal -> Certificates" and you will see your user certificate appear.
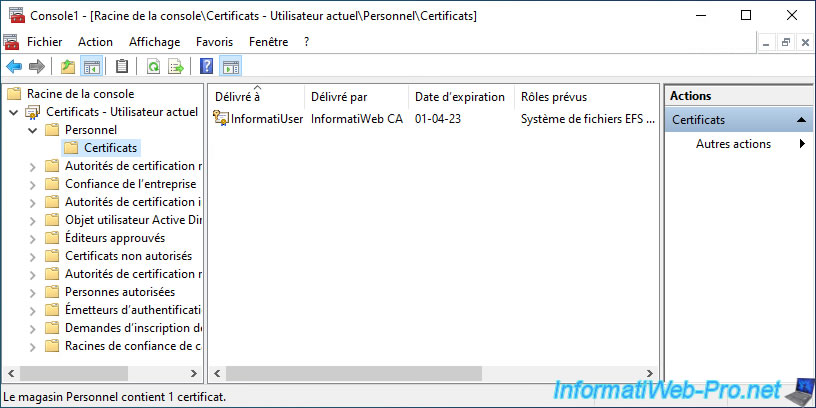
If you double click on this certificate, you will see that this one :
- allows data on disk to be encrypted (thanks to EFS)
- has been issued to your user account
- was issued by your certification authority (CA)
- is valid for 1 year (default)
- also contains the associated private key (which is only stored locally on that computer or server)
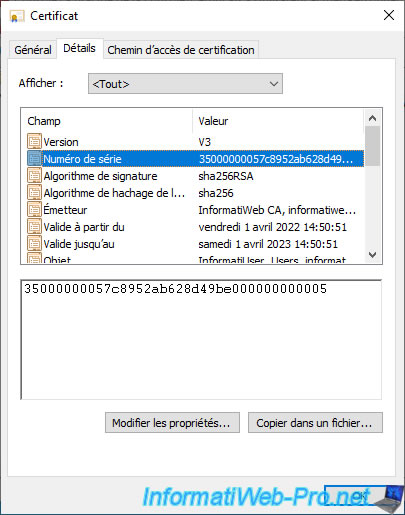
If you go to the "Details" tab, you will be able to see the serial number of this certificate.
This serial number will allow you later to easily check if certificate roaming works correctly in your case when this feature is enabled.
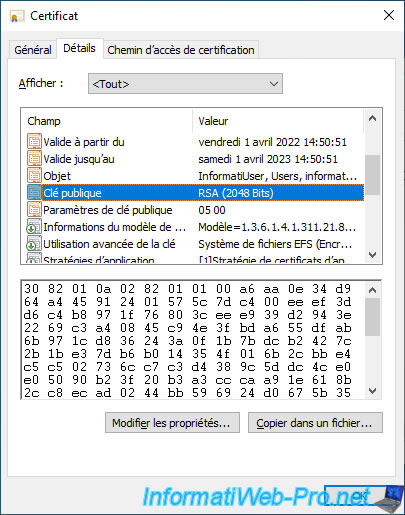
If you select the "Public Key" field, you will be able to see the public key of this certificate.
This public key is the one that will be used by this user to decrypt (and therefore also read) the data that he has encrypted with his private key.
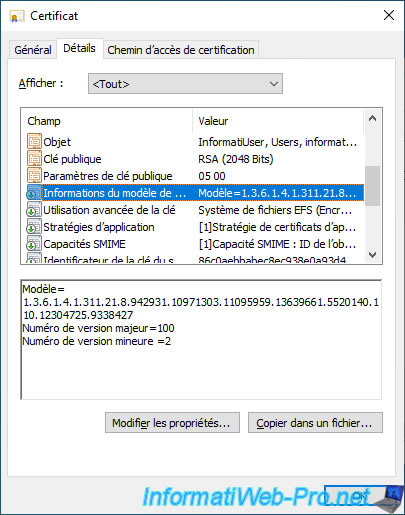
If you select the "Certificate Template Information" field, you will see that the template used is not a standard template, but a custom certificate template.
Hence the fact that a unique identifier appears instead of the name of the template.
Note that in some cases, the name of the custom certificate template may also appear here.
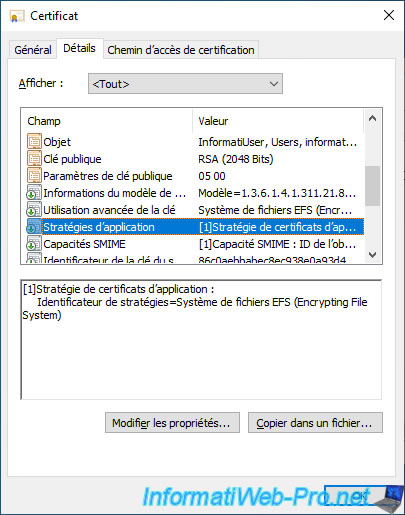
If you select the "Application Policies" field, you will see that this certificate will be used for the Encrypting File System.
If you select the "Subject Alternative Name" field, you will see that the user's principal name will appear.

Share this tutorial
To see also
-

Articles 1/26/2024
SafeNet Authentication Client (SAC) - Installation and overview
-

Articles 9/8/2023
What is encryption and how does it work ?
-
Windows Server 12/29/2023
WS 2016 - AD CS - Backup and restore a certificate authority (CA)
-

Windows Server 1/19/2024
WS 2016 - AD CS - Buy smart cards and log in via them
No comment