- Windows Server
- 22 September 2023 at 08:08 UTC
-

- 1/2

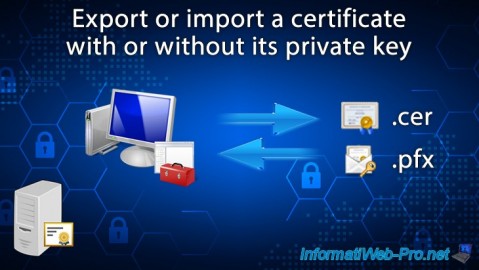
When you want to secure a service or use a secure one, you will need to manage certificates.
Depending on the case, you may need to export and/or import a certificate with its associated private key or not.
1. Manage certificates from an mmc console
To start, whether you are on a computer (client workstation) or a server, the procedure is identical.
Open the start menu and type : mmc.
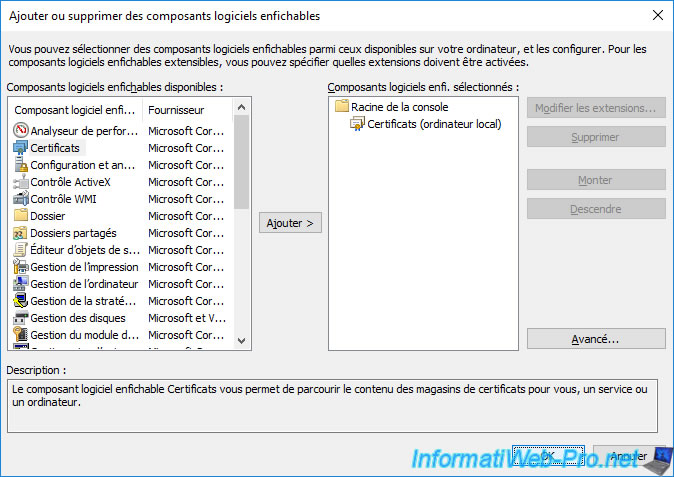
Then, in the "mmc" console that appears, click : Add/Remove Snap-in.
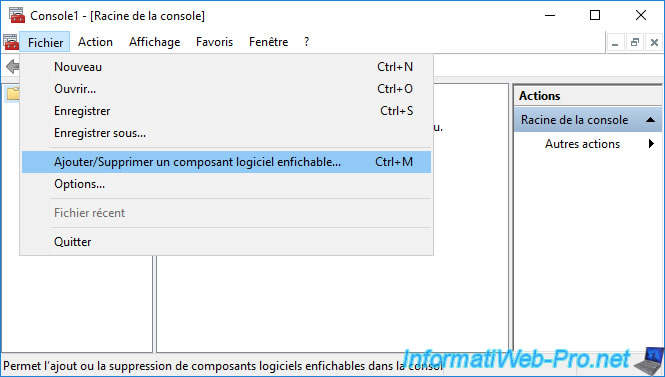
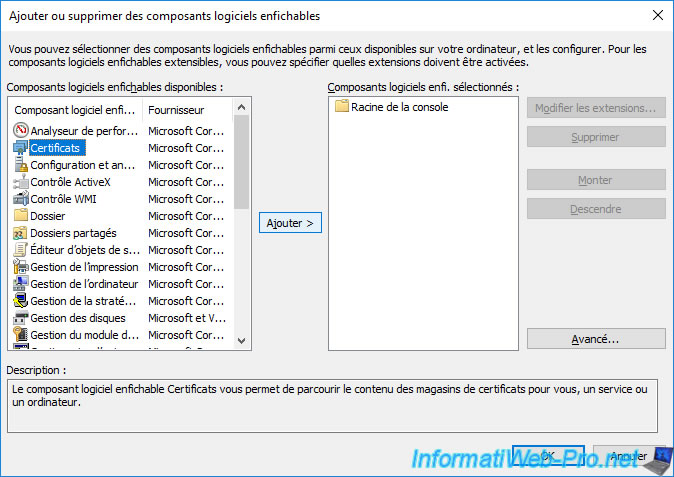
Add the component : Certificates.
Choose "Computer account" if you want to manage your computer or server's certificates or "My user account" to manage those of the user.
Note : this choice only appears if you have "administrator" rights on the computer or server where you are.
Shortcuts : rather than launching an "mmc" console and adding the certificate component for the local computer or current user, you can launch the file directly :
- certmgr.msc : to manage the current user's certificates
- certlm.msc : to manage local computer certificates
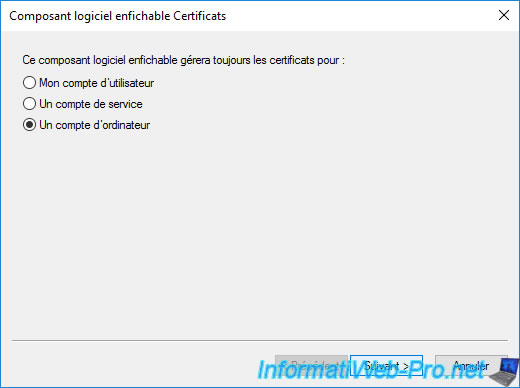
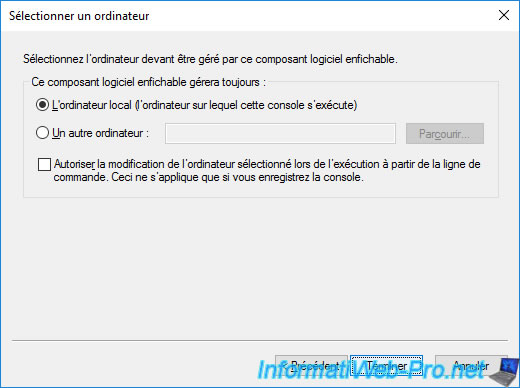
If you selected "Computer account", leave the "Local computer..." option selected and press Finish.
Click OK to confirm the addition of this "Certificates" component in the "mmc" console.
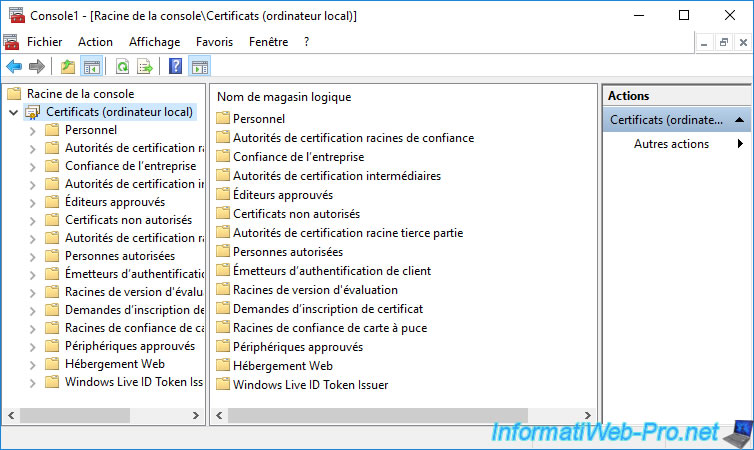
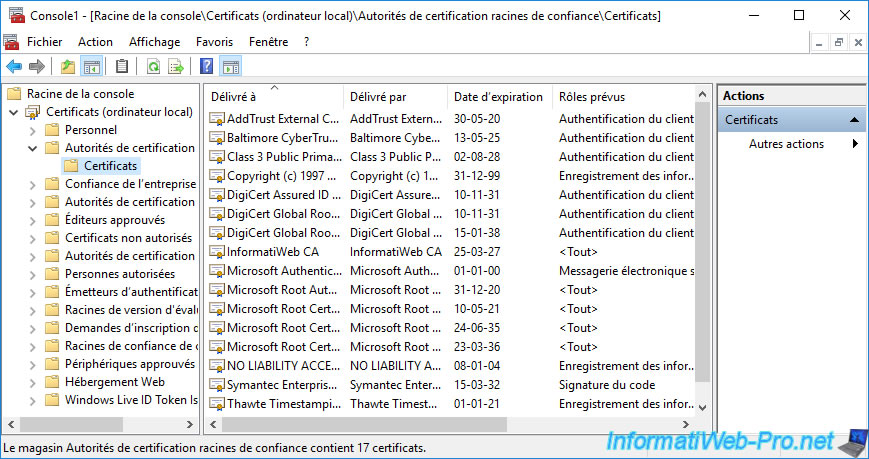
If you select the "Certificates ..." component that appears, you will see that several certificate stores exist by default on your computer or server :
- Personal : contains the personal certificates (along with the associated private keys) of the current computer/server or user.
This contains, for example, the certificates of this computer, server or user signed by your certification authority or self-signed certificates generated and trusted by applications (such as EFS, for example). - Trusted Root Certification Authorities : contains public certificates (including public keys) of root certification authorities recognized by default by Windows (Server).
You will find there, for example, the certificates of these certification authorities : DigiCert, Microsoft Root Authority, VeriSign, ...
You can also find the public certificate of your own root certification authority there.
This will allow your computer or server to trust all certificates issued by your own certification authority. - Enterprise Trust : contains Certificate Trust Lists (CTL) that allow self-signed certificates from other organizations to be trusted by limiting the purposes for which they are trusted.
- Intermediate Certification Authorities : certificates of secondary (subordinate) CAs that your computer/server trusts.
You can also find the public certificates of your own secondary (subordinate) CAs there, if applicable. - Trusted Publishers : contains the authenticode (signature) certificates of trusted publishers which allow, for example, to verify the digital signature applied to some programs (.exe), drivers (.sys) and PowerShell scripts (.ps1).
- Untrusted Certificates : certificates that you have decided NOT to trust. This can be done through the Software Restriction Policy, as well as when prompted by your web browser or email client.
- Third-Party Root Certification Authorities : certificates from trusted root authorities (excluding Microsoft's and yours).
- Trusted People : certificates issued to persons that have been explicitly approved.
Most of the time, these will be self-signed certificates. - Client Authentication Issuers : since Windows Server 2012, the use of Certificate Trust Lists (CTL) is deprecated. This new certificate store has therefore appeared so that only certificates not concerned by the request are sent in the messages sent.
- Preview Build Roots : contains the "Microsoft Development Root Certificate Authority 2014" certificate for trusting Windows Insider Preview code.
- Certificate Enrollment Requests : pending or rejected certificate requests
- Smart Card Trusted Roots : may contain the Kerberos Key Distribution Center (KDC) certificate, for example. What is required if the computer or server is not joined to the Active Directory domain.
- Trusted Devices : certificates to trust devices
- Web Hosting : certificates used to secure access to your website created under IIS (Internet Information Services).
Note that, from the IIS console, you have the possibility to add your certificates in this certificate store or in the "Personal" certificate store.
It's therefore possible that some certificates for your websites are in the "Personal" certificate store instead of this one (Web Hosting). - Windows Live ID Token Issuer : certificate used by Microsoft Services Manager (formerly : Windows Live ID Security Token Service).
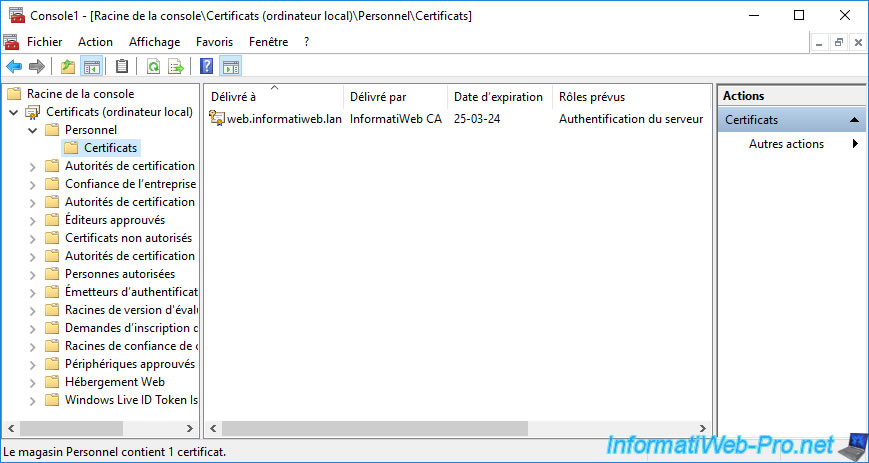
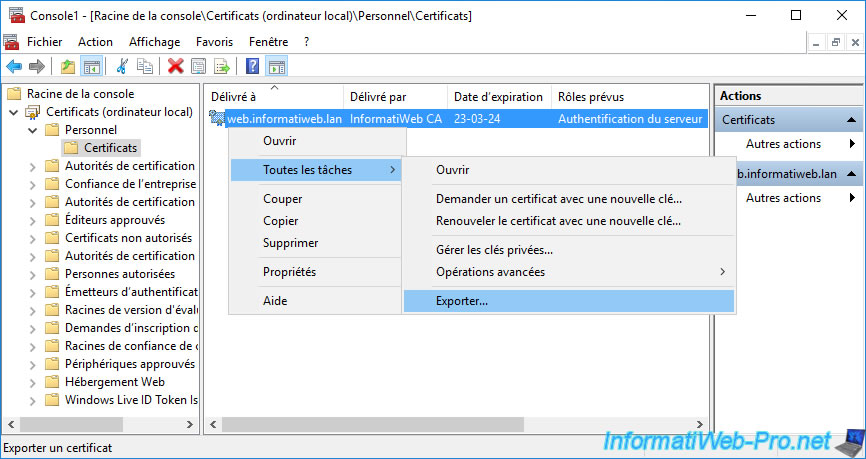
As explained before, in the "Personal" certificate store, you will find the certificates of the current computer, server or user.
Generally, the private keys associated with these certificates will also be present. Which you can easily see from the certificate icon as a key is also displayed if the associated private key is present for it.
Note that in the case of a secure website hosted on an IIS web server, the desired certificate may be in the "Web Hosting" certificate store.
As explained previously, in the "Trusted Root Certification Authorities" certificate store, you will find the certificates of the root certification authorities that your computer or server trusts by default, as well as that of your certification authority if applicable.
Note that if you have an enterprise certificate authority and this computer or server is linked to the same Active Directory domain as it, its certificate will be automatically imported in this certificate store.
In our case, it's our "InformatiWeb CA" certification authority.
2. Export a certificate
2.1. Export a certificate with its private key (.pfx format)
When you have certificates in the "Personal" certificate store, the private keys associated with them are often also present.
If you try to export one of your personal certificates, you will therefore have the option of exporting only the certificate or the certificate and its private key.
Warning : as its name suggests, the private key must remain secret. So, don't share it with anyone.
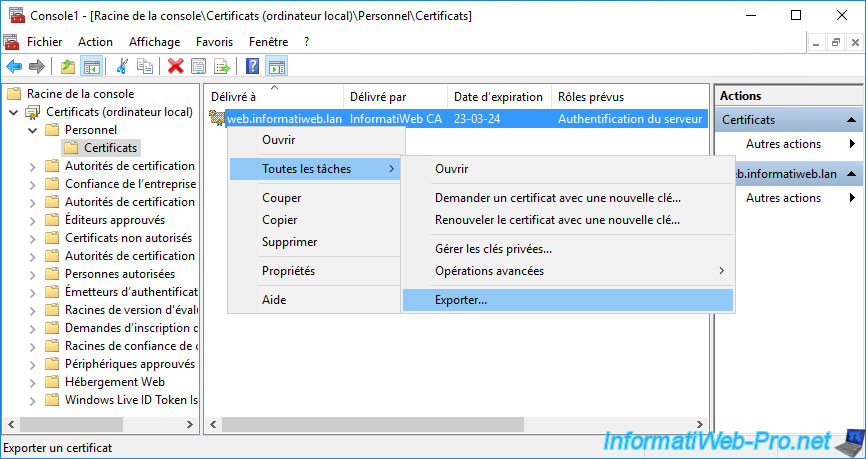
To export a personal certificate with its private key, right-click on the desired certificate and click on : All Tasks -> Export.
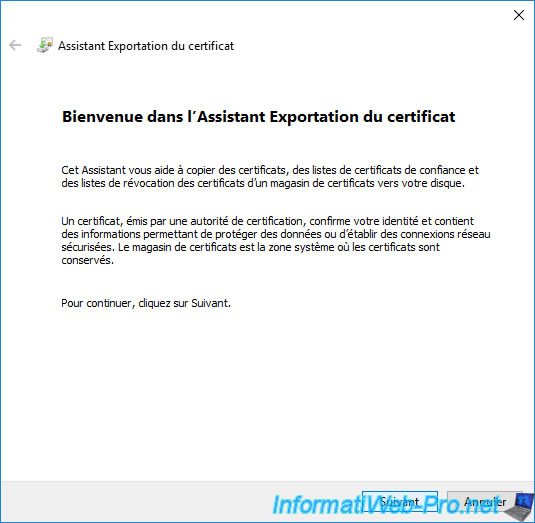
The Certificate Export wizard appears.
Click Next.
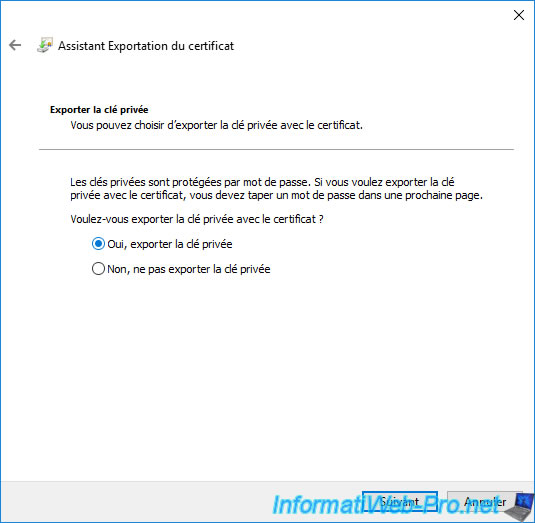
Choose : Yes, export the private key.
Notes :
- if this step doesn't appear and the wizard directly offers you the ".cer" format, it means that you don't have the private key associated with this certificate.
- if this step appears, but the "Yes, export the private key" option is grayed out, it means that the export of the private key is not possible for this certificate.
Indeed, for this to be possible, the option "Allow private key to be exported" must be checked in the "Request Handling" tab of the certificate template that was used to obtain this certificate.
Note that this option must have been enabled on the relevant certificate template at the time the certificate was issued.
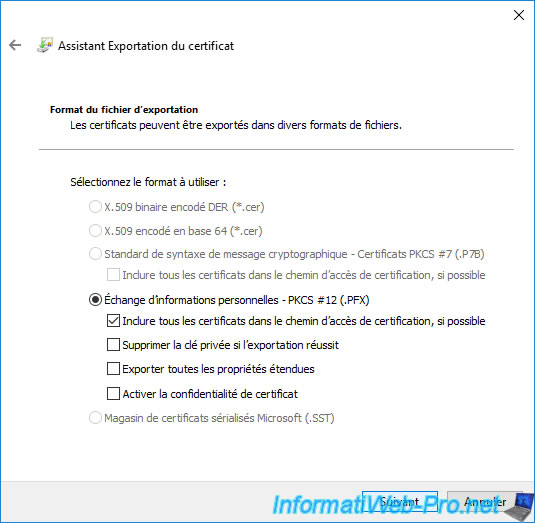
When you export the certificate, along with its associated private key, the format used will be : Personal Information Exchange - PKCS #12 (.PFX).
In this case, the export options available are :
- Include all certificates in the certification path if possible : also exports all parent certificates up to the relevant root CA to obtain the full certification path.
In our case, this will export our "web.informatiweb.lan" certificate, as well as its associated private key. But, also the public certificate of our root certification authority that issued this certificate.
If your certificate was issued by a secondary (subordinate) CA, the wizard would export the desired certificate, that of the secondary CA that issued it, as well as that of the root CA (that signed the certificate of the relevant sub-CA). - Delete the private key if the export is successful : indicates that if the export of the certificate and its associated private key is successful, the private key associated with this certificate will be deleted from your computer or server. Which will be a problem if this certificate was still in use on your computer or server.
- Export all extended properties : a certificate has data (such as revocation lists (CRLs) or certificate trust lists (CTLs), extensions, ...) that are part of it. However, CryptoAPI certificates can also have extended properties on Microsoft platforms that are not actually part of the certificate.
If you check this option, the extended properties added to this certificate will also be exported.
However, these extended properties are only available on Microsoft platforms. - Enable certificate privacy : recommended option when exporting Azure Stack Hub PKI certificates. Otherwise, an error may occur because only the password protects the private information of this certificate.
In most cases, only the 1st option (Include all certificates in the certification path ...) is useful.
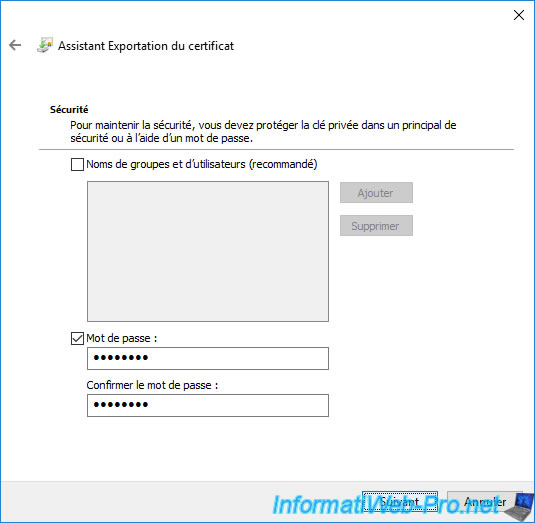
Given that you are exporting a certificate with its associated private key, it's important to protect the private key which will also be in the ".pfx" file which will be generated.
To do this, you can specify a password which must be specified again when you re-import the exported ".pfx" file.
If you wish, you can also check the "Group and user names (recommended)" option.
This option will allow you to import this certificate later without needing to specify the password protecting the private key if you are connected with a user authorized here.
Otherwise, the wizard will ask you to specify the password protecting the private key.
Hence the interest of always specifying a password here, even if you want to use the 1st option (Group and user names ...).
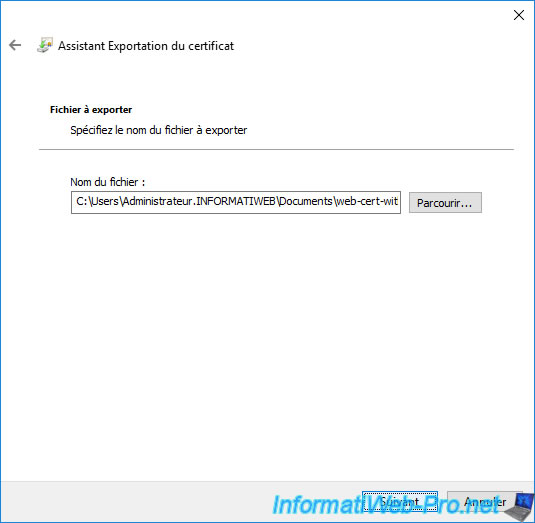
Click "Browse".

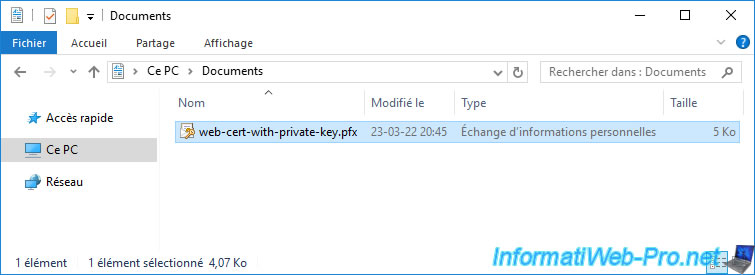
Choose where and under what name you want to export your certificate in ".pfx" format, then click on : Save.

The path to the certificate that will be exported appears.
Click Next.
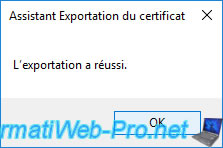
Click on : Finish.

The "The export was successful" message appears.
The certificate in ".pfx" format appears and is recognized under the "Personal Information Exchange" type in Windows.
If you want to open this ".pfx" certificate without importing it, you will have to right click "Open" on it instead of a double click.
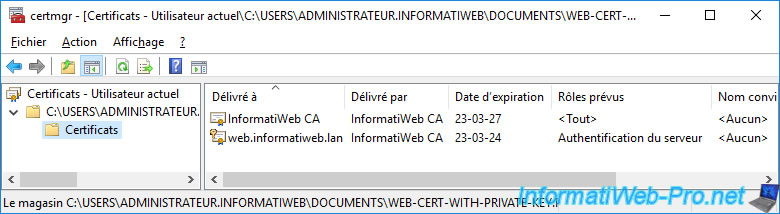
In the "Certificates" folder, you will find :
- the certificate of the root authority that issued this certificate
- the certificate you exported, along with its private key
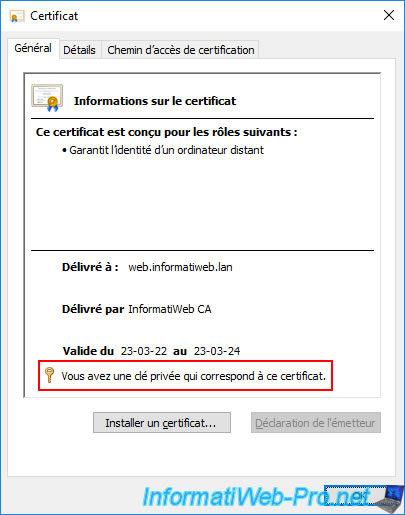
If you double click on the exported certificate in the window above, you will see that you have a private key that corresponds to this certificate.
2.2. Export a certificate without its private key (.cer format)
In order for someone or something to decrypt the data you send them and also verify that it was you who sent it, they must know your public key.
On the other hand, you must never communicate your associated private key to it.
To do this, right-click "All Tasks -> Export" on the desired certificate.
Select "No, do not export the private key".
Note : if you are exporting a certificate for which you don't have the associated private key (which is particularly the case if you are trying to export a certificate present in the "Trusted Root Certification Authorities" certificate store), this step will not appear.
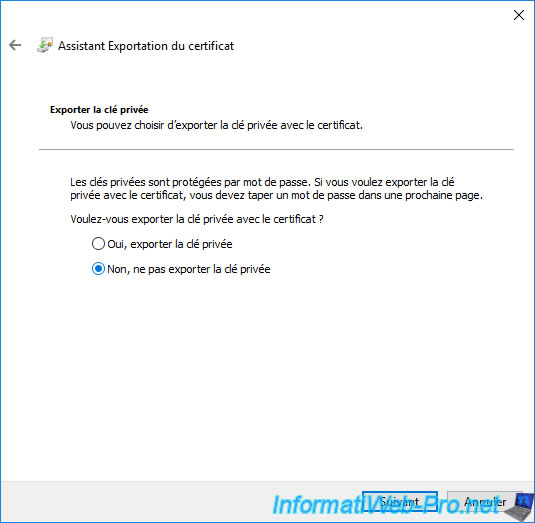
Since only the certificate will be exported and NOT its private key, the proposed format will be ".cer".
When you export a certificate without its private key, you have 3 options :
- DER encoded binary X.509 (.CER) : Microsoft format used by most applications running on Windows or Windows Server.
- Base-64 encoded X.509 (.CER) : readable Linux format used on Linux distributions (such as : Debian or Ubuntu, for example), but also by other Linux-based services (such as the VMware ESXi hypervisor, for example).
This format has the advantage of being easily "readable" with notepad. - Cryptographic Message Syntax Standard - PKCS #7 Certificates (.P7B) : allows exporting the certificate, as well as the parent certificates (that of the root CA, as well as that of the secondary CA, if applicable). This ensures that the certificate will continue to be valid when you re-import it.
To do this, also check the "Include all certificates in the certification path if possible" box.
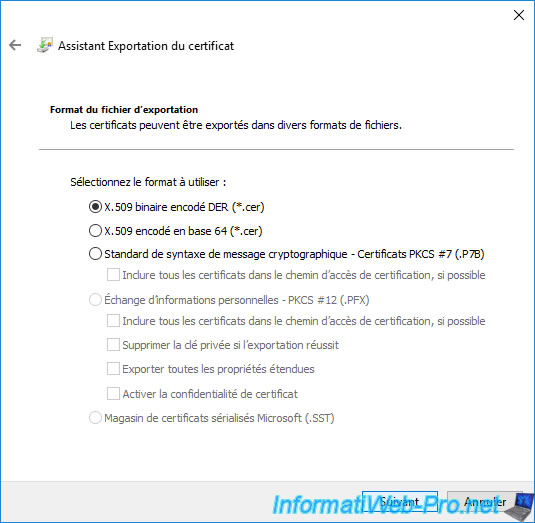
Click "Browse" to choose where you want to store the ".cer" or ".p7b" certificate that will be exported and under what name.
Then, click Next.

Click "Finish" to confirm the export of this certificate.
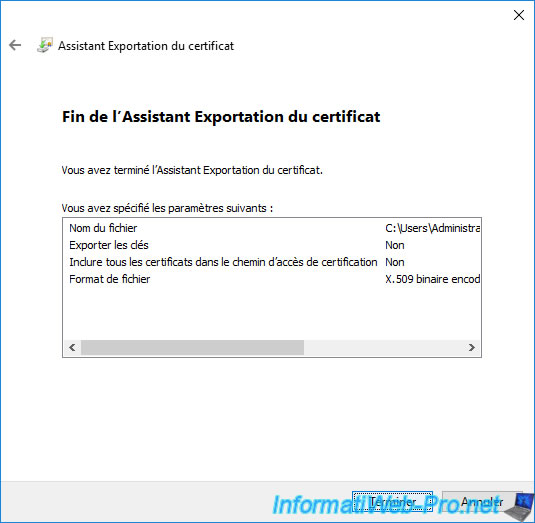
The "The export was successful" message.

As expected, if you open the exported ".cer" certificate (by double-clicking on it), you will see that no message indicates that a private key is present.
Which proves that it was not exported.

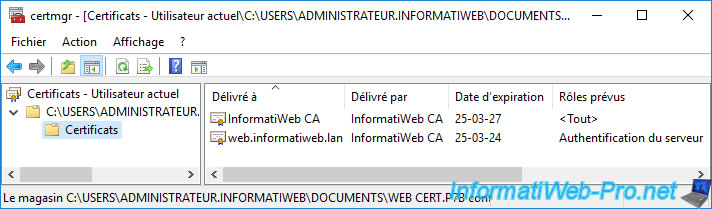
If you exported the certificate in ".p7b" format, you will see that this file contains :
- one or more certification authority certificates (root and secondary) used to create the complete chain of trust for the exported certificate.
This or these certificates will only be present if you have also checked the "Include all certificates in the certification path if possible" option when exporting the certificate in ".p7b" format. - the certificate you exported WITHOUT its private key.
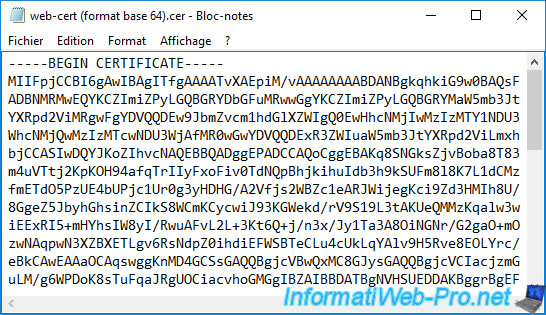
Note that if you exported the certificate in "Base-64 encoded X.509 (*.cer)" format (Linux format), you will be able to open it with Notepad and you will see that its contents look like this :
Plain Text
-----BEGIN CERTIFICATE-----
xxxxxxxxxxxxxxxxxxxxxxxxxxxx...
-----END CERTIFICATE-----
This is useful when the application to be protected asks you to paste the certificate as simple text rather than sending a file.
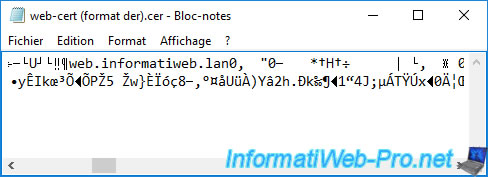
On the other hand, if you exported it in "DER encoded binary X.509 (.CER)" format (Microsoft format), you will not be able to display it as text.
Note that the "Cryptographic Message Syntax Standard - PKCS #7 Certificates (.P7B)" format is also not readable as text and the preview will look similar to what is shown below.
Share this tutorial
To see also
-

Articles 1/26/2024
SafeNet Authentication Client (SAC) - Installation and overview
-

Articles 9/8/2023
What is encryption and how does it work ?
-
Windows Server 12/29/2023
WS 2016 - AD CS - Backup and restore a certificate authority (CA)
-

Windows Server 1/19/2024
WS 2016 - AD CS - Buy smart cards and log in via them
You must be logged in to post a comment