

When you have offices in different countries, it may be interesting to have access to data hosted elsewhere in the world.
To do this, we will use the VPN gateway system.
Info : in business, it's possible to use IP VPN technologies available from some operators : IP VPN from Orange (diagram available here) or SD-WAN from Interoute (GTT) for example.
If you check the WHOIS of your company's public IP address in the case of IP VPN, you will see for example this "[country name] [city name] Customer P2p Interface Addresses In [2-letter code country]" for the location of your IP address.
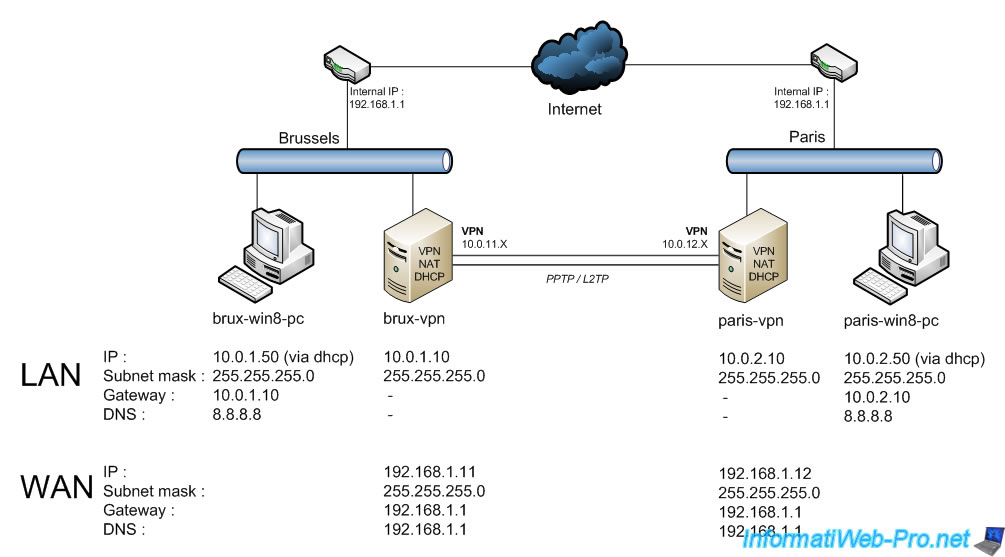
In this tutorial we will take the example of a company that would be implemented in Belgium (with an office in Brussels) and who would also have another office in France (in Paris).
Note : if you want to learn more about VPN technology, see our previous tutorial : Windows Server 2012 - Routing and VPN server.
Important : for the stability and security of your VPN tunnels on Windows Server, favor the use of L2TP as explained at the end of the tutorial, rather than PPTP.
Tutorial created on Windows Server 2012, but also tested on Windows Server 2022 and 2016.
- Network configuration used
- Configuring hardware firewalls
- Install and configure DHCP servers
- Create local users for VPN server authentication
- Install role: Remote Access (Routing and Remote Access)
- Configure routing and remote access with required VPN tunnels
- Configure routing and remote access (VPN) on site 1 (Brussels)
- Initial configuration of routing and remote access (VPN) at site 1 (Brussels)
- Define the IP address range to assign to clients of the VPN server at Site 1 (Brussels)
- Configure routing (NAT) for the local area network (LAN) and Internet access (WAN) at site 1 (Brussels)
- Configure the VPN server firewall on site 1 (Brussels)
- Configure routing and remote access (VPN) on site 2 (Paris)
- Installation and initial configuration of routing and remote access (VPN) at site 2 (Paris)
- Define the IP address range to assign to clients of the VPN server at Site 2 (Paris)
- Configure routing (NAT) for the local area network (LAN) and Internet access (WAN) at site 2 (Paris)
- Configure the VPN server firewall on site 2 (Paris)
- Create VPN tunnels and configure routing between your physical sites (Brussels and Paris)
- Configure routing and remote access (VPN) on site 1 (Brussels)
- Allow ping on your VPN servers
- Establish site-to-site VPN connections (VPN tunnels)
- Test connectivity between your physical sites (between VPN servers and from client PCs)
- Change the VPN protocol to use L2TP instead of PPTP
- Change the VPN protocol to use L2TP on site 1 (Brussels)
- Change the VPN protocol to use L2TP on site 2 (Paris)
- Connect site 1 (Brussels) to site 2 (Paris) using L2TP instead of PPTP
- Connect site 2 (Paris) to site 1 (Brussels) using L2TP instead of PPTP
- Restart VPN servers
- Automatic VPN connections
- VPN connections established (using L2TP)
- Test connectivity between your physical sites (via VPN tunnel using L2TP protocol)
- Connectivity tests between servers at 2 different physical sites (optional)
- Routing information about your VPN servers
1. Network configuration used
To implement this solution and best match the configuration of a real corporate network, here is the network configuration we used:
- One server at each physical site that acts as a router (these servers therefore have two network cards: one for the LAN and the other connected to the Internet), a VPN server, and a DHCP server.
- One client PC per physical site to simply test remote access to prove that data routing through the VPN tunnel is working seamlessly (if everything is configured correctly on your VPN server/router).
The "brux-vpn" and "paris-vpn" servers will serve:
- VPN servers for the VPN tunnel that will be established between the two physical sites (and more specifically, between these two VPN servers).
- routers for the machines on each local network (at each site) for Internet access, as well as access to the resources at the remote site.
Indeed, the client PCs will use this machine (brux-vpn / paris-vpn) as the default gateway, and since this machine knows the network ID used at the remote site, it will correctly route packets to the other physical site.
Important : to access servers on both the internal and remote networks, It is recommended to use different network IDs on these 2 networks. Thanks to the VPN connection, all machines will be able to access both networks.
As you can see in the image below, each server has a unique LAN IP address. For example: "10.0.1.50" for the "brux-win8-pc" PC at Site 1 (Brussels) and "10.0.2.50" for the "paris-win8-pc" PC at Site 2 (Paris).
Warning : you will also see that you will need to use a different network ID for each VPN tunnel between your physical sites.
This is what will allow your VPN servers (also acting as a router) to correctly route packets between machines on the LAN (at each site), as well as send traffic to and receive traffic from the remote site. In our case, "10.0.11.X" for VPN clients (i.e., the "paris-vpn" server) is on the Brussels VPN server (brux-vpn) and "10.0.12.X" for VPN clients (i.e., the "brux-vpn" server) is on the Paris VPN server (paris-vpn).
Note: as you can see, there are no DNS servers in this infrastructure, as the DHCP server we configure will simply send the IP address of Google's public DNS server (e.g., 8.8.8.8).
However, you could also use root DNS servers by simply installing the "DNS Server" role on your "brux-vpn" and "paris-vpn" servers.
Once the "DNS Server" role is installed on these two servers, simply configure your DHCP server so that your client machines use the IP address of this local DNS server at each site as their primary DNS server. Without configuring Windows Server DNS server, it will automatically forward DNS queries to existing root DNS servers on the Internet.
1.1. Configuration of the brux-vpn VPN server for site 1 (Brussels)
As you can see, the VPN server "brux-vpn" of site 1 (Brussels) is in a workgroup "WORKGROUP".
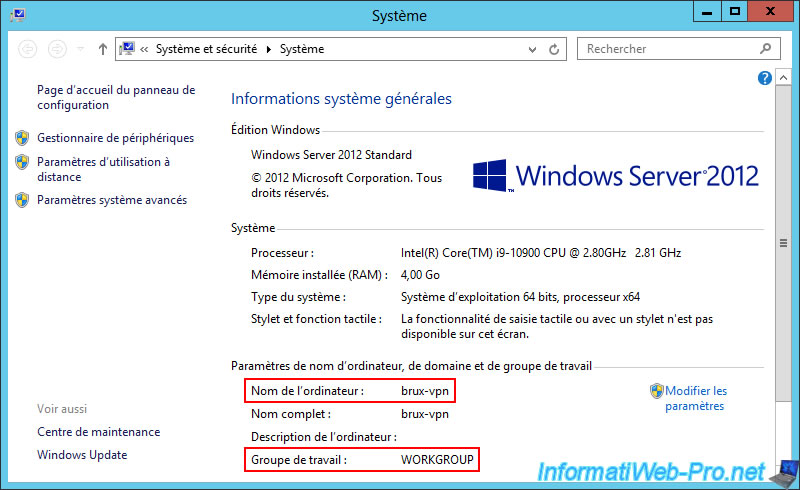
Here's the configuration of its network cards.
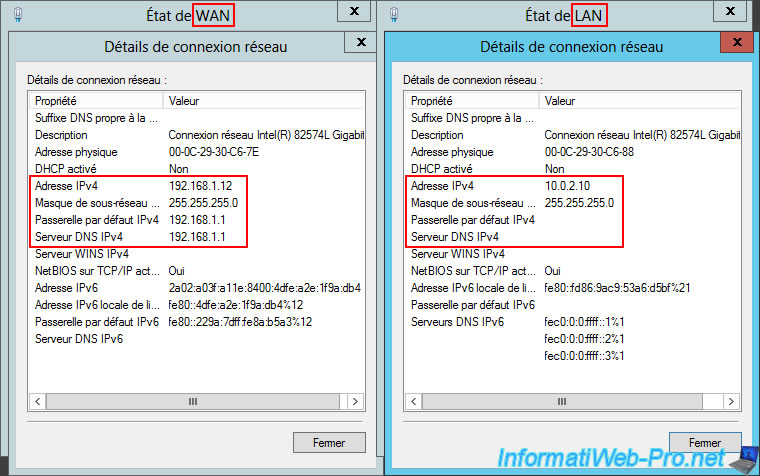
For its WAN interface:
- IPv4 Address: 192.168.1.11.
- Subnet Mask: 255.255.255.0.
- IPv4 Default Gateway: 192.168.1.1 (your ISP router).
- IPv4 DNS Server: 192.168.1.1 (your ISP router).
For its LAN interface:
- IPv4 Address: 10.0.1.10
- Subnet Mask: 255.255.255.0 (to use a "10.0.1.X" network).
- IPv4 Default Gateway: (blank, as you don't need it and using two default gateways can cause problems on Windows Server)
- IPv4 DNS Server: (blank, as this is not required. DNS resolution is performed via the DNS server specified in the WAN interface configuration for Internet access).

1.2. Configuration of the paris-vpn VPN server for site 2 (Paris)
The VPN server "paris-vpn" at site 2 (Paris) is in the same working group "WORKGROUP".
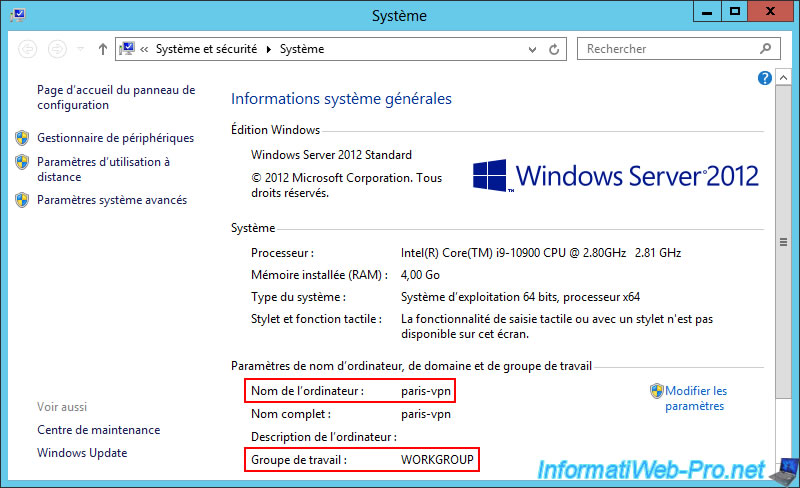
The network card configuration is similar, except that Site 2 (Paris) uses a "10.0.2.X" (Paris) network instead of "10.0.1.X" (Brussels).
For its WAN interface:
- IPv4 Address: 192.168.1.12.
- Subnet Mask: 255.255.255.0.
- IPv4 Default Gateway: 192.168.1.1 (your ISP router).
- IPv4 DNS Server: 192.168.1.1 (your ISP router).
For its LAN interface:
- IPv4 Address: 10.0.2.10.
- Subnet Mask: 255.255.255.0 (to use a "10.0.2.X" network).
- IPv4 Default Gateway: (blank, for the same reason as above)
- IPv4 DNS Server: (blank, for the same reason as above).
2. Configuring hardware firewalls
Since the VPN gateway system allows you to connect multiple remote networks into a single network, it may be necessary to configure any hardware firewalls that may be present between your network and the Internet. This is particularly the case in large companies.
Note: this does not apply to the Windows firewall, which is, by default, correctly configured to allow the PPTP and L2TP VPN connections we will use in this tutorial.
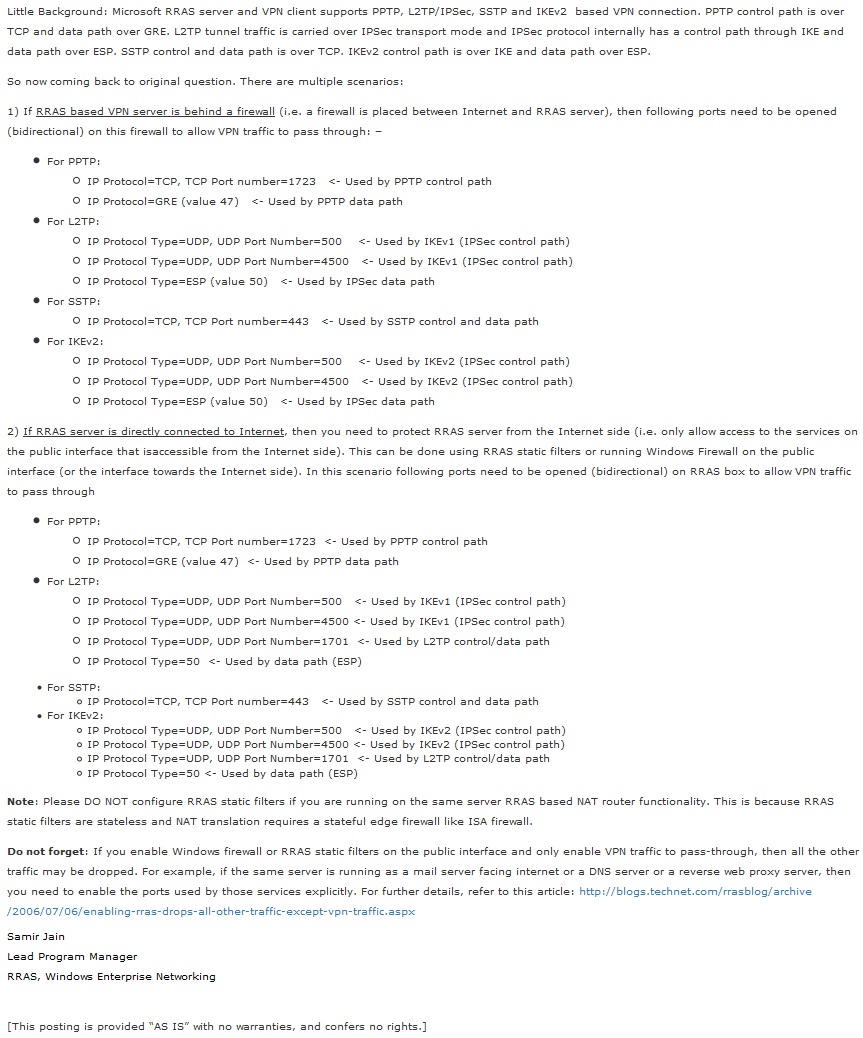
To find out which ports to unblock (depending on your configuration), consult the page "Which ports to unblock for VPN traffic to pass-through ?" created by Samir Jain on Microsoft's Technet.
3. Install and configure DHCP servers
3.1. Install the DHCP server on site 1 (Brussels)
First, the machines at Site 1 (Brussels) must receive an IP address, but must also be able to know the gateway IP address (the IP address of the local VPN server that will also act as a router at this physical site) and the IP address of the DNS server they should use (e.g., Google's (8.8.8.8)).
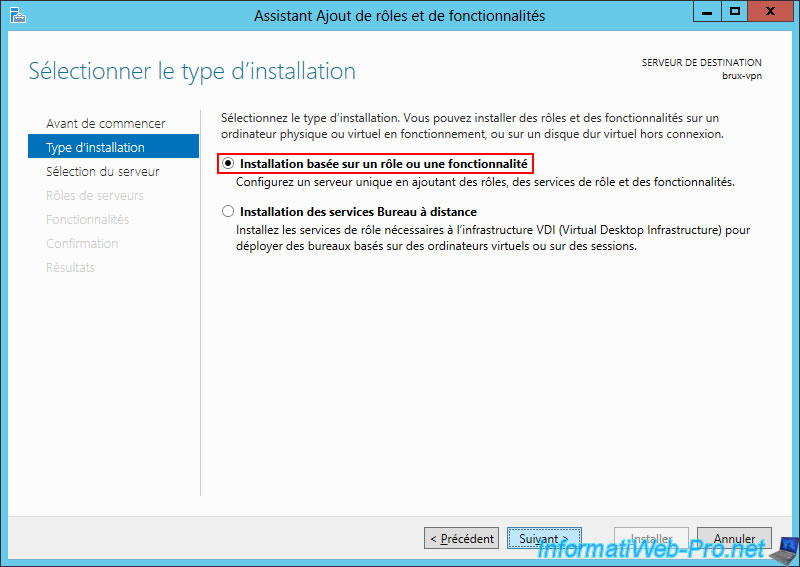
To do this, on the "brux-vpn" server, open the Server Manager and click "Add roles and features".

Select "Role or feature-based installation".
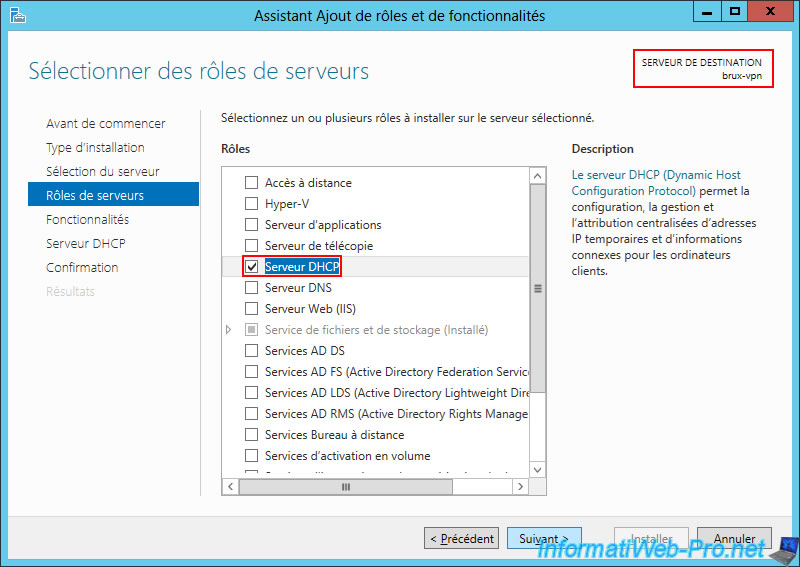
On this "brux-vpn" server, install the "DHCP Server" role.
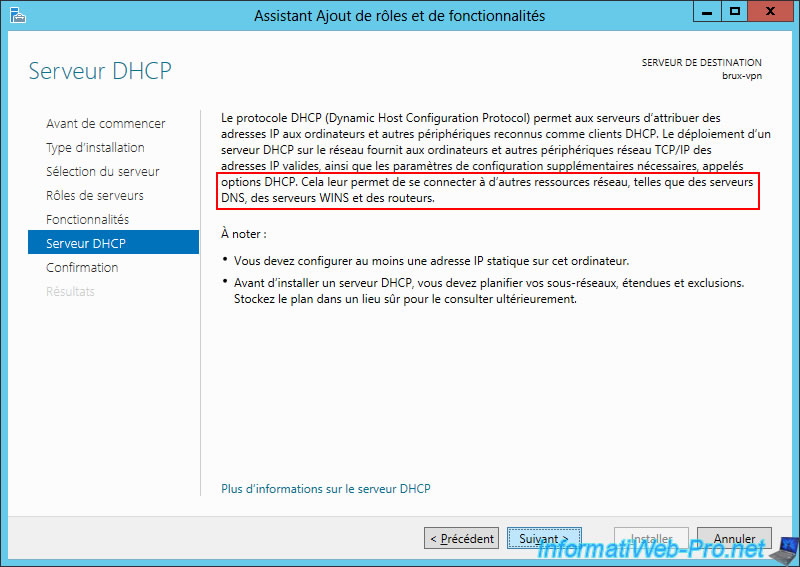
As Windows Server tells you, DHCP options allow you to specify the addresses of the DNS servers and routers that your client machines should use.
Which is necessary in this case.
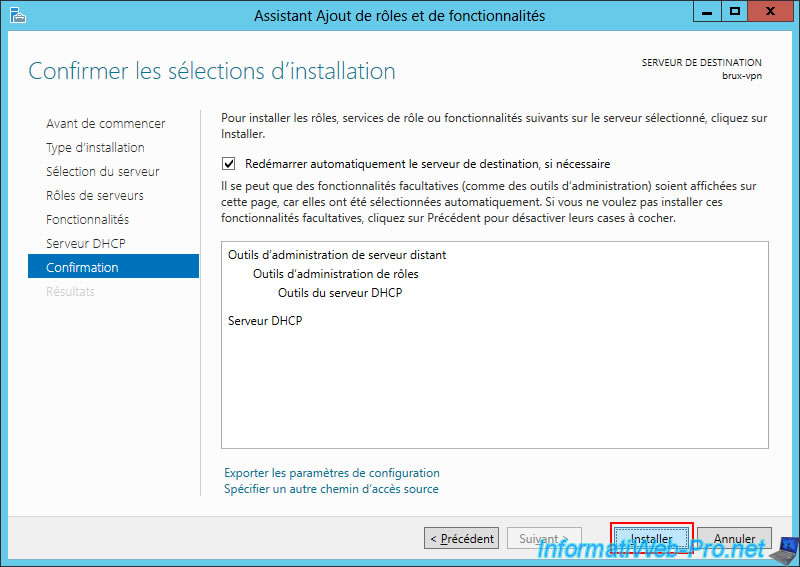
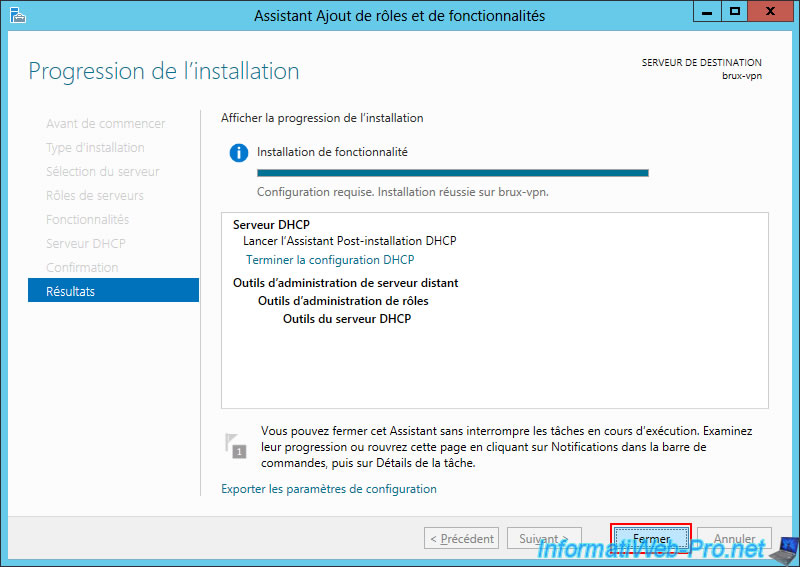
Confirm DHCP server installation.
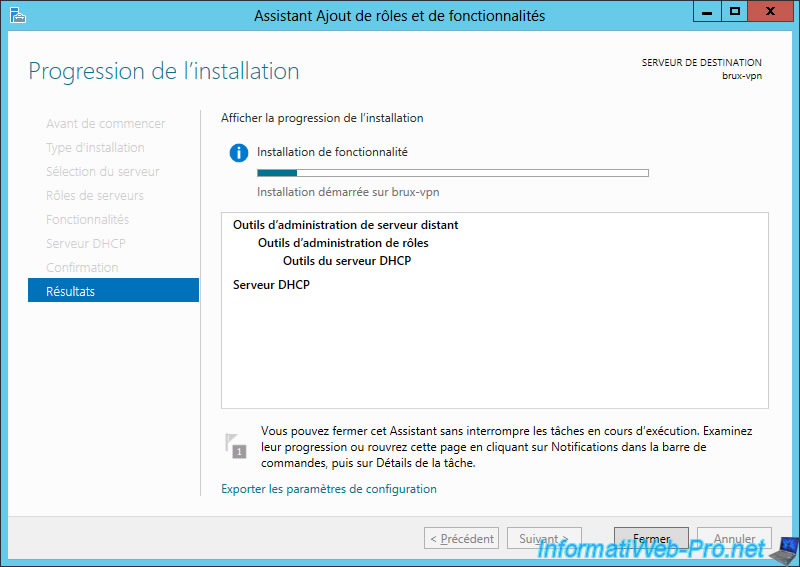
Please wait while the DHCP server is installed on this "brux-vpn" server.
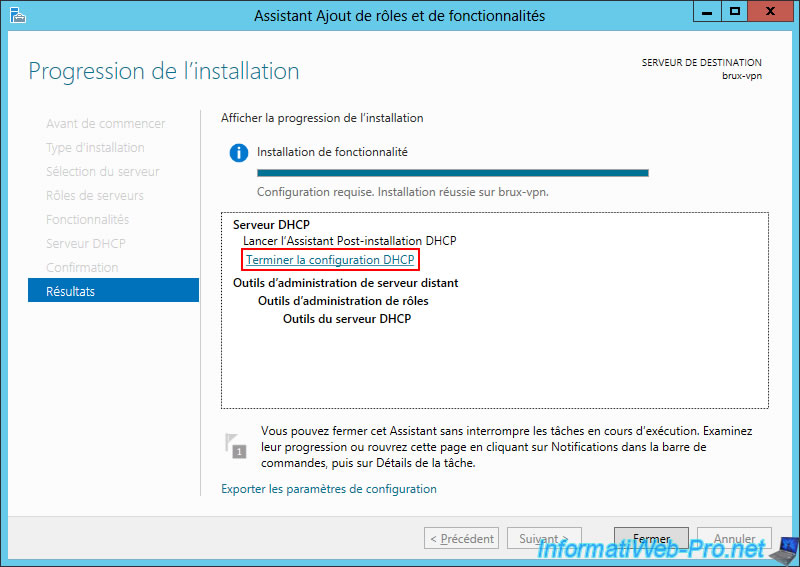
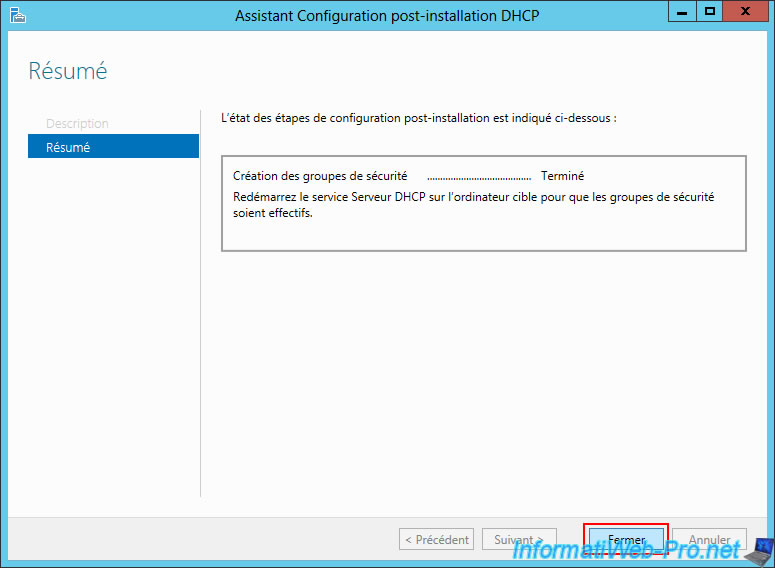
Once the DHCP server installation is complete, click the "Complete DHCP Configuration" link.
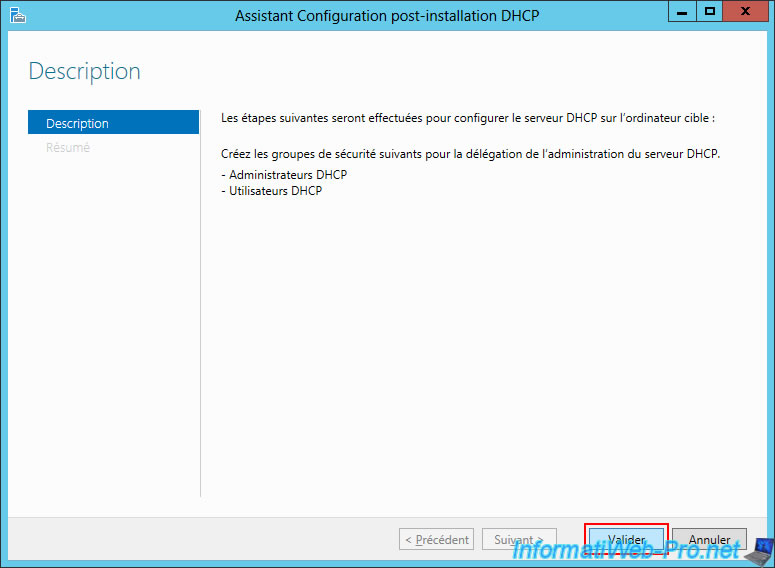
Simply click "Validate" to create the security groups needed for DHCP server administration.
Then, click "Close".
Also close the Add Roles and Features Wizard.
Share this tutorial
To see also
-

Windows Server 4/28/2012
WS 2003 - NAT and network routing
-

Windows Server 8/8/2012
WS 2008 - NAT and network routing
-

Windows Server 4/22/2015
WS 2012 - NAT and network routing
-
Windows Server 11/23/2017
WS 2012 / 2012 R2 - Dynamic routing (RIPv2)
You must be logged in to post a comment