Routing and VPN gateways on Windows Server 2012
6. Static routing for LAN computers
Now that our two VPN gateways are configured to be able to access the local network of the remote network, our 2 VPN servers will be able to access each their local network as well as the remote network.
Indeed, each VPN server already knows the path to access the remote network thanks to the static route configuration.
However, if the on-demand connection is not yet established, other computers on the network will not be able to access machines on the remote network because they will not know how to access them.
To solve this problem, simply add a static route to the computers on your LAN so that they know where they will need to go.
Since your VPN server (which also acts as a router) knows that he must use its on-demand connection to access the remote network, it will be enough to tell the computers on the network that it is enough to ask it.
In other words, when a computer on the network wants to access the remote network, it will send its packets to your router and your router will send them to the on-demand connection.
On computers of the 1st network (which have IP addresses starting with 10.0.1), it will suffice to add a route with this information :
- network ID : 10.0.2.0 (Network ID of the remote network / Paris network in this case)
- subnet mask : 255.255.255.0 (because all IP addresses start with 10.0.2)
- The local (LAN) IP address of your router / VPN server : 10.0.1.11
To add a static route to a Windows computer, there are several possibilities. Including command line and Active Directory group policies (GPO).
6.1. Static routing in command line
To create a static route command line, just use the "route ADD" command like this :
Batch
route -p ADD 10.0.2.0 MASK 255.255.255.0 10.0.1.11
Note : the "-p" parameter keeps this route even after the computer is restarted.

6.2. Static routing with group policies (GPO)
Since the use of an Active Directory and group policies are essential in business, we will configure our static route through group policies (GPO).
To do this, run the "Group Policy Management" (GPMC) program and right-click "Edit" on the "Default Domain Policy" line.

Then, go to : Computer Configuration -> Policies -> Windows Settings -> Scripts (Startup/Shutdown).
Double-click on "Startup".

Click Add.

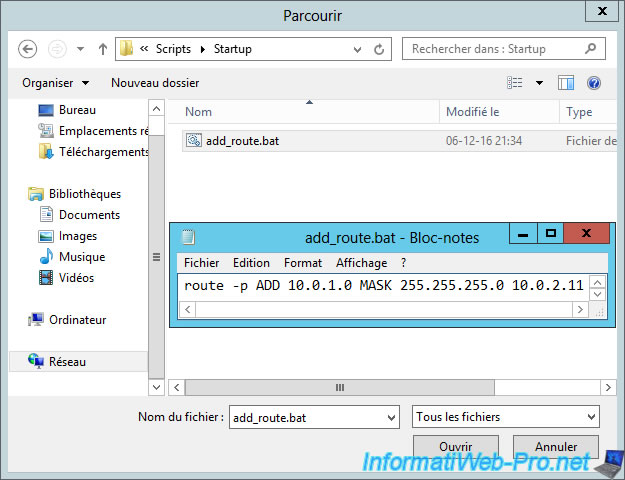
Click Browse.

By default, you will get to an empty "Startup" folder.
In this folder, create an "add_route.bat" file and paste the "route -p ADD ..." command into this file.
Then, select this file and click "Open".

Click OK.

The script is added.

Restart your Active Directory server, and then restart machines of the local network.
Each time Windows is started, the command will be automatically executed.
If you type the "route print" command in a command prompt, you will see that the route will appear in the "Persistent Routes" section.
Now, Windows knows that it will have to go through the router (gateway) 10.0.1.11 to access machines of the network 10.0.2.0

On the Active Directory server of the 2nd network, the command will be a little different : route -p ADD 10.0.1.0 MASK 255.255.255.0 10.0.2.11
7. Test VPN Gateways
As explained earlier, this is an on-demand connection. This means that, by default, the VPN connection is not established between your 2 remote sites (Brussels and Paris in our case).

For the connection to be established, simply attempt to access a server on the remote network.
To do this, you can ping the remote server or attempt to access a web server installed on a server of the remote network.
If you test this with the ping command, be aware that ping is disabled by default on Windows Server.
To enable it on the remote server, go to this remote server -> Control Panel -> System and Security -> Windows Firewall -> Advanced settings.
Then, in the Inbound Rules, enable the "File and Printer Sharing (Echo Request - ICMPv4-In)" rule for IPv4 and the "File and Printer Sharing (Echo Request - ICMPv6-In)" rule for IPv6.

Then, use the ping command to specify the IP address of a server on the remote network.
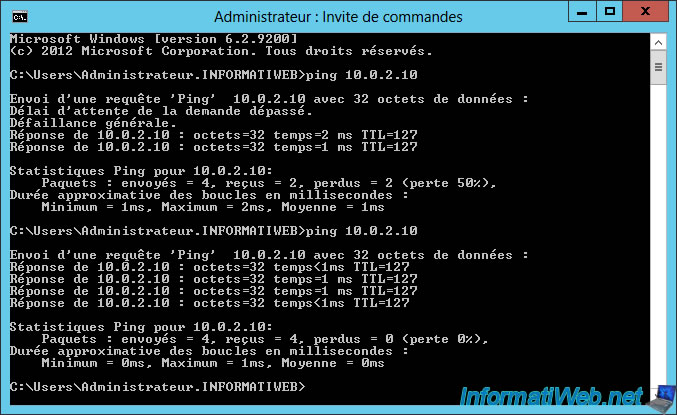
For example, from a server of our 1st network, we will ping the Active Directory server of our 2nd network (whose IP address is : 10.0.2.10).
Note : as you can see on the image below, the first 2 packets were lost, but the rest of the packets were sent correctly to the remote server.
Indeed, since we use an on-demand connection, there is a delay for the establishment of this connection. But once the connection is established, this problem disappears.
Note that it's also possible to use a permanent connection as you will see later in this tutorial.
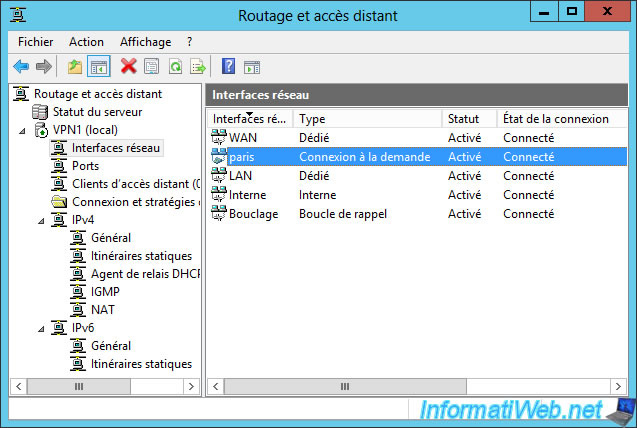
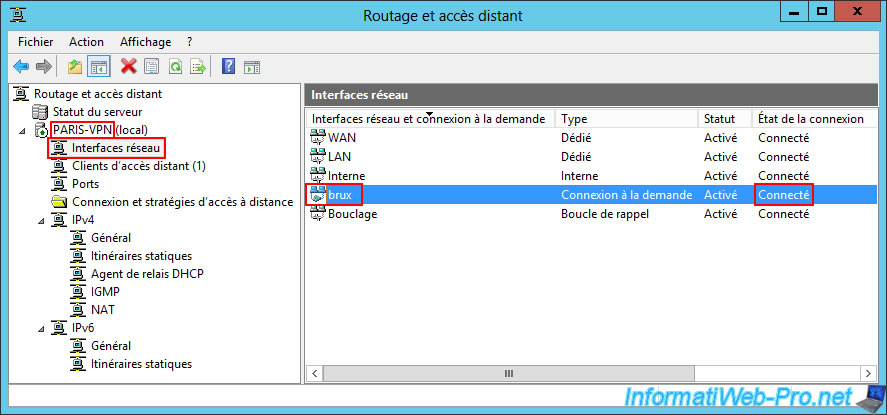
Now, if you return to the "Routing and Remote Access" console of your VPN server, you will see that your on-demand connection is currently connected.
So : the VPN server located in Brussels is currently connected to the VPN server of Paris.
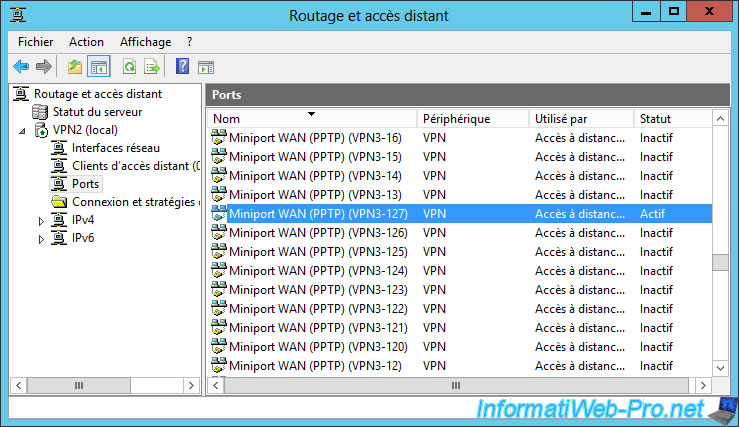
On the remote server, you will see that a client is currently logged on to a PPTP port of your VPN server
On your remote VPN server, you will see that the connection has been made too.
So : the VPN server located in Paris is also connected to the Brussels VPN server.

If you look on your VPN1 server, you will see that there is also a client connected to a PPTP port of your VPN server.
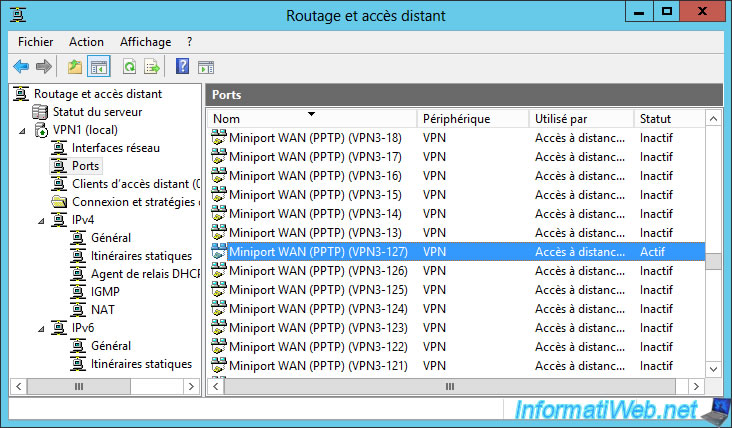
For now, your 2 networks are connected to each other with the PPTP VPN protocol.
8. Configure VPN gateways to use L2TP/IKEv2
Since sensitive information will pass through this VPN connection, it's preferable to use the L2TP/IKEv2 protocol to make the connection more secure.
Indeed, thanks to IKEv2, you can secure the connection with a password (a preshared key) or with a digital certificate (which technically can not be pirated, unless the certificate has been stolen by a hacker).
Nevertheless, as stated at the beginning of the tutorial, this will require :
- to open the necessary ports (client and server side) in the hardware firewall(s) that would be between your VPN server and the Internet
- and redirect the necessary ports (client side and server side) in the router(s) that would also be between your VPN server and the Internet
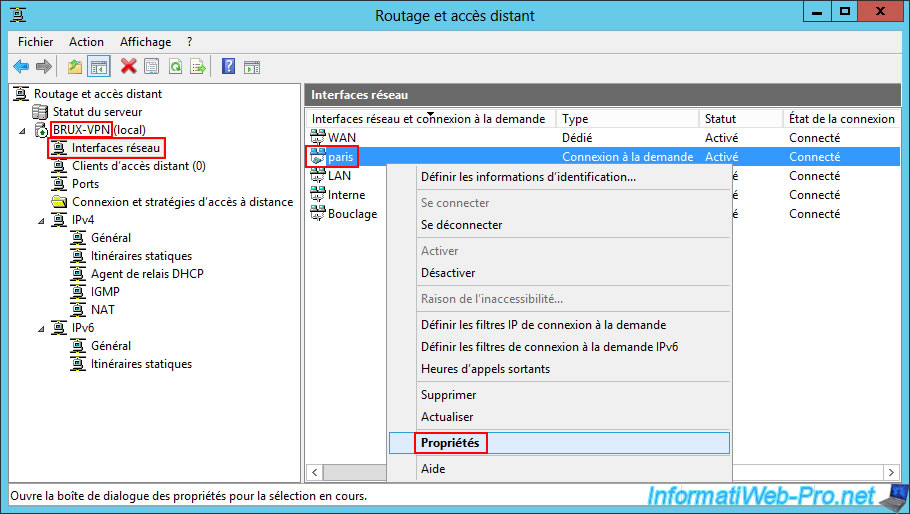
In short, to use L2TP/IKEv2 instead of the PPTP used previously, right-click "Properties" on your on-demand connection interface.
Important : this must be done on your 2 servers (VPN1 and VPN2).
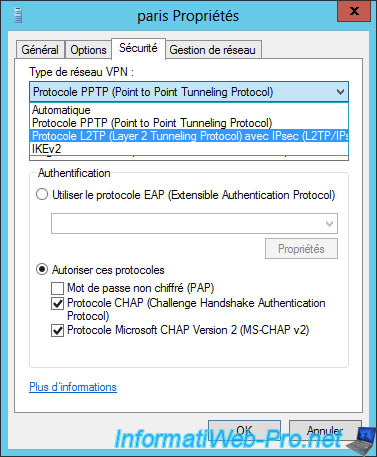
In the "Security" tab, select "Layer 2 Tunneling Protocol with IPsec (L2TP/IPsec)".
Then, click on the "Advanced settings" button.

To use a password, select "Use preshared key for authentication" and type a secure password (lowercase, uppercase, digits, and special characters).
For this tutorial, we will use the password "toto".

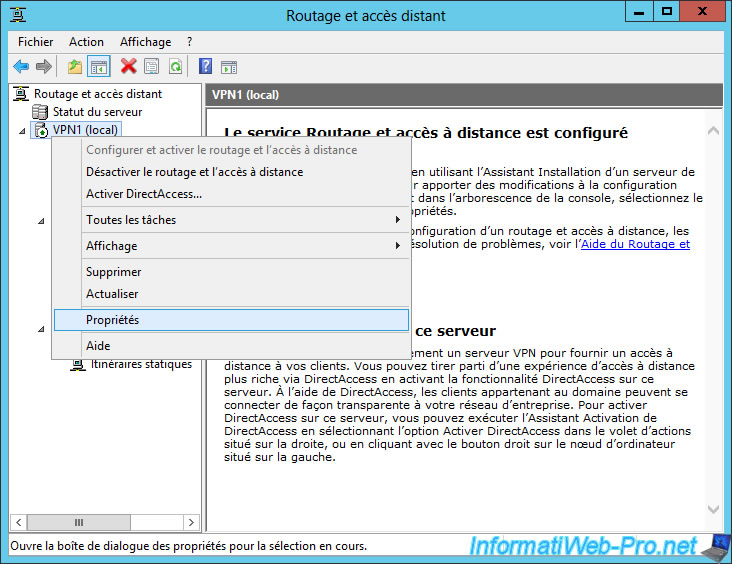
Then, right click on the name of your VPN server and click on "Properties".
In the "Security" tab, select "Allow custom IPsec policy for L2TP/IKEv2 connection" and specify the same password.
Then, click OK.
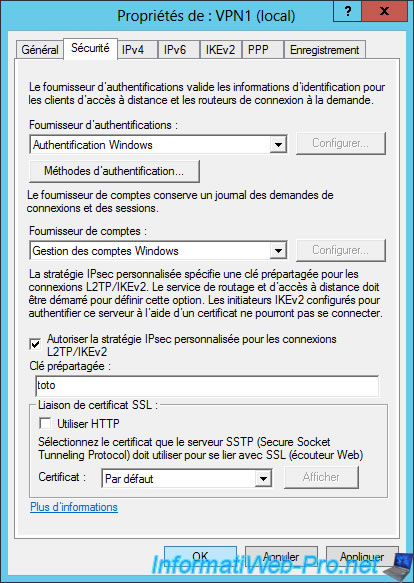
A warning will appear and prompt you to restart the Routing and Remote Access server.

Right click on your server and click : All Tasks -> Restart.
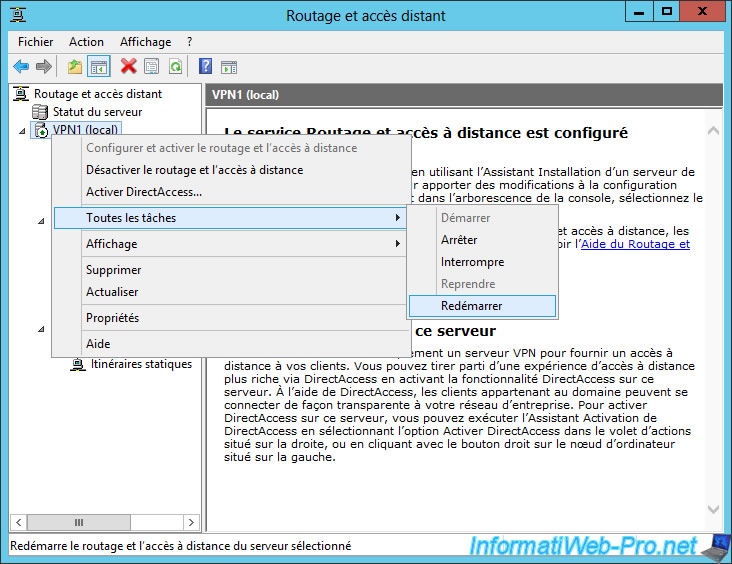
The server restarts.

Now, on-demand connections are disconnected again.
Note : if you want the connection to be permanent, simply go to your on-demand connection properties.
In "Connection type", you only need to select "Persistent connection". Thus, the connection will remain connected and will be automatically connected after the Routing and Remote Access service is started.

9. Test VPN gateways (over L2TP/IKEv2)
To test the connection, the principle is the same.
Simply ping a server of the remote network.
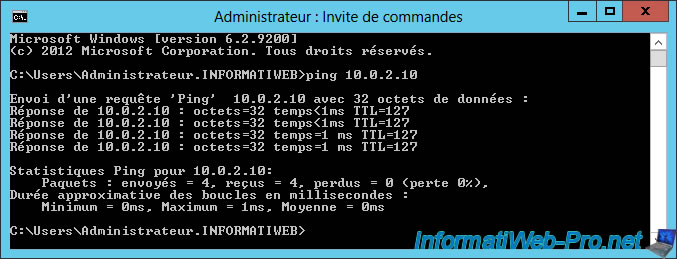
If your configuration is correct and everything is configured properly (including : hardware firewalls and routers), the connection will be established correctly.

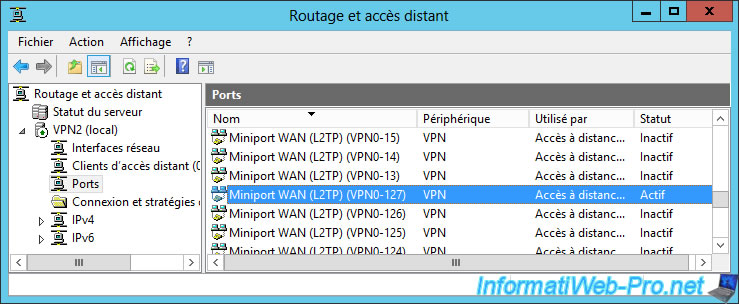
On the remote VPN server, you will see that a client is now connected to an L2TP port on your VPN server.
Share this tutorial
To see also
-

Windows Server 4/28/2012
WS 2003 - NAT and network routing
-

Windows Server 8/8/2012
WS 2008 - NAT and network routing
-

Windows Server 4/22/2015
WS 2012 - NAT and network routing
-
Windows Server 11/23/2017
WS 2012 / 2012 R2 - Dynamic routing (RIPv2)

No comment