
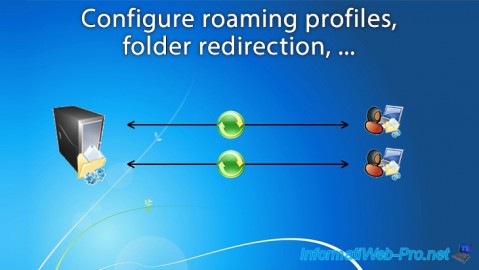
In the IT rooms of schools and training centers in particular, it's important that each student or trainee will be able to log in with his credentials and work on his files from any computer.
To make this possible, you will need to set up :
- an Active Directory that allows you to centralize all user accounts to be able to log in with the same credentials on any PC linked to your Active Directory domain.
- roaming profiles and/or the folder redirection that allows you to make available user documents from a network share of the server. In summary, users can access their documents with their credentials from any computer linked to your Active Directory.
Configuration used :
- 1 server on Windows Server 2008 R2 with the Active Directory role already installed
- 2 client computers on Windows 7
This tutorial has also been tested with :
- 1 server on Windows Server 2012 with the Active Directory role already installed
- 2 client computers on Windows 8 Pro
Note : the version of the client Windows is important, because we use the "offline files" feature available from Windows 7.
1. Setting up roaming profiles
To set up the roaming profiles system, you will need to :
- Take precautions to avoid the problem that you might have in the future with roaming profiles.
- Create users who will have a roaming profile.
- Share a folder on the server in which personal files of your roaming users will be stored.
- Enable and/or configure Group Policies (GPO) related to roaming profiles.
- Test if roaming profiles work correctly.
1.1. Take precautions to avoid the problem that you might have in the future with roaming profiles
Because all Windows settings and programs used by the user will be saved in its roaming profile, you must make sure that each client PC will have exactly the same configuration :
- same programs and same versions
- same Windows updates
- and finally, any program or document should be in the same place to avoid having problems in the future.
In this tutorial, we will store only the parameters, search history, ... in the roaming profile of each user. For user documents and user downloads, they will be accessible through the folder redirection.
This will allow you to have some flexibility.
Indeed, if some client PCs have a different configuration from the others, you can ignore the roaming profile for these PC and allow the user to access to its documents and its downloads through the folder redirection and/or a network drive configured using a GPO .
1.2. Create users
To facilitate the management of Group Policy (GPO), we recommend you to create this structure using organizational units :
- Roaming users
- Computers
- Users
To do this, right click on your domain and click on "New -> Organizational Unit".
Then, move computers (to be used by users with roaming profiles) in the folder : Roaming users -> Computers.
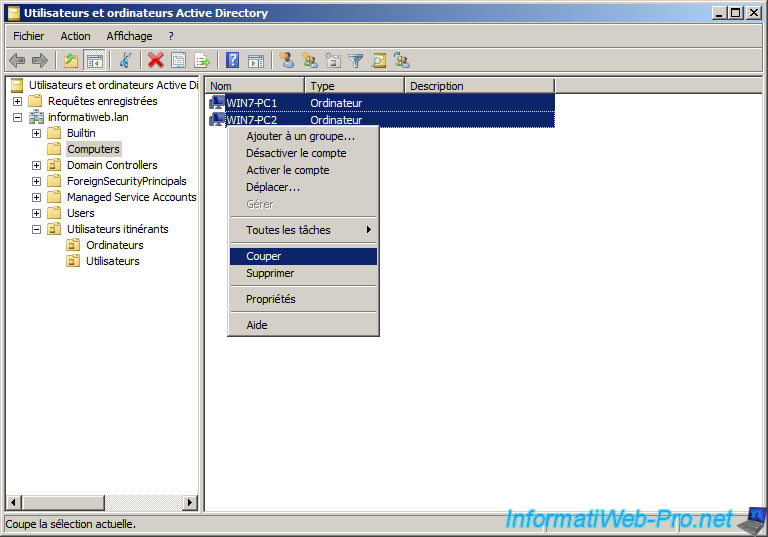
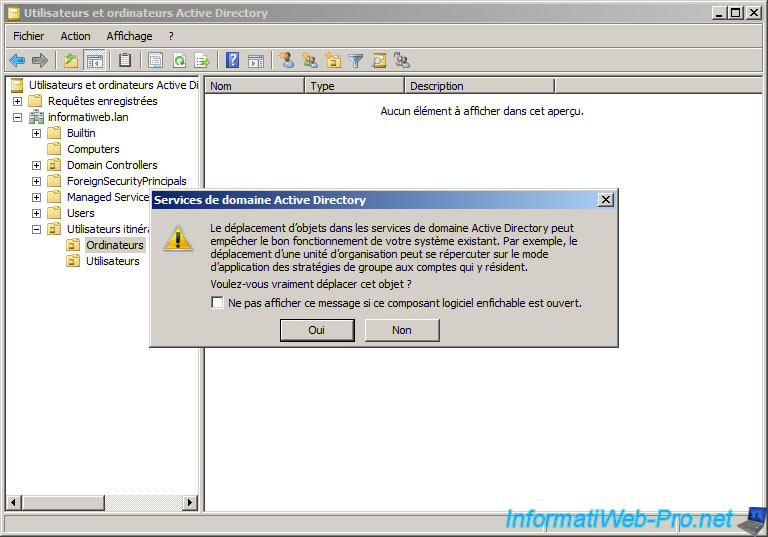
The Active Directory domain service will show you a warning indicating that the movement of objects in the Active Directory can prevent the proper operation of the existing system.
This is quite normal, but in our case, no specific strategy currently applied to these computers. So, ignore this warning by clicking Yes.
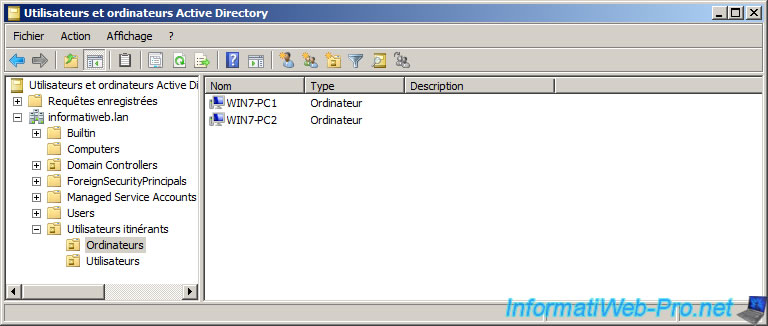
Now, computers are in our new folder.
Allowing us to applying security policies more easily.
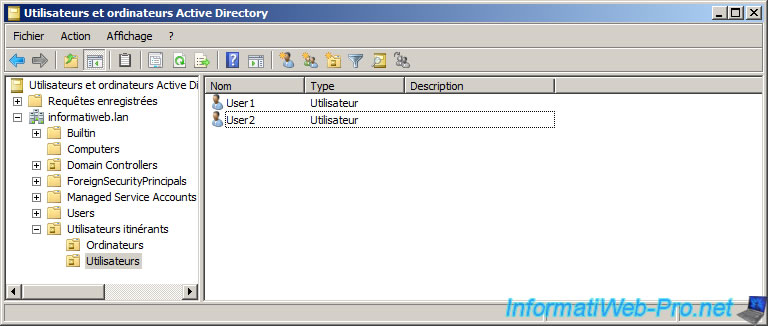
In the "Users" folder, create two users to test especially the NTFS security that will be applied on folders containing the roaming profiles.
1.3. Create the network share
To allow a user to use a roaming profile (which will be stored on the server), it's necessary that your users can access it from the network.
Then, for security reasons, it's recommended (but not required) to store user data on another hard drive that will be regularly backed up using automatic backups for example.
In addition, it allows you to restore data in case of major problems with the server.
Then, if you want to use disk quotas (discussed at the end of the tutorial), data should be stored on a dedicated partition.
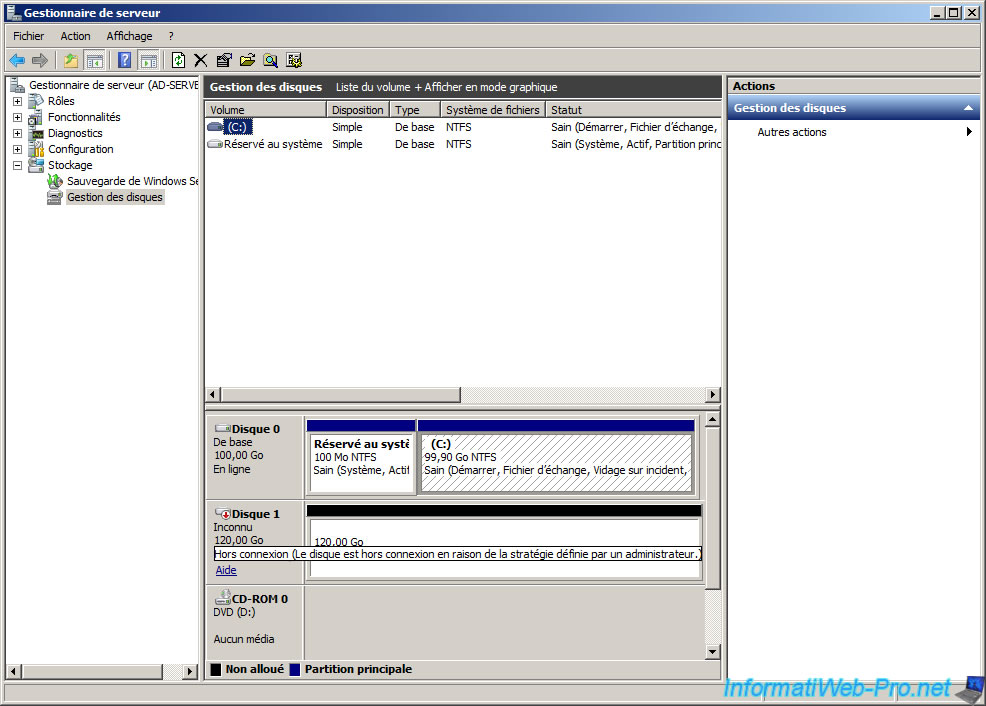
For information, be aware that when you add a hard drive in a server, this hard drive will be "Offline" by default. To use it, simply do a right click -> "Online" on this status.
If you want to use roaming profiles + the folder redirection to combine user experience and performance, you should use 2 partitions to avoid the synchronization problem that could occur when using a single partition.
Indeed, if you store everything on the same partition and the user reaches its disk quota, the roaming profile can't be synchronized because the user can't store more data on the server.
Unless you uncheck the "Deny disk space ..." box that you will see during the configuration of disk quotas.
In our case, we will use a new hard disk with these two partitions :
- Users data : this partition will contain "My Documents" (and : my pictures, my videos, ...) and "Downloads" folders of each user, which will be accessible through the folder redirection.
- Users profiles : this partition will contain only the users profiles (except the above mentioned folders). These folders will therefore have a small size and contain only Windows settings, Internet Explorer settings, customizations of the user, ...
Note that the partition must use the the NTFS file system to be able to use the disk quota system.
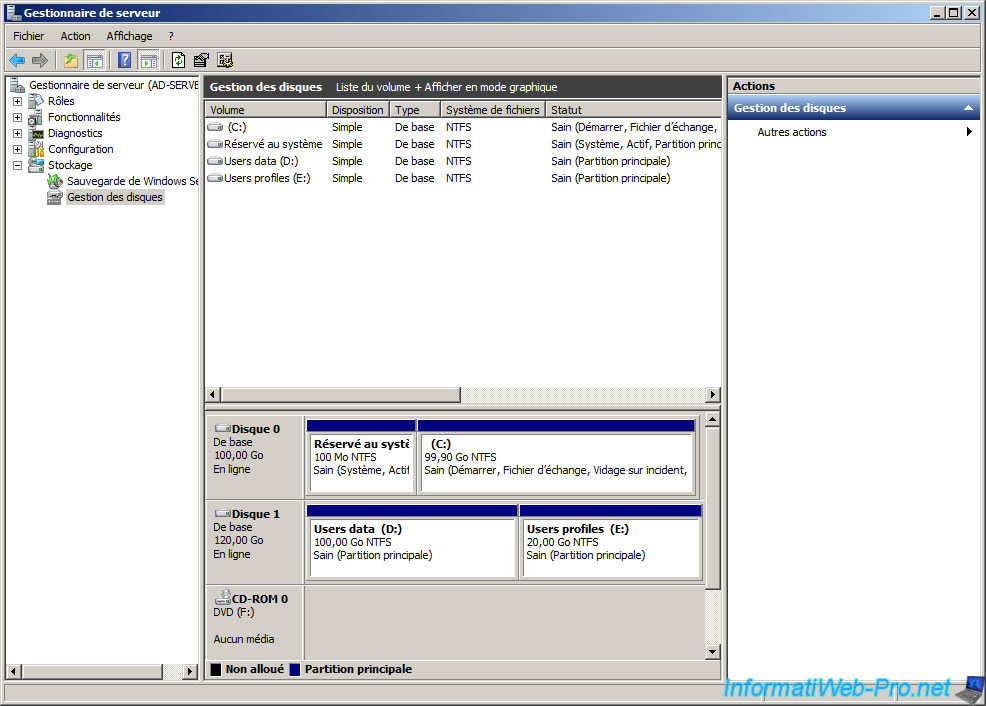
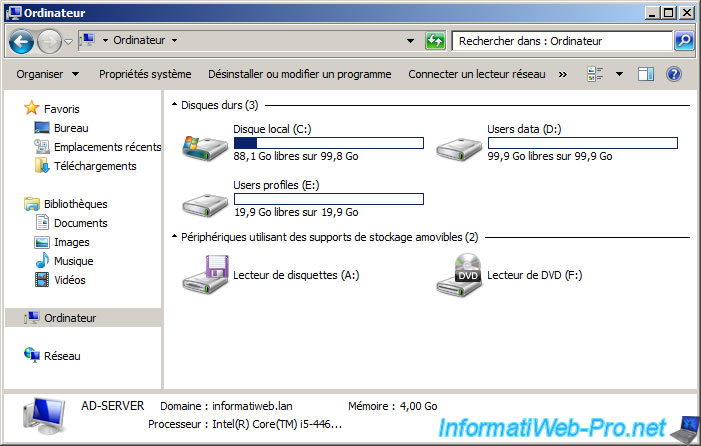
Once the hard disk is partitioned, your new partitions will be displayed.
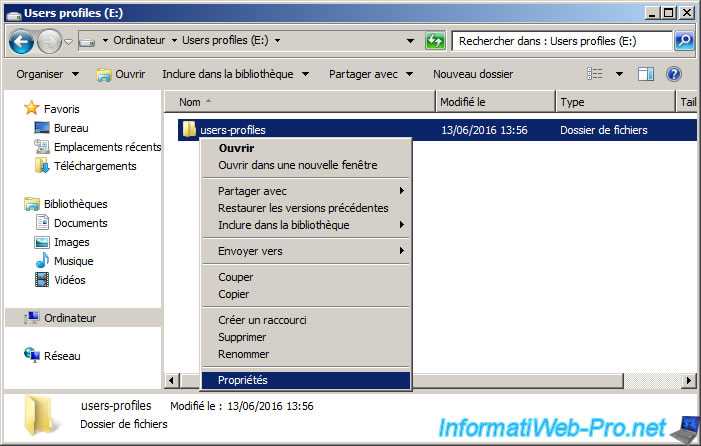
In the partition "Users profiles", create a new "users-profiles" folder where Windows will automatically create folders of roaming profiles of your users.
Then, right click on the folder and click "Properties".
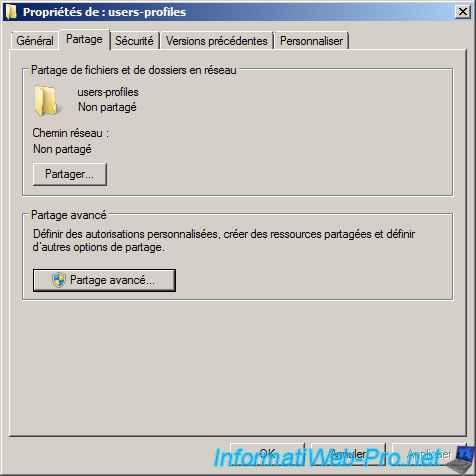
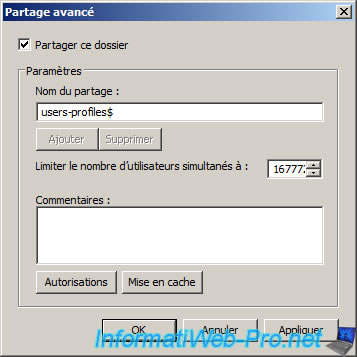
Go to the "Sharing" tab and click on "Advanced Sharing" in order to be able to choose the name of the shared folder.
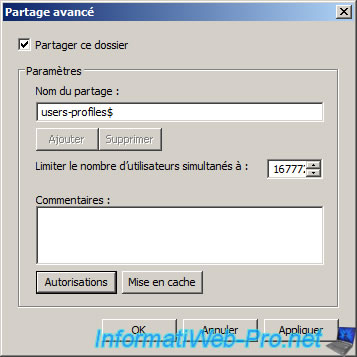
Check the "Share this folder" and add a $ at the end of the share name.
Thus, this network share will be hidden on the network.
Indeed, if anyone list shared folders on your server, it will not appear. But he may be able to enter into this network share if he knows his name and have the right to enter into it.
Then, click the "Permissions" button.
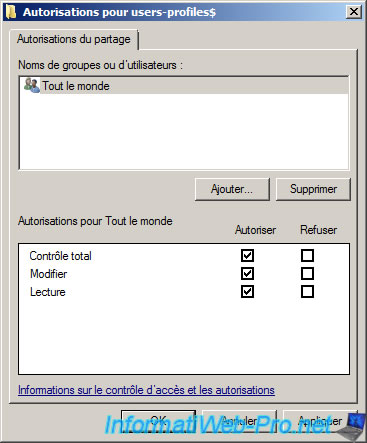
To create roaming profiles in this folder, you must enable the "Full Control" for the "Everyone" group.
Then, click OK.
Click on OK for the remaining windows.
Now, a network path is displayed on the window.
You will need it soon after.

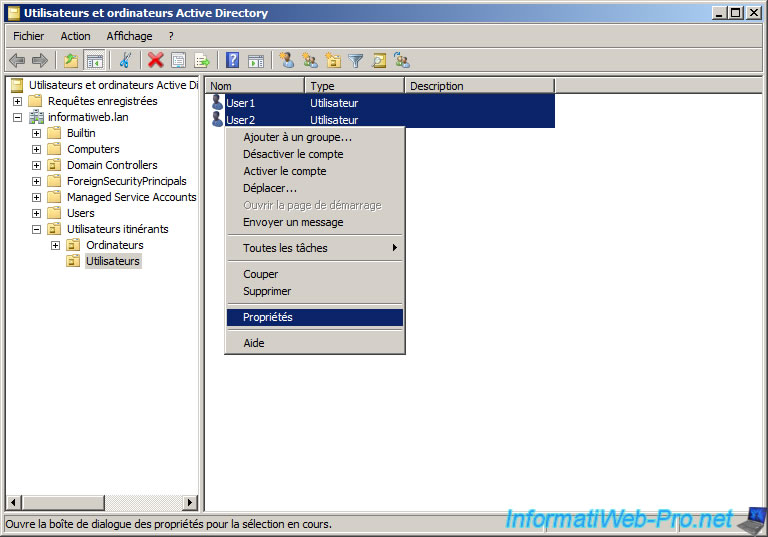
Go back in the "Active Directory Users and Computers" window, select users for whom you want to enable roaming profiles and right click -> Properties.
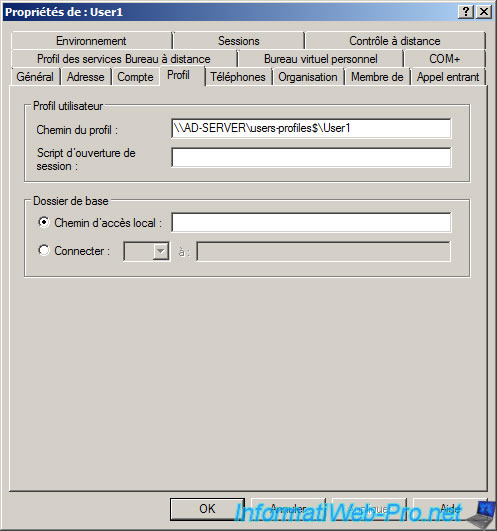
In the "Profile" tab, check the "Profile path" and enter this value: \\AD-SERVER\users-profiles$\%Username%
The %Username% variable corresponds to the name of the user.
Then, click OK.
Note : remember to adapt this network path according to your own configuration.

If you go into the properties of a user that you selected, you will see that Windows has automatically replaced the %Username% variable by the user name of the user concerned by the change.
This trick simply allows you to save time.
1.4. Security policies for roaming profiles
Now that our users use roaming profiles, we will enable and/or configure some security policies that will improve the management of these user profiles.
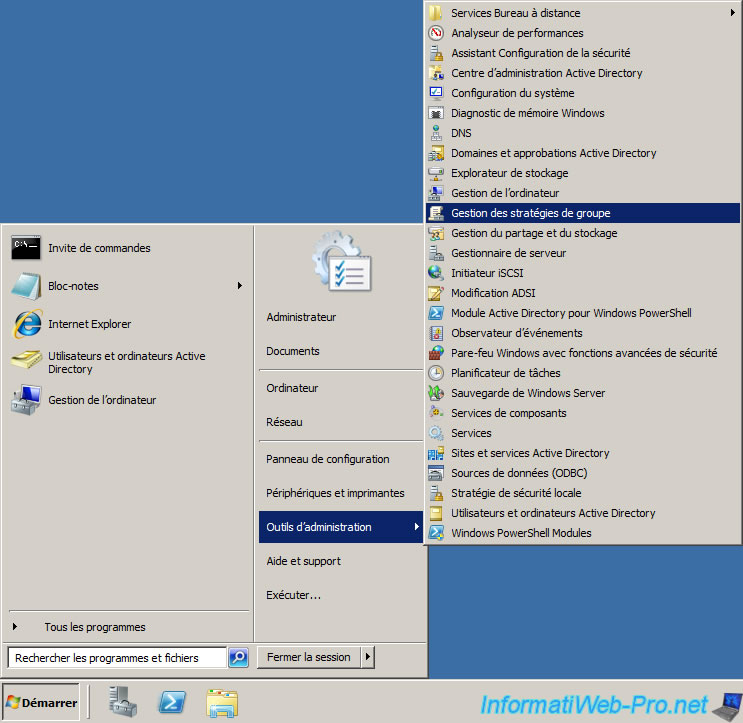
For that, go to the start menu -> Administrative Tools -> Group Policy Management.
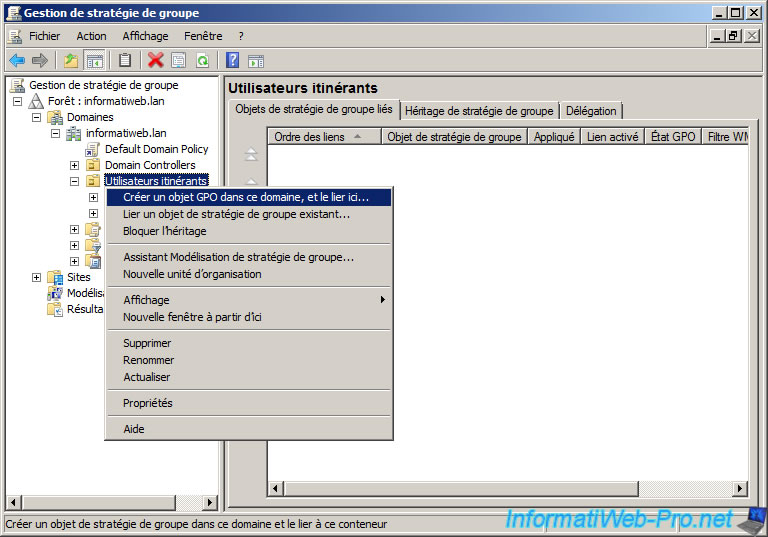
By looking in the "Forest : [your domain] -> Domains -> [your domain]" structure, you will see the "Roaming users" organizational unit that we had created earlier (at step 1.1).
Right click on that folder and click "Create a GPO in this domain ...".
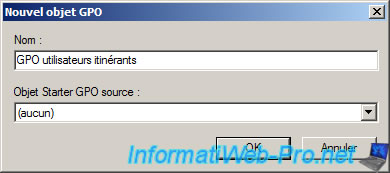
Specify a name for this Group Policy (GPO).
Then, right click "Edit" on this GPO.

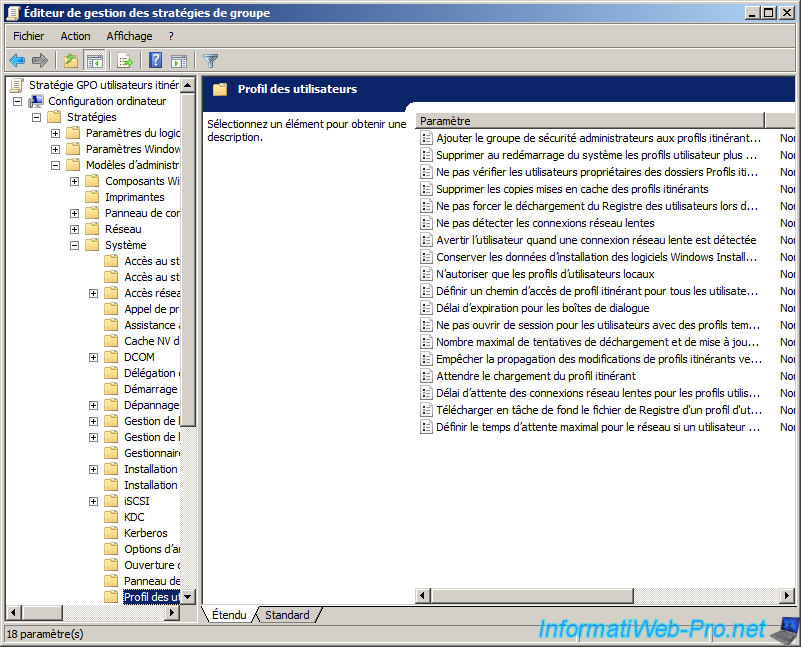
Group policies for roaming profiles of your users are in : Computer Configuration -> Policies -> Administrative Templates -> System -> User Profiles.
In this section, you will find these policies including :
- Add the Administrators security group to roaming profiles
- Delete user profiles older than a specified number of days on system restart
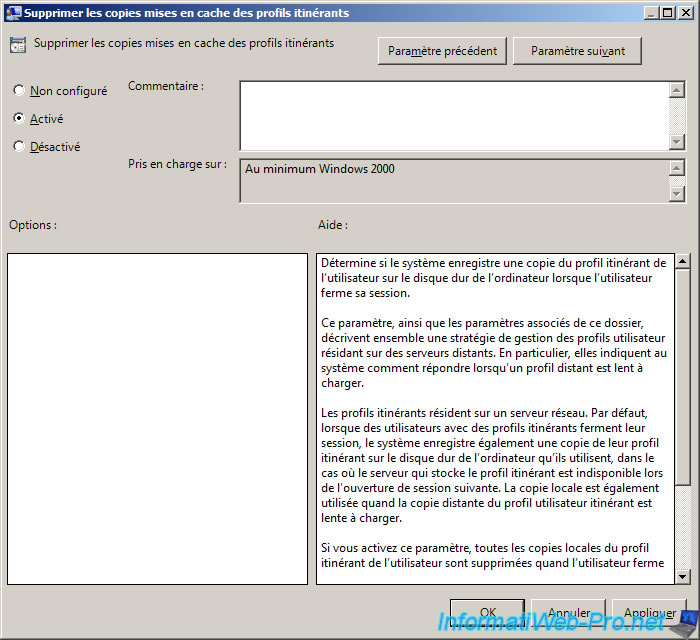
- Delete cached copies of roaming profiles
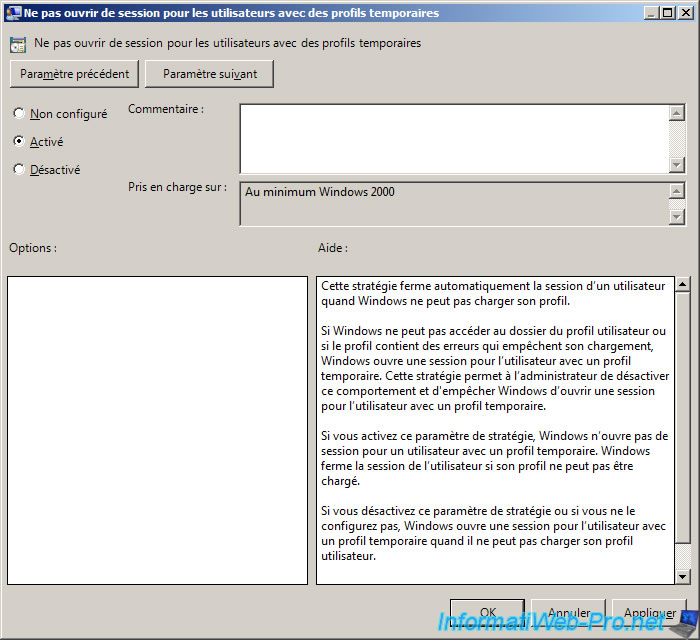
- Do not log users on with temporary profiles
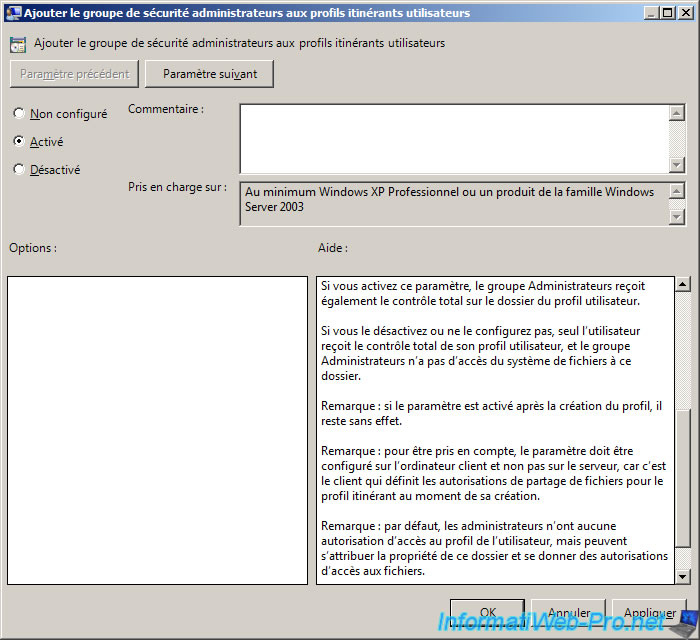
By default, when Windows creates the roaming profile of the user on the server during its first connection from a client PC, the folder containing the profile is accessible only by the concerned user.
So, server administrators don't have access to this folder.
To solve this problem, you can enable the "Add the Administrators security group to roaming profiles" policy to add the "Administrators" group to groups and users authorized to access that folder.
Thus, this will allow you as an administrator to manage documents of your users from the server in case of problems.
Important : this policy is not retroactive on roaming profiles already created (if applicable).
It's therefore important to force the update of the client computer policy (by restarting them or using the "gpupdate /force" command) before creating the roaming profiles (by connecting to a client PC configured to use these roaming profiles).
Then, you'll also find the policy "Delete on reboot of the system the user profiles older than a specified number of days" that will allow you to automatically delete copies of user profiles on client PCs.
Indeed, because any user (with a roaming profile) can connect to any computer connected to your Active Directory, these profiles copies take up space on all of these client PCs.
With this policy, the removal of these copies will be automatic.
Personally, I advise you to put at least 3 days. Thus, it prevents the removal of profiles due of the weekend, for example.
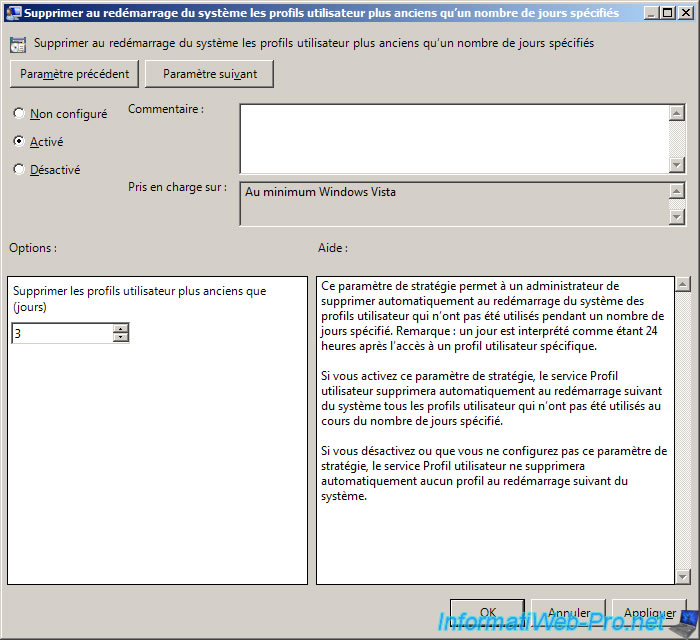
In test environment, it may be useful to remove each copy of roaming profiles on client PCs used in the implementation of this new system.
Then, in production, it would be better to disable it or to not configure this policy to avoid saturating the bandwidth unnecessarily.
You can also enable the "Do not log users on with temporary profiles" to prevent your users log on with a temporary profile (which can happen in case of problems).
Choose what you prefer : avoid this case or allow the user to log in despite that there is a problem with the recovery of the roaming profile.
To finish with policies for roaming profiles, you will find one more in : User Configuration -> Policies -> Administrative Templates -> System -> Users Profiles.
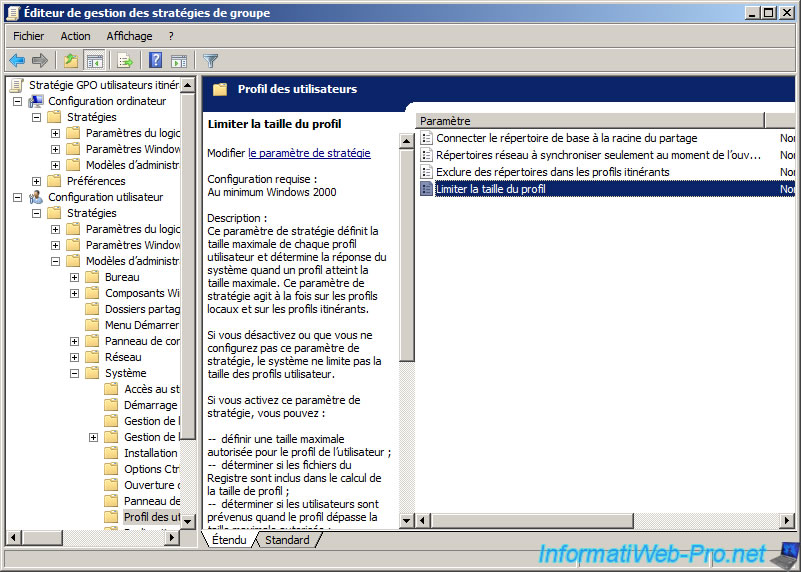
In this section, you will find the policy "Limit the size of profile" that allows you to limit the size of roaming profiles of the user.
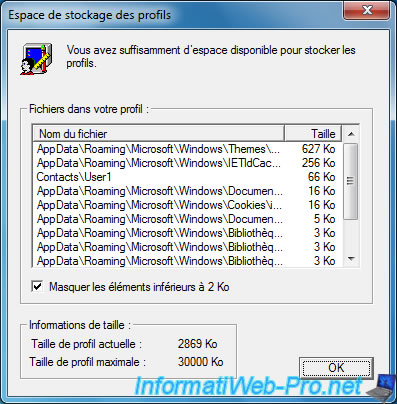
In our case, we indicated 30 MB (30,000 KB) because we will use the folder redirection for user documents. This means they will not be counted in the size of the user profile.
To limit the size of the profile, enable this policy and check the "Make a reminder to the user ..." box to warn the user every x minutes when he exceeds the maximum allowed for its profile.

1.5. Test of the roaming profile
Now that roaming profiles are configured on the server side, we will test this system from a client PC linked to our Active Directory.
In our case, we will log in with the "User1" user.
The "Preparing your desktop" message will appear at the first connection of your roaming user.
It's at this moment that the roaming profile will be created by Windows.
![]()
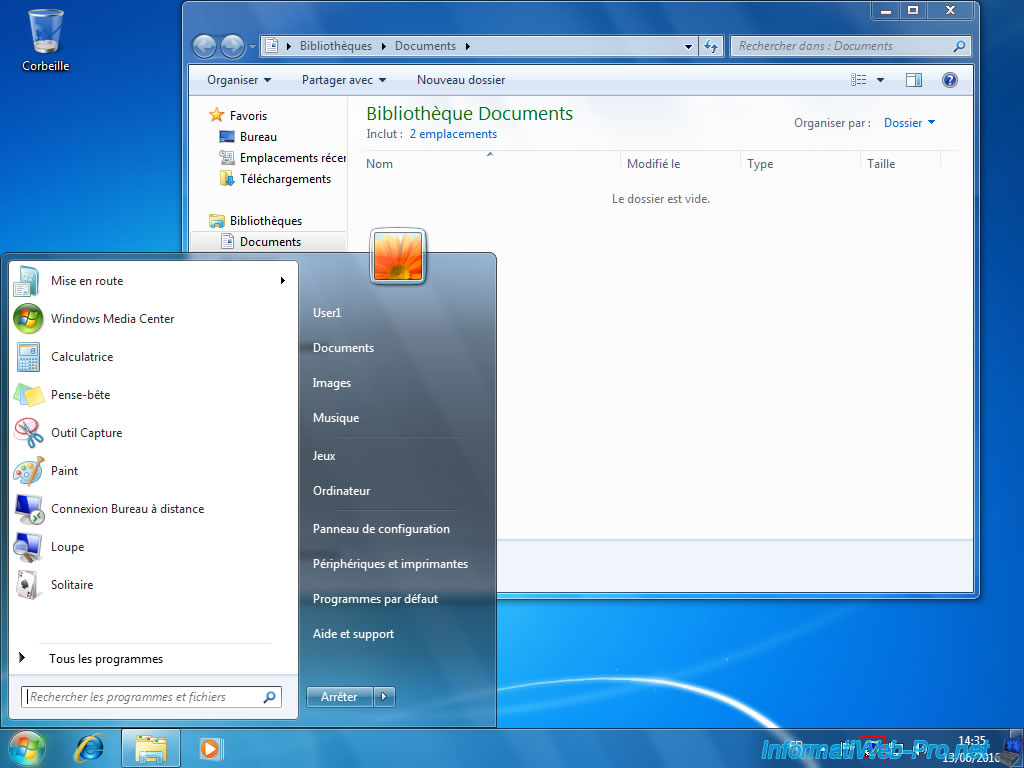
For the user, nothing has changed. Except the fact that a small icon has appeared at the bottom right of the screen.
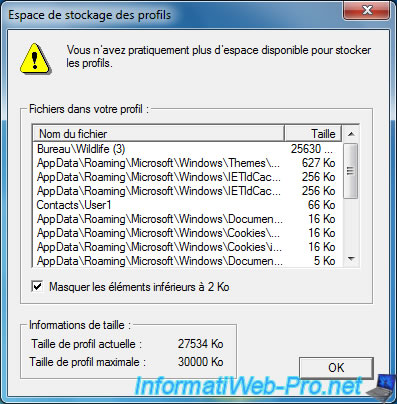
This icon is present only when you specify a size limit for the romaing profile of the user.
Indeed, if you double-click on this icon, a window "Profile Storage Space" will appear with the list of files present in your user profile.
The biggest file appears at the top of the list.
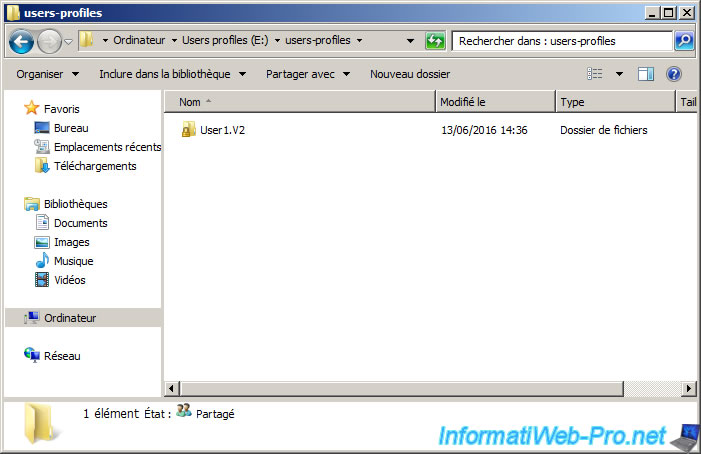
When users log off, his roaming profile will be copied to the server through the network share that we had set up earlier.
![]()
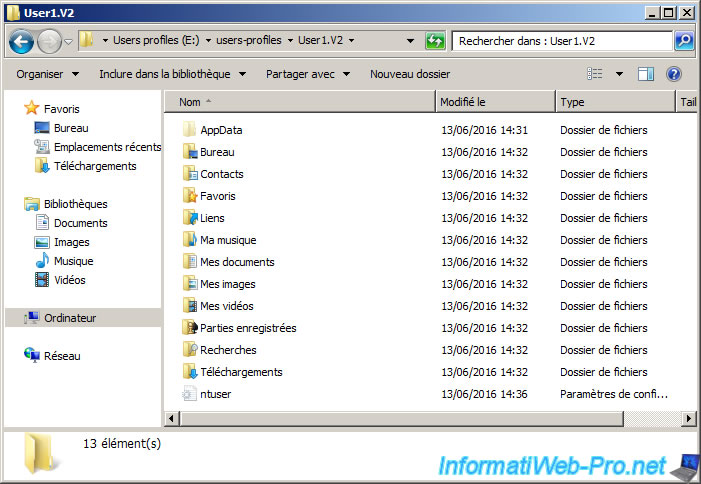
Indeed, if you go in the "users-profiles" folder on your server, you will see a new folder with the name of your user.
By default, this folder will be accessible by the concerned user and users of the "Administrators" security group.
Note : This folder was created at the first opening of the user session, but remains empty until the user has logged off at least once.
Once the session will be closed, you will find all folders and files of the roaming profile of your user.
Including these folders :
- AppData in which are stored various user settings
- My documents, my pictures, ...
For your information, if your user is approaching the limit for the size of its profile, the bottom right icon will be replaced by a yellow icon as on the pictured below.
And if the user exceeds the limit for his profile, the icon will appear at the bottom right and the message "You have exceeded your profile storage space" will be displayed.
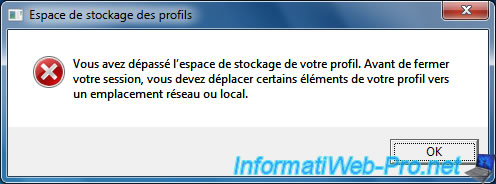
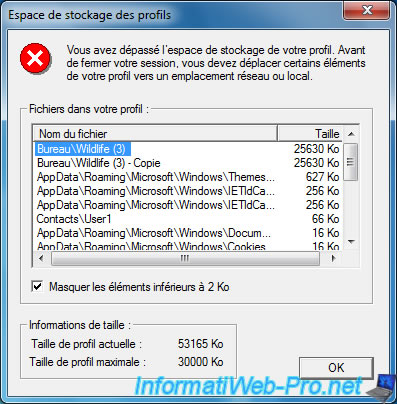
Note that if the user does nothing to drop below this limit and tries to close its session, the error message will be redisplayed and prevent him from closing its session.
Also, if the user forces the closing of its session, despite that error, his profile will not be synchronized with the server and Windows will warn him.
Share this tutorial
To see also
-
Windows Server 9/22/2017
WS 2012 / 2012 R2 - Join an offline computer to an AD
-
Windows Server 2/16/2019
WS 2012 / 2012 R2 / 2016 - RDS - Customize the RDS web access
-
Windows Server 5/19/2019
WS 2012 / 2012 R2 / 2016 - RDS - Force the use of the RD gateway for local users
-
Windows Server 6/22/2019
WS 2012 / 2012 R2 / 2016 - RDS - Manage resources and printers redirection
You must be logged in to post a comment