
When you want to manage servers remotely, it's recommended that you link them to an Active Directory to make it easier to set up WinRM (Windows Remote Management), as well as authentication on the remote server.
However, if you want to remotely manage a server present in a workgroup, this is also possible thanks to a few small manipulations.
- Configuration used
- Set network type to private
- Enable the remote management of the Core server
- Add the Core server in the Server Manager
1. Configuration used
For this tutorial, we will use 2 servers :
- 1 Windows Server 2012 server in Core mode
- 1 Windows Server 2012 server installed with a graphical interface
2. Set network type to private
In order for WinRM activation (and thus for Windows Server remote administration) to be possible, you must first ensure that your servers are configured to use the "private" network type (formerly : home).
Note : this problem only occurs when you use servers in a workgroup. Indeed, once joined to an Active Directory, the type of network automatically changes to "domain". Which is supported by WinRM.
To change the network type by using the command line, you can use powershell.
On your Core server, open powershell by typing the command below in the command prompt (cmd) :
Batch
start powershell
To know the network type used by your server, type this powershell command :
PowerShell
Get-NetConnectionProfile | Select InterfaceAlias,NetworkCategory
In our case, this command tells us that our Core server is currently using the "Public" network type.
Plain Text
InterfaceAlias                                              NetworkCategory
--------------                                              ---------------
Ethernet0                                                            Public
If the network is not private or domain, use this command :
PowerShell
Get-NetConnectionProfile | Set-NetConnectionProfile -NetworkCategory Private
Now, the network type is : Private.
PowerShell
Get-NetConnectionProfile
Plain Text
Name             : Network
InterfaceAlias   : Ethernet0
InterfaceIndex   : 12
NetworkCategory  : Private
IPv4Connectivity : Internet
IPv6Connectivity : NoTraffic
3. Enable the remote management of the Core server
3.1. Server side
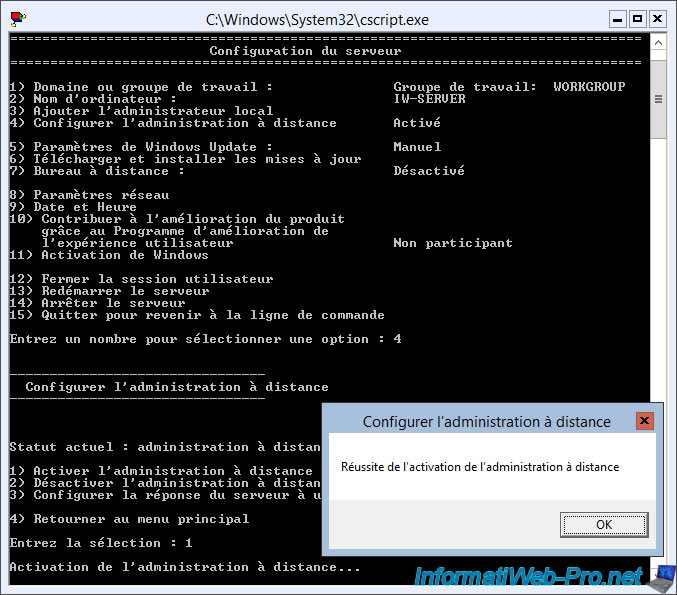
On your Core server, start by enabling remote administration of it from the "sconfig" tool (if you have not done so already).
For this, choose these options :
- 4 : Configure Remote Administration
- 1 : Enable Remote Management
Then, in a powershell console, display the status of WinRM with this command :
PowerShell
Get-Service winrm
Enable the remote management via PowerShell using the command below.
Note : answer "Y" to all questions.
PowerShell
Enable-PSRemoting –force
Add the IP address of the client PC to hosts that are allowed to remotely connect to this server.
Notes :
- 10.0.0.102 corresponds to the IP address of the client PC
- this command must be launched from a powershell console
Batch
winrm s winrm/config/client '@{TrustedHosts="10.0.0.102"}'
Launch the quick winrm configuration :
Batch
winrm quickconfig
3.2. Client side
On the server used as "client", open a PowerShell console as an administrator and use these commands by replacing "iw-server" by the name of the server you want to manage remotely.
Enable the remote management of Windows Server through PowerShell.
PowerShell
Enable-PSRemoting
Add the remote server to trusted hosts :
PowerShell
Set-Item WSMan:\localhost\Client\TrustedHosts -Value iw-server
Enable the support for CredSSP authentication.
PowerShell
Enable-WSManCredSSP -Role client -DelegateComputer iw-server
Store login credentials of the remote server using the command below.
Note : this command will ask you for the password corresponding to the user indicated in parameter (user).
Batch
cmdkey /add:iw-server /user:Administrateur /pass
4. Add the Core server in the Server Manager
To be able to add your Core server in the server manager, it's first necessary that your server can know the IP address corresponding to the name of your server.
Since we will not use an Active Directory server in this case, we will assume that you don't have a DNS server on your network either.
To solve the problem :
- either you install and configure yourself a local DNS server with a WINS redirection if you wish
- you simply add the name of the remote server in the "hosts" file of your "client" server
In our case, we will use the 2nd possibility.
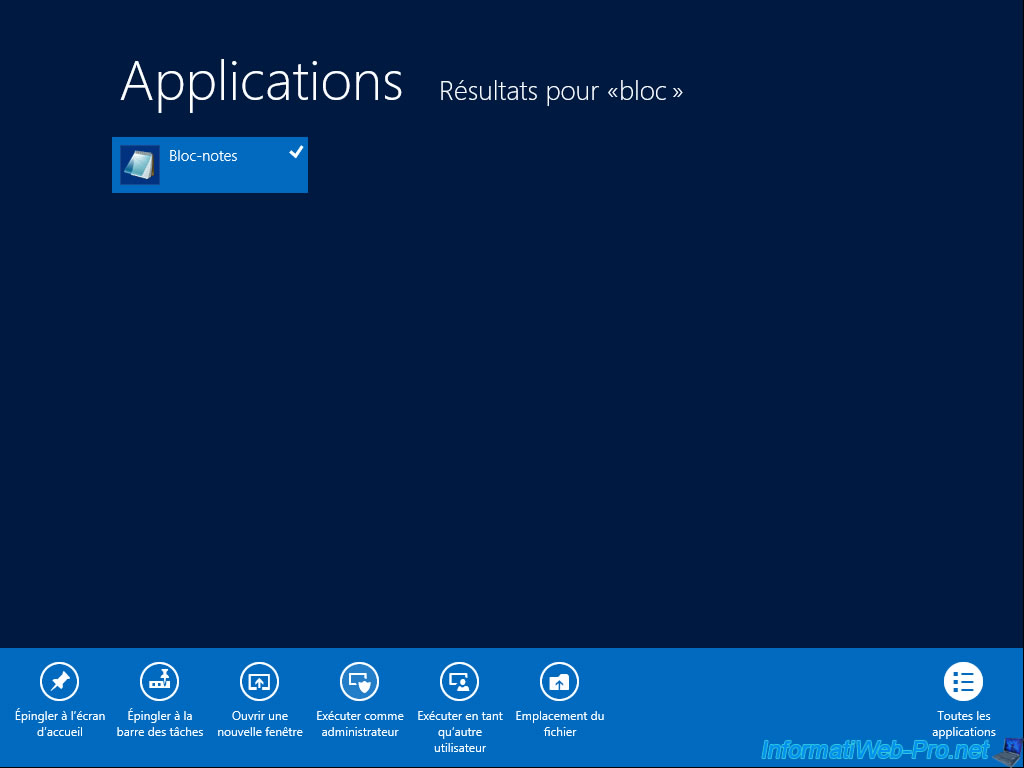
Since the Windows "hosts" file is a system file, you will need to open it as an administrator to edit it.
On the Home screen, type "notepad" and then right-click "Run as Administrator" on the "Notepad" program.
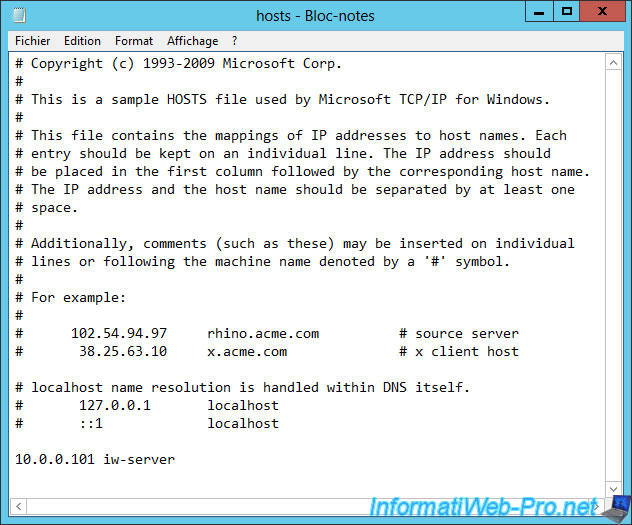
Open this file : C:\Windows\System32\drivers\etc\hosts
Note that you will need to select the "All Files" option in the "Open" window of Notepad for the file to appear.
In this file, add a line with : the IP address followed by the NETBIOS name of the remote server, separated by a space.
In our case, this gives this :
Plain Text
10.0.0.101 iw-server
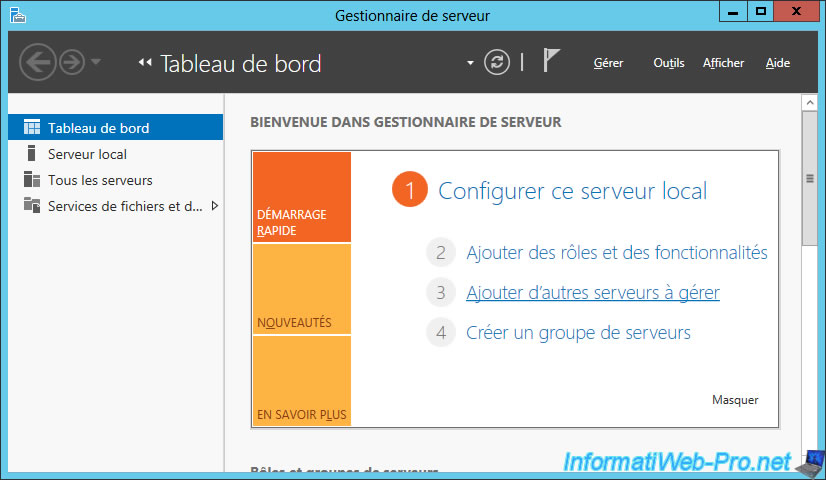
Open the server manager on the server used as "client" and click "Add other servers to manage".
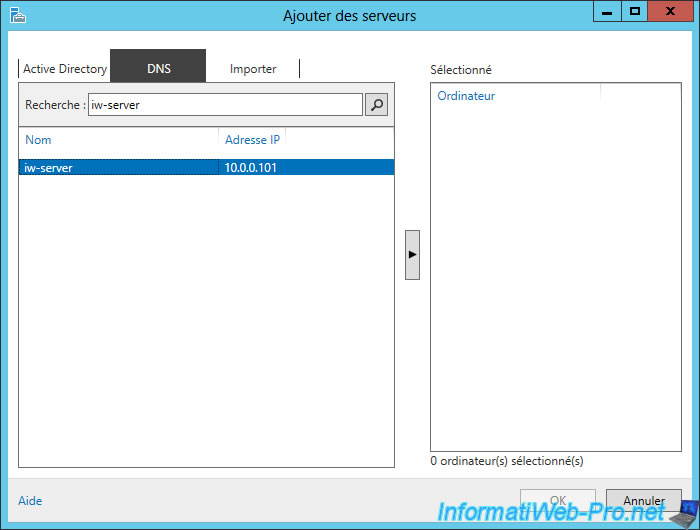
In the DNS tab, enter the NETBIOS name of the remote server (the Core server in our case) and click on the magnifying glass icon.
Then, select your server on the left and click on the arrow in the middle of the window.
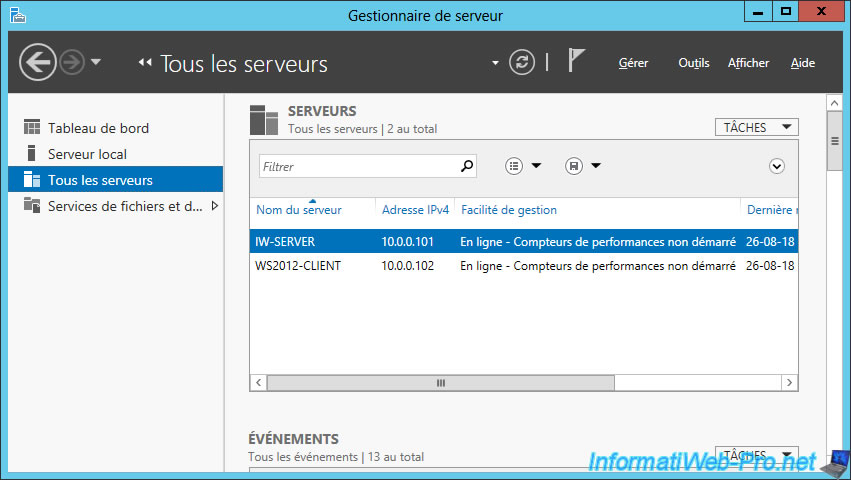
If all goes well, your server will appear "Online" in the "All Servers" section of the server manager.
For the rest of the configuration to manage a Windows Server server remotely, refer to our previous tutorial : Windows Server 2012 / 2012 R2 - Manage multiple Core servers remotely with WinRM
Share this tutorial
To see also
-
Windows Server 11/9/2017
Windows Server - Remote Server Administration Tools (RSAT)
-
Windows Server 3/7/2021
Windows Server - Remote Server Administration Tools (RSAT) for Win 10 v1809 and later
-
Windows Server 11/16/2018
WS 2012 / 2012 R2 - Manage multiple Core servers remotely
-
Windows Server 12/1/2018
WS 2012 / 2012 R2 - Manage multiple servers remotely (securely)
You must be logged in to post a comment