Join Windows MultiPoint Server 2012 virtual desktops to an Active Directory and centralize users management
- Windows Server
- 24 March 2018 at 11:20 UTC
-

- 2/5

4. Check the virtual desktop network configuration
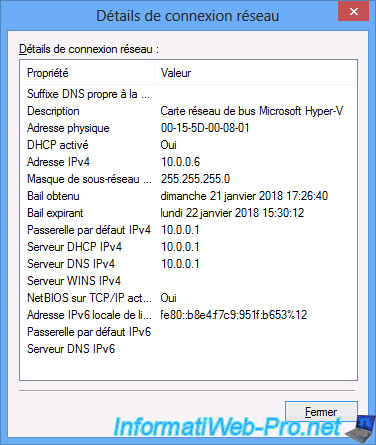
Currently, the virtual desktop may still have the old network configuration.
Indeed, this network configuration was sent by the DHCP server of our router.
Note : as you can see, the DHCP server IPv4 address is the same as the IPv4 default gateway (the router).
To obtain the new network configuration, you must reset the network configuration by using 2 DOS commands.
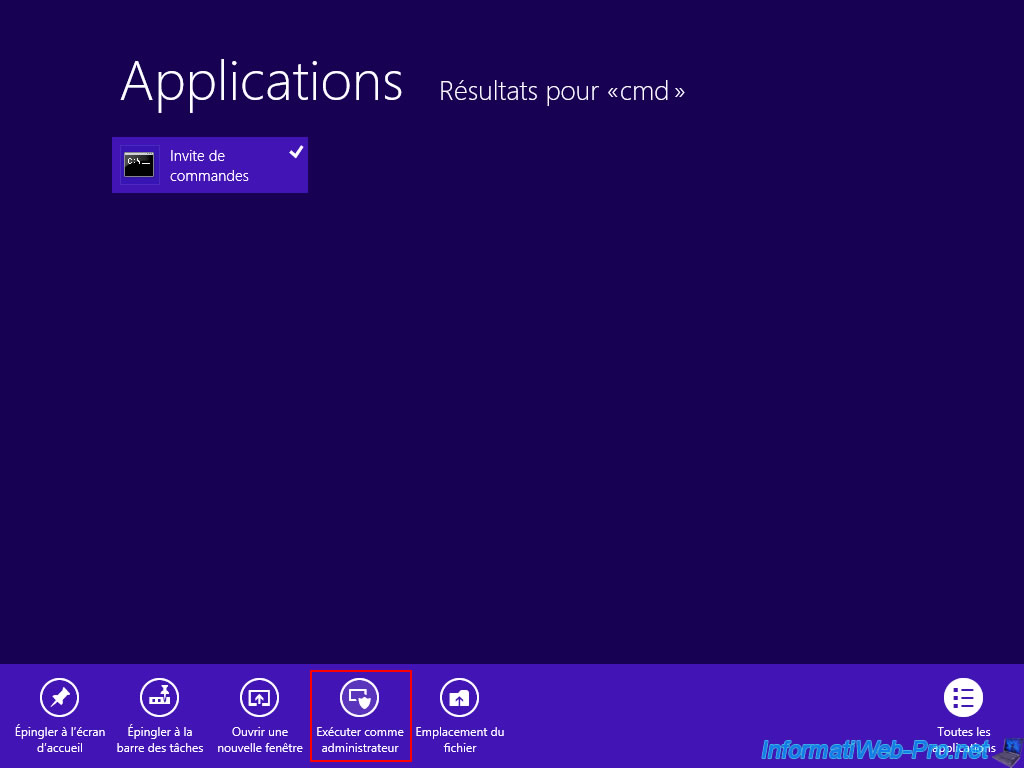
To do this, run a command prompt (cmd) as an administrator.
Type the "ipconfig /release" command to release the IP address you had and reset the network configuration of your computer.
Batch
ipconfig /release
Then, type the "ipconfig /renew" command to receive a new IP address, as well as the DHCP options previously configured.
Batch
ipconfig /renew

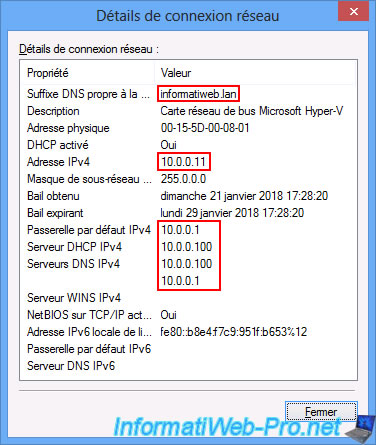
Now, the virtual desktop knows :
- the connection-specific DNS suffix : in other words, your Active Directory domain and the "parent domain" configured on your DHCP server.
- its own IP address
- the IP address of the default gateway (the router)
- the IP addresses of the DNS servers to use. Including, the IP address of your Active Directory server.
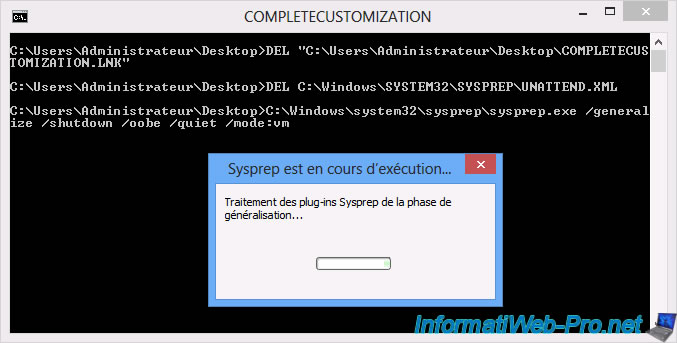
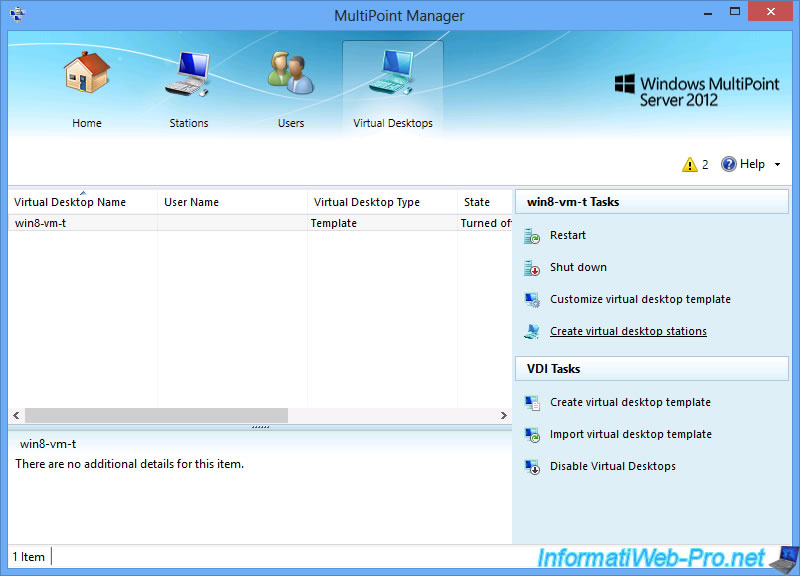
Once the network configuration is correct, run the COMPLETECUSTOMIZATION file present on the desktop to properly shut down the template.
Now, create the stations from this template.
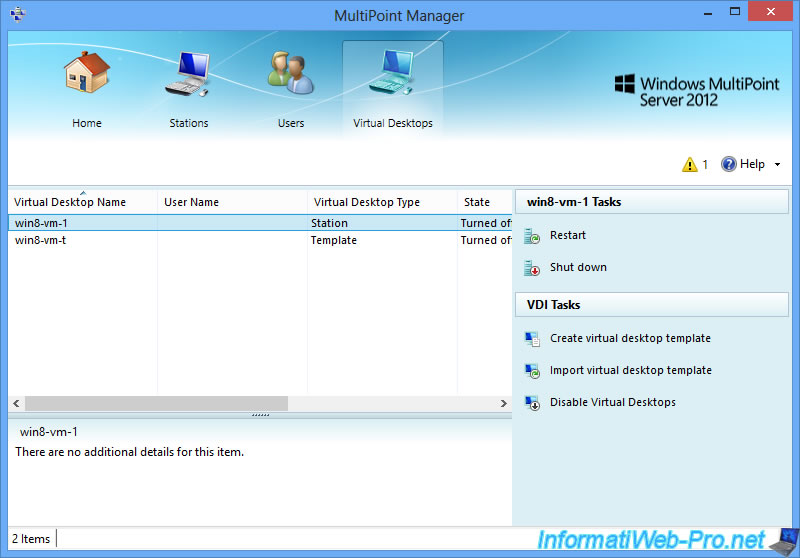
5. Virtual desktop management from MultiPoint Manager
For the moment, we have a virtual desktop associated with a station.
Nevertheless, the virtual desktop is turned off by default.
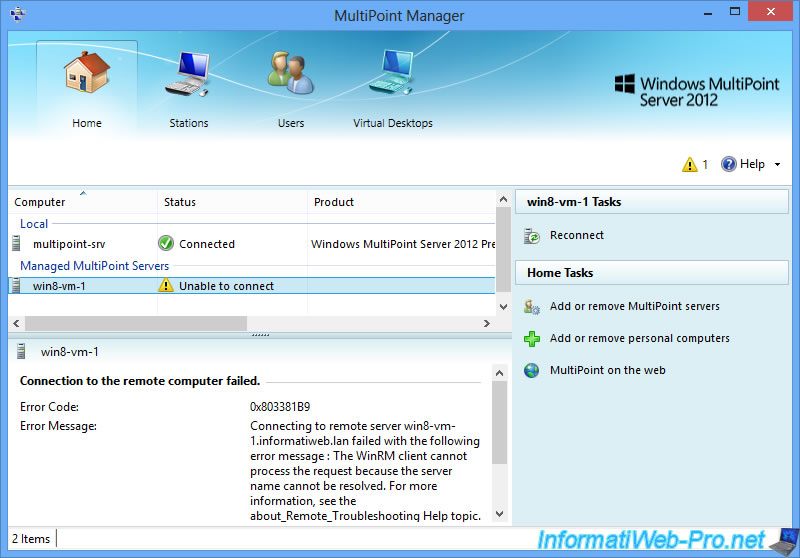
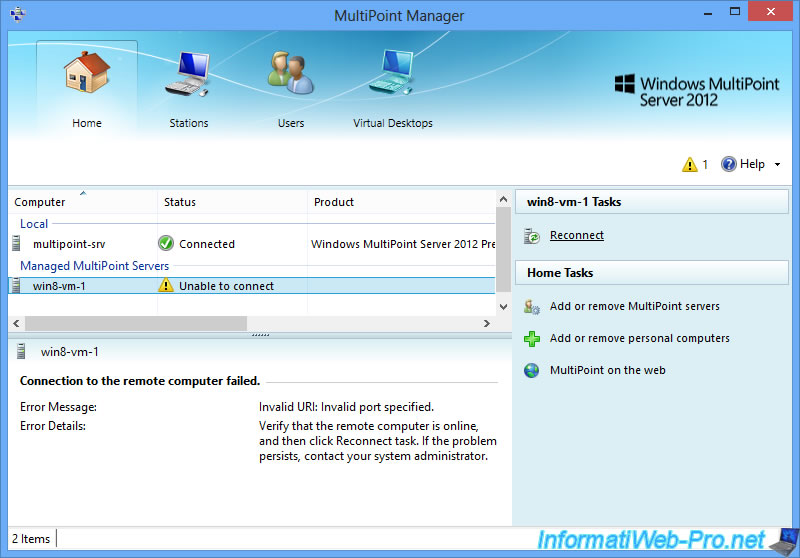
If you go to the "home" tab, you will see that the MultiPoint Manager can't connect to your virtual desktop.
Which is normal, since this desktop is turned off for the moment.
Note : if you see the same name twice for your virtual desktop, click "Add or remove personal computers" and remove the desktop whose name doesn't contain your Active Directory domain name.
To test the connection to our virtual desktop from MultiPoint Manager, we will launch the corresponding virtual machine from Hyper-V Manager.
To do this, select the machine with the same name as the desired virtual desktop (win8-wm-1 in our case) and click Start.
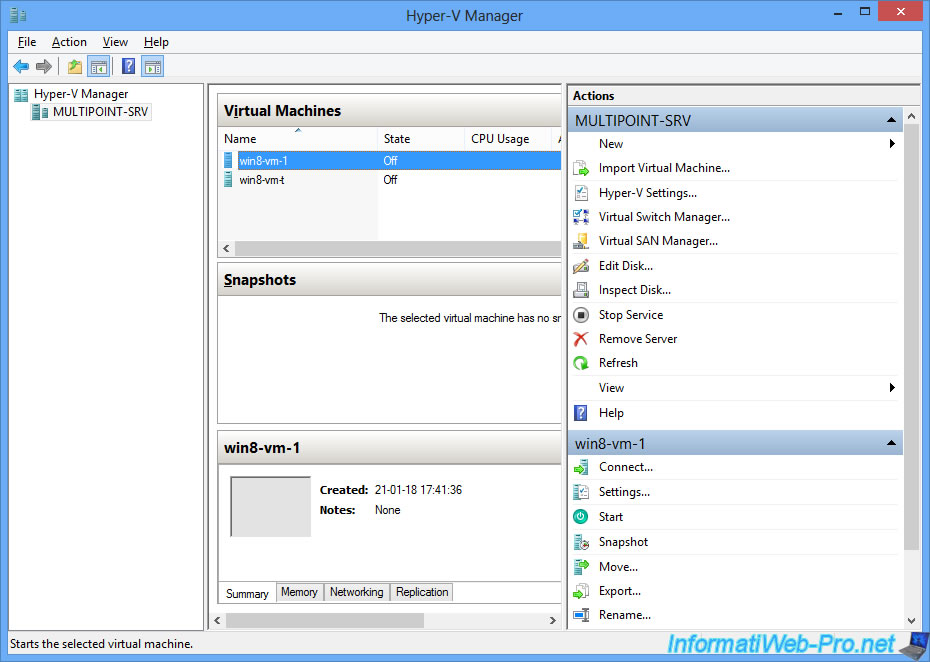
Once you see the Windows login screen at the bottom, you can return to MultiPonit Manager.
Note : at the first launch of the virtual desktop, it will restart automatically 2 times because of the use of sysprep.

In MultiPoint Manager, select your virtual desktop and click Reconnect.
Check the "Remember my credentials" box and enter the local Administrator account IDs you defined when creating the template for your virtual desktop.
Important : since virtual desktops are linked to your Active Directory domain, you will need to specify the name of the virtual machine in front of the user name of your local administrator account.
Which in our case gives "win8-wm-1\Admin" instead of "Admin".
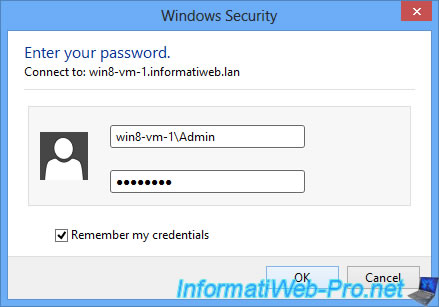
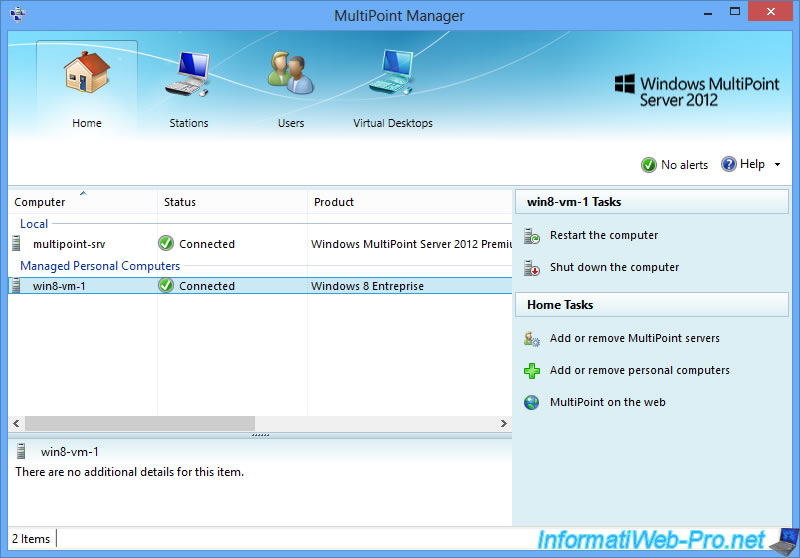
If all goes well, MultiPoint Manager will be able to connect to your virtual desktop.
If this isn't the case, check that you have installed the MultiPoint Connector in the template of your virtual office.
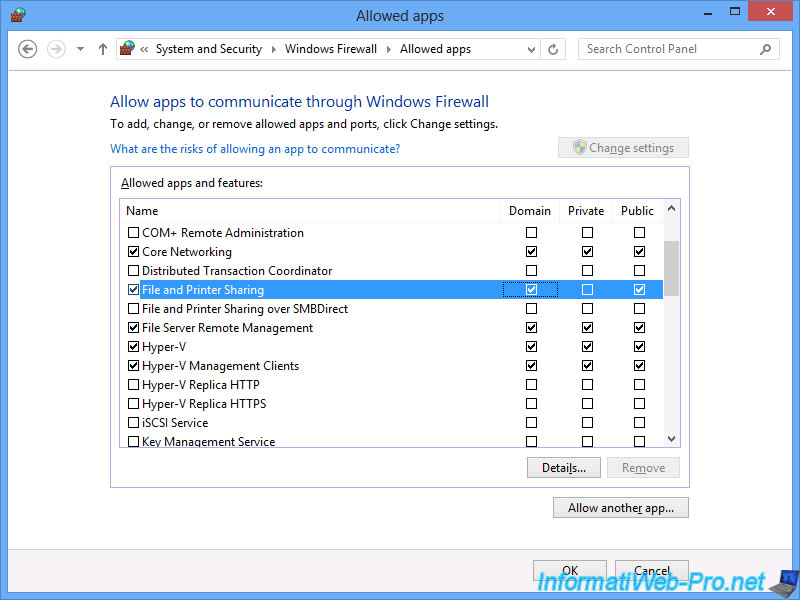
Note that, by default, the "\\multipoint-srv\Connector" share of your WMS server is only accessible for public networks.
However, since the connection of the server to your Active Directory, this share will no longer be accessible until you authorize file sharing for networks of "domain" type.
To allow file sharing for "domain" networks on your WMS 2012 server, go to : Control Panel -> System and Security -> Windows Firewall -> Allow an app or feature through Windows Firewall.
Then, click on "Change settings".
Note : if the "Change settings" button is grayed out, reconnect with a domain administrator account.
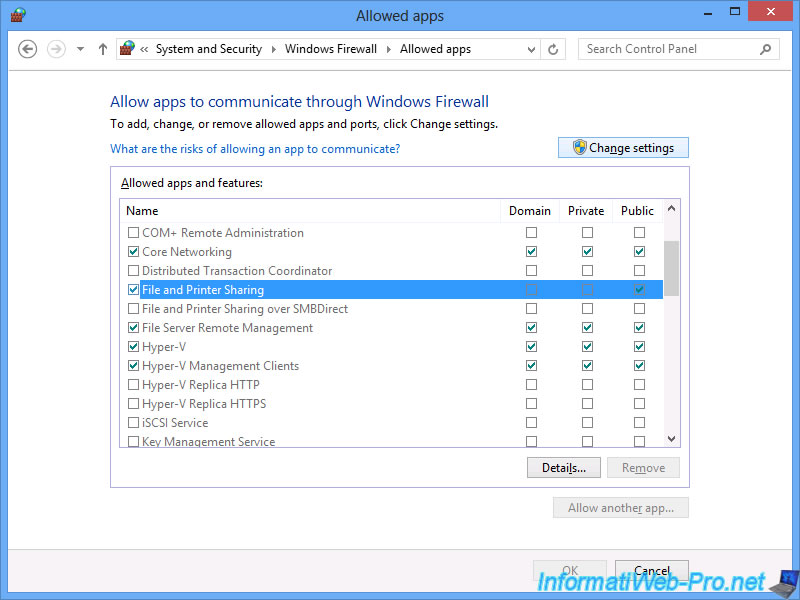
Then, check the "Domain" box for the "File and Printer Sharing" application.
Share this tutorial
To see also
-
Windows Server 2/12/2018
WMS 2012 - Enable the Disk Protection
-
Windows Server 1/17/2018
WMS 2012 - Install, configure and how works MultiPoint 2012
-

Windows Server 2/21/2018
WMS 2012 - Joining an AD and use roaming profiles
-
Windows Server 2/3/2018
WMS 2012 - Manage desktop computers with the MultiPoint Connector
No comment