Unboxing, assembly and connecting the Adaptec SmartRAID 3154-8i8e controller and its battery (ASCM-35F)
- RAID
- 21 January 2022 at 12:46 UTC
-

- 2/2

4. Connect the ASCM-35F battery to your SmartRAID controller in your computer
As shown in step 5 of Microsemi's document, you need to plug the power cable of this ASCM-35F battery into the white port of your SmartRAID controller (as shown in the photo below).
Then, as step 6, place the ASCM-35F battery in the PCIe slot just below the SmartRAID controller in your computer and secure it with the screw that holds the PCI bracket in your case.
Warning : as shown in step 7 of the document, you need to make sure that the metal plate doesn't touch the PCIe slot or anything else conductor to avoid short circuit.
Finally, turn on your computer and the battery will be fully charged after 5 or 6 minutes.
Important : as stated at the bottom of Microsemi's document, you should never plug or unplug a charged ASCM-35F battery.
To discharge it, unplug your computer and wait 5 minutes for it to discharge completely. This will prevent damage to your SmartRAID controller and/or the ASCM-35F battery.
5. Microsemi SmartRAID controller BIOS boot (without hard disk drive)
Note that once your Microsemi SmartRAID controller is plugged into your computer, your computer startup may be extended from 30 to 45 seconds.
As indicated on the "Boot time for Adaptec SmartRAID Controllers" page of the Adaptec site.
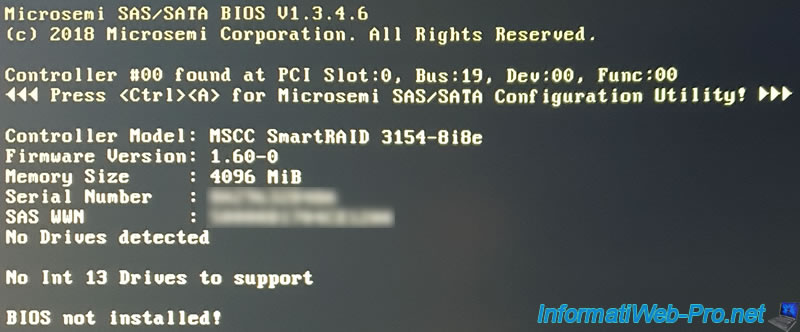
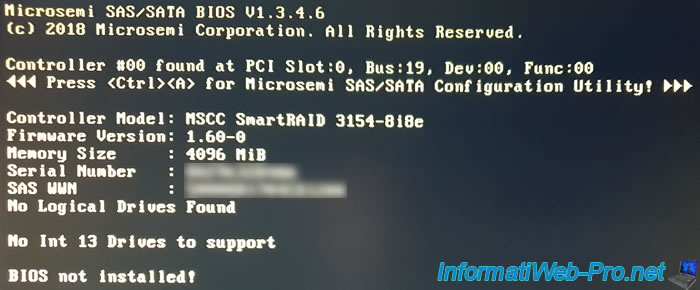
Once your computer screen turns on, you will see this display over time :
Plain Text
Microsemi SAS/SATA BIOS V1.3.4.6.
(c) 2018 Microsemi Corporation. All Rights Reserved.

Controller #00 found at PCI Slot:0, Bus:19, Dev:00, Func:00.
Press <Ctrl><A> for Microsemi SAS/SATA Configuration Utility!

Controller Model: MSCC SmartRAID 3154-8i8e
Firmware version: 1.60-0
Memory Size     : 4096 MiB
Serial Number   : xxxxxxxxxx
SAS WWN         : xxxxxxxxxxxxxxx
No Drives detected

No Int 13 Drives to support

BIOS not installed!
At this time, no drives are detected (No Drives detected) as we have nothing connected to our SmartRAID controller yet.
6. Connect the hard drives to the SmartRAID controller
As you have seen previously, the cable to connect your hard drives to your Adaptec SmartRAID controller is not supplied with your SmartRAID controller.
In our case, we bought 3 "WD Ultrastar DC HC310 (4 TB)" SAS hard drives.
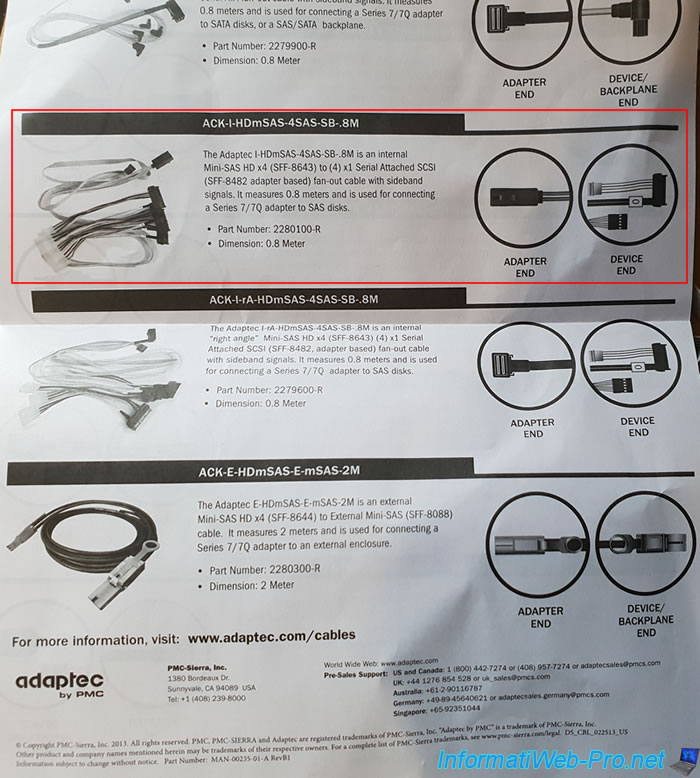
We therefore bought an "Adaptec ACK-I-HDmSAS-4SAS-SB-.8M" cable which allows us to connect our SAS hard disks to our SmartRAID controller supporting the 12 GB/s speed supported by these hard disks and our SmartRAID controller.
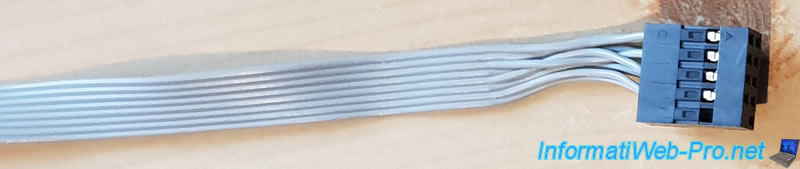
This is what that cable looks like when it's received.
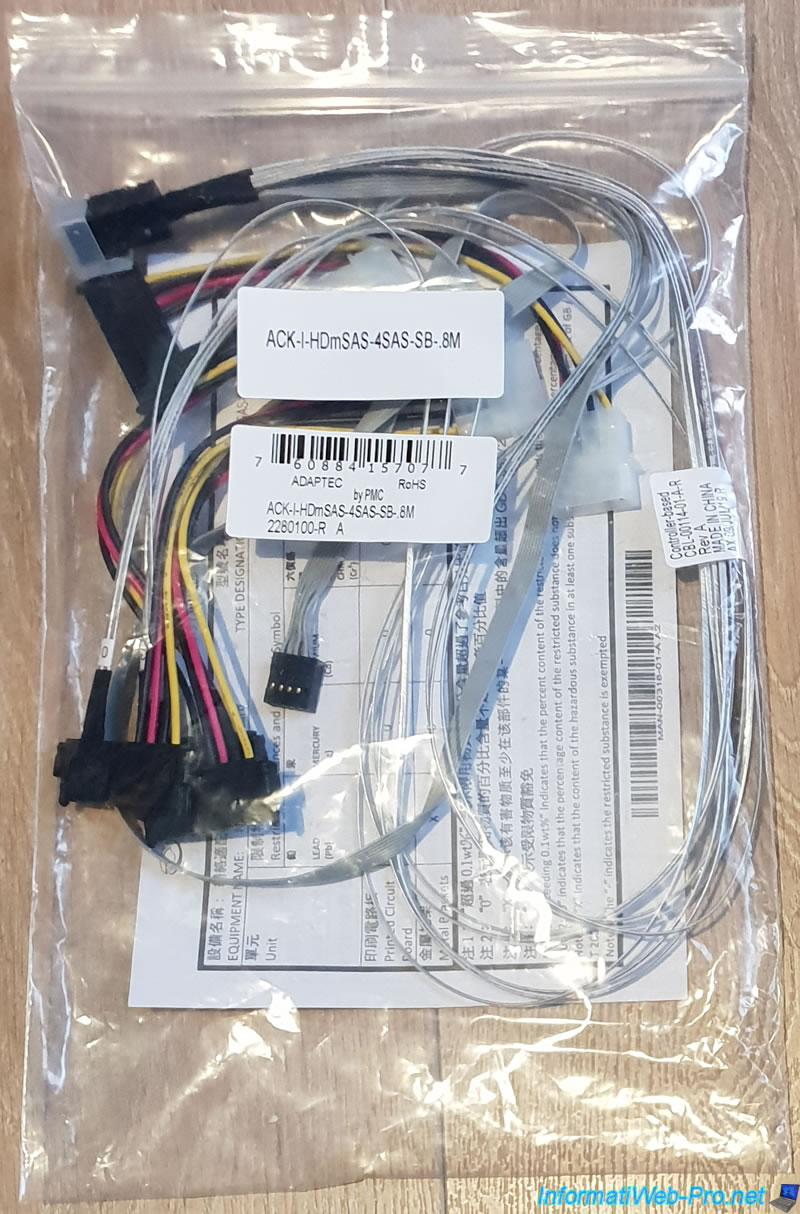
In the packaging, Microsemi provides you with a paper with different types of cables, a list of which can also be found on the Microsemi website : Adaptec Cables & Accessories.
Here is a picture of the "Adaptec ACK-I-HDmSAS-4SAS-SB-.8M" cable.
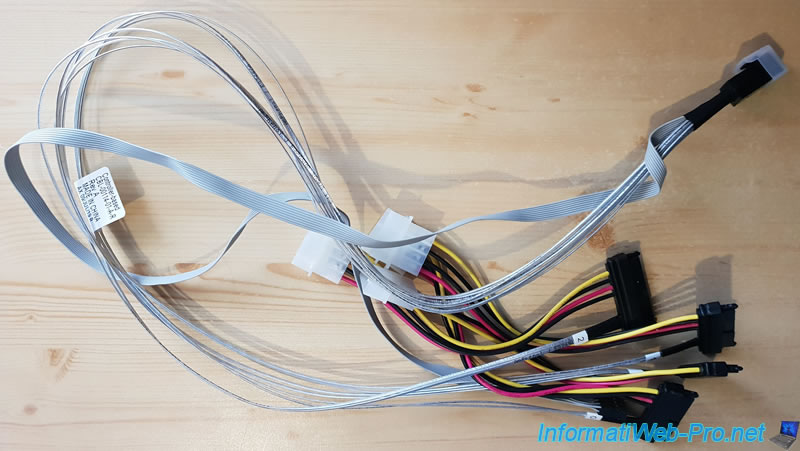
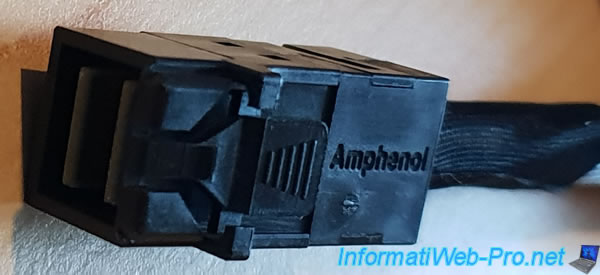
This cable has a mini SAS HD connector (SFF-8643) that you will plug into the internal port of your SmartRAID controller.
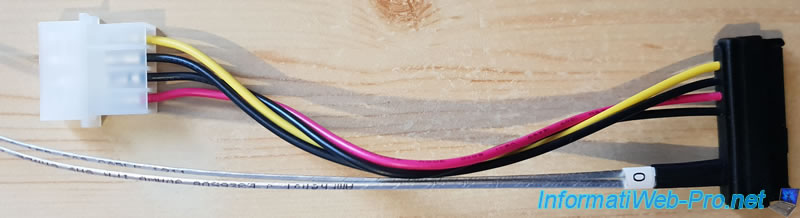
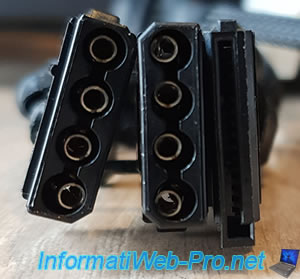
On the other side, you will find 4 times : 1 Serial Attached SCSI connector (the big black connector) and 1 Molex connector for powering the SAS hard drive.
Also note that each of the 4 cables is numbered with a number from 0 to 3 included and will allow you to find each hard drive in the configuration tool of your SmartRAID controller.
Finally, you will also find a gray colored sideband cable with an SFF-8482 connector.
This cable is only used in servers to transmit the "SGPIO" and "SES-2 over I2C" signals to the backplane. This makes it possible in particular to make the LEDs flash according to the use of the hard disks connected to the SmartRAID controller.
If you are not affected (as is the case for us), don't connect this cable. It's optional.
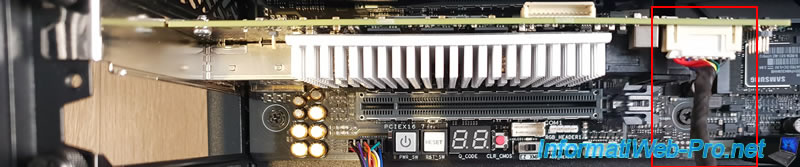
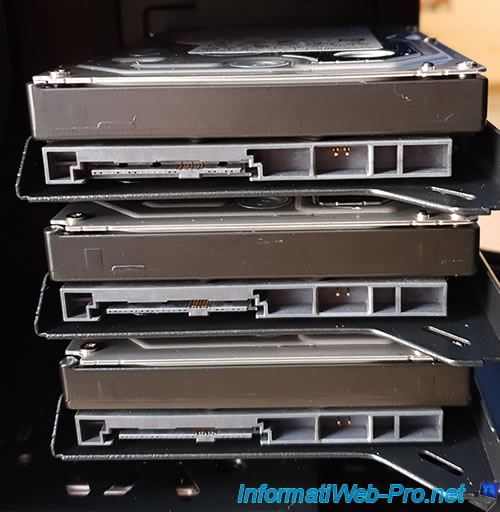
Before plugging in the mini SAS HD (SFF-8643) connector of our cable, here is a photo of the internal mini SAS HD (SFF-8643) ports of our Microsemi Adaptec SmartRAID 3154-8i8e controller with the "ASCM-35F" battery just in below.
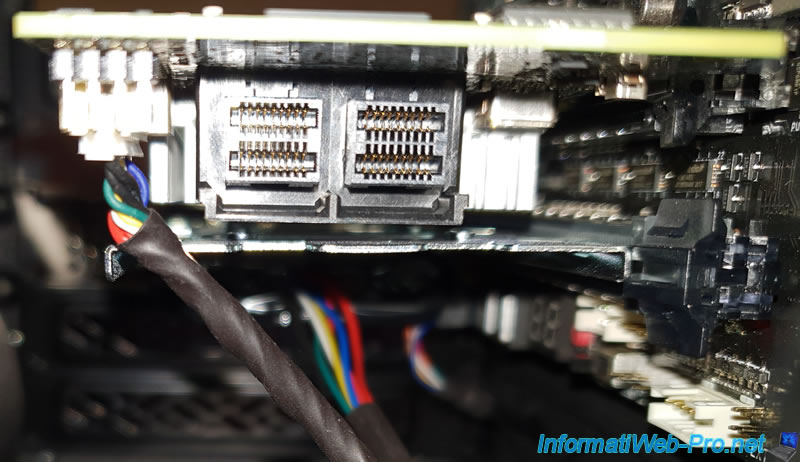
If you look at the image below, you will see that the connector clips is at the bottom.
This photo will allow you to plug this connector in the correct direction.
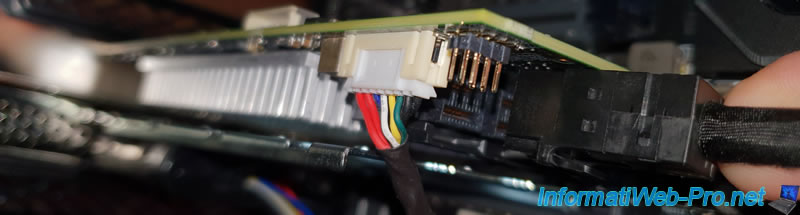
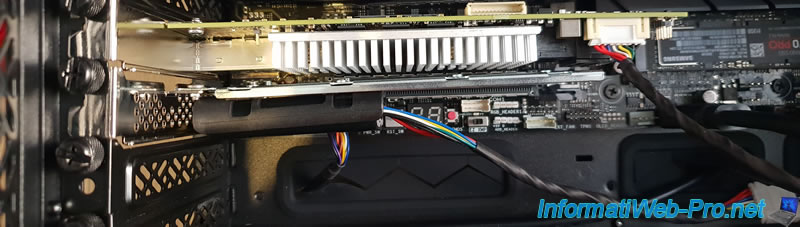
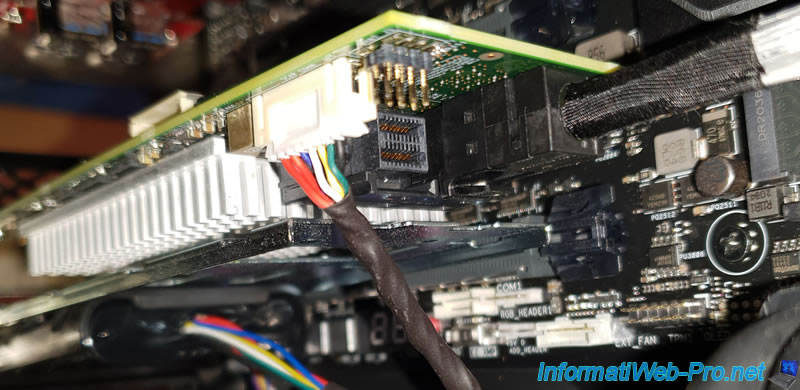
Once the mini SAS HD connector (SFF-8643) is plugged in, this is what it looks like.
As we already explained previously, we bought 3 SAS hard drives "WD Ultrastar DC HC310 (4 TB)" for our new computer.
The SAS connector almost looks like the SATA connector, except for one detail. The SAS connector is in one piece instead of 2 with the SATA (one connector for data and the other for power).
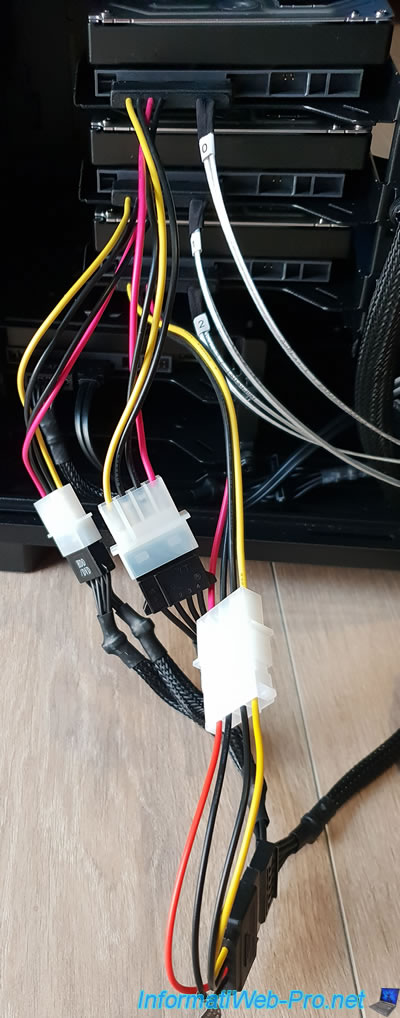
Connect the number of cables required for the number of hard drives you wish to use with your SmartRAID controller, preferably respecting the numbering indicated on the cables.
As you can see we have plugged in 3 SAS hard drives with cables : 0, 1 and 2.
Once the hard drives are plugged in, you will easily notice that they can be powered through Molex power cables.

In our case, we bought a modular power supply, but this only offers power cables with Molex and SATA plugs on the same cable.
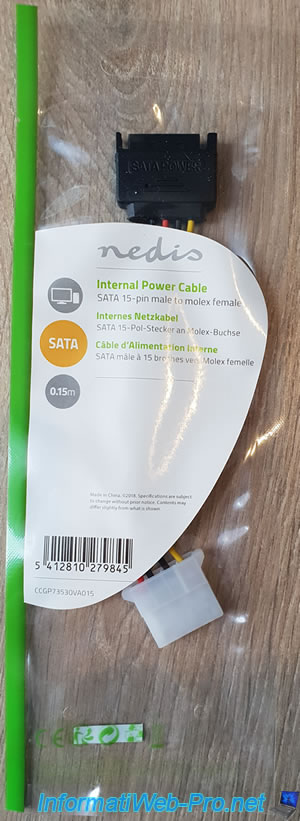
To avoid plugging in a 2nd power cable, we bought a small SATA to Molex adapter.
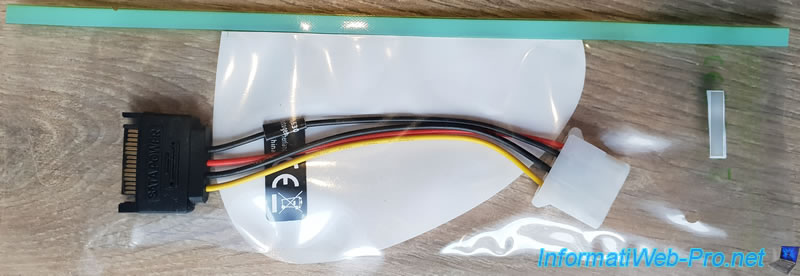
This type of adapter is supplied in particular by Nedis and allows you to connect many hard drives in Molex, even if your power supply offers mainly or only SATA power connectors.
In short, we connected 2 SAS hard drives directly with the Molex power cables and the 3rd hard drive with the SATA to Molex adapter.
7. Booting the BIOS of the Microsemi SmartRAID controller (with hard disk drive)
At startup, you will again see the same beginning and in particular the "Scanning for devices" message.

The "Press <Ctrl><A> for Microsemi SAS/SATA Configuration Utility!" message will appear as usual.

Now that your SAS hard drives are plugged in, you will see the "No Logical Drives Found" message appear instead of the "No Drives detected" message.
Share this tutorial
To see also
-

RAID 4/20/2022
Adaptec maxView Storage Manager v3 - Create a RAID volume
-

RAID 4/8/2022
Adaptec maxView Storage Manager v3 - Download and boot on USB version
-

RAID 4/13/2022
Adaptec maxView Storage Manager v3 - Installation on Linux
-

RAID 4/15/2022
Adaptec maxView Storage Manager v3 - Manage an Adaptec SmartRAID controller on VMware ESXi 6.7
No comment