- RAID
- 27 April 2022 at 14:58 UTC
-


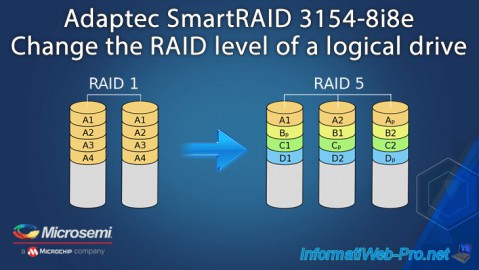
To increase the capacity of a logical device or change its RAID level to improve performance and/or security (fault tolerance), you can add a physical device to an array.
- Current RAID level
- Add a physical device to an existing RAID array
- Change the RAID level of a logical device
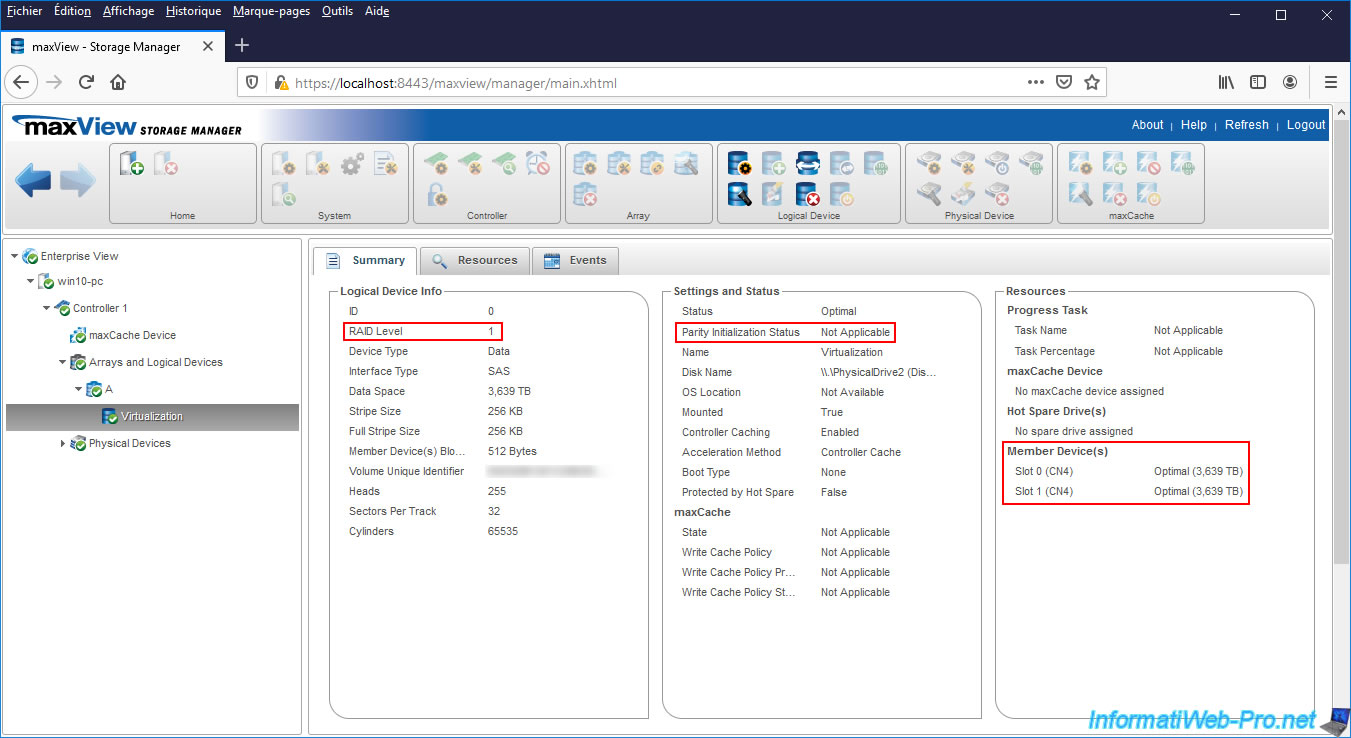
1. Current RAID level
For this tutorial, we have created an array with 2 SAS hard drives and a logical device in RAID 1 on it.
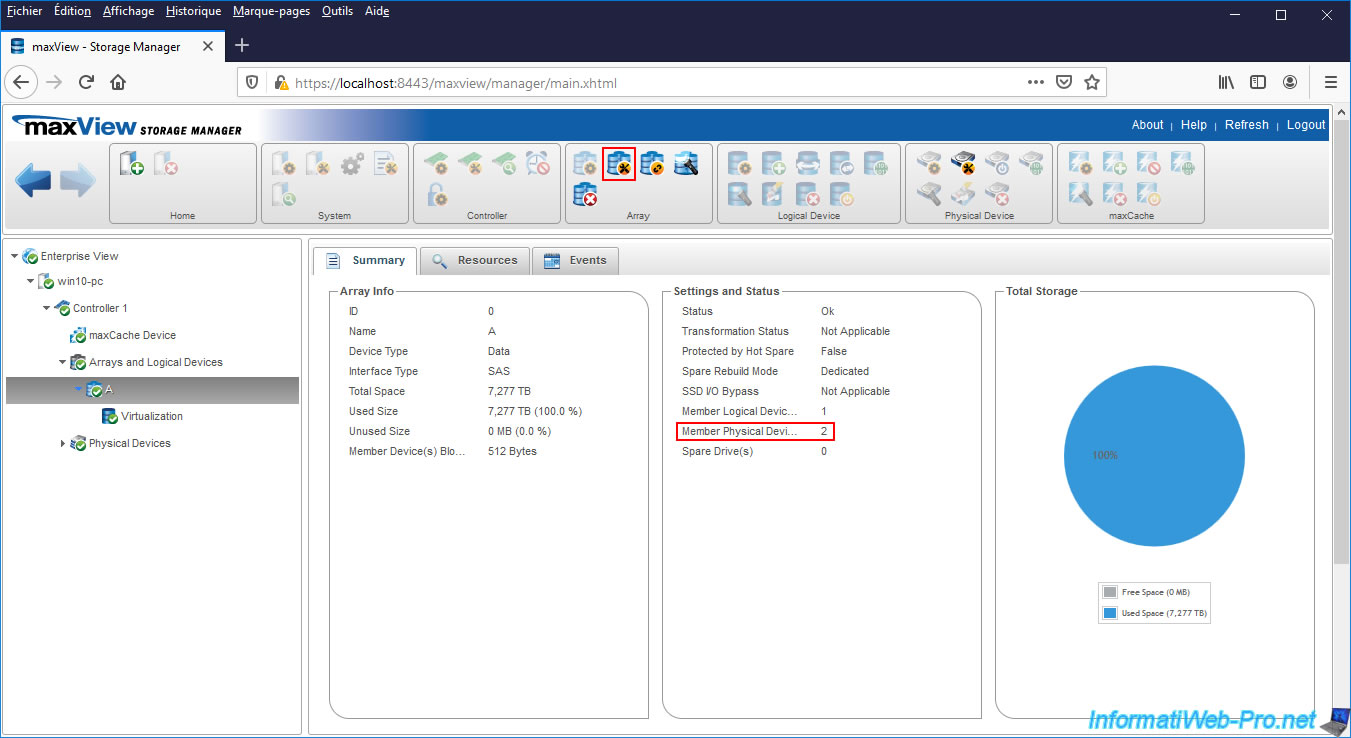
2. Add a physical device to an existing RAID array
To add a physical device to an existing RAID array, plug an additional physical device into your Microsemi Adaptec SmartRAID controller, then select the desired array and click on the 2nd icon (Modify Array) of the "Array" block at the top of the page.
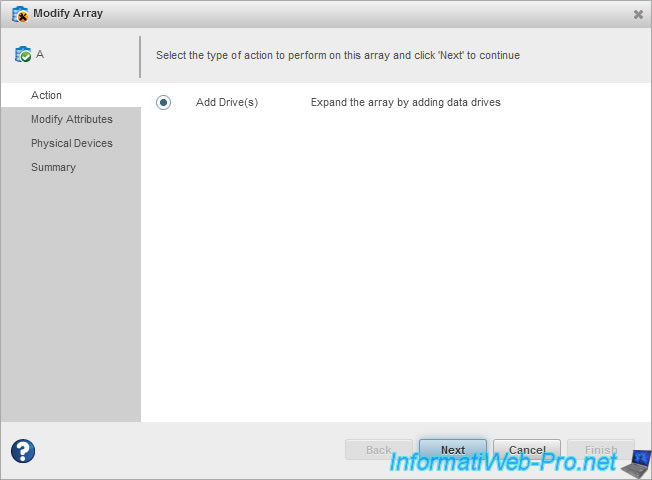
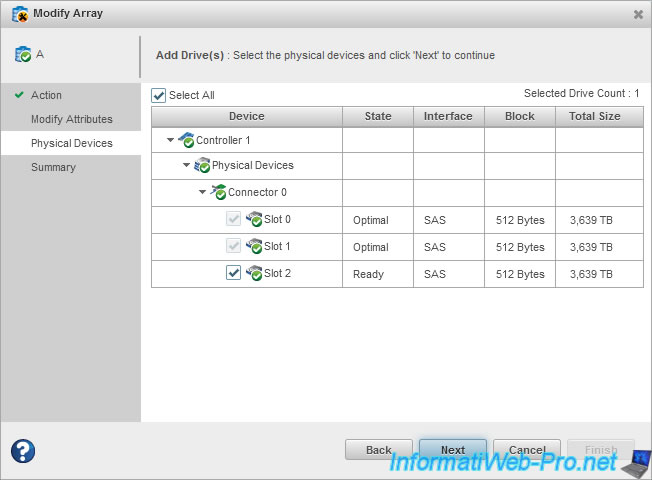
In the "Modify Array" window that appears, select "Add Drive(s)" and click Next.
In our case, we had added a SAS hard drive (connected with cable n° 2 = Slot 2).
So, we check the "Slot 2" box and click on Next.
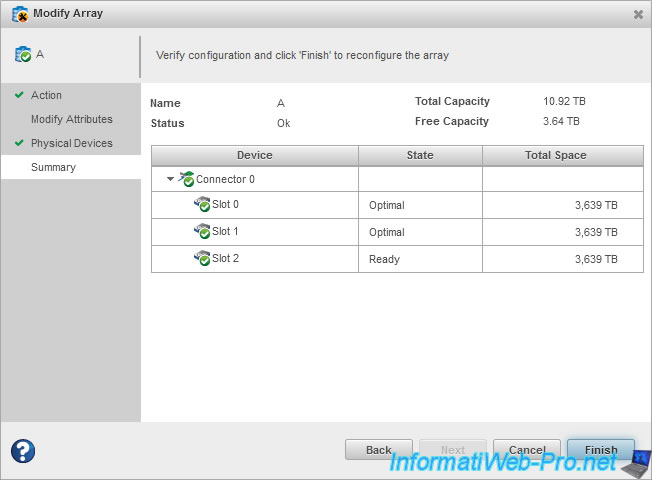
Then, click on Finish.
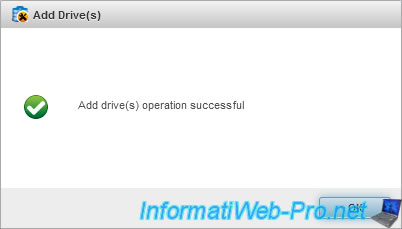
The "Add drive(s) operation successful" message appears.
Click on OK.
Once the physical device is added, the array will be undergoing transformation (Transformation Status : True) and the number of Member Physical Devices will have increased.
![]()
Note that adding one or more physical devices may change the RAID level of your RAID array.
As you can see, our "Virtualization" RAID logical device which was in RAID 1 (when the array was composed of only 2 physical devices) is now in RAID 5 (since this one is composed of 3 physical devices).
However, you will see that you can change the RAID level a bit later.
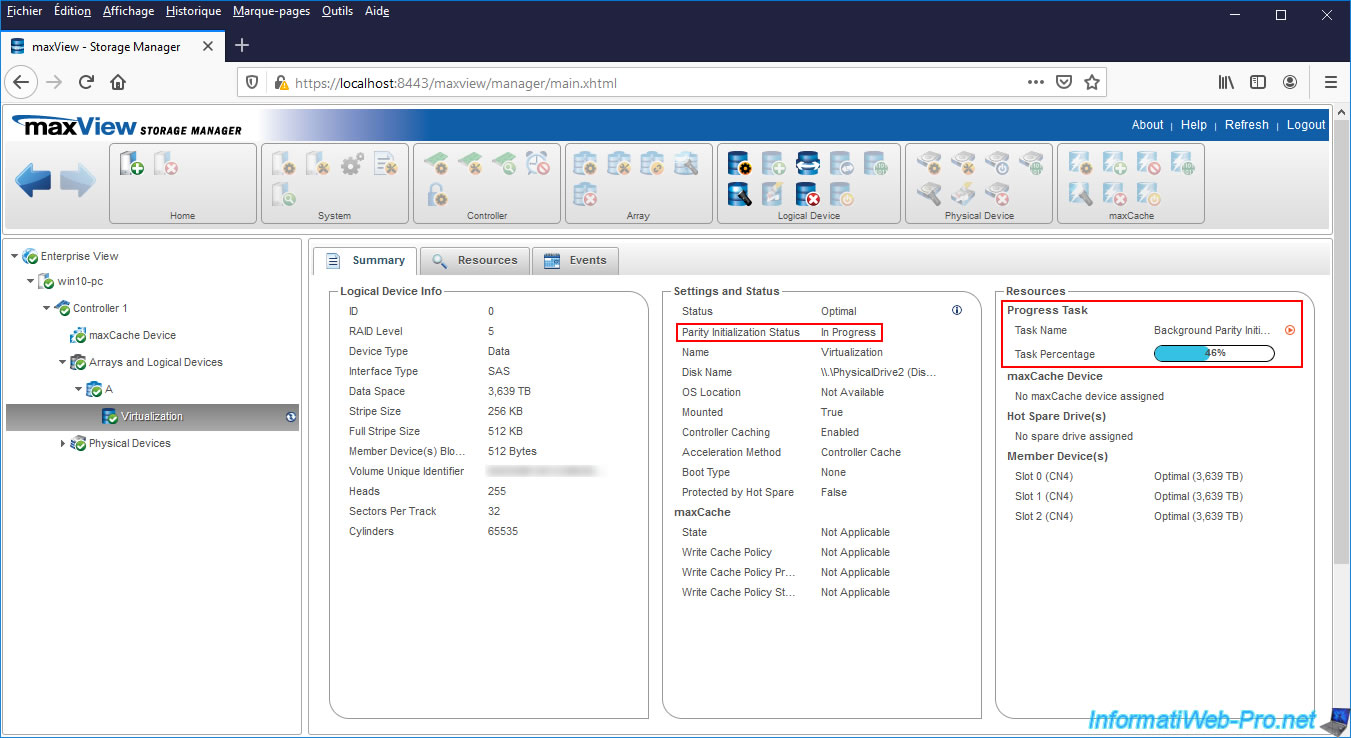
For now, if you look at the logical device there, you will see that its status is "Expanding" and that there is an "Expanding" task in progress for it.
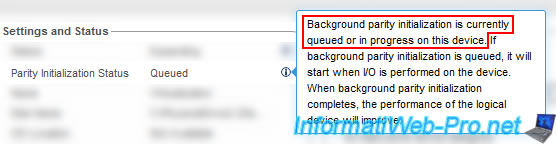
In our case, as the RAID level has changed and RAID 5 requires parity, maxView tells you that it's Queued for the moment.
This is because the parity calculation for this logical device will start when the "Expansion" task is finished.
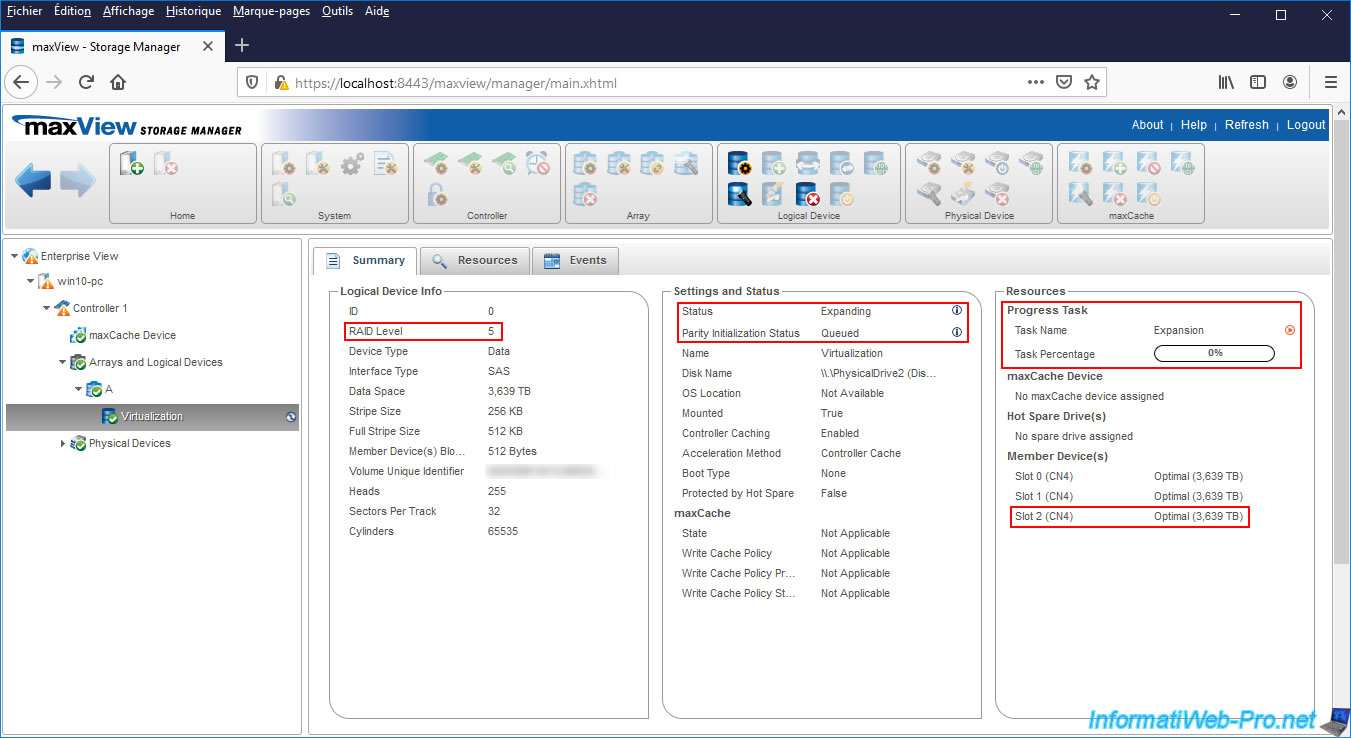
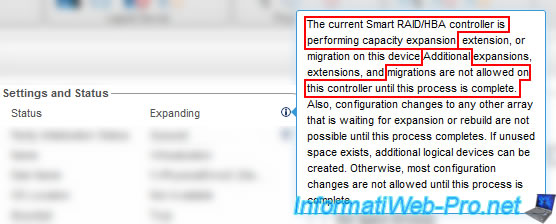
If you hover over the little "i" next to "Status : Expanding", you will see that maxView is telling you that your SmartRAID controller is expanding your logical device capacity and that additional migrations (RAID level change) are not allowed on this controller until this process is completed.
For parity initialization (if applicable, since it depends on the RAID level chosen by the controller), you can see that it's currently pending.
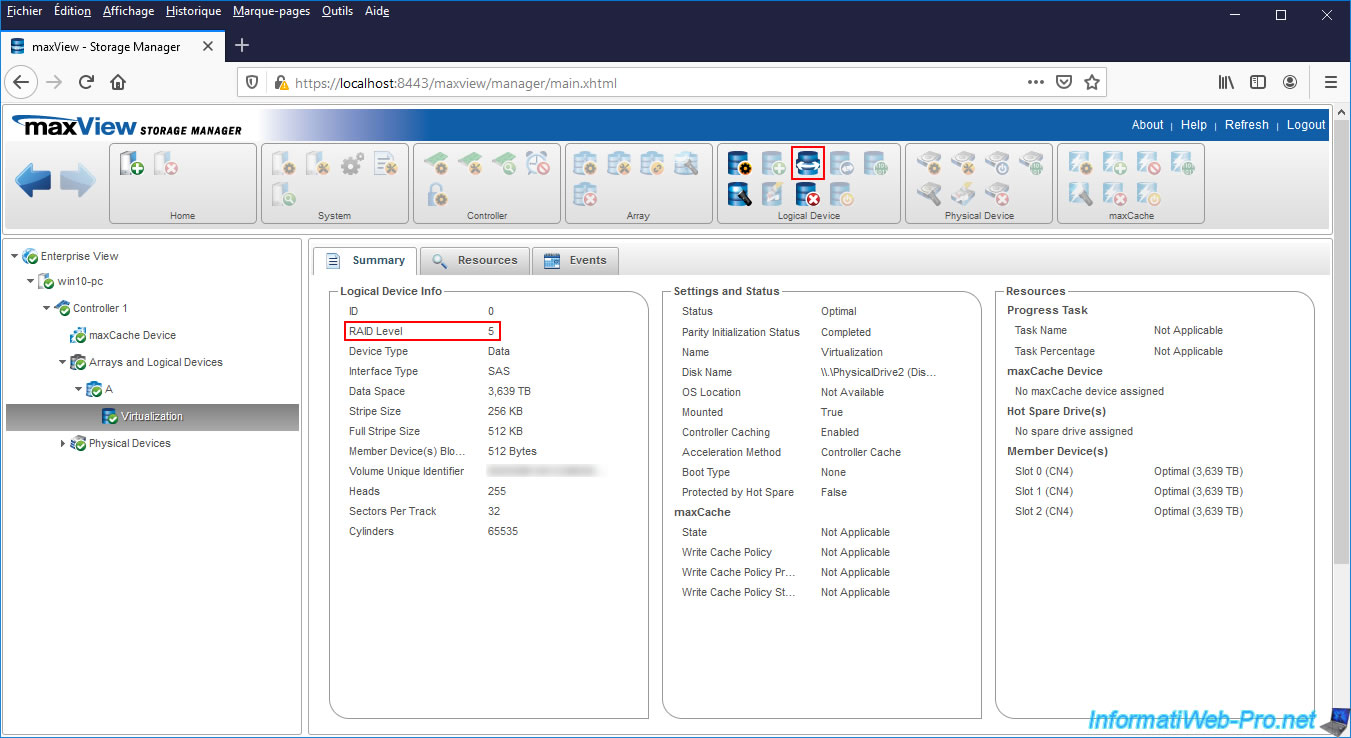
Once your logical device capacity expansion is complete, your controller will perform the parity initialization (if applicable) for your logical device.
Once parity initialization is complete, the Parity Initialization Status will be : Completed.

3. Change the RAID level of a logical device
At the moment, the RAID level of our logical device is : RAID 5.
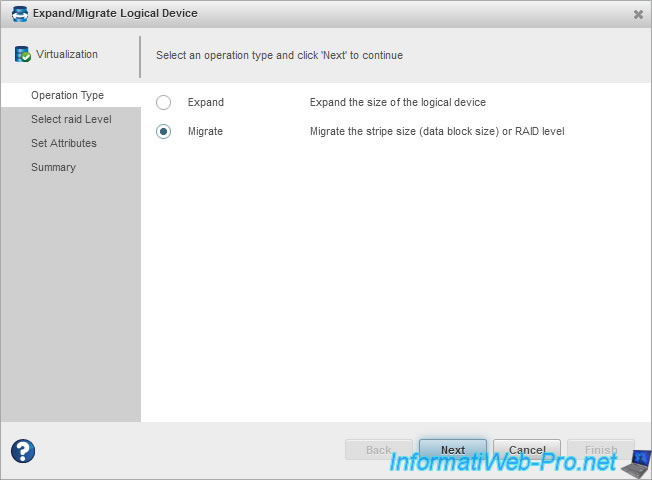
To migrate (change) its RAID level to another RAID level (whether lower or higher), click on the 3rd icon (Expand/Migrate Logical Device).
In the "Expand/Migrate Logical Device" window that appears, select "Migrate" and click Next.
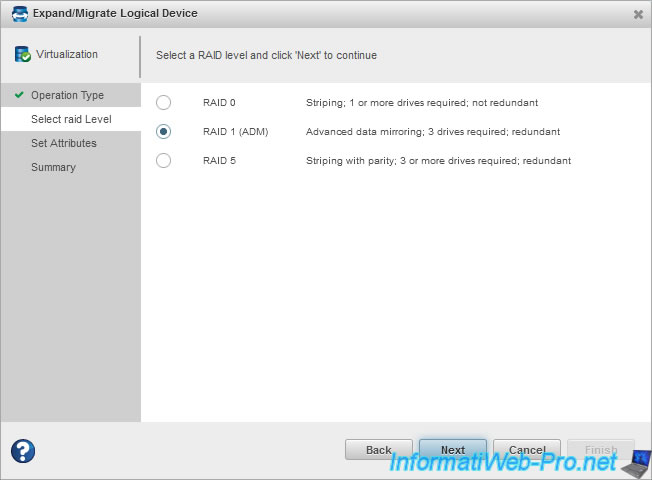
Select the desired RAID level and click Next.
In our case, we will be using a "RAID 1 (ADM)" RAID level instead of the current RAID 5.
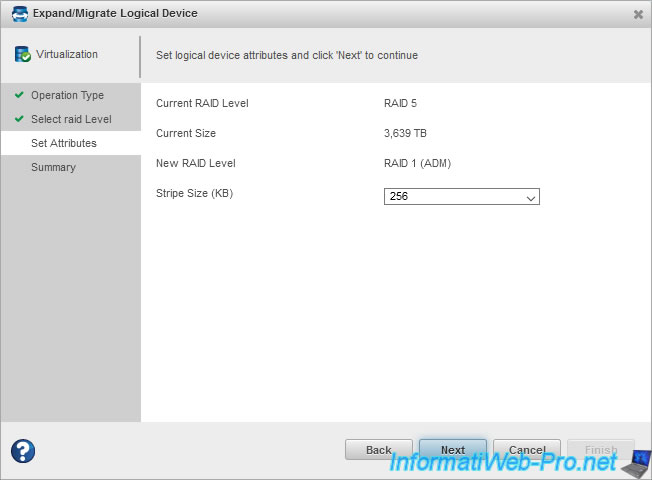
Leave the default Stripe Size and click Next.
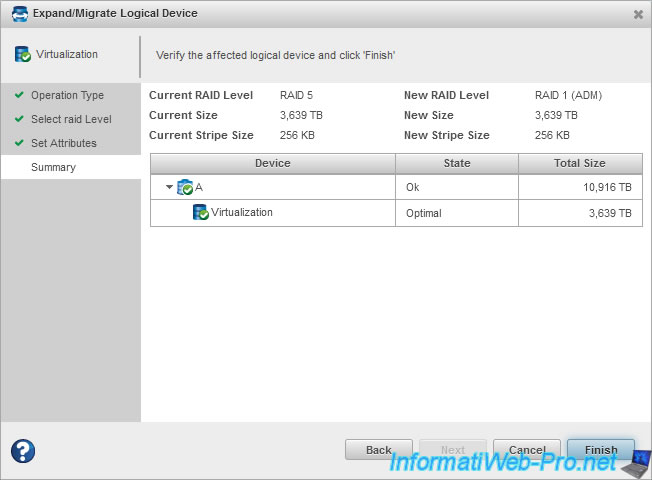
A summary is displayed with :
- the current RAID level and the RAID level that will be used after migration (New RAID Level)
- the storage size available with the current RAID level (Current Size) and that which will be available after migration (New Size)
- the current stripe size and the one that will be used after the migration (New Stripe Size)
Click on Finish.
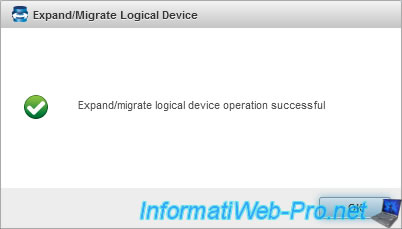
The "Expand/migrate logical device operation successful" message appears.
Click on OK.
The RAID level changes and the status becomes "Expanding" again.
Note that in our case, the initialization status is "Not Applicable" since the RAID 1 (ADM) level has no parity.
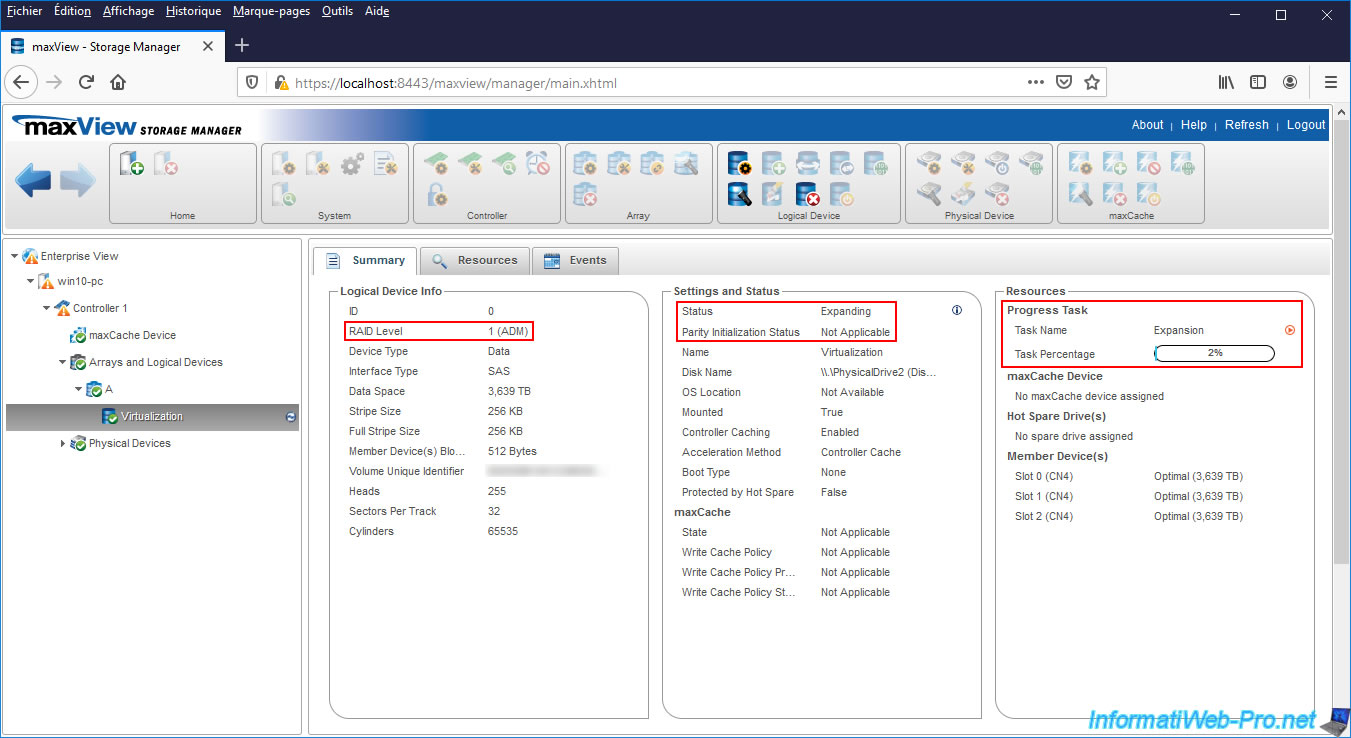
Once the RAID level migration and parity initialization (if applicable) is complete, the logical device status will change to : Optimal.

Share this tutorial
To see also
-

RAID 4/20/2022
Adaptec maxView Storage Manager v3 - Create a RAID volume
-

RAID 4/8/2022
Adaptec maxView Storage Manager v3 - Download and boot on USB version
-

RAID 4/13/2022
Adaptec maxView Storage Manager v3 - Installation on Linux
-

RAID 4/15/2022
Adaptec maxView Storage Manager v3 - Manage an Adaptec SmartRAID controller on VMware ESXi 6.7
You must be logged in to post a comment