Presentation of the Microsemi Adaptec maxView Storage Manager v4 / v3 web interface
- RAID
- 19 May 2024 at 15:34 UTC
-

- 4/5

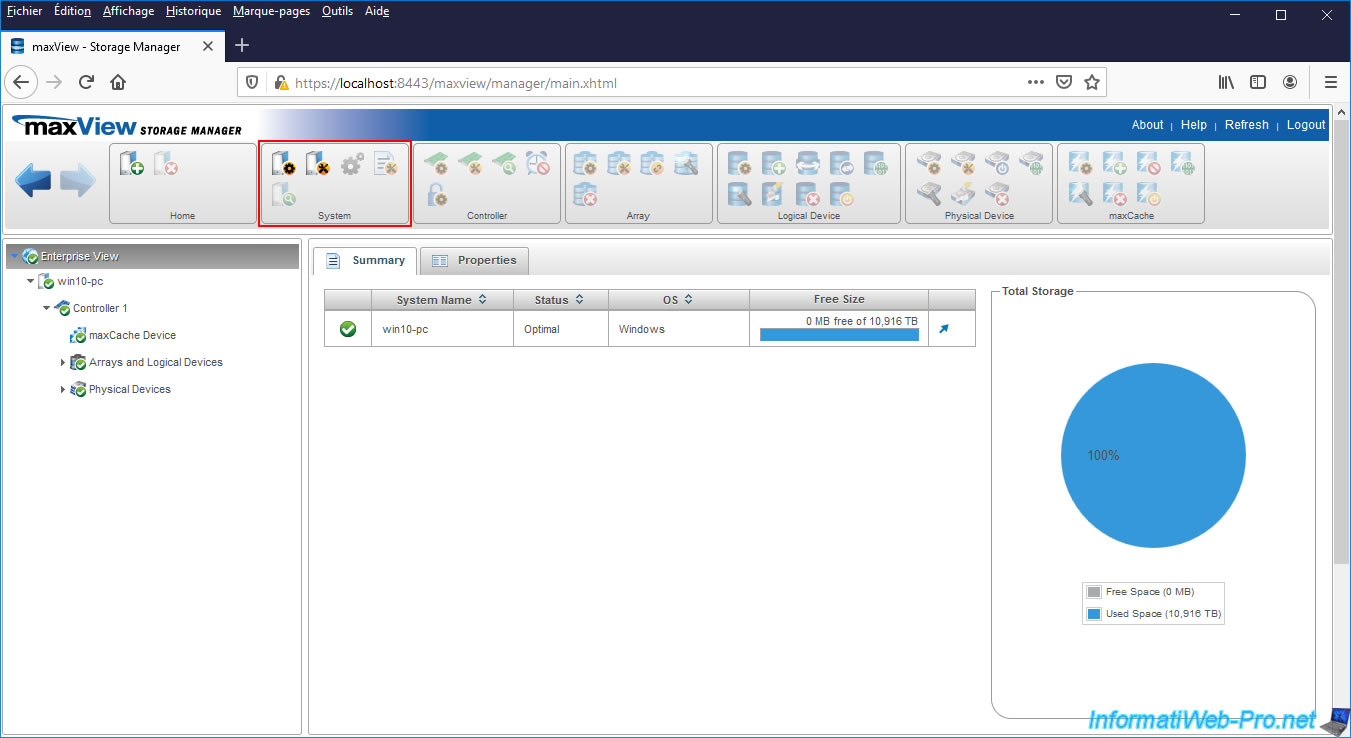
3.10. Discovering the maxView Storage Manager ribbon
Finally, here are the informations about the different icons present in the banner located at the top of the web interface.

3.10.1. Home
For the "Home" block, you can :
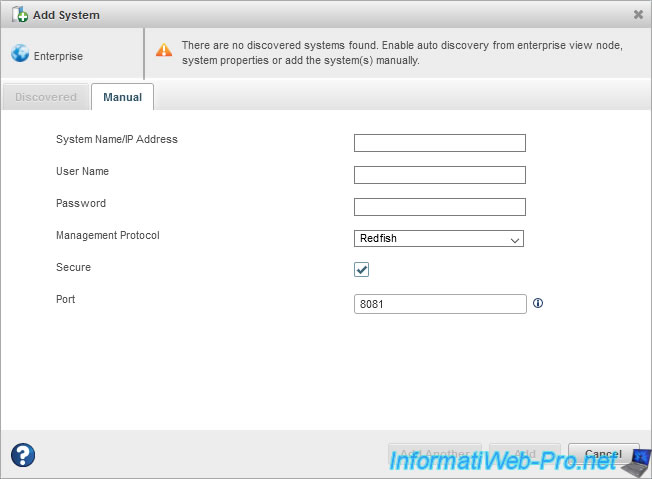
- Add System : add a system to your maxView Storage Manager web interface
- Delete System : remove one system of the maxView web interface
This will allow you to manage the controllers of your different computers / servers remotely from a single maxView Storage Manager web interface.
For this :
- you must select the "Enterprise View" node
- maxView Storage Manager must be installed on the source computer / server and the remote one, but the Standalone mode must be disabled (when installing maxView) to allow incoming connections

Note that with version 3 of maxView Storage Manager, you can connect to remote systems using the "Redfish", "CIM" or "ESXi" protocols depending on your case and the version of maxView installed on the remote system.
For more information about this remote management feature, refer to on of our tutorials :
- Adaptec maxView Storage Manager v3 - Manage an Adaptec SmartRAID controller remotely
- Adaptec maxView Storage Manager v3 - Manage an Adaptec SmartRAID controller on VMware ESXi
3.10.2. System
For the "System" block, you can (in this order) :
- System Settings : manage system settings, such as automatic discovery of remote systems, management of the controller's sound alarm, ...
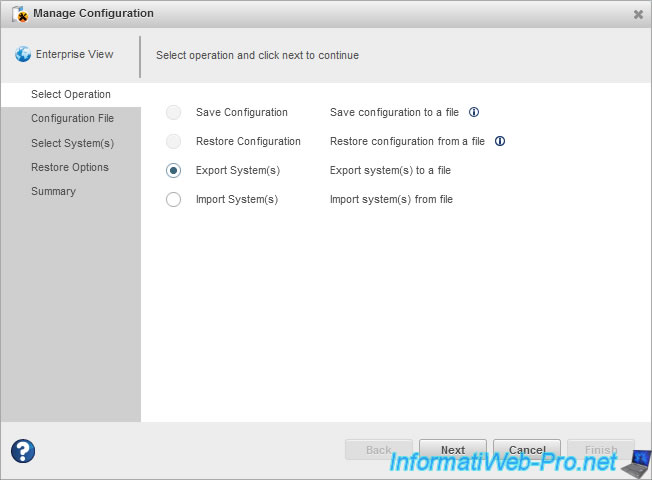
- Manage Configuration : save and restore the configuration for the selected system (computer / server) or export / import the list of systems if you have selected the root node (Enterprise View)
- Firmware Update : update the firmware of your controller or a physical disk in your system
- Archive Management : allows you to export the logs of your controller when you need technical support to solve a problem with your controller
- System Refresh : allows you to refresh the configuration for the selected controller
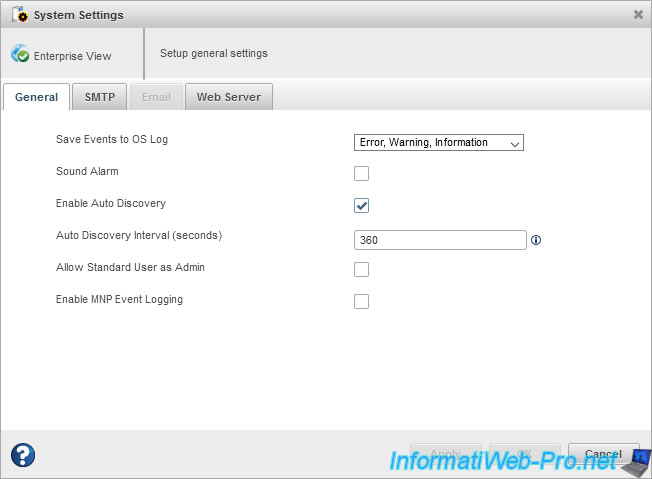
For the 1st icon (System Settings), in the "General" tab, you can :
- Save Events to OS Log : choose which types of events to save in the operating system logs.
Default : Error, Warning, Information. - Sound Alarm : enable or disable the sound alarm which may sound in the event of a problem with your Microsemi controller.
- Enable Auto Discovery : enables or disables automatic discovery to manage remote systems from the maxView Storage Manager web interface.
- Auto Discovery Interval (seconds) : indicates how often maxView will check for changes in remote system resources.
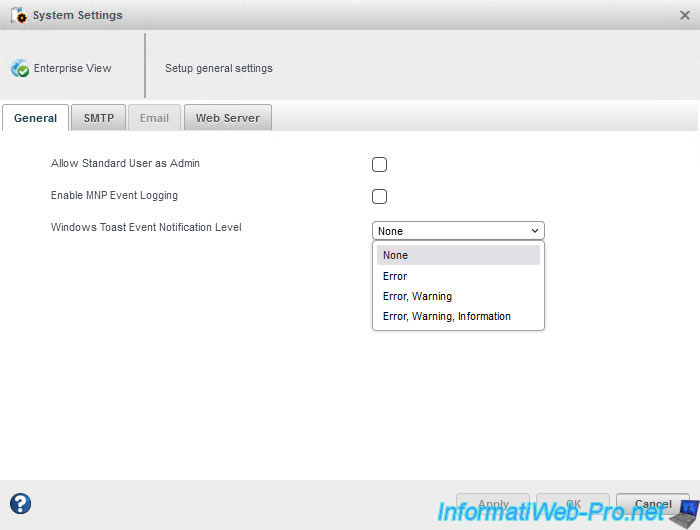
- Allow Standard User as Admin : as administrator, this allows you to allow standard users to have administrator rights in the maxView Storage Manager web interface
- Enable MNP Event Logging : allows the user to enable or not the recording of monitoring events and performance of physical disks
Since version 4, a new "Windows Toast Event Notification Level" option has appeared and allows maxView to send "error", "warning" and/or "information" type events to the Windows Action Center under the form of notifications.
By default, the value "None" is selected. Which disables this new feature.
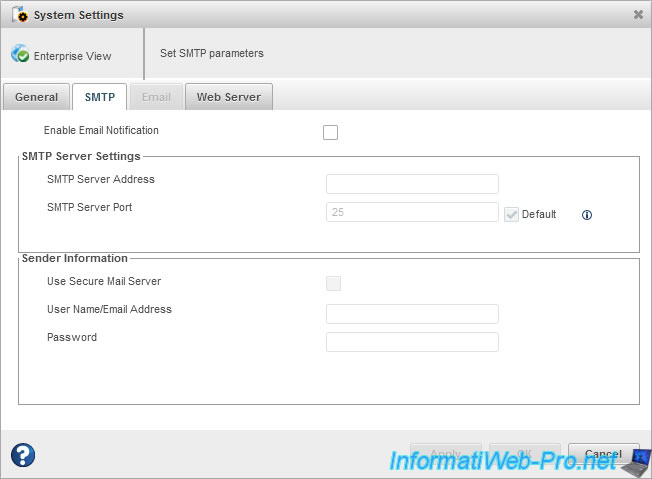
In the "SMTP" tab of the System Settings, you will be able to configure the connection information for an SMTP server to receive e-mail notifications about your controller.
This will allow you to be automatically notified if there is a problem with your Microsemi controller.
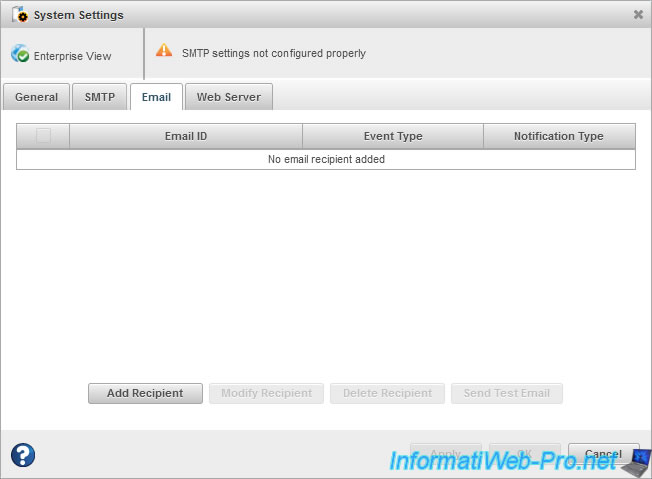
In the "Email" tab of the System Settings, you can add, modify or delete the e-mail addresses to which the notification emails will be sent.
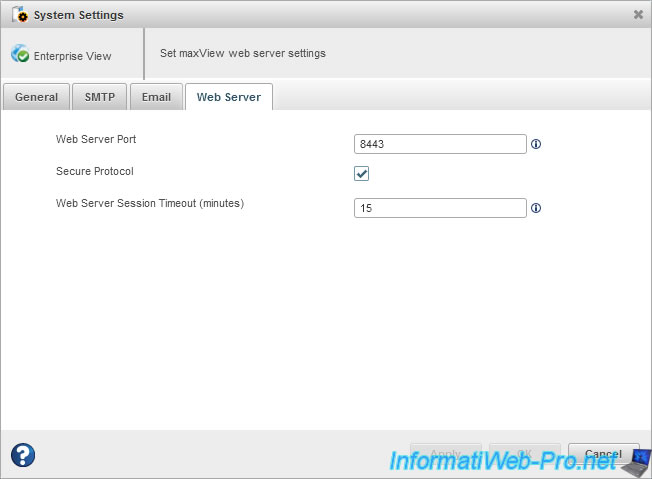
In the "Web Server" tab of the System Settings, you can :
- Web Server Port : change the port of the maxView web server (to resolve a port conflict with another program, for example)
- Secure Protocol : activate or deactivate the secure protocol (HTTPS)
- Web Server Session Timeout (minutes) : specify the time in minutes after which your session on the maxView web interface will expire
For the 2nd icon (Manage Configuration), if you select a system (computer / server), you can save or restore the configuration from a file.
Since version 4, the "Export System(s)" and "Import System(s)" options are no longer available.
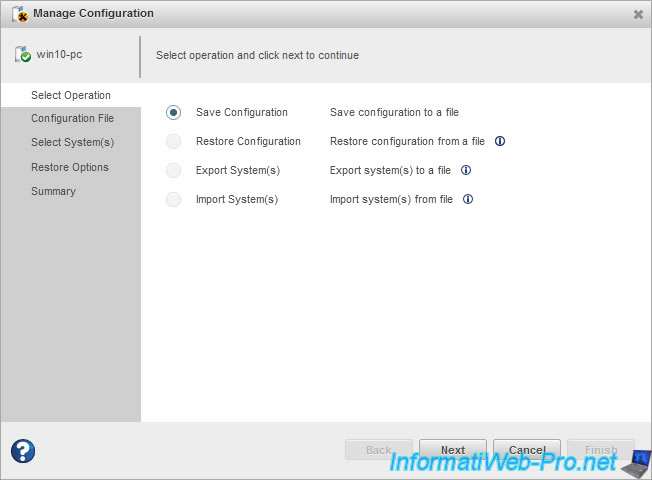
If you have selected the "Enterprise View" root node, this same icon will allow you to export or import the list of systems from a file.
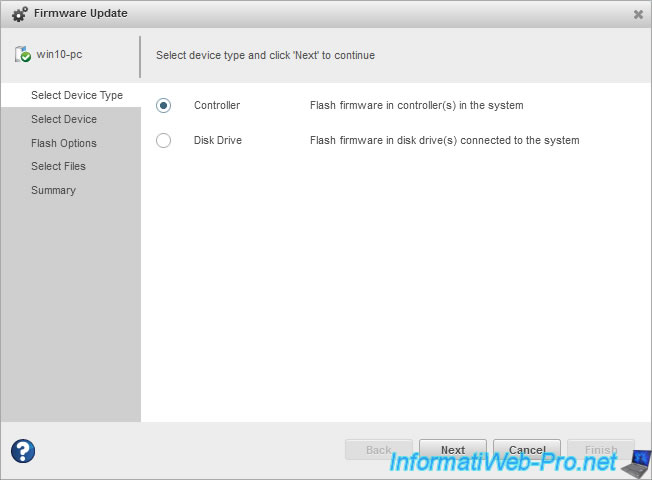
For the 3rd icon (Firmware Update), you can update the firmware :
- of a Microsemi controller
- of a physical disk connected to it
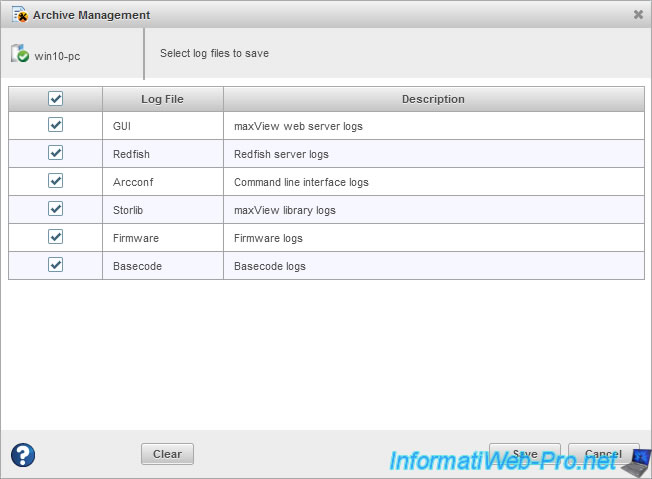
For the 4th icon (Archive Management), you can export the various log files from your system to send them to support in the event of a problem :
- GUI : maxView web server logs
- Redfish : Redfish server logs allowing in particular the remote management of a controller
- Arcconf : ARCCONF command line tool logs
- Storlib : logs linked to the maxView library
- Firmware : logs related to controller firmware
- Basecode : Basecode logs
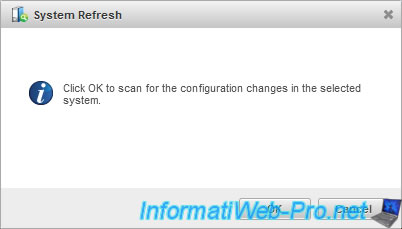
For the 5th icon (System Refresh), this will allow you to update the changes made to the configuration for the selected system (computer / server).
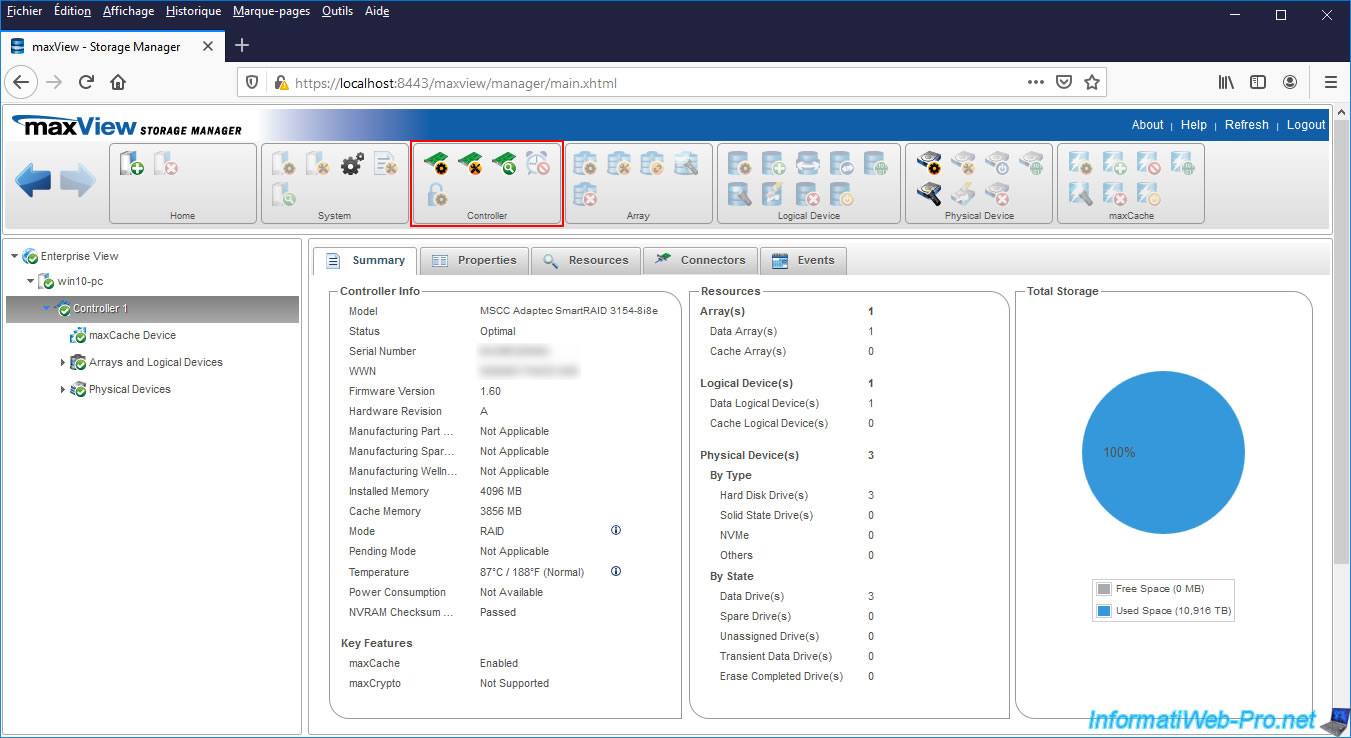
3.10.3. Controller
For the "Controller" block, you can :
- Set Properties : configure the many settings of your Microsemi controller
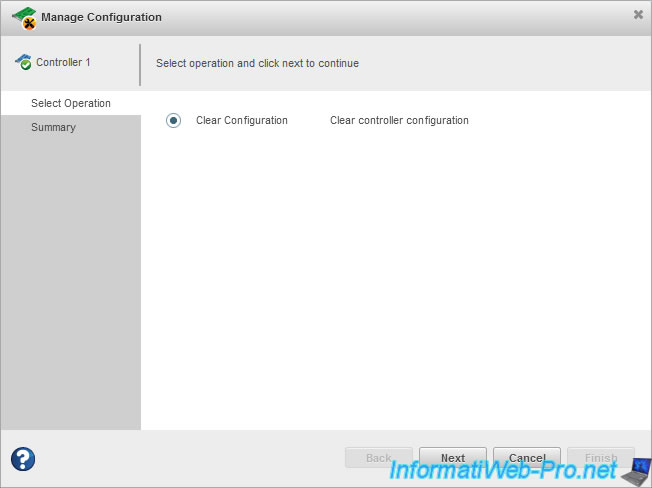
- Manage Configuration : clear your Microsemi controller configuration (if you wish)
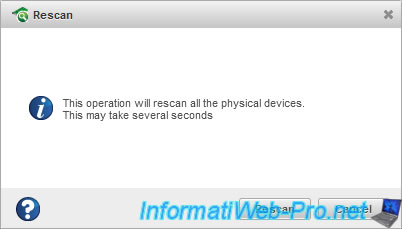
- Rescan : rescan physical disks connected to Microsemi controller to detect new disks
- Silence Alarm : allows you to stop the alarm which sounds during an event of type "warning" or "error" (if this one is enabled in the system settings)
- maxCrypto Settings : allows you to configure the maxCrypto settings of your controller (if it supports this feature)
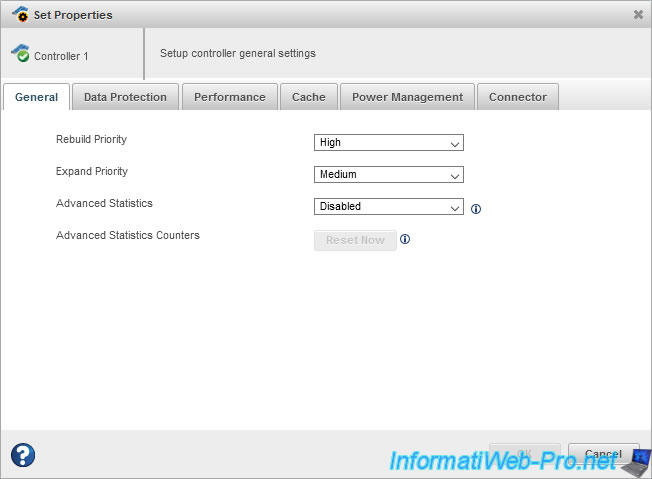
In the "General" tab of the properties of your controller (Controller Properties), you can :
- Rebuild Priority : set the priority of rebuilding a physical disk (which happens when you replace a failed physical disk).
- Expand Priority : set the priority with which the controller will expand an array.
- Advanced Statistics : allows you to enable or disable the generation of advanced statistics for the controller, physical disks (hard disks and SSDs), logical devices and maxCache devices.
- Advanced Statistics Counters : allows you to reset the advanced statistics generated for the current controller.
Since version 4, the last 2 options ("Advanced Statistics" and "Advanced Statistics Counters") are no longer available.
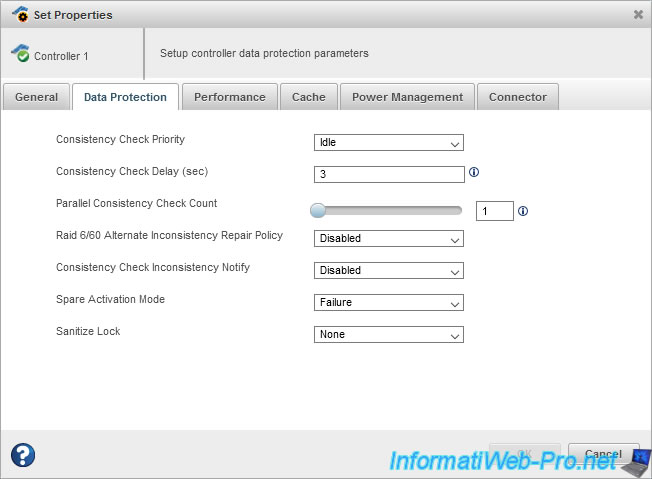
In the "Data Protection" tab of your controller properties, you will find :
- Consistency Check Priority : this setting is for a process that runs automatically in the background that helps ensure that your data can be rebuilt if a physical disk in an array fails.
- Consistency Check Delay (sec) : the amount of time your controller must be idle before the above consistency check process starts.
Note : indicating the value 0 disables this process. - Parallel Consistency Check Count : indicates the number of logical drives on which the controller will be able to perform a parallel consistency check.
- Raid 6/60 Alternate Inconsistency Repair Policy : this alternative inconsistency repair policy for RAID 6/60 levels searches for a stripe and repairs it on only one physical disk.
- Consistency Check Inconsistency Notify : allows you to enable or disable debug event notification messages for mirrored volumes.
- Spare Activation Mode : allows you to choose in which case the failed physical disk of a RAID array will be rebuilt on the Spare previously assigned to it.
For this setting, you have the choice between :
- Failure : the failed physical disk will be rebuilt on the Spare when the affected member physical disk has failed
- Predictive : the failed physical disk will be rebuilt on the Spare shortly before the affected member physical disk actually fails. The reconstruction will therefore start when the failure of this physical disk is predicted. But, the final failure may very well occur before the rebuild is complete.
Therefore, this is not a 100% reliable solution for RAID level 0. - Sanitize Lock : specifies the policy to use for all SATA physical disks that support this feature.
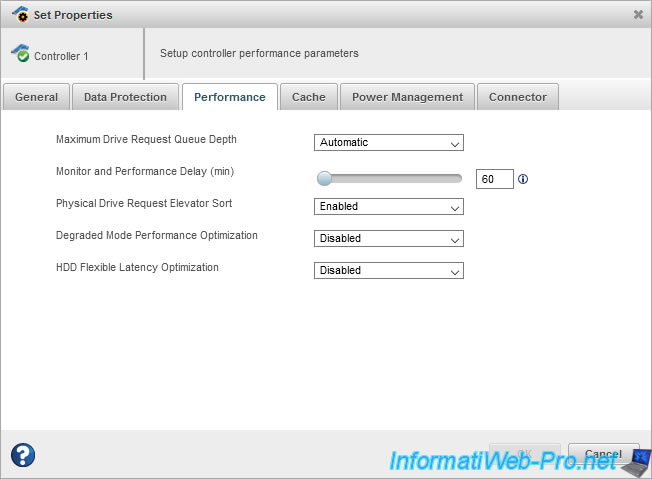
In the "Performance" tab of your controller properties, you will find :
- Maximum Drive Request Queue Depth : allows you to manage the behavior of the queue for the write cache.
- Monitor and Performance Delay (min) : allows you to manage the delay in minutes for controlling monitor behavior and your controller performance.
- Physical Drive Request Elevator Sort : allows you to control the behavior of the sorting algorithm for the write cache elevator
- Degraded Mode Performance Optimization : concerns only logical devices in RAID 5 operating in degraded mode (= at least 1 physical disk has failed, but the parity is still sufficient to be able to read "lost" data).
Enabling this setting improves performance for a high number of read requests.
Disabling this setting will force the controller to re-read data multiple times on the same physical disks. - HDD Flexible Latency Optimization : allows you to change the priority of input/output (I/O) requests to prevent some of the timeout for specific requests sent to the physical disk from being exceeded (timeout)
Note that these settings are mainly used to configure performance in the event that you are using video applications (such as video editing software, for example).
In the "Cache" tab of your controller properties, you will find :
- Cache Ratio : the ratio of use of the cache built into your controller as a read and write cache
- Write Cache Bypass Threshold (KB) : any write exceeding this threshold in KB will ignore the cache and will be written directly to the disk
- No-Battery Write Cache : set whether or not the write cache is enabled when it has no battery (or the battery is not yet fully charged).
Important : it's strongly recommended to leave this setting disabled to avoid any loss of data in the event that the write cache is enabled and a power failure occurs before the battery (example : ASCM-35F) is fully charged. - Wait for Cache Room : enabling this setting will force the controller to always wait until there is room in the read/write cache rather than overriding it for better performance.
It's therefore recommended to leave this setting disabled. - Recover Cache Module : recover cache module
- Write Cache Policy for Configured Drives : allows you to enable or not the write cache to increase the write performance for the configured disks
- Write Cache Policy for Unconfigured Drives : same, but for unconfigured disks
- Write Cache Policy for HBA Drives : same, but for physical disks configured in HBA mode (so that the operating system sees real physical disks and not RAID volumes)

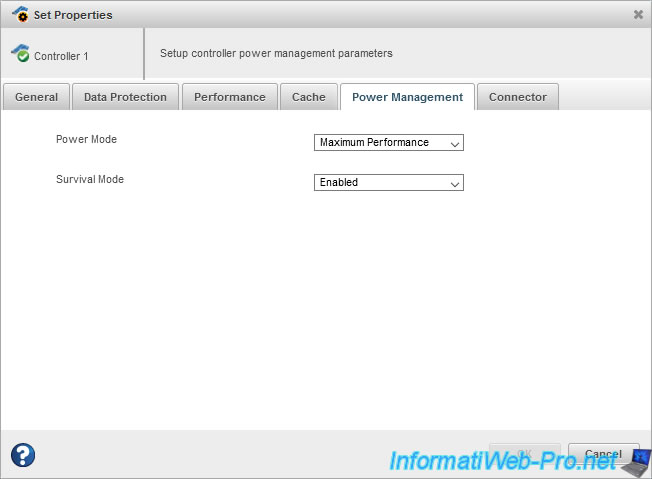
In the "Power Management" tab of your controller properties, you can :
- Power Mode : choose the power mode to use :
- Minimum Power : to dynamically reduce the power supply of the controller according to its use.
- Maximum Performance : to use the highest possible values and not to reduce the power supply according to the use of the controller. - Survival Mode : enable or not the survival mode which allows the controller to limit itself by reducing the power supply settings to their minimum when its temperature exceeds that recommended.
This setting can therefore affect the performance of your controller, but it allows you to avoid physically damaging your controller if there is not enough ventilation to keep it at an acceptable temperature.
In the "Connector" tab of your controller properties, you can change the functional mode (RAID / HBA / Mixed) for all ports (All Connector Mode) of the controller or for a specific port (Connector x (CNx)).

For the 2nd icon (Manage Configuration), this will allow you to delete its configuration and therefore reset the configuration thereof.
For the 3rd icon (Rescan), this will allow you to rescan the physical disks connected to your controller.
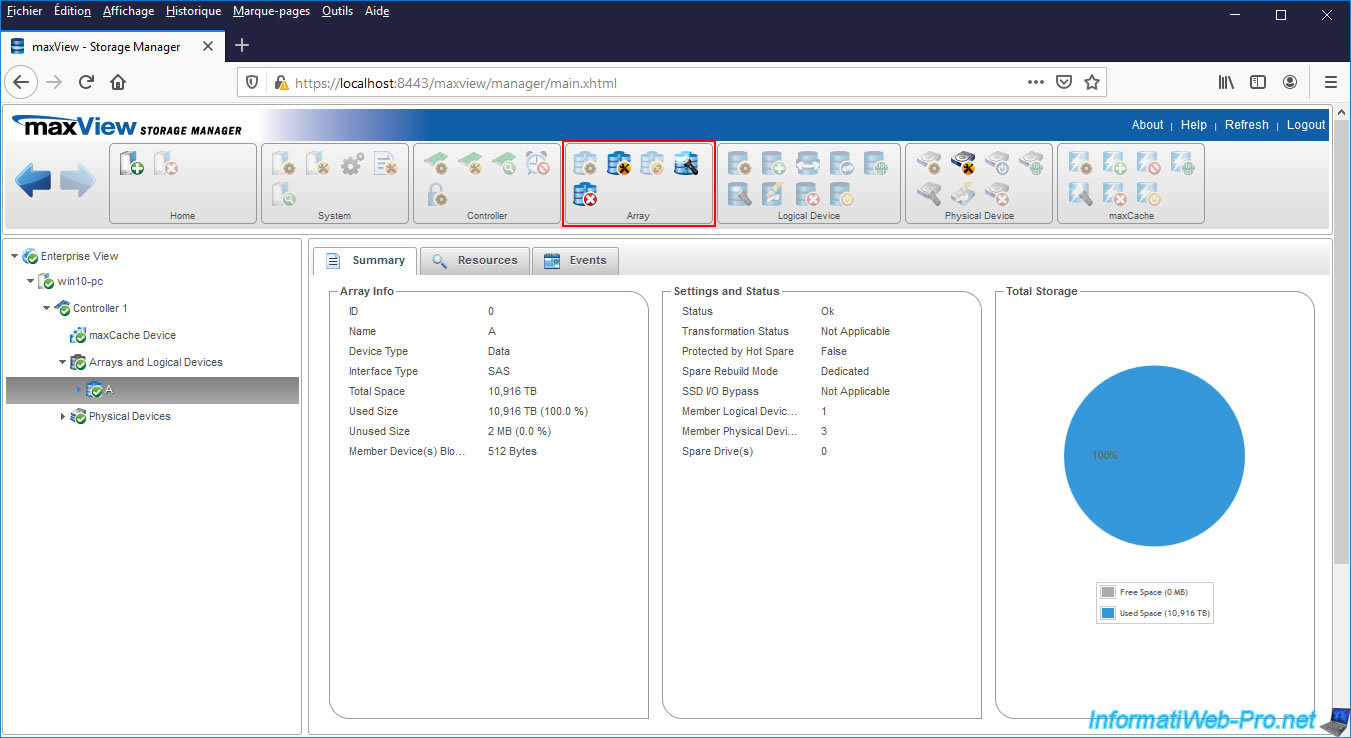
3.10.4. Array
For the "Array" block, you can :
- Set Properties : configure the properties of your array.
- Modify Array : modify your array by adding or moving disks or changing the type of disks.
- Split Mirror Backup : create a backup RAID 0 array by dividing the mirror array (RAID 1 (ADM), RAID 1 + 0, RAID 10 (ADM)).
- Locate Array : flash the LEDs of the disks making up this array to locate them more easily
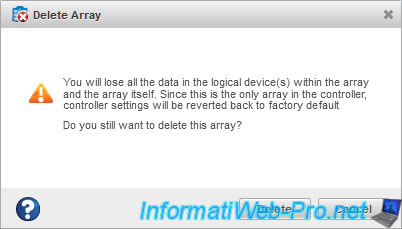
- Delete Array : delete the currently selected array
Note that, for the deletion of an array, if it's the only array existing on your controller, the settings of this one will be restored to those of factory.
Share this tutorial
To see also
-

RAID 4/20/2022
Adaptec maxView Storage Manager v3 - Create a RAID volume
-

RAID 4/8/2022
Adaptec maxView Storage Manager v3 - Download and boot on USB version
-

RAID 4/13/2022
Adaptec maxView Storage Manager v3 - Installation on Linux
-

RAID 4/15/2022
Adaptec maxView Storage Manager v3 - Manage an Adaptec SmartRAID controller on VMware ESXi 6.7
No comment