Use a personal domain (OVH) with a dynamic WAN IP for SWAG on Unraid 6.9.2
- NAS
- Unraid
- 01 July 2026 at 13:16 UTC
-

- 2/3

6. Delete the DNS record of your root domain
Now that your dynamic subdomain (DDNS) created at Duck DNS points to your current WAN IP address and that it will be automatically updated to take into account regular changes to your WAN IP address, you must delete the DNS records of type "A" and "AAAA" so that no IP address is associated with the root of your domain.
Warning : at OVH, when you do this, OVH automatically returns a special address pointing to a redirection server that belongs to them and that will automatically redirect your domain to your "www" subdomain.
Which is rather practical in our case, even if it may seem strange at first.
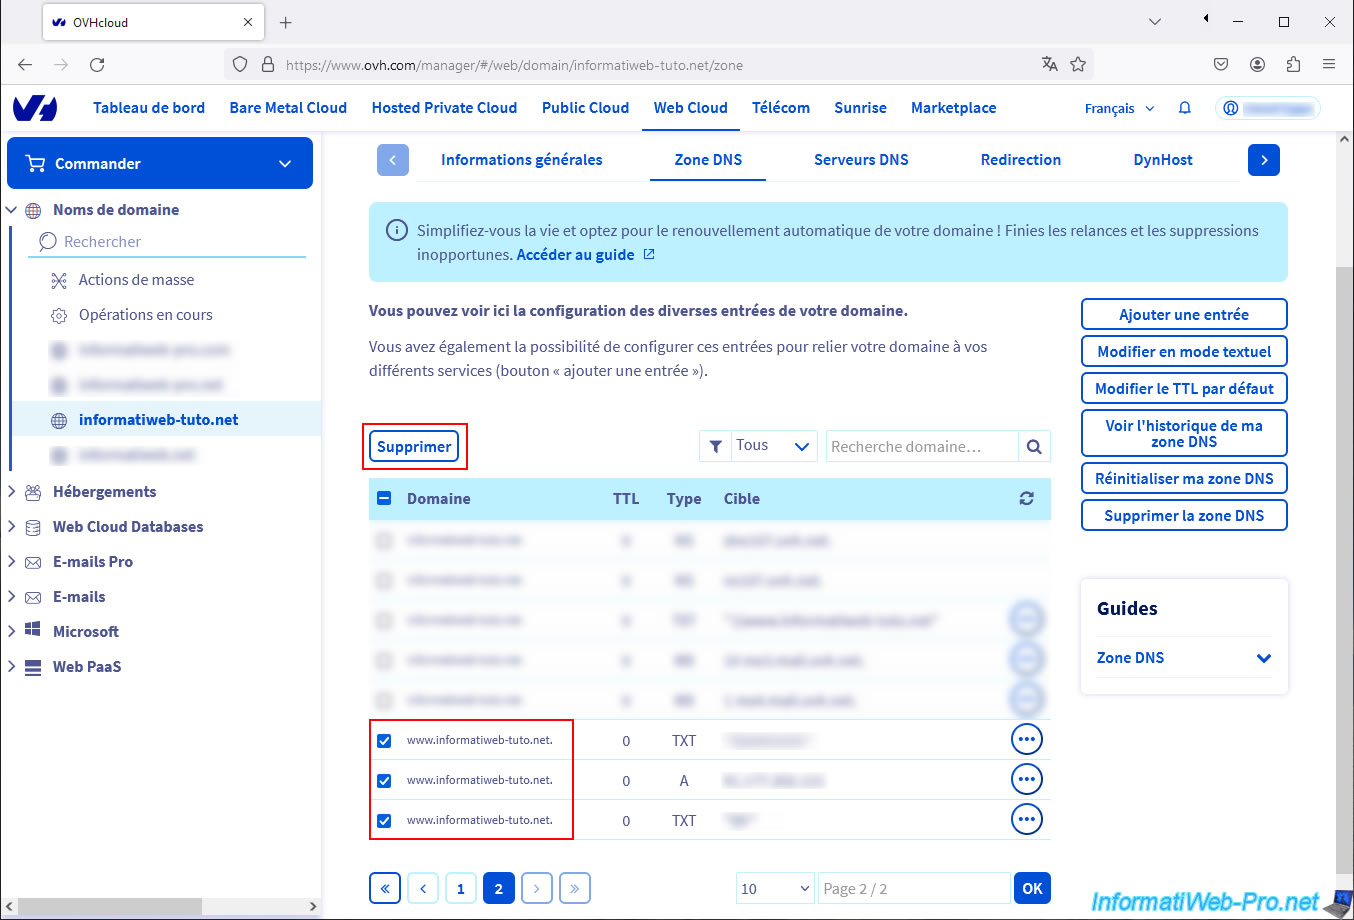
At OVH, go to the DNS zone of your domain and delete the records for "your-domain.com" whose type is "A" (IPv4) or "AAAA" (IPv6).
To do this, click on the "..." icon located to the right of the desired DNS records, then click on: Delete the entry.
Warning : do not delete other types of DNS records.
Indeed, you probably also have DNS records of type "NS" (which indicate which DNS servers contain the configuration of your domain), of type "MX" (for the functioning of e-mails with your domain), ...
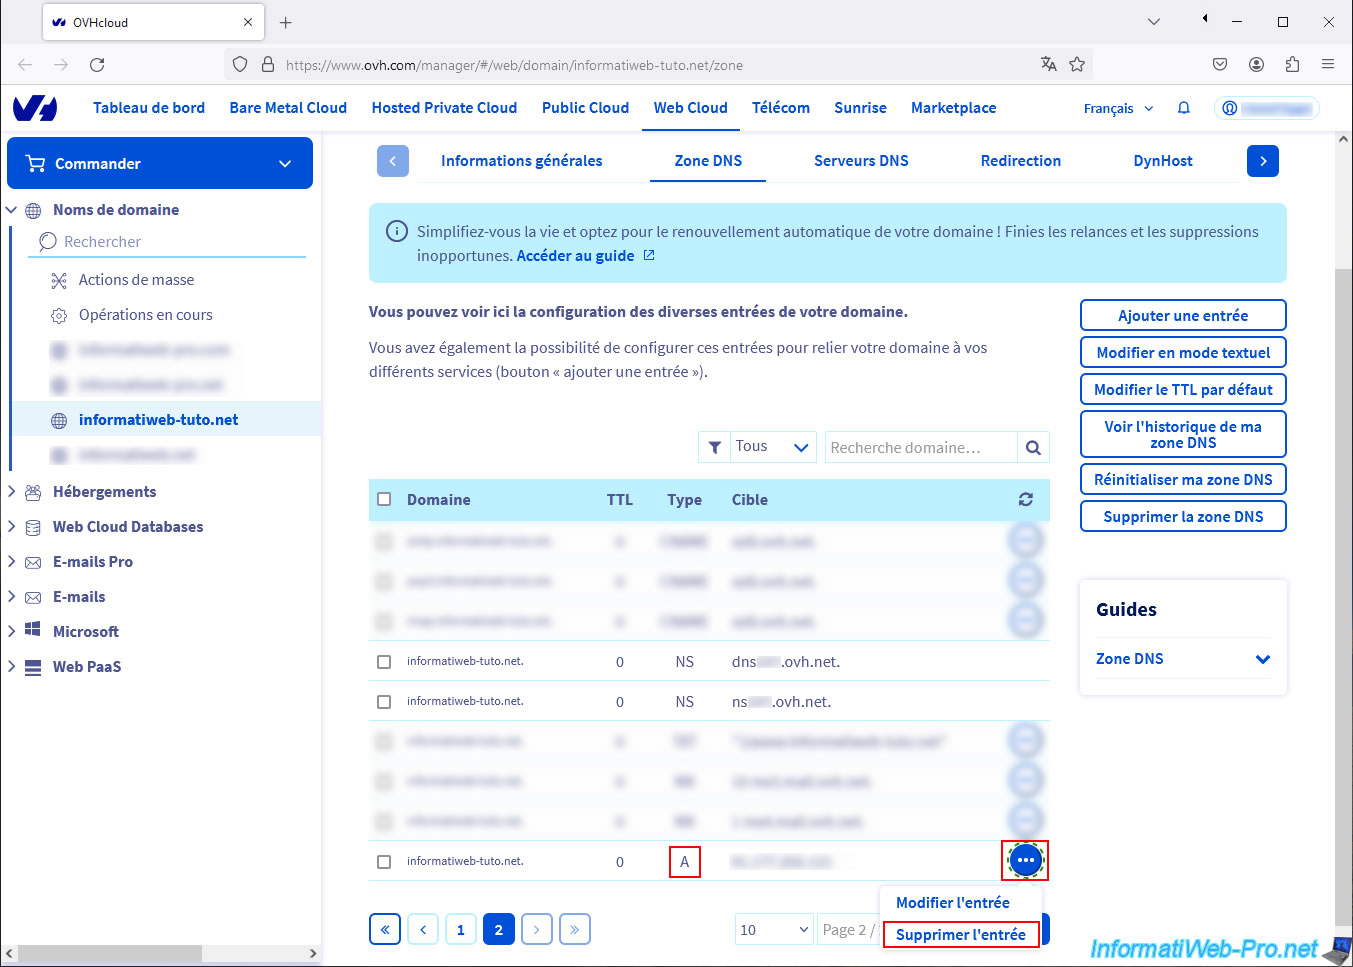
Confirm the deletion of the entry by clicking on "Validate".

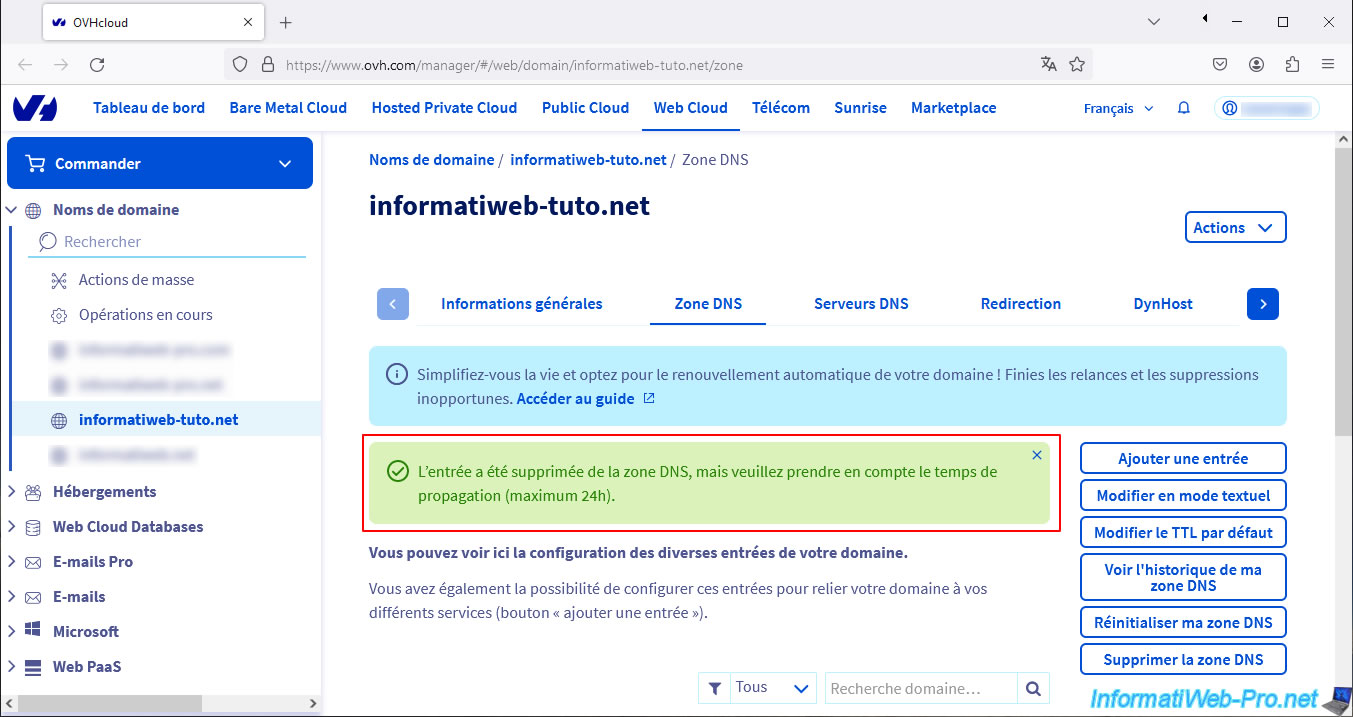
A message will tell you that deletion is immediate, but that propagation may take up to 24 hours.
Plain Text
The entry has been removed from the DNS zone, but please take into account the propagation time (maximum 24h).
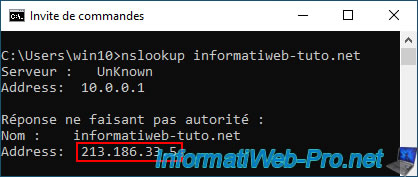
If you check the IP address associated with the root of your domain (which is supposed to point nowhere), you will notice that OVH returns an address "213.186.33.5" for your domain.
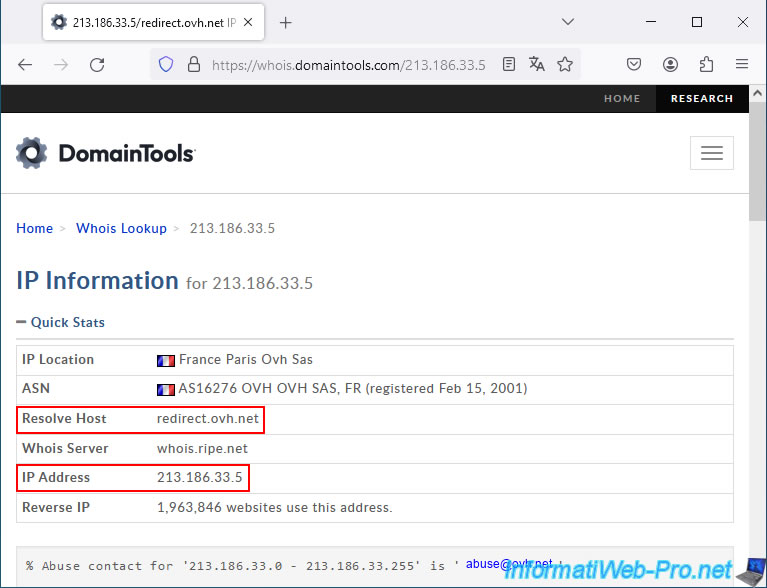
Using the "DomainTools" site, you can see that this IP address corresponds to the domain "redirect.ovh.net" (managed by OVH).
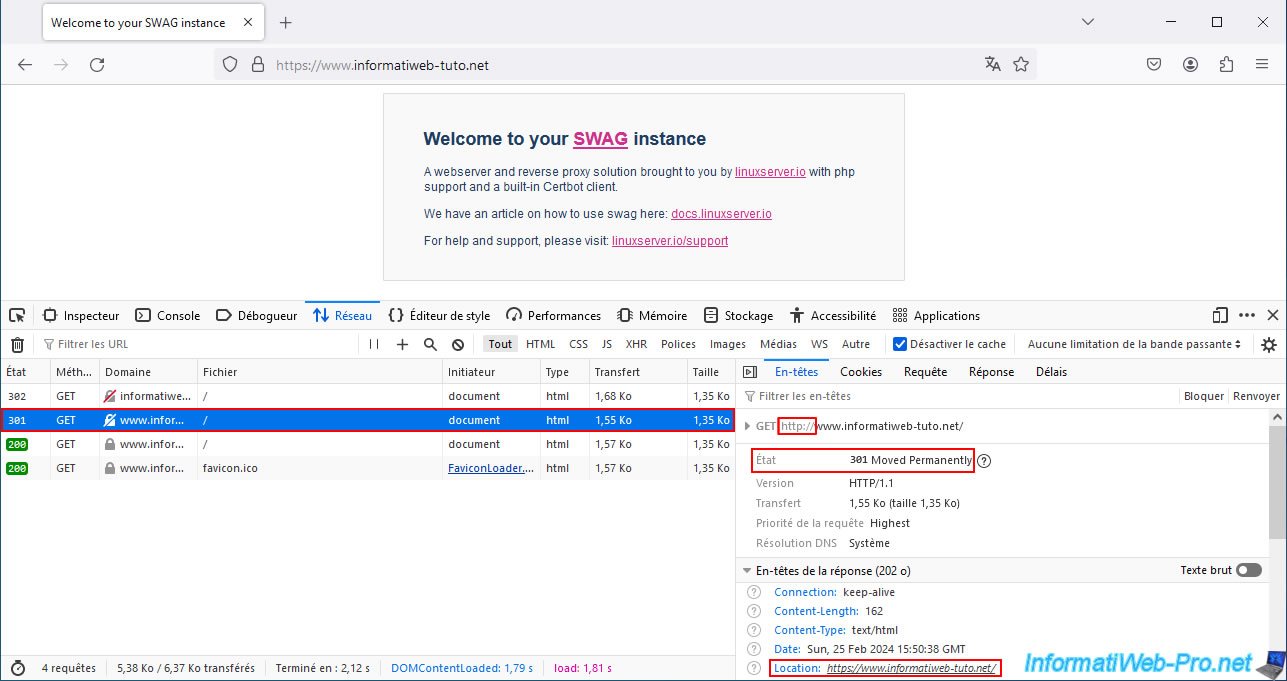
Using another computer with a VPN connection to be virtually outside our home, we can see that by accessing the root of our domain "informatiweb-tuto.net", our web browser receives a 301 response that redirects it to our subdomain "www" (with the HTTP protocol).
This 1st response is sent by the OVH server "redirect.ovh.net".
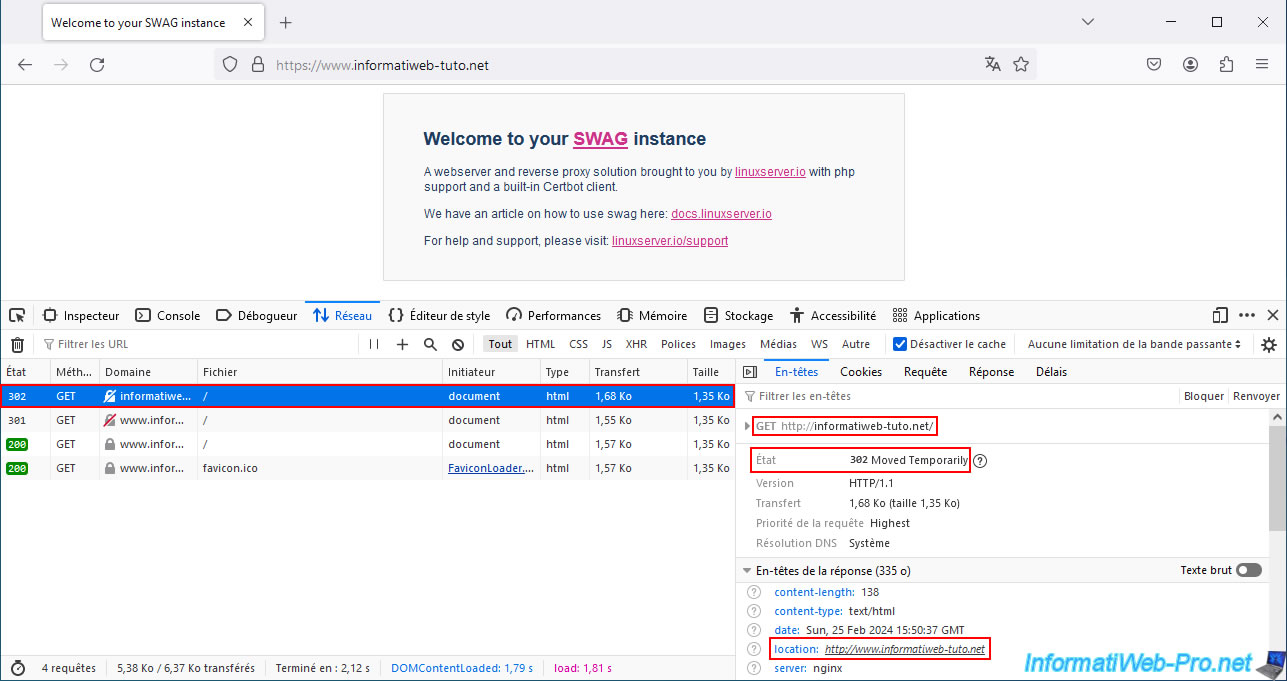
Then, the following request is sent to your reverse proxy (given that your "www" subdomain points to your WAN IP address) and it redirects you to the secure version (HTTPS) of this "www" subdomain.
This 2nd response is therefore sent by your "swag" reverse proxy.
You must therefore be outside your home to receive it.
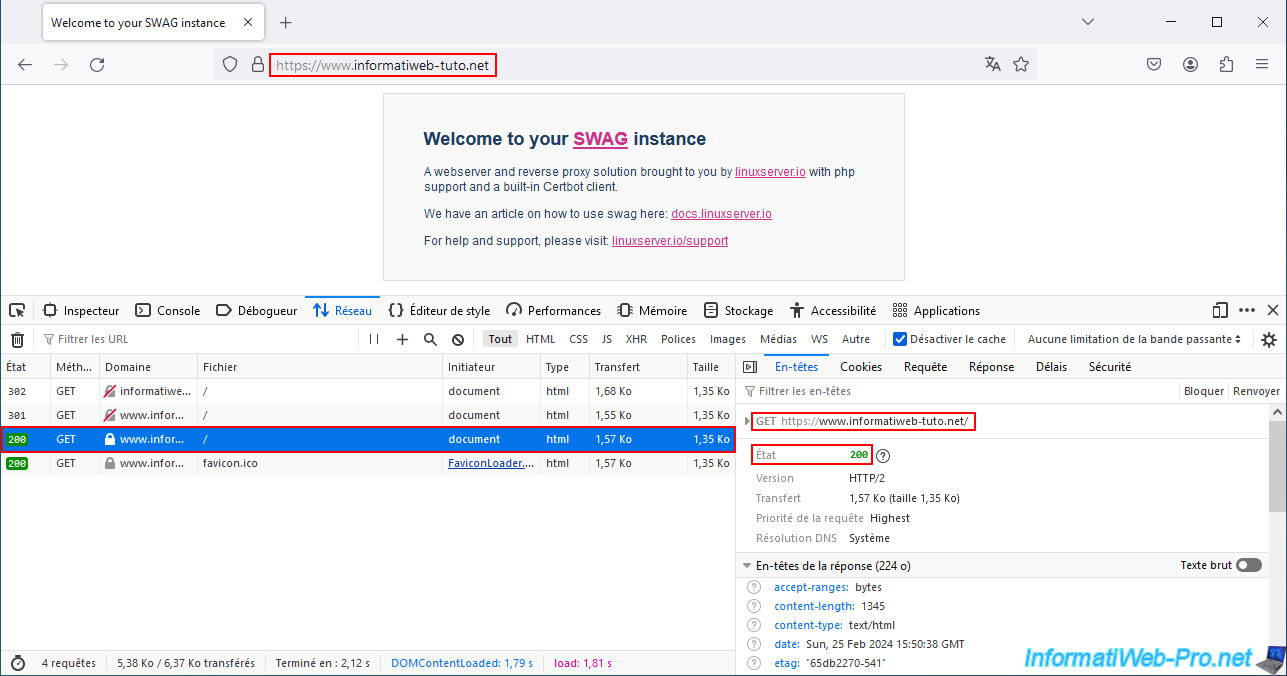
Finally, the default SWAG page appears for the "www" subdomain when you access it in HTTPS.
Hence the "200" status (which is the standard HTTP code when a page exists).
Note that there is a DNS record of type "TXT" for the root of our domain, whose value refers to our subdomain "www".
We don't know if this is necessary for OVH's automatic redirection to work, but just in case, here is its value.

7. Point your www subdomain at OVH to your dynamic domain name created at Duck DNS
In your domain's DNS zone, delete all records whose domain is "www.your-domain.com".
Indeed, as explained previously, a CNAME record must be unique for a subdomain. You are therefore obliged to delete the existing DNS records for your "www" subdomain, before creating your "CNAME" type DNS record for this same subdomain (www).
Confirm the deletion of these DNS records by clicking on: Validate.
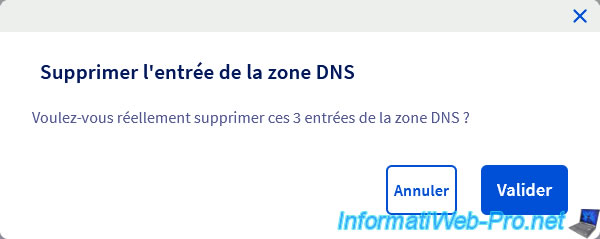
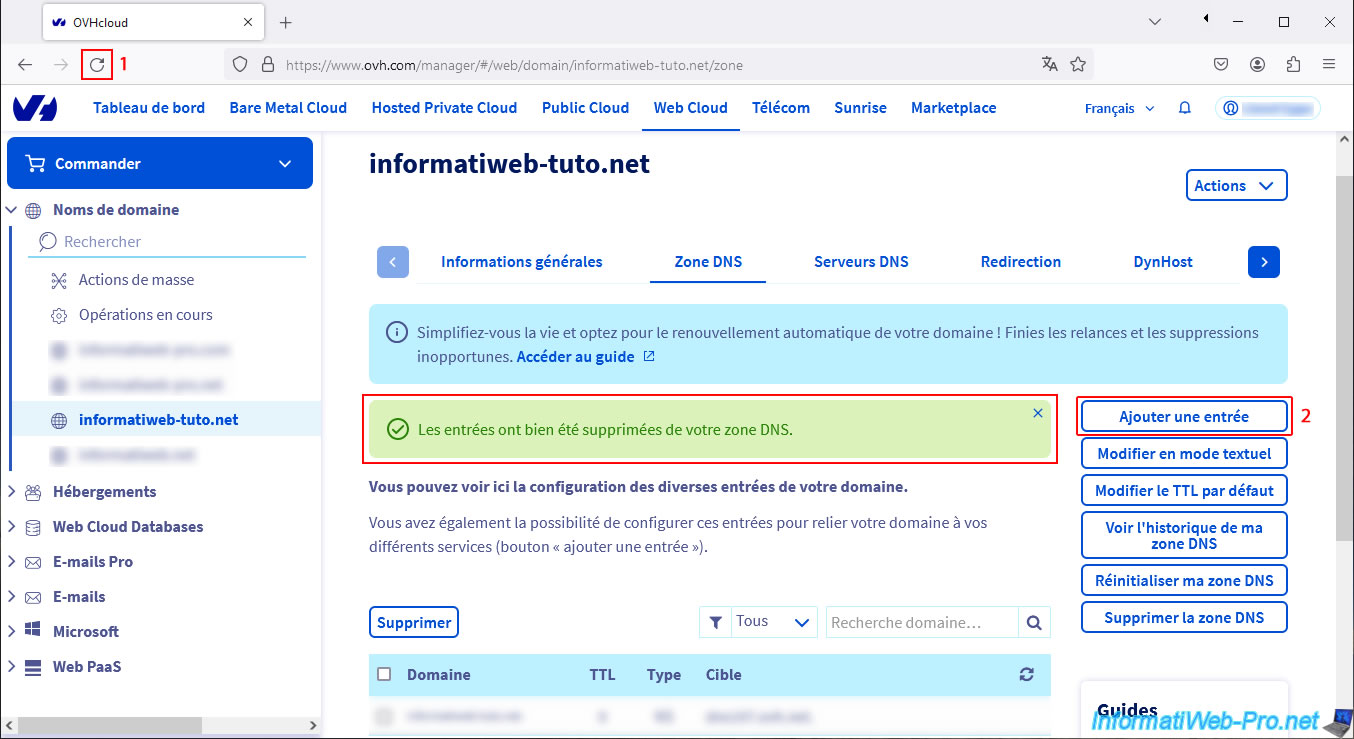
A message appears indicating that the entries have been deleted from your DNS zone.
Warning : there seems to be a slight delay between the moment you delete DNS records on your domain at OVH and the moment they are actually deleted on the DNS servers of this host.
Therefore, we advise you to wait 2 minutes before trying to create your CNAME DNS record.
Otherwise, you may see an error concerning a conflict with the records you have just created and which supposedly still exist.
Refresh the page, then click on: Add an entry.
Choose type: CNAME.
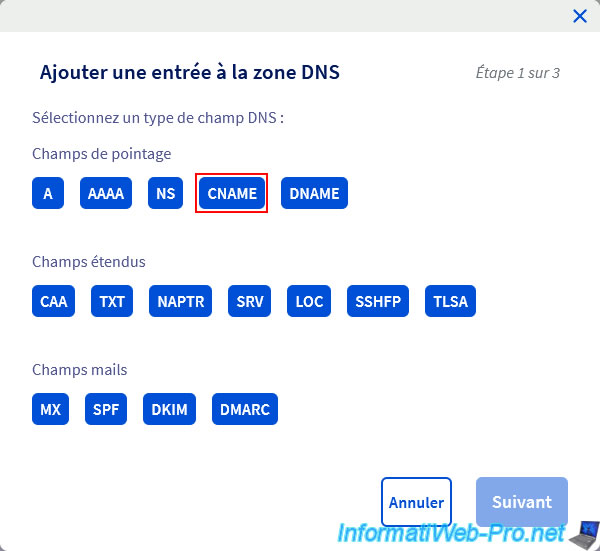
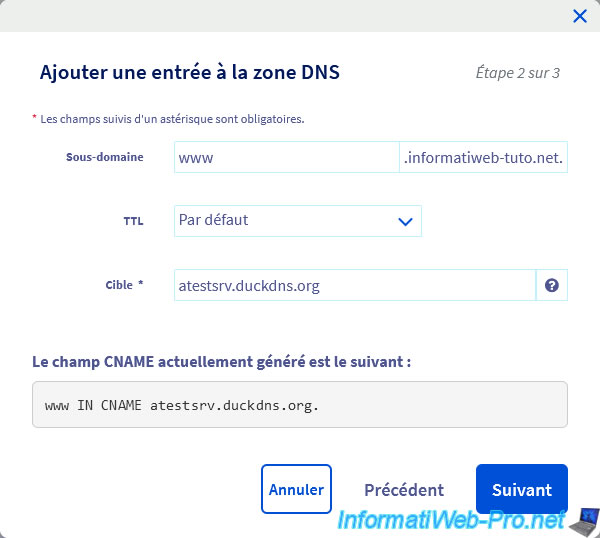
Specify :
- Subdomain: www.
- Target: [your subdomain created at Duck DNS].
In our case: atestsrv.duckdns.org.
Then, click on: Next.
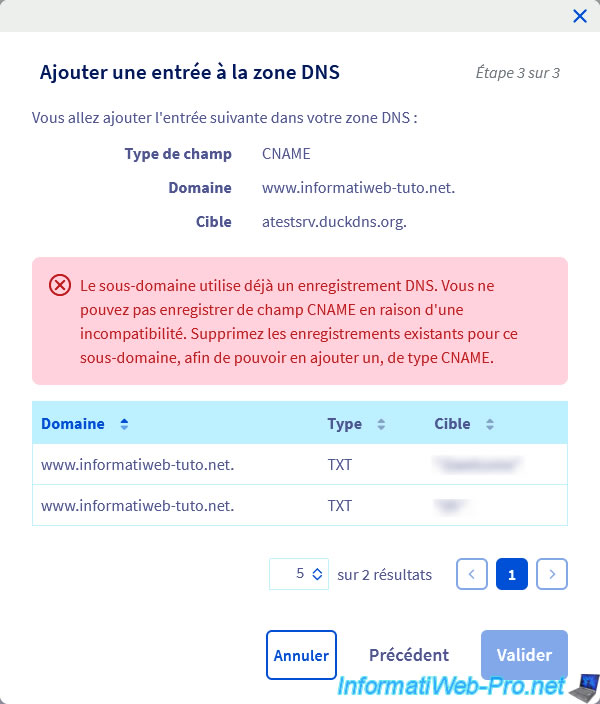
If you create your CNAME DNS record too early, you may see the error below.
Plain Text
The subdomain already uses a DNS record. You cannot register a CNAME field...
In this case, wait 2 minutes, refresh the page and try adding this CNAME record again.
If you wait a bit and then refresh the page, you will see that it works.
Plain Text
Field type : CNAME.
Domain : www.[your domain].
Target : xxxxx.duckdns.org.
Click on: Validate.
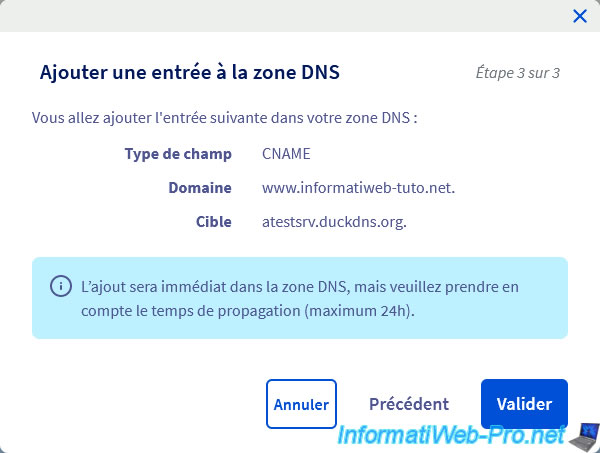
A message appears telling you that the entry has been added, but that DNS propagation may take up to 24 hours.

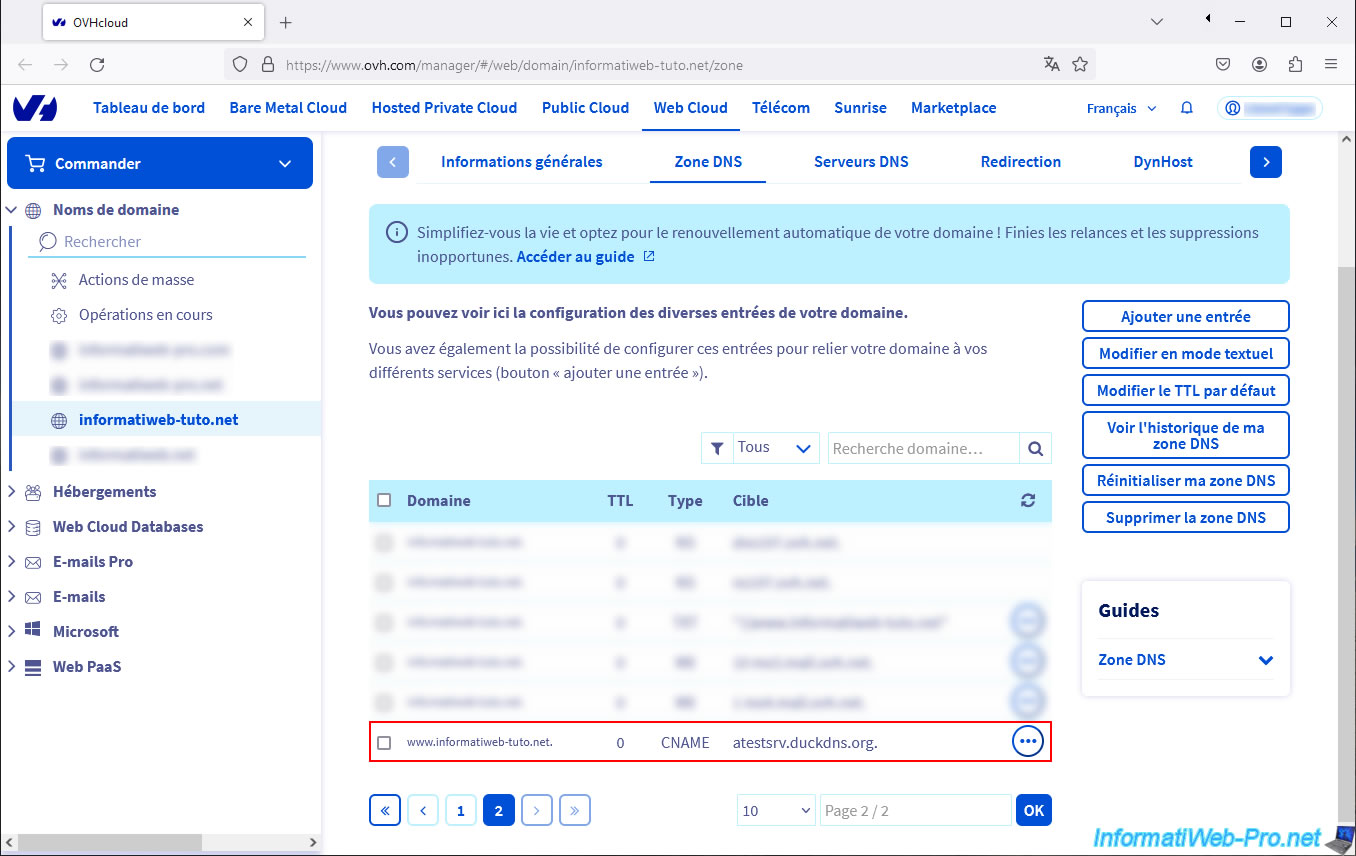
As expected, our "CNAME" record for our "www" subdomain points to our subdomain created at Duck DNS.
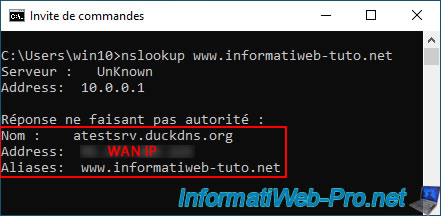
Open a command prompt and type the command below to get the IP address associated with your "www" subdomain.
Batch
nslookup www.informatiweb-tuto.net
As you can see, this command tells you that your subdomain "www" is an alias of your subdomain created at Duck DNS.
Plain Text
Name: atestsrv.duckdns.org
Address: [your WAN IP]
Aliases: www.informatiweb-tuto.net
Share this tutorial
To see also
-

NAS 1/30/2026
Unraid 6.9.2 - Create shares (network / user)
-

NAS 7/8/2026
Unraid 6.9.2 - Docker - Install a password manager (Vaultwarden)
-

NAS 2/25/2026
Unraid 6.9.2 - Install the "Community Applications" (CA) plugin
-

NAS 1/28/2026
Unraid 6.9.2 - Replace the parity disk
No comment