Use a DDNS client (Duck DNS) on Unraid 6.9.2 with SWAG for external access with a dynamic IP
- NAS
- Unraid
- 27 May 2026 at 07:59 UTC
-

- 2/2

3. Install SWAG using free Duck DNS subdomains
Before installing SWAG, follow steps 1 to 4 of our tutorial: Unraid 6.9.2 - SWAG - Install a reverse proxy (SWAG).
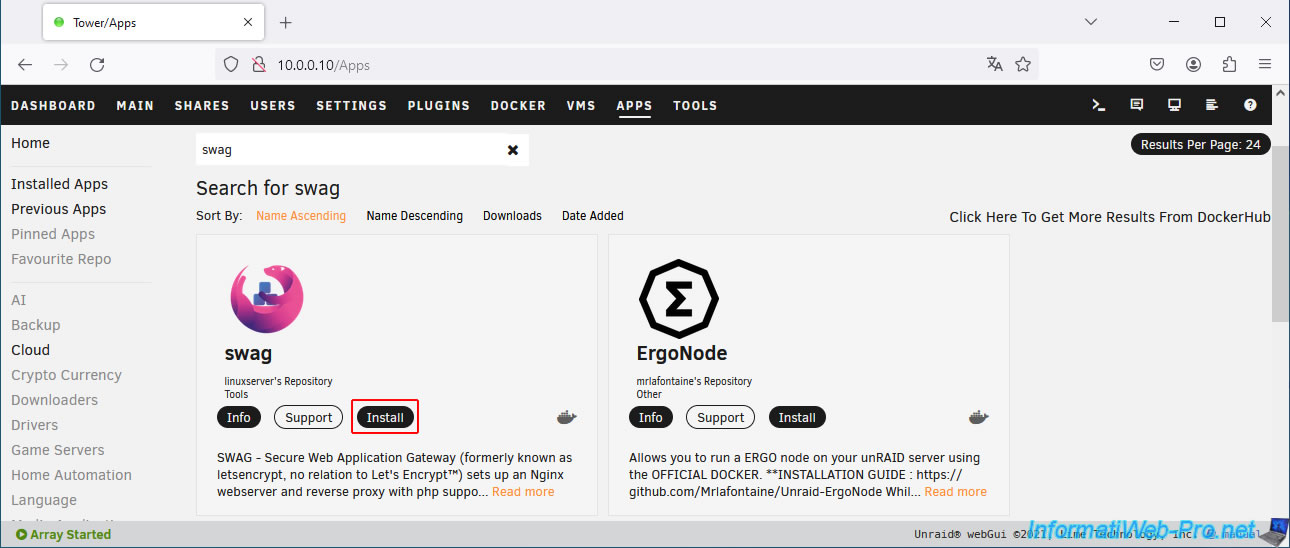
Next, go to the "Apps" tab of your Unraid server and search for "swag".
Install the application of the same name (present in the "linuxserver" repository).
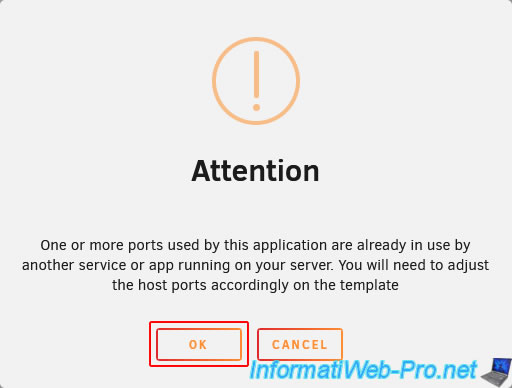
Ignore the warning that appears by clicking OK.
This is due to the fact that "swag" uses by default ports 80 and 443 for its web server (working as a reverse proxy) and which correspond to the same ports as those used by the web interface of your Unraid server.
However, you will use other ports for swag to avoid this problem.
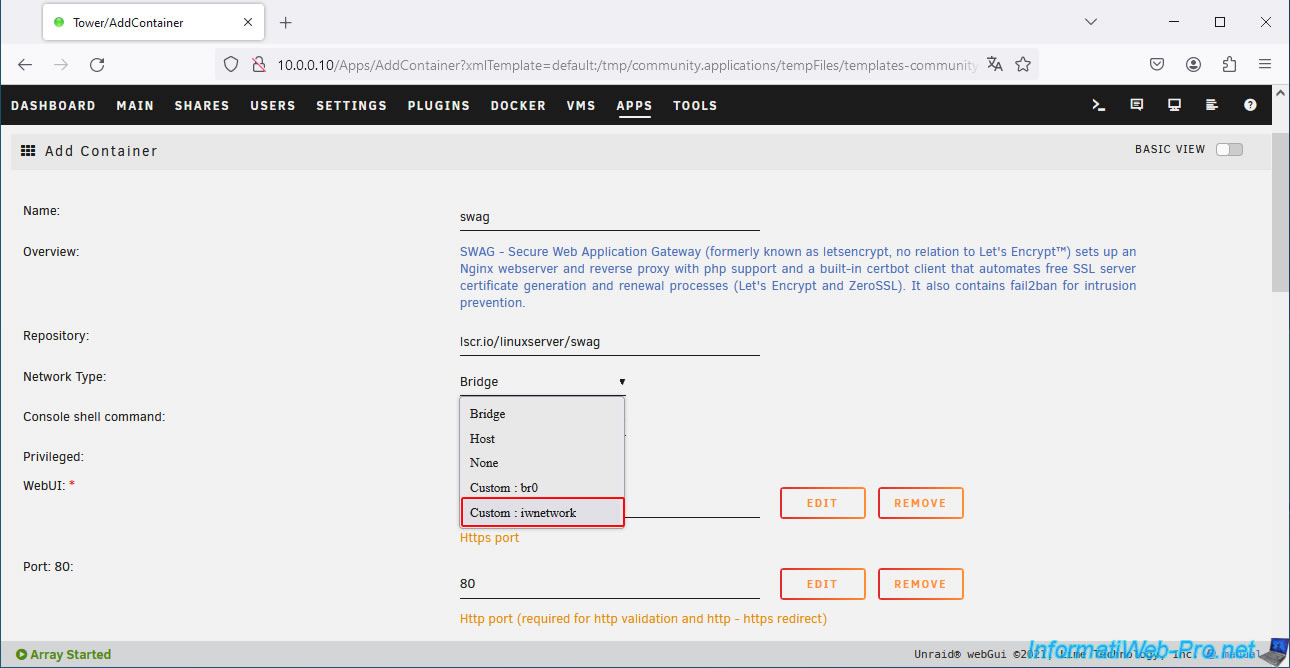
On the "Add Container" page that appears, select your personalized Docker network (Custom) created previously (via the tutorial cited above).
In our case, "swag" will use the custom network "iwnetwork".
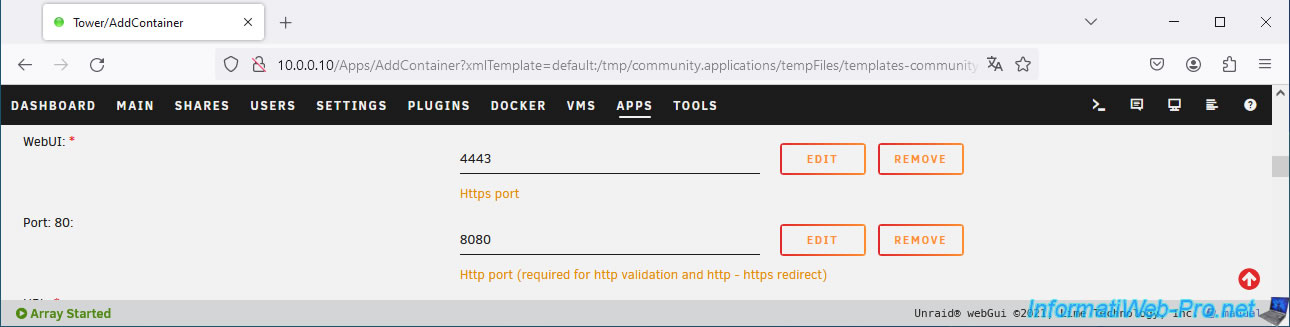
For ports used by "swag", indicate:
- WebUI : 4443 (for HTTPS).
- Port 80 : 8080 (for HTTP).
Next, configure these fields:
- URL: duckdns.org. Which corresponds to the root domain of the dynamic domain name provider (DDNS) used in this case.
- VALIDATION: http. Because you do not have access to the configuration of the domain name "duckdns.org" (since it does not belong to you).
- SUBDOMAINS: atestsrv,atestsrvjellyfin,atestsrvnextcloud. The list of subdomains previously created at Duck DNS and that you wish to use with "swag" to access the different services hosted on your Unraid server.
Provide only your subdomains and NOT the suffix "duckdns.org".
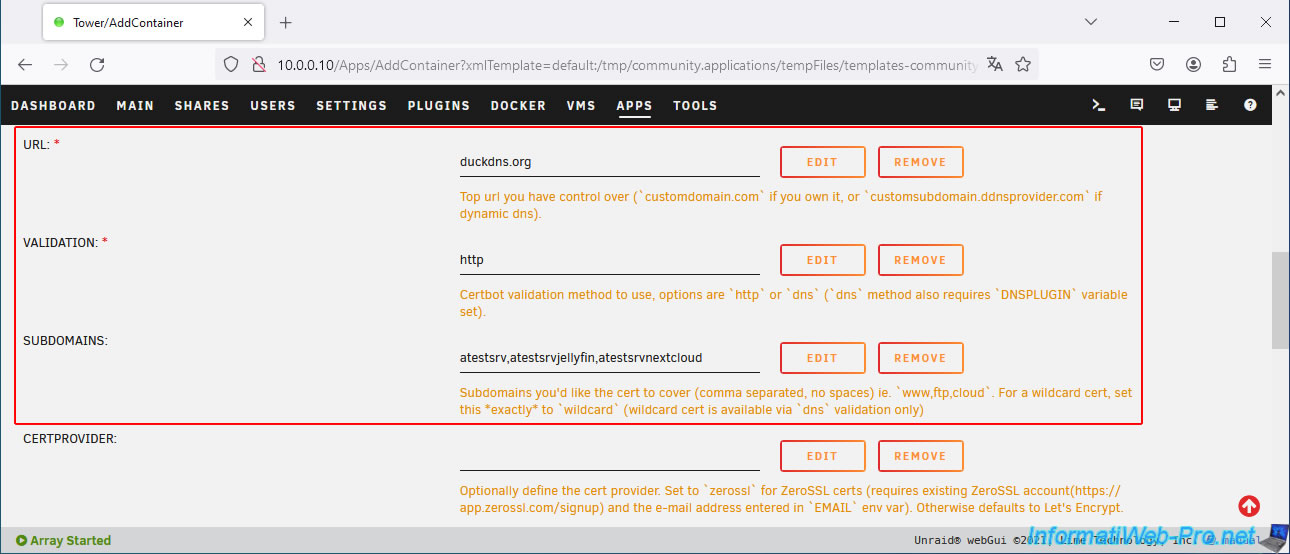
Also configure these fields:
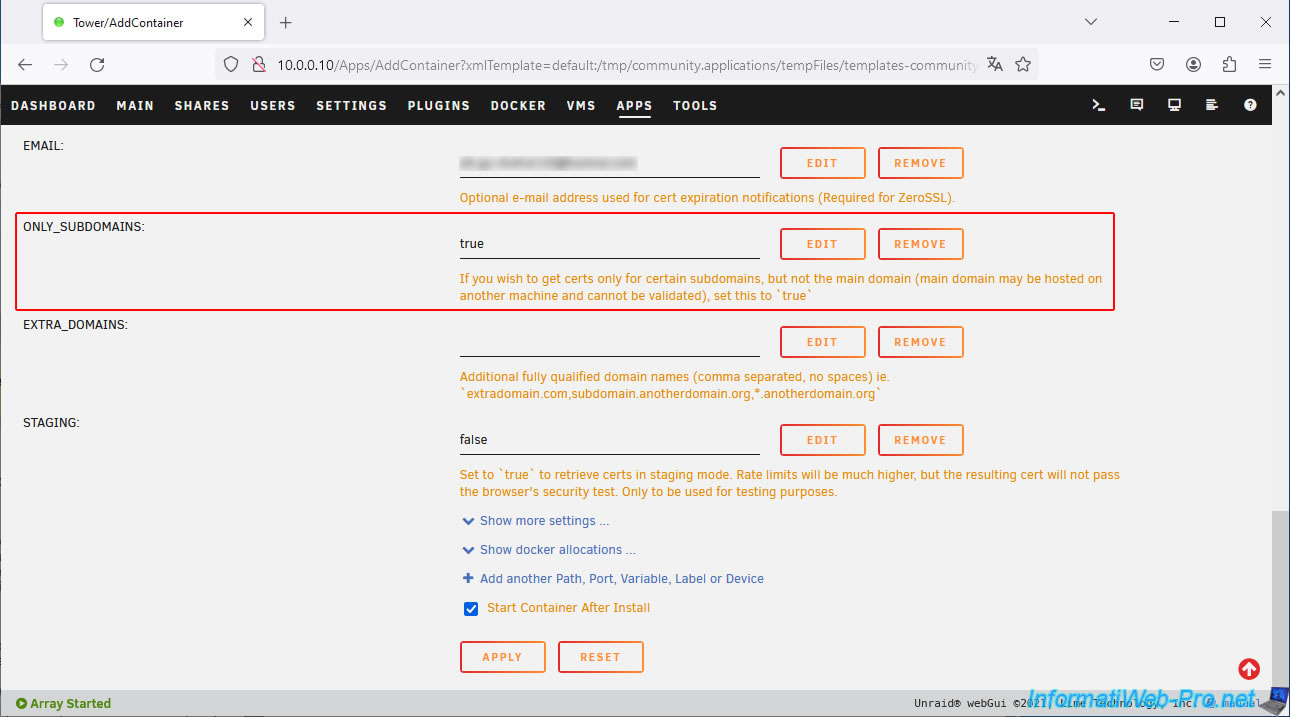
- EMAIL: your email address (optional).
This allows you to be automatically notified by email before the expiration of your SSL certificate which will be generated automatically and free of charge by "swag" via the "Let's Encrypt" certification authority. - ONLY_SUBDOMAINS: true. You must specify "true" to specify that you do not own the root domain name ("duckdns.org" in this case), but only the specified subdomains (created through your Duck DNS account).
To finish, click on the "Apply" button at the bottom of the page.
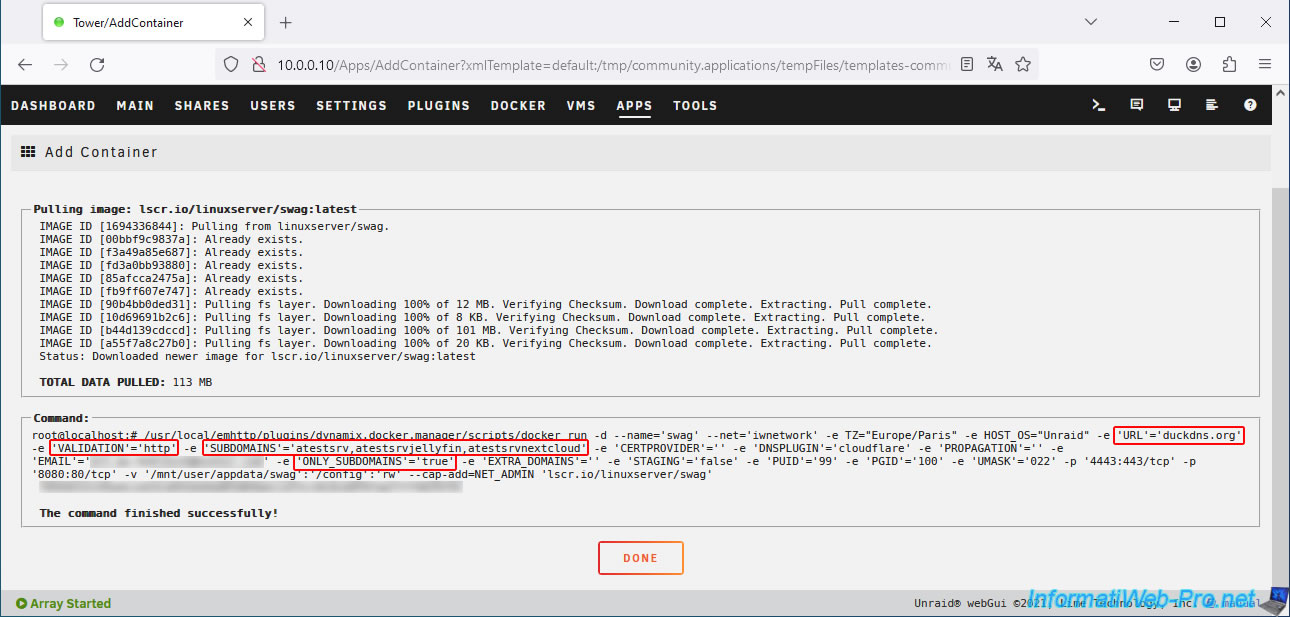
Wait while "swag" downloads, installs and configures.
Then, click on the button: Done.
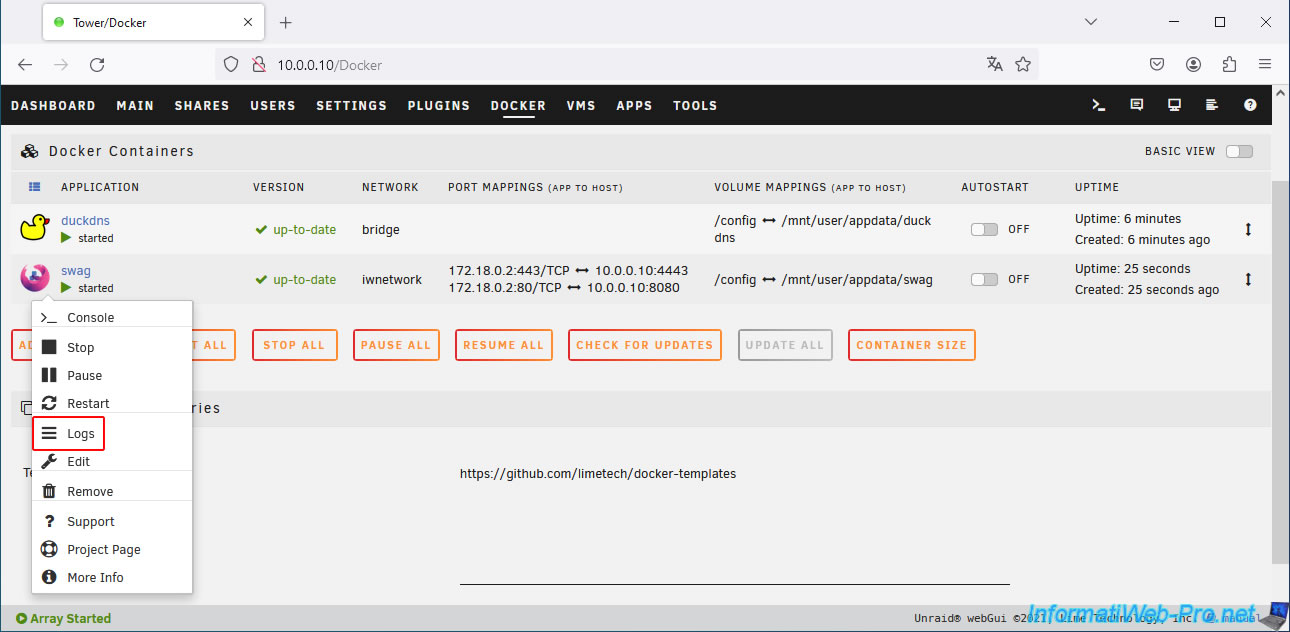
Once the installation of "swag" is complete, go to the "Docker" tab, click on the "swag" icon, then click on: Logs.
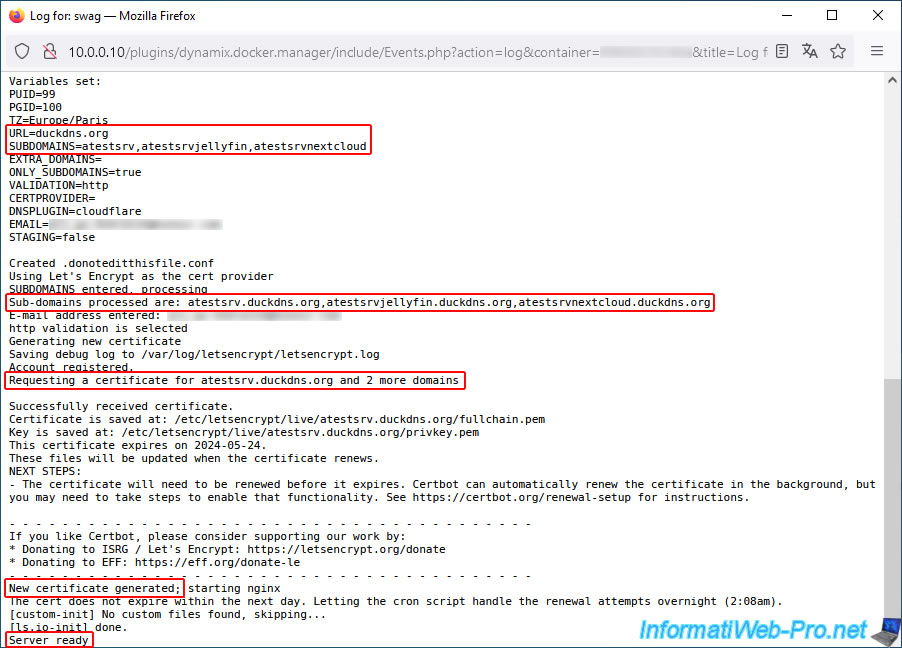
As you can see, a new certificate has been generated for your subdomains created at Duck DNS and entered in the configuration of this "swag" container.
Plain Text
Log for: swag.
...
URL=duckdns.org
SUBDOMAINS=atestsrv,atestsrvjellyfin,atestsrvnextcloud
...
Sub-domains processed are:atestsrv.duckdns.org,atestsrvjellyfin.duckdns.org,atestsrvnextcloud.duckdns.org
...
Requesting a certificate for atestsrv.duckdns.org and 2 more domains
...
New certificate generated...
...
Server ready
In case of error, refer to our tutorial: Unraid 6.9.2 - SWAG - Install a reverse proxy (SWAG).
Next, make sure that all your subdomains created at Duck DNS referenced in the "swag" configuration are also present in the "duckdns" client configuration installed on your Unraid server.
Indeed, if one of your subdomains created at Duck DNS does not point to the WAN IP address used by the Internet connection of your Unraid server, the "http" type validation used here will fail.
The new certificate can't therefore be generated for this new subdomain created at Duck DNS.
4. Test access from outside to your reverse proxy using Opera VPN
As explained several times in our tutorials for "swag", accessing your (external) WAN IP address from your own local network is impossible.
The "loopback" is blocked by most routers and you must therefore try to access it from outside (using a 3G connection on a smartphone or the free Opera web browser by activating its VPN, also free).
If your configuration is correct, you will see the default "SWAG" page appear by typing one of your domain names created with Duck DNS.
Plain Text
Welcome to your SWAG instance.
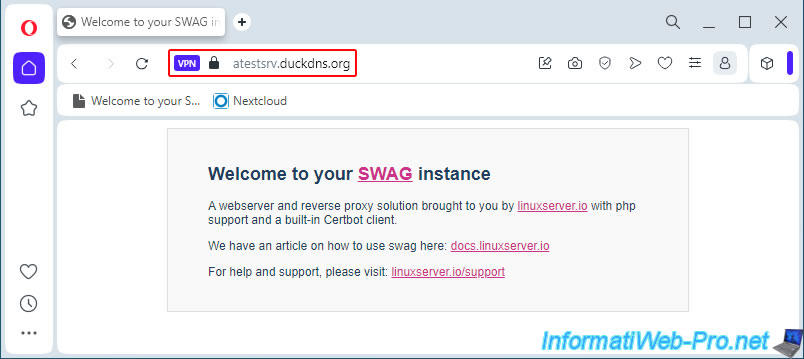
If you click on the small padlock in the address bar, you will see that the connection is secure.
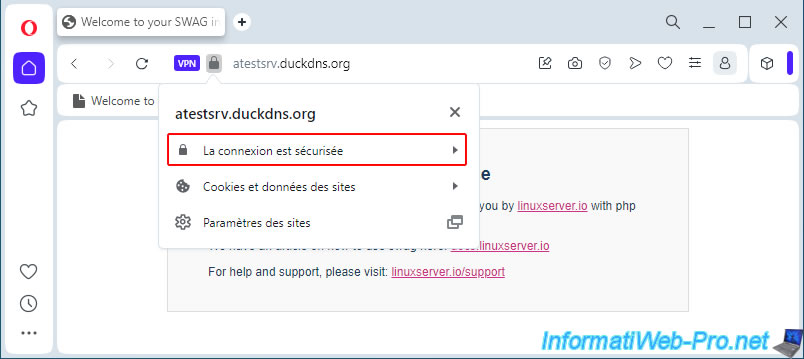
You will see that this certificate is valid (since it comes from a certification authority recognized by all current computers and smartphones).
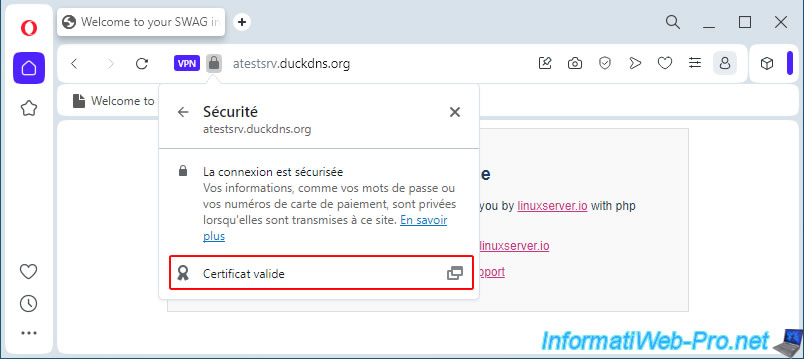
If you click on "Valid certificate", you will see that it is valid for the 1st Duck DNS subdomain indicated in the "swag" configuration and that this certificate was issued by "Let's Encrypt".
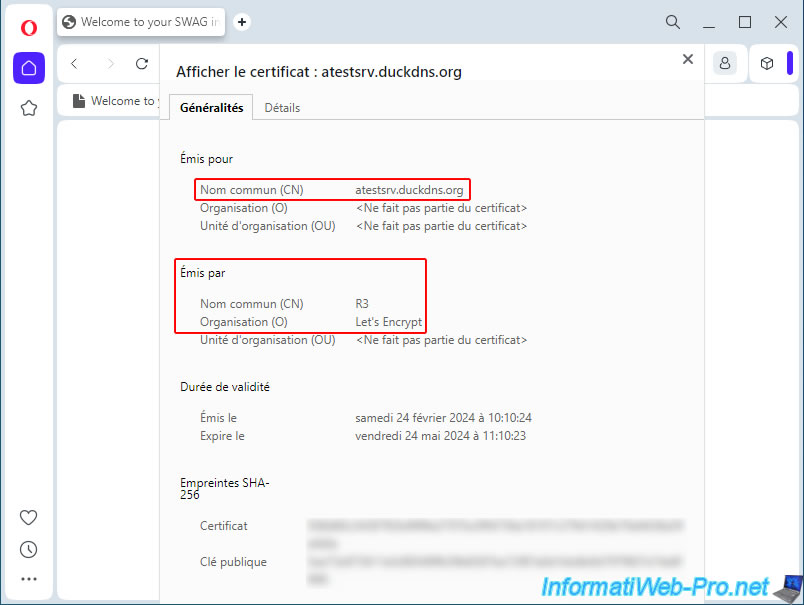
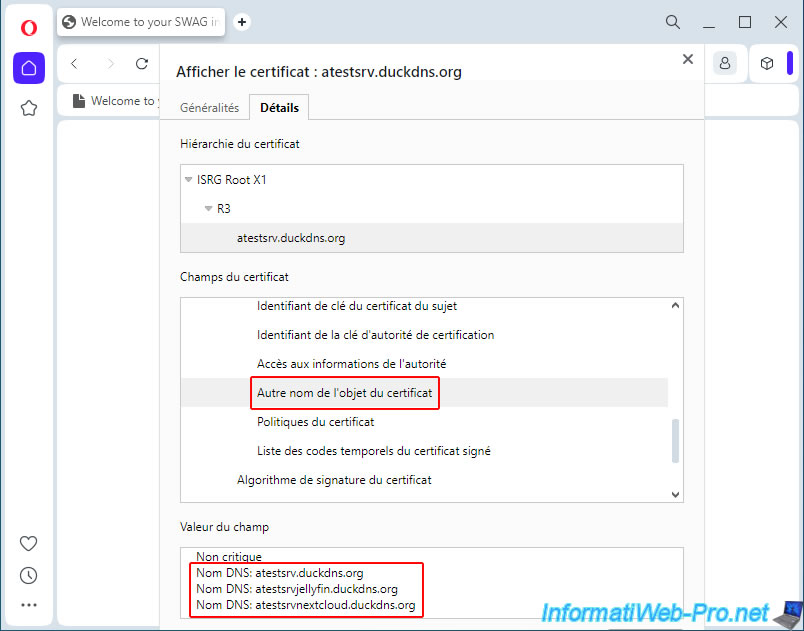
If you go to the "Details" tab of this certificate, you will be able to see your other Duck DNS subdomains for which this SSL certificate is also valid.
To do this, in the "Certificate fields" section, go to "Certificate -> Extensions -> Certificate subject alternative name".
5. Add the configuration for Jellyfin on the reverse proxy (swag)
For one of your services to be accessible remotely via your reverse proxy, at least the corresponding configuration file must be created in the "swag" container.
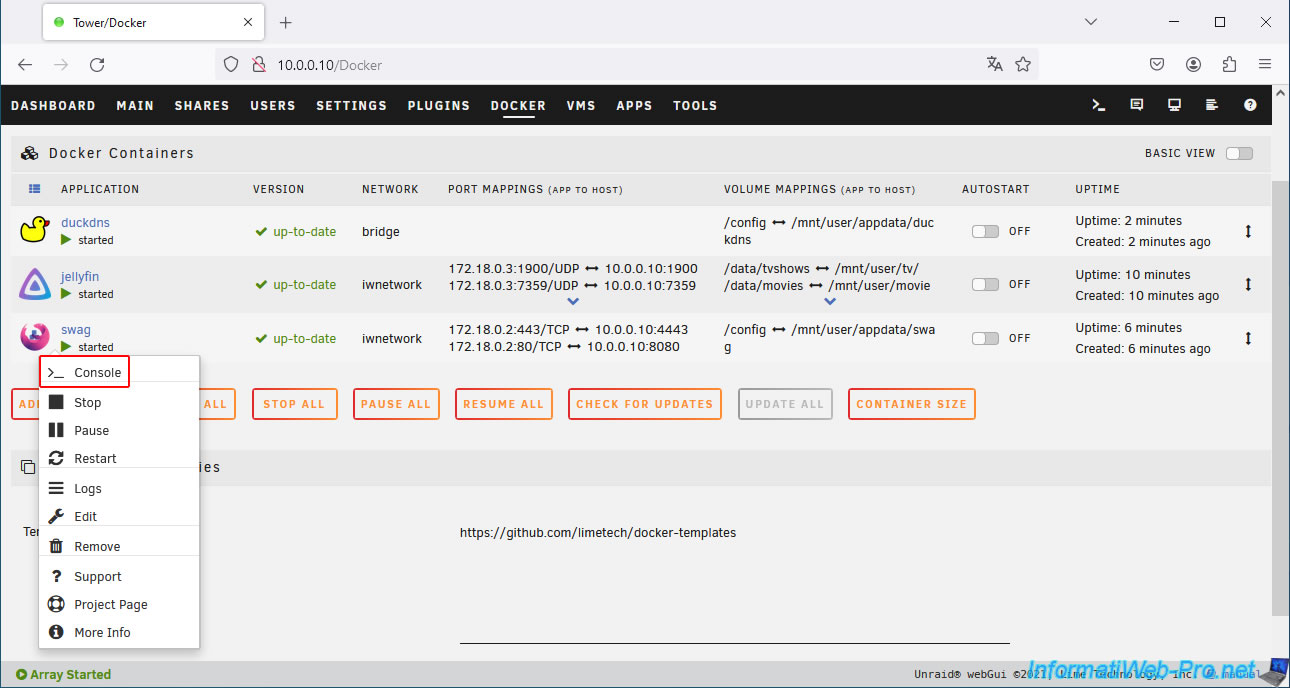
To do this, click on the "swag" icon, then on: Console.
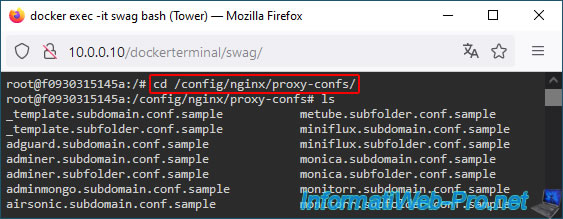
Go to the "/config/nginx/proxy-confs" folder.
Bash
cd /config/nginx/proxy-confs/
ls
Create the "jellyfin.subdomain.conf" file (in the case of "Jellyfin") based on the pre-configured template for this service.
Bash
cp jellyfin.subdomain.conf.sample jellyfin.subdomain.conf
nano jellyfin.subdomain.conf
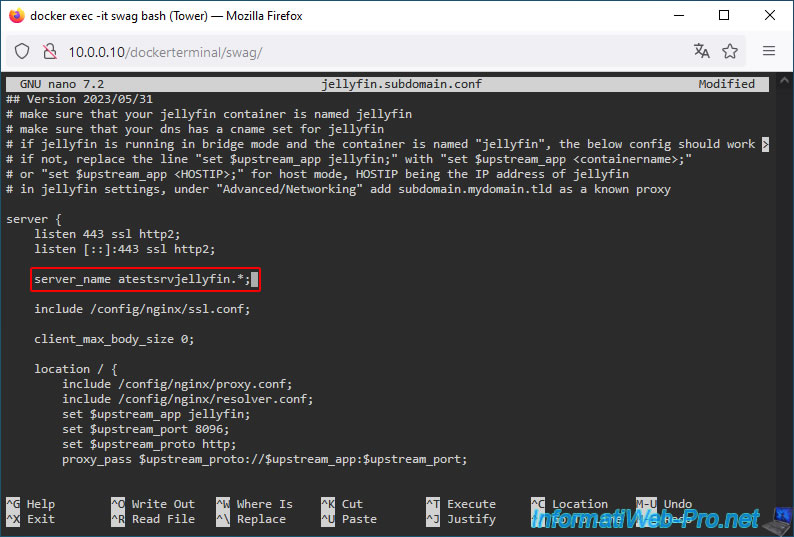
When you use subdomains created at Duck DNS, you will need to adapt the value indicated in the "server_name" line each time.
Indeed, by default, "swag" expects you to create a subdomain with the name of the service (for example "jellyfin" in the case of "jellyfin.your-domain.com").
However, with Duck DNS, you are obliged to add something unique in front so as not to use the same subdomain as another Internet user.
In our case, we therefore modified the default line:
Plain Text
server_name jellyfin.*;
In this:
Plain Text
server_name atestsrvjellyfin.*;
Once the file has been edited, press "CTRL+O" to save, then "Enter" to confirm.
Then, press "CTRL+X" to exit the "nano" text editor.
Warning : this is not enough for Jellyfin to work correctly with "swag", as you can see in the comment at the top of this configuration file.
The goal here is simply to let you know that this additional instruction you will need to modify for each service if you prefer to use free subdomains "xxxxx.duckdns.org" rather than a real paid domain where you can create your own subdomains (e.g. jellyfin.your-domain.com, nextcloud.your-domain.com, ...).
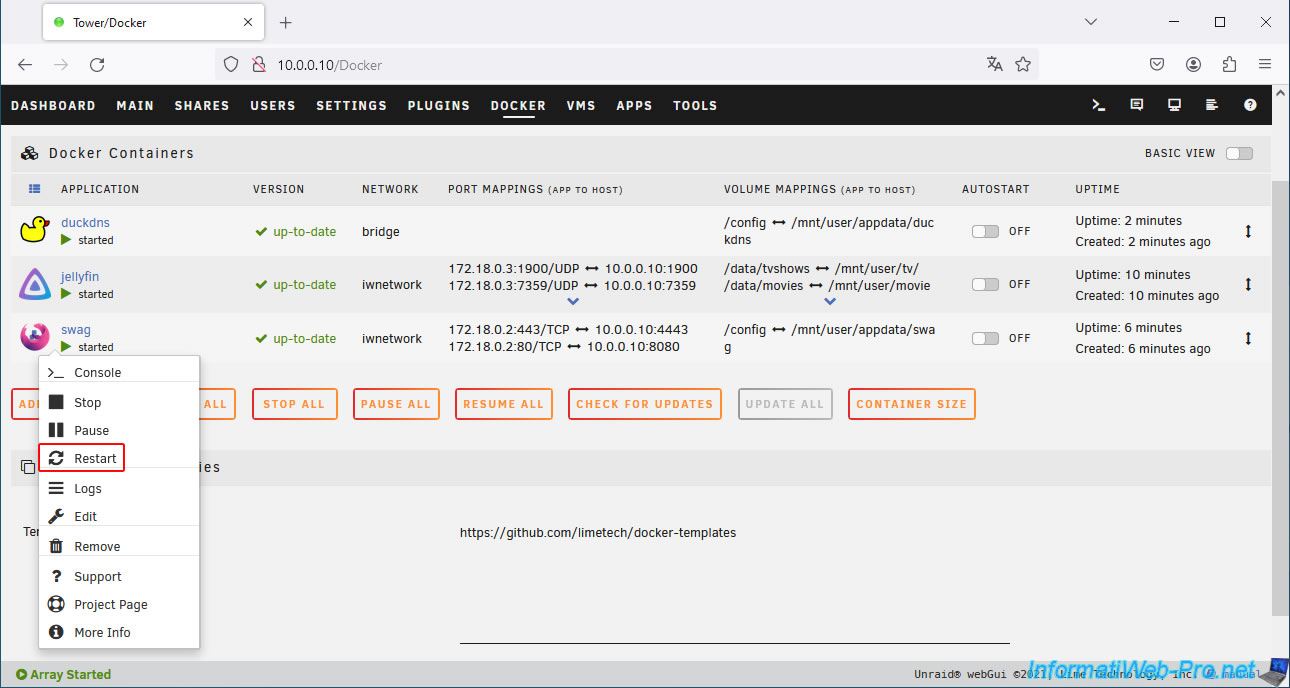
Now, restart "swag" so that this new configuration file is loaded by the reverse proxy.
Share this tutorial
To see also
-

NAS 1/8/2026
Unraid 6.9.2 - Add a storage disk
-
NAS 7/8/2026
Unraid 6.9.2 - Docker - Install a password manager (Vaultwarden)
-
NAS 7/22/2026
Unraid 6.9.2 - VMs - Backing up a VM manually
-
NAS 10/14/2026
Unraid 6.9.2 - VMs - Virtualize Hyper-V (nested virtualization)
No comment