- NAS
- Unraid
- 08 January 2026 at 08:47 UTC
-


If you store a lot of large files or are running out of space on your Unraid server, you can easily add a new disk to it.
Important : the disk you want to add must have a capacity (size) equivalent to or smaller than the capacity of the disk used for parity.
Otherwise, you will need to replace the disk used for parity with a disk having an equivalent or higher capacity than the new disk you want to add to the array.
1. Shutdown Unraid server
To add a disk into your server, you will probably need to shut down your computer/server (unless you can hot plug disks in your case).
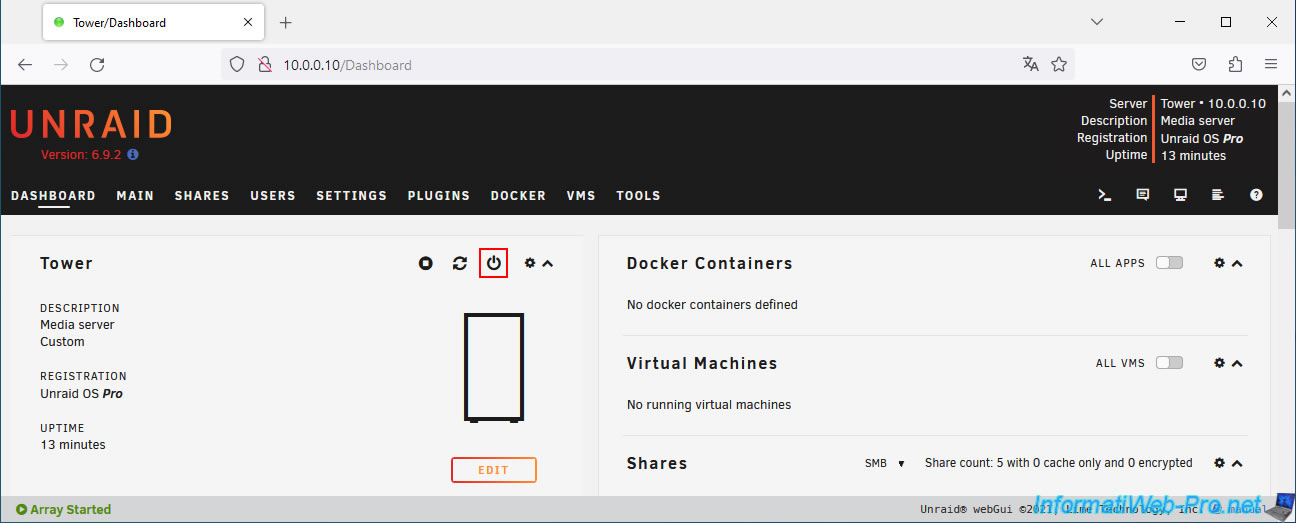
To do this, go to the "Dashboard" tab and click on the power icon (framed in red in the image below).
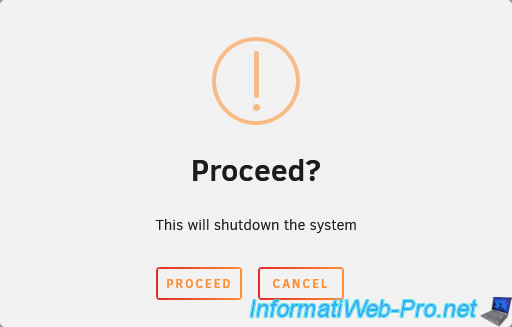
Confirm the shutdown of the Unraid server.
2. Stop the array
If you have enabled auto-start for the array, it will start automatically when Unraid starts.
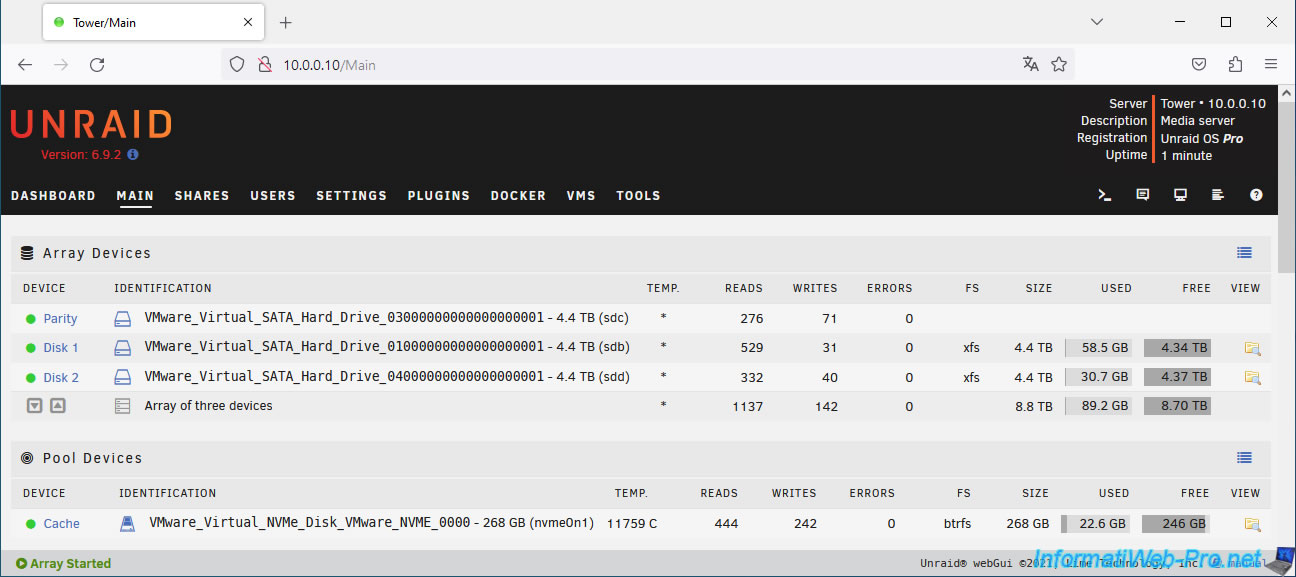
As you can see at the bottom of the screen: Array Started.
To stop it, go to the "Main" tab.
Then, in the "Array Operation" section at the bottom of the page, click "Stop".
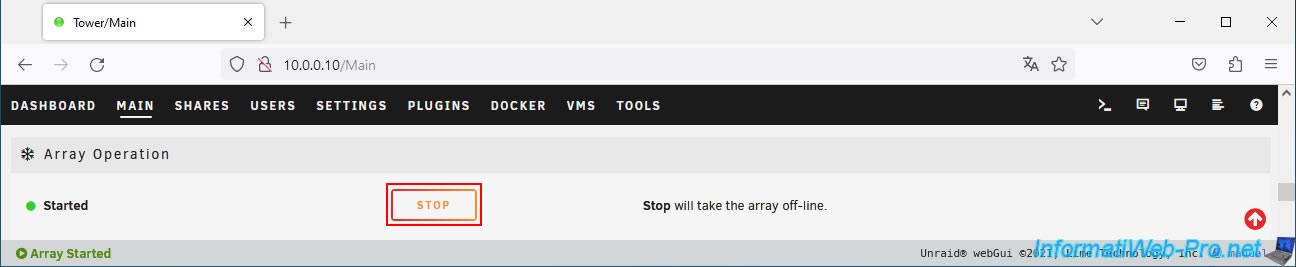
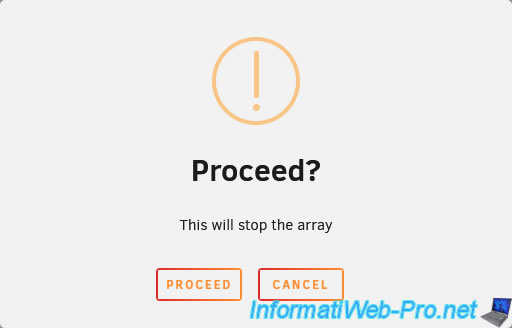
Confirm the shutdown of the array.
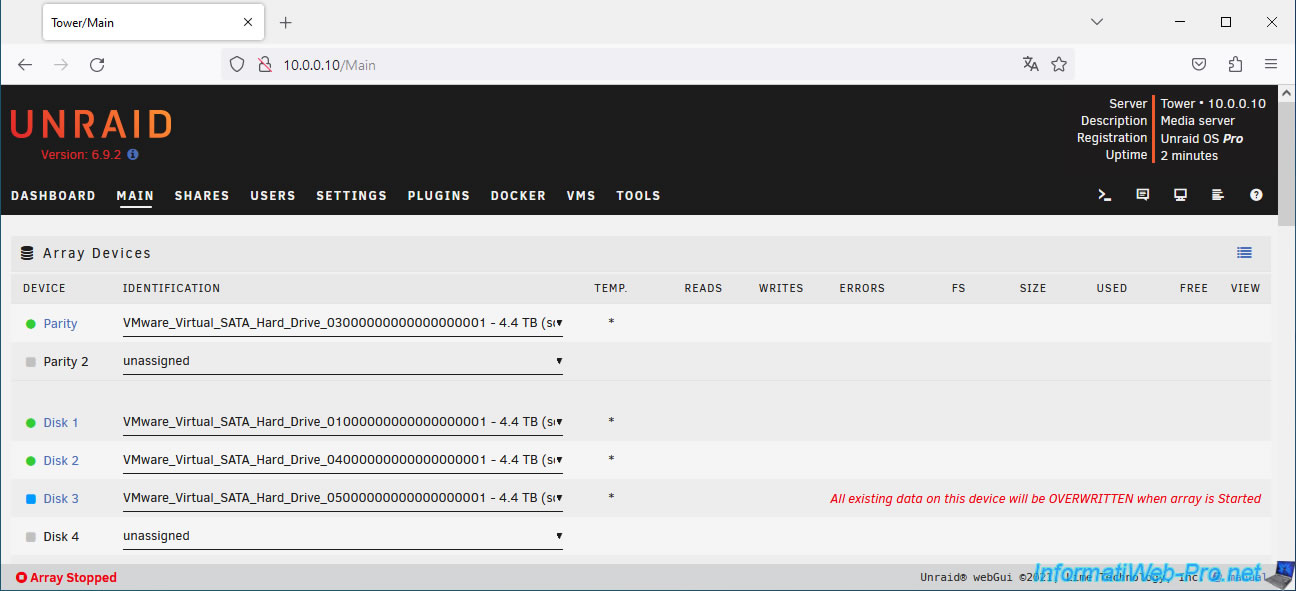
3. Clearing the new array disk
Now that the array is stopped, you can manage your disks in the "Main" tab.
Select your new disk as Disk X (in our case: Disk 3).

Once your new disk is selected, a blue icon will appear to the left of it and Unraid will warn you that its contents will be erased.
Plain Text
All existing data on this device will be OVERWRITTEN when array is Started.
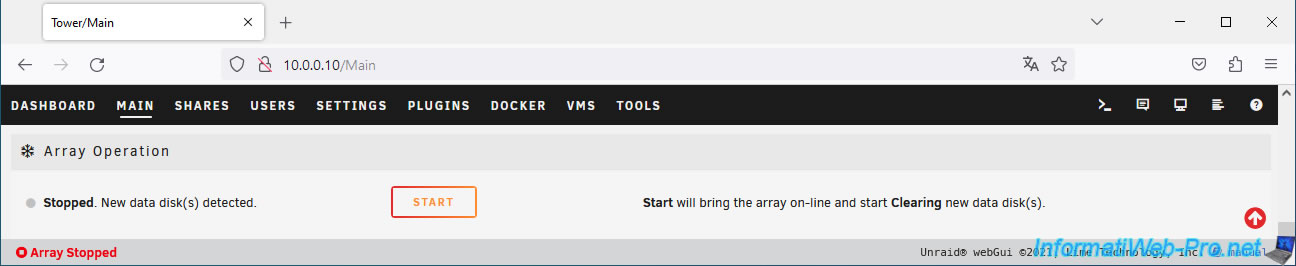
At the bottom of the page, Unraid will tell you that a new data disk has been detected.
Plain Text
New data disk(s) detected.
Start the array to start clearing the new disk added to the array.
Plain Text
Start will bring the array on-line and start Clearing new data disk(s).
While clearing the new data disk (from the array), you will see that its icon is blue and you will see the progress status at the bottom of the page: Clearing 0.3%.
![]()
You will also see a notification appear regarding the erasure of the new disk.
Plain Text
Unraid Disk clear.
Notice [TOWER] - Disk clear started.
Size: 4.40 TB.
![]()
Once the new disk is finished erasing, you will see a green notification appear with this message:
Plain Text
Unraid Disk clear.
Notice [TOWER] - Disk clear finished (0 errors).
Duration: 35 minutes, ... Average speed: 2.1 GB/s.
![]()
4. Format the new array disk
To store data on the new disk added to your array, you must format that disk to create a file system on it.
Indeed, at the moment, this disk is not available for data storage. Hence the appearance of the "Unmountable" status.

At the bottom of the page, you will see that an unmountable disk is present.
The name of this disk corresponds to the disk that you have just added to your array and which has just been erased.
To be safe, you will first need to check the "Yes, I want to do this" box (located to the right of the "Format" button).
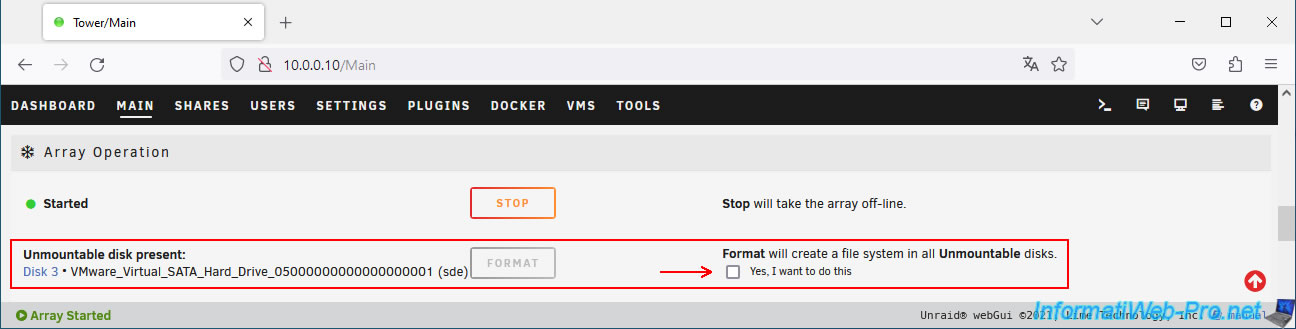
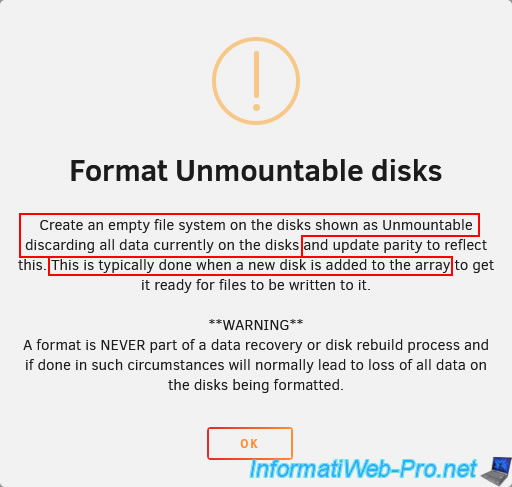
A warning will appear to tell you that:
- Formatting an unmountable disk creates an empty file system on the affected disk.
- Formatting deletes any data currently present on that disk.
However, the disk is already blank since Unraid just erased it. - Formatting an unmountable disk is usually done when you add a disk to the array (which you are currently doing).
Click OK to ignore this message.
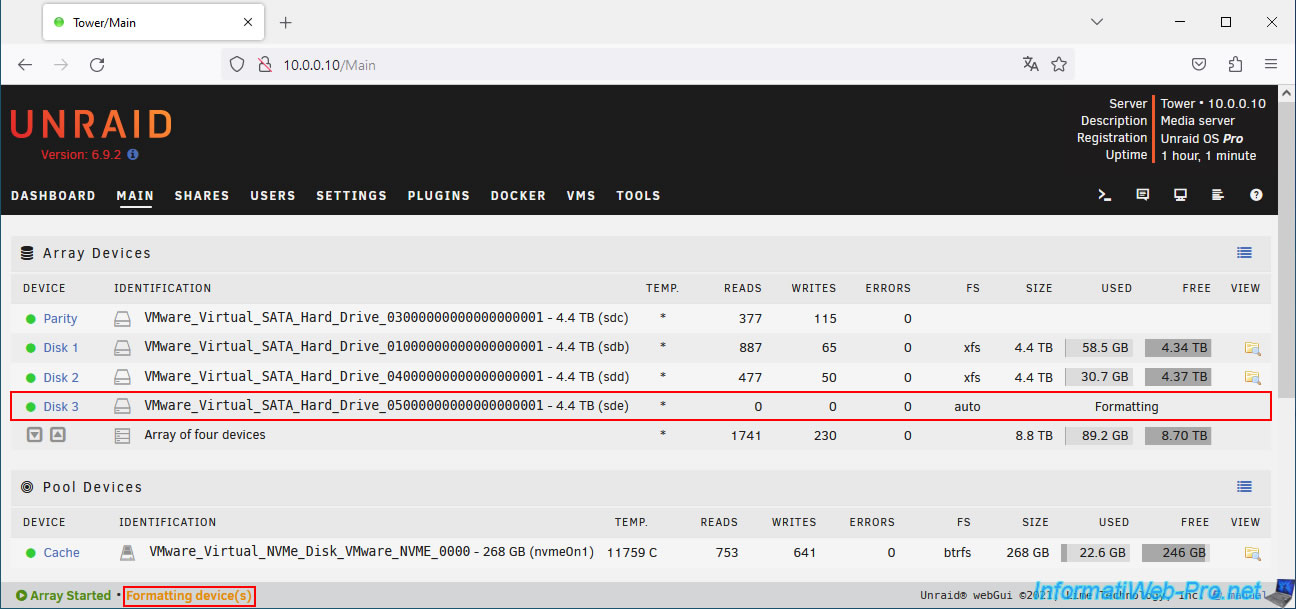
Now, click on the "Format" button.

Wait while your new disk is formatted.
While formatting, you will see the "Formatting" status for the affected disk and you will also see the message "Formatting device(s)" appear at the bottom of the screen.
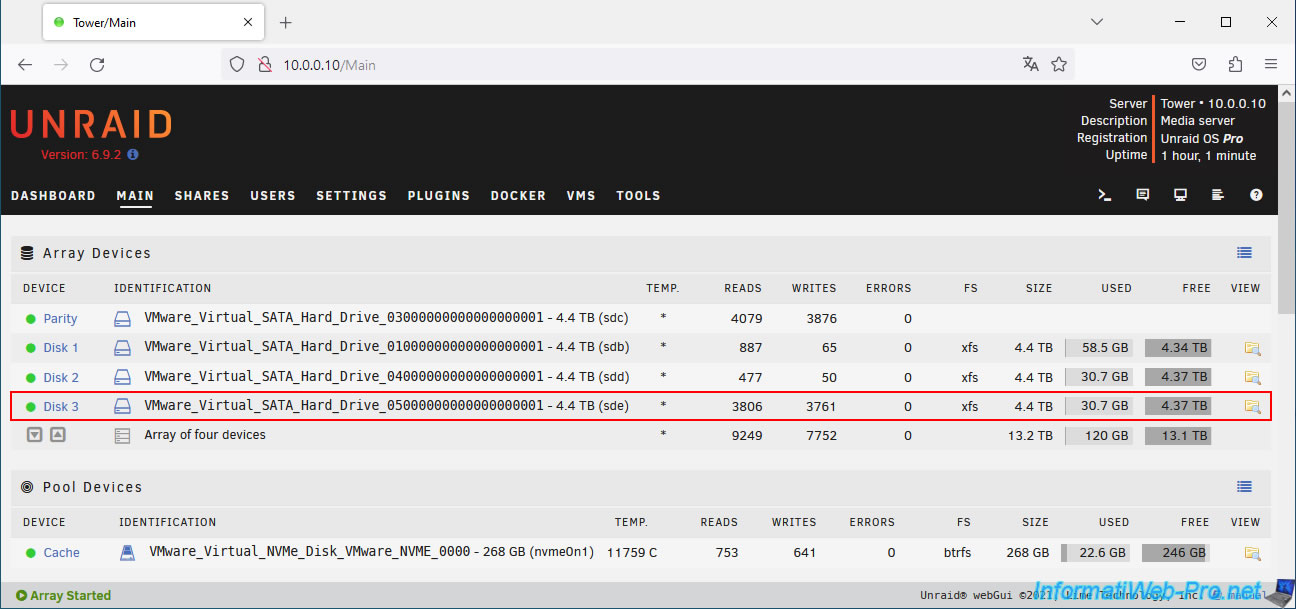
Once formatting is complete, the file system, capacity, used space, and available space will appear for your new drive.
Share this tutorial
To see also
-
NAS 1/15/2026
Unraid 6.9.2 - Change the parity disk
-

NAS 4/8/2026
Unraid 6.9.2 - Docker - Install a media server (Jellyfin)
-

NAS 7/8/2026
Unraid 6.9.2 - Docker - Install a password manager (Vaultwarden)
-
NAS 5/20/2026
Unraid 6.9.2 - SWAG - Locally access the reverse proxy (SWAG) via NAT reflection
You must be logged in to post a comment