Install and configure your NAS server with Unraid 6.9.2
- NAS
- Unraid
- 21 November 2025 at 13:38 UTC
-

- 4/5

8. Stop the server
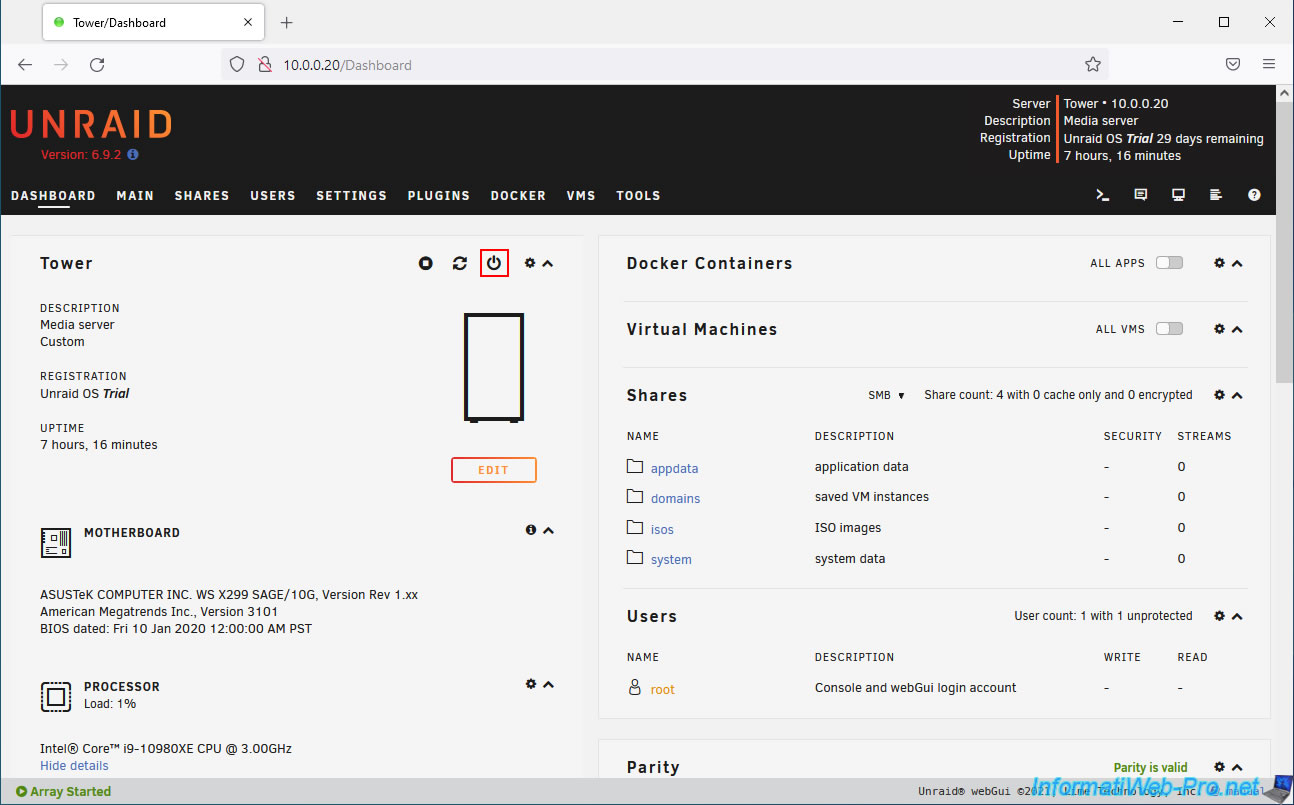
To shut down your Unraid server, go to the "Dashboard" tab and click the power button (outlined in red in the image).
Confirm stopping your server by clicking "Proceed".
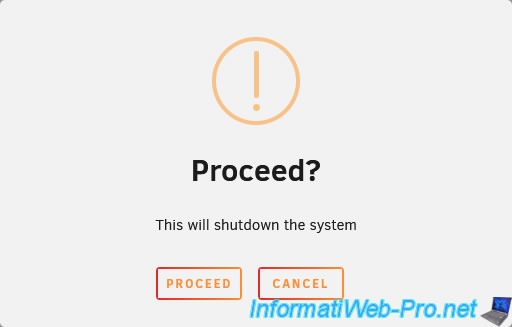
The message "System is going down" appears.

9. Automatically start the array when Unraid starts
Start your Unraid server and go to the "Main" tab.
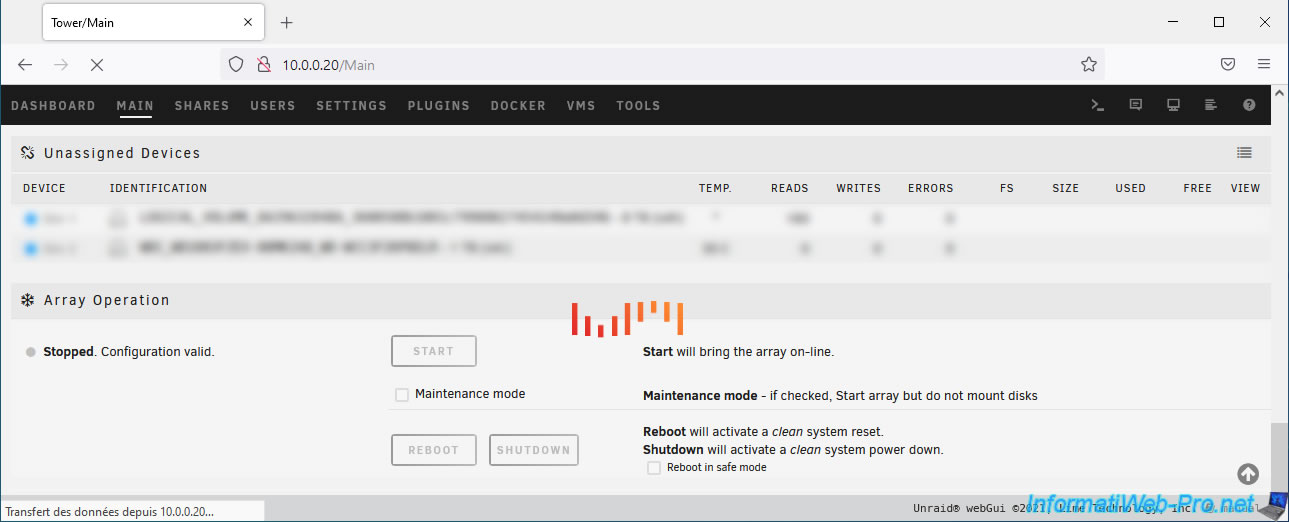
You'll quickly notice that your array is not started (Array Stopped) and that its automatic startup is disabled (Autostart Disabled).
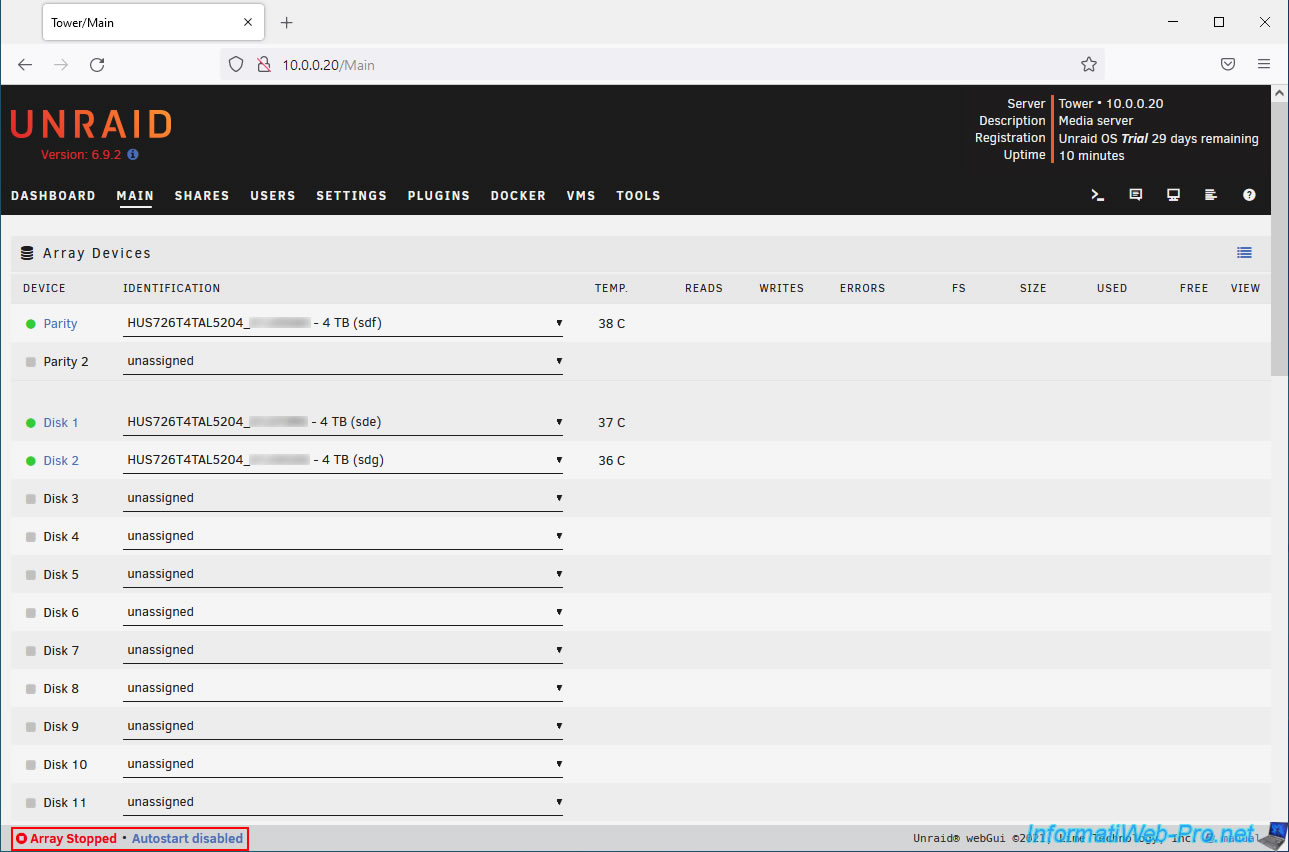
In fact, by default, the array is configured not to start automatically when your Unraid server starts.
Except that without the array, you won't be able to do much.
Therefore, we recommend enabling automatic startup for it.
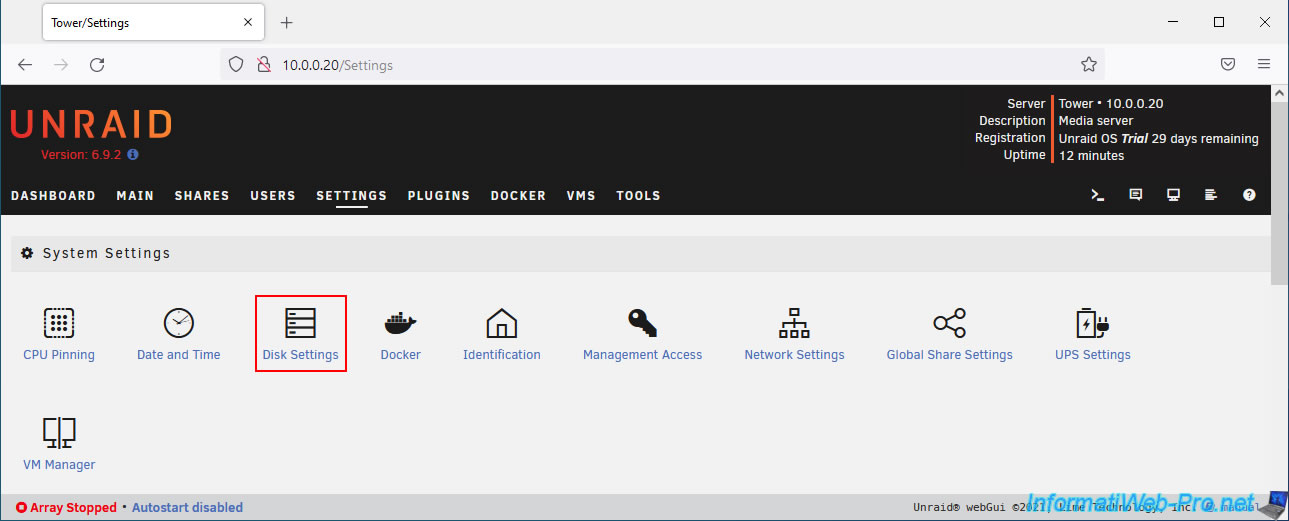
To do this, go to: Settings -> Disk Settings.
Enable the "Enable auto start" option by selecting "Yes".

Then, click on "Apply" a little further down.

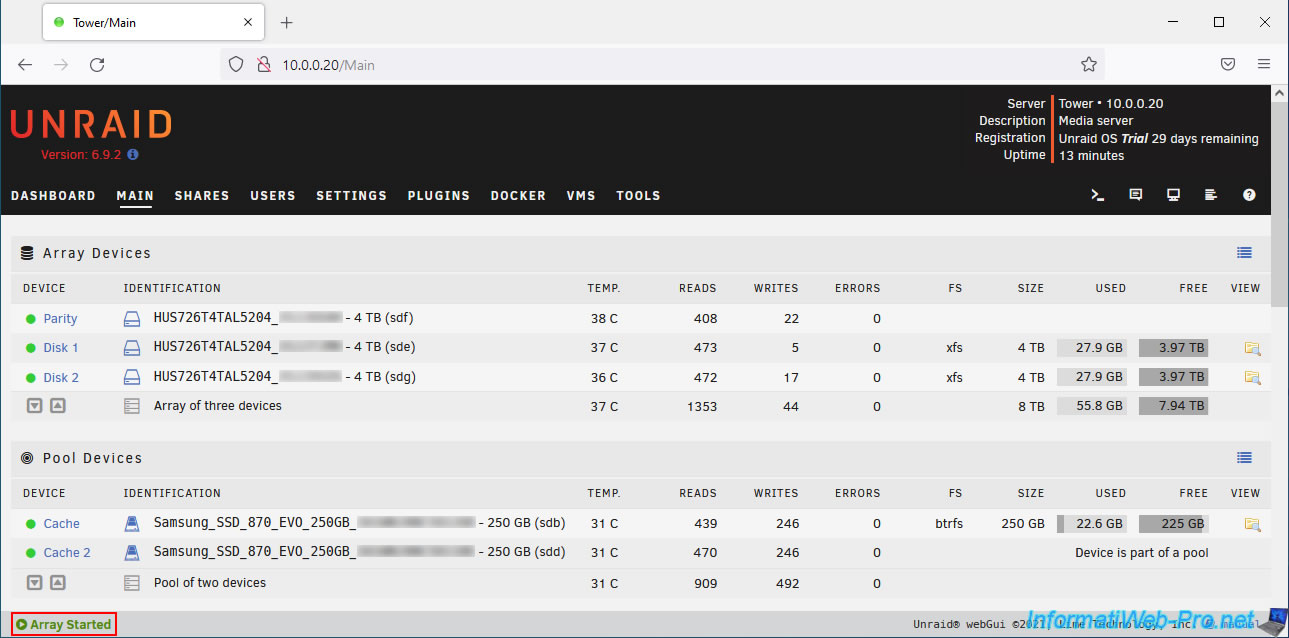
Then, return to the "Main" tab and click "Start" to start your array.
On subsequent reboots, this will no longer be necessary, as your array will automatically start when your Unraid server starts.

Wait a few seconds while the array boots.
And there you have it, your array is started.
10. Purchase an Unraid Plus or Pro license
As previously explained, Unraid is a paid solution for which you can obtain a 30-day trial period.
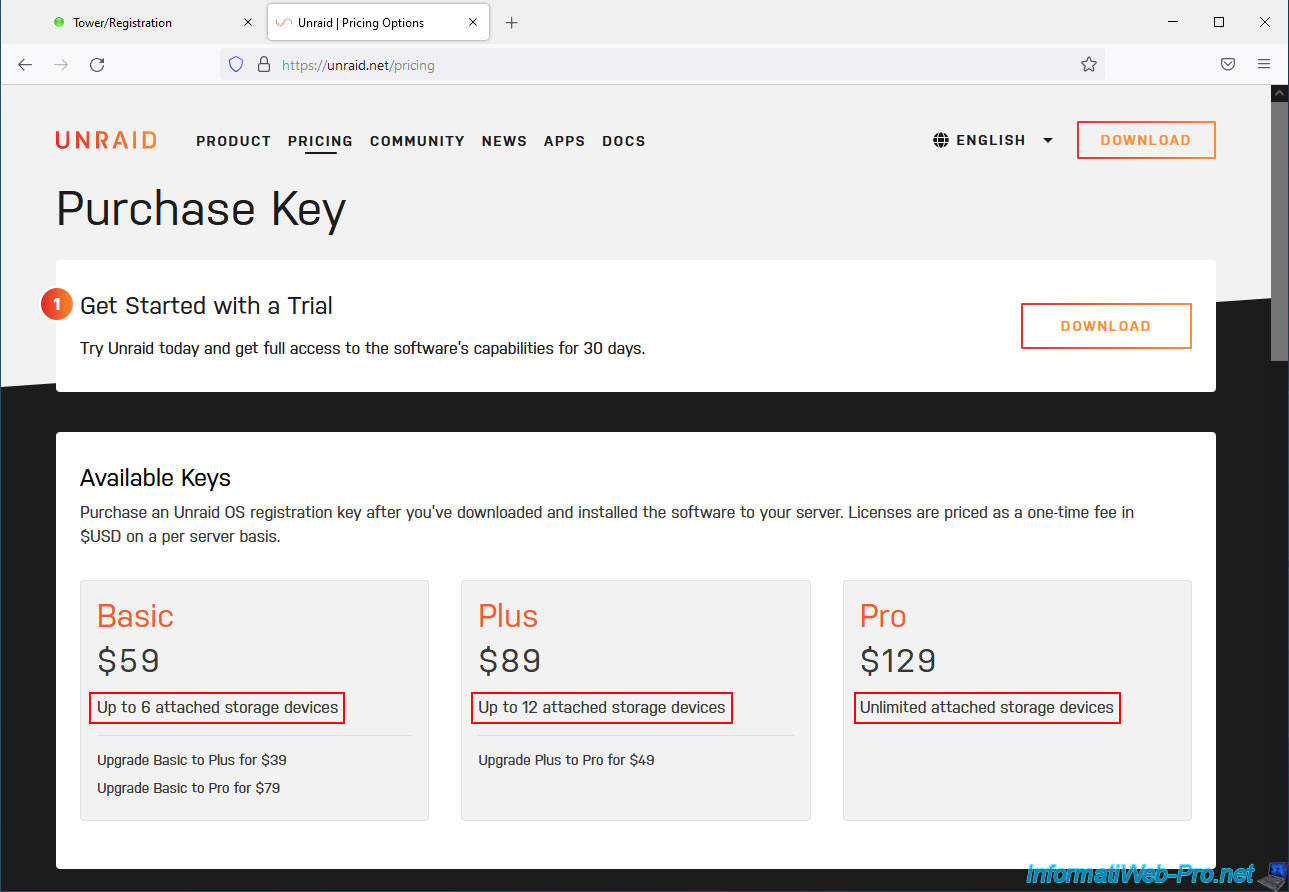
The main difference between the different editions is the price and the number of storage devices (hard drives, SSDs, etc.) that you can connect to your server.
- Basic: $59. Allows use of up to 6 storage devices.
- Plus: $89. Allows use of up to 12 storage devices.
- Pro: $129. No limit on the number of storage devices.
Note that you can also purchase a small license now and upgrade later if you wish.
Although the final price you pay will be slightly higher if you choose to upgrade later.
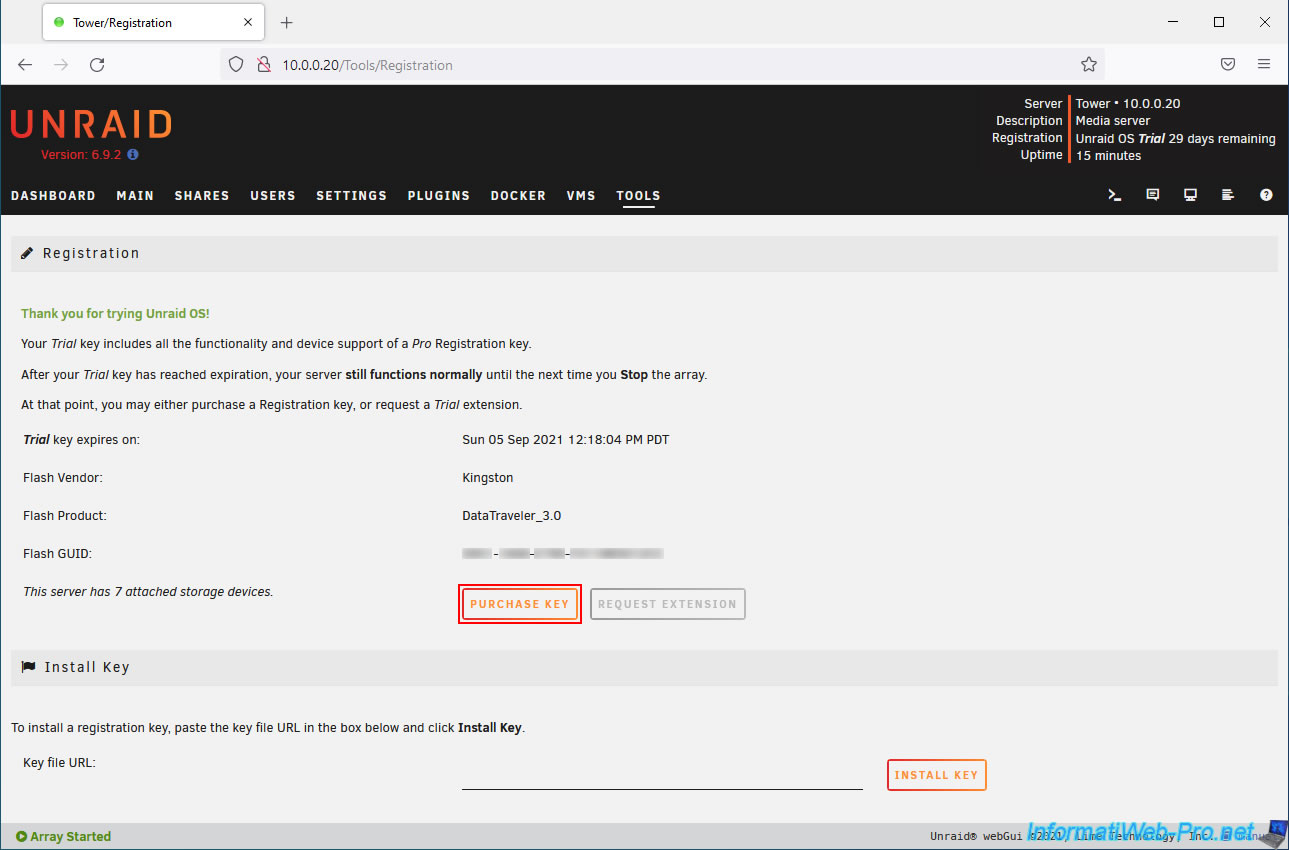
To purchase a license for your Unraid server, you must access its web interface and click on the "Registration - Unraid OS Trial xx days remaining" line.
You can also go to: Tools -> Registration.
On this page, Unraid displays the number of devices connected to your computer.
In our case, it detects 7: This server has 7 attached storage devices.
Click the "Purchase key" button.
You will be redirected to the Unraid website with a rather special address that displays the GUID of your USB key (since the license will be linked to it) and the number of storage devices connected to your server.
Depending on the number of storage devices connected to your server, you will have the choice between different editions: Basic, Plus, and/or Pro.
In our case, we chose the Pro edition.

Next, fill out the form by selecting "Individual" (if you are an individual) or "Business/Organization" (if you are a company).
In the line "How did you hear about us", do not hesitate to indicate the name of our website "InformatiWeb Pro".

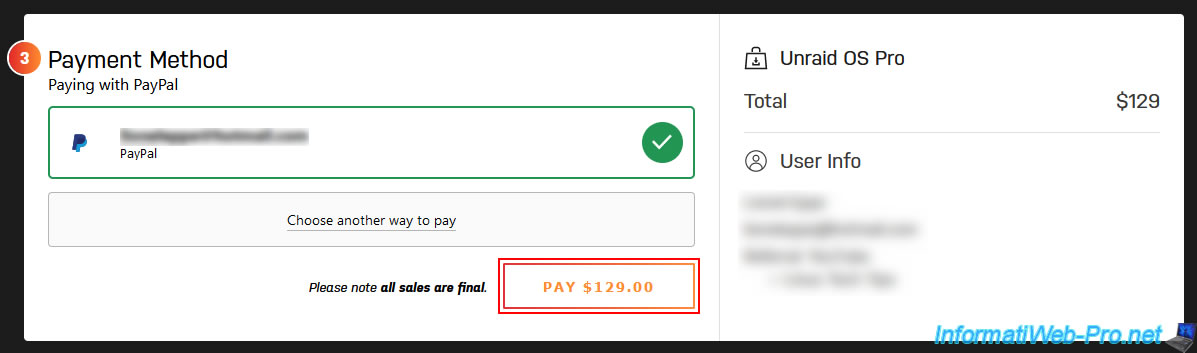
Select your preferred payment method: Card, PayPal, or Alipay.
In our case, we chose PayPal because it's simpler and more secure.
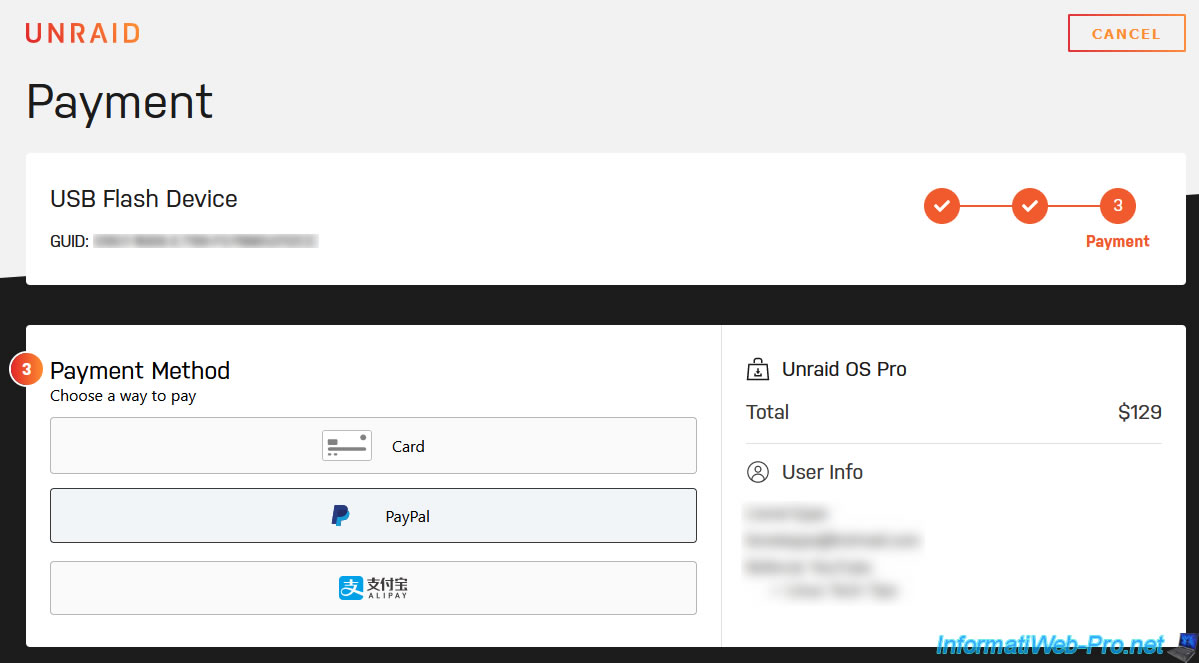
Then, click on the PayPal button that appears.
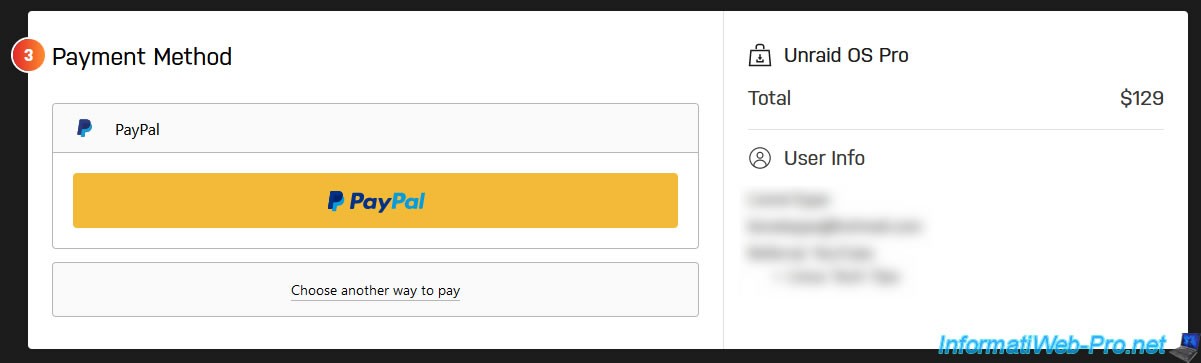
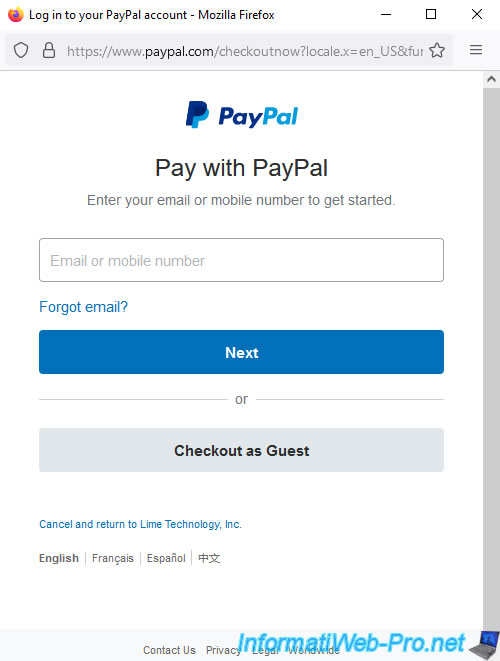
Log in to your PayPal account using the small window that appears.
If you have sufficient PayPal balance, simply click "Continue".
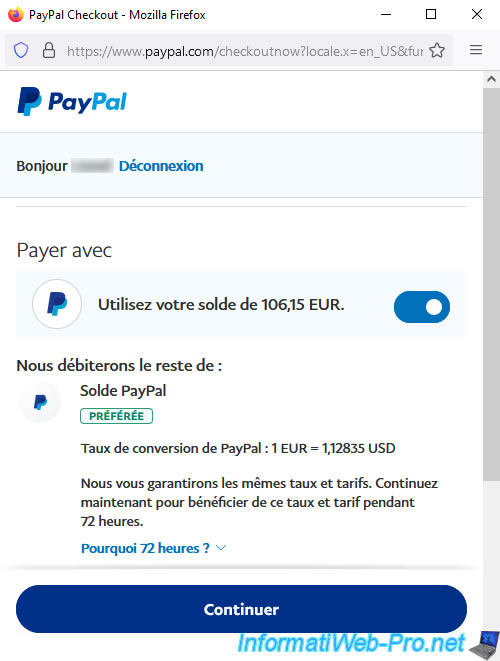
Then, click on: Pay $ xx.xx.
If this appears, simply click RESUBMIT.

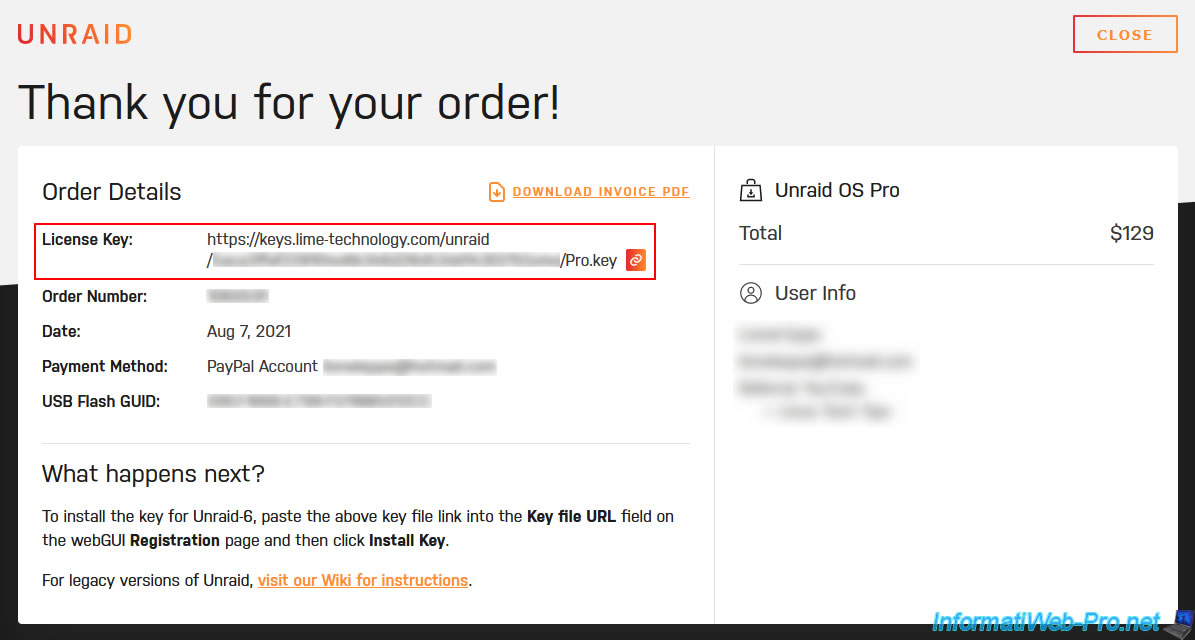
The "Thank you for your order" page appears with an address to your personal license file.
Copy the link.
Share this tutorial
To see also
-
NAS 12/4/2025
Unraid 6.9.2 - Define a private static IP address
-

NAS 4/8/2026
Unraid 6.9.2 - Docker - Install a media server (Jellyfin)
-

NAS 7/8/2026
Unraid 6.9.2 - Docker - Install a password manager (Vaultwarden)
-

NAS 6/17/2026
Unraid 6.9.2 - SWAG - Access Nextcloud via reverse proxy and personal domain
No comment