Install and configure your NAS server with Unraid 6.9.2
- NAS
- Unraid
- 21 November 2025 at 13:38 UTC
-

- 3/5

7.3. Building the parity disk
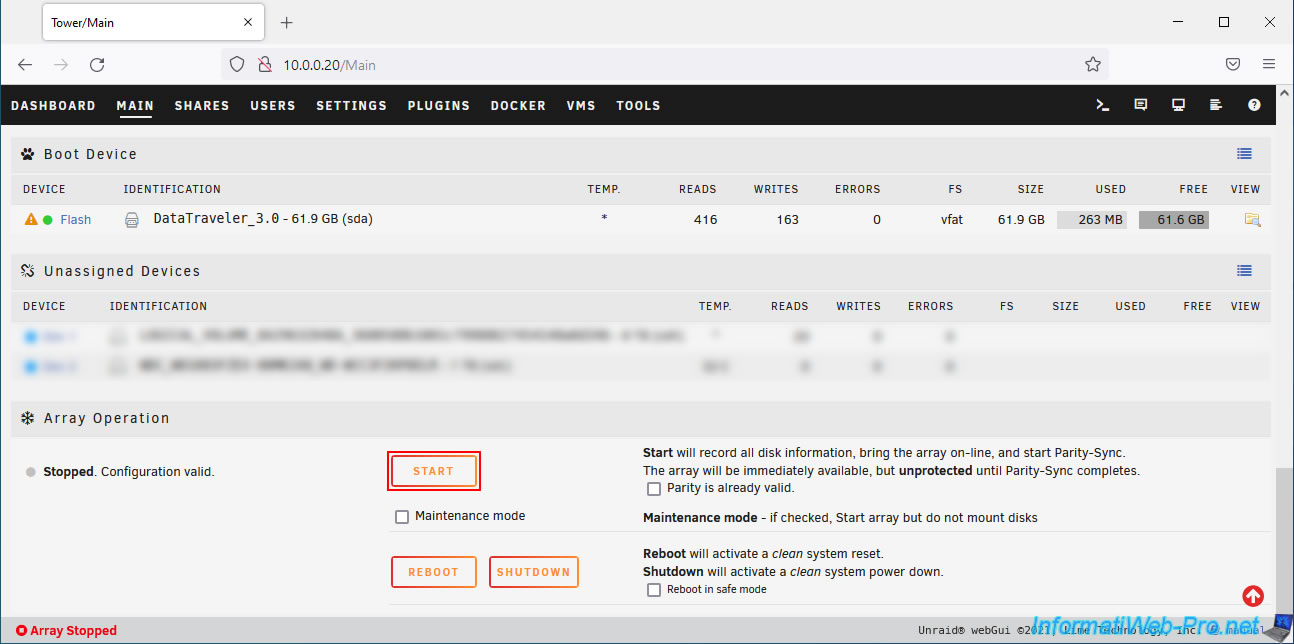
So far, you've only selected which disks you want to use as parity disks, storage disks, and for the cache pool.
To create the parity disk for the first time, click the "Start" button.
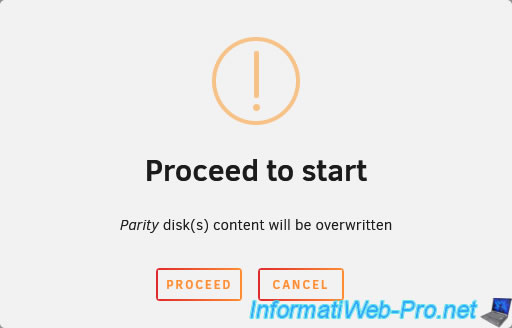
Unraid warns you that the contents of the disk(s) selected as parity disks will be overwritten (and therefore permanently lost).
Please wait a few seconds.
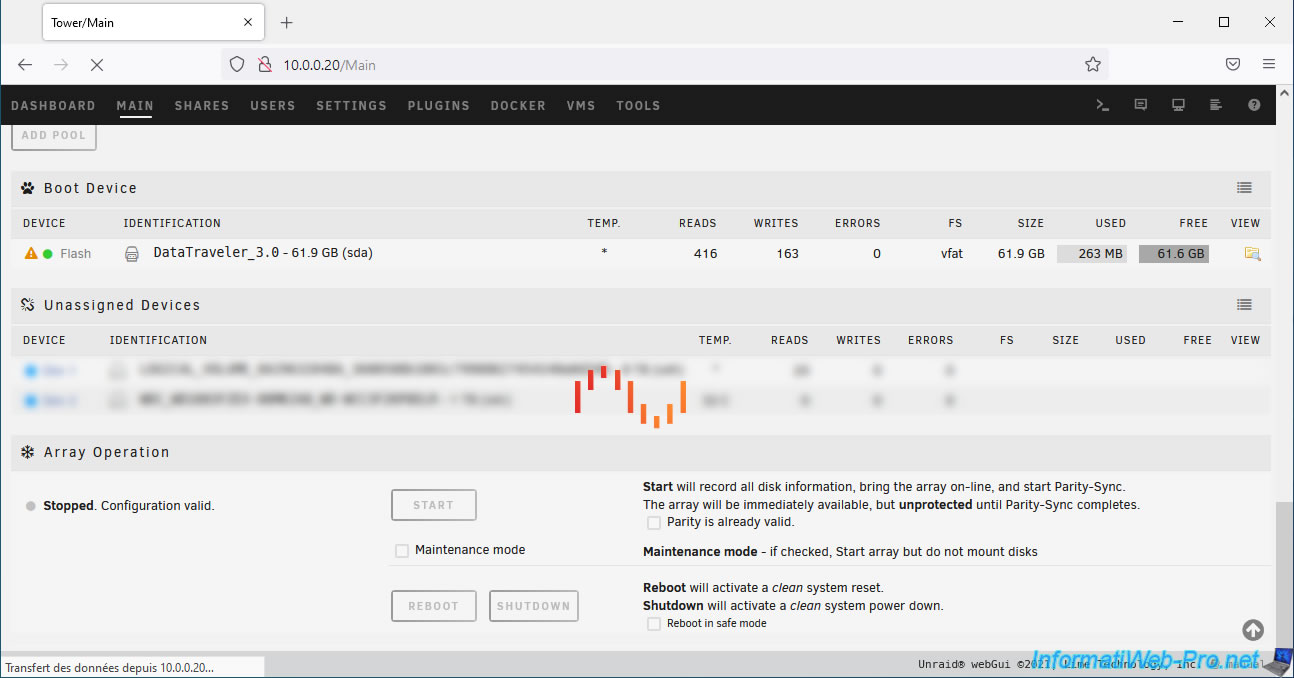
Then the page will refresh automatically and a lot of information will appear concerning:
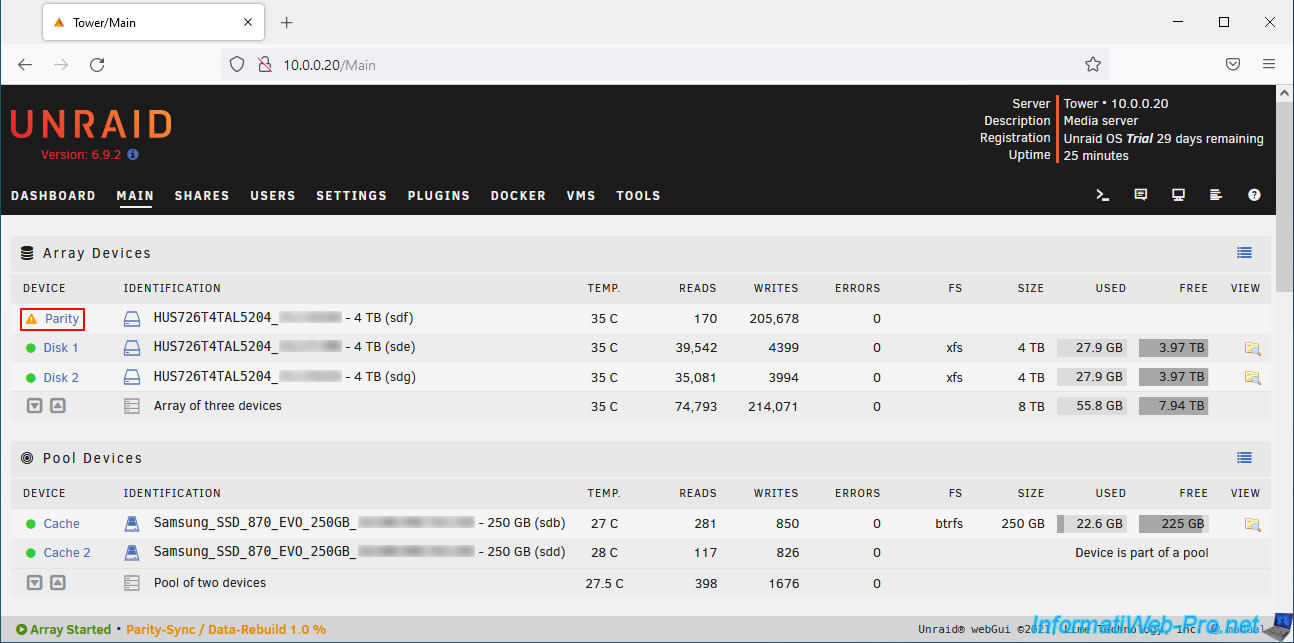
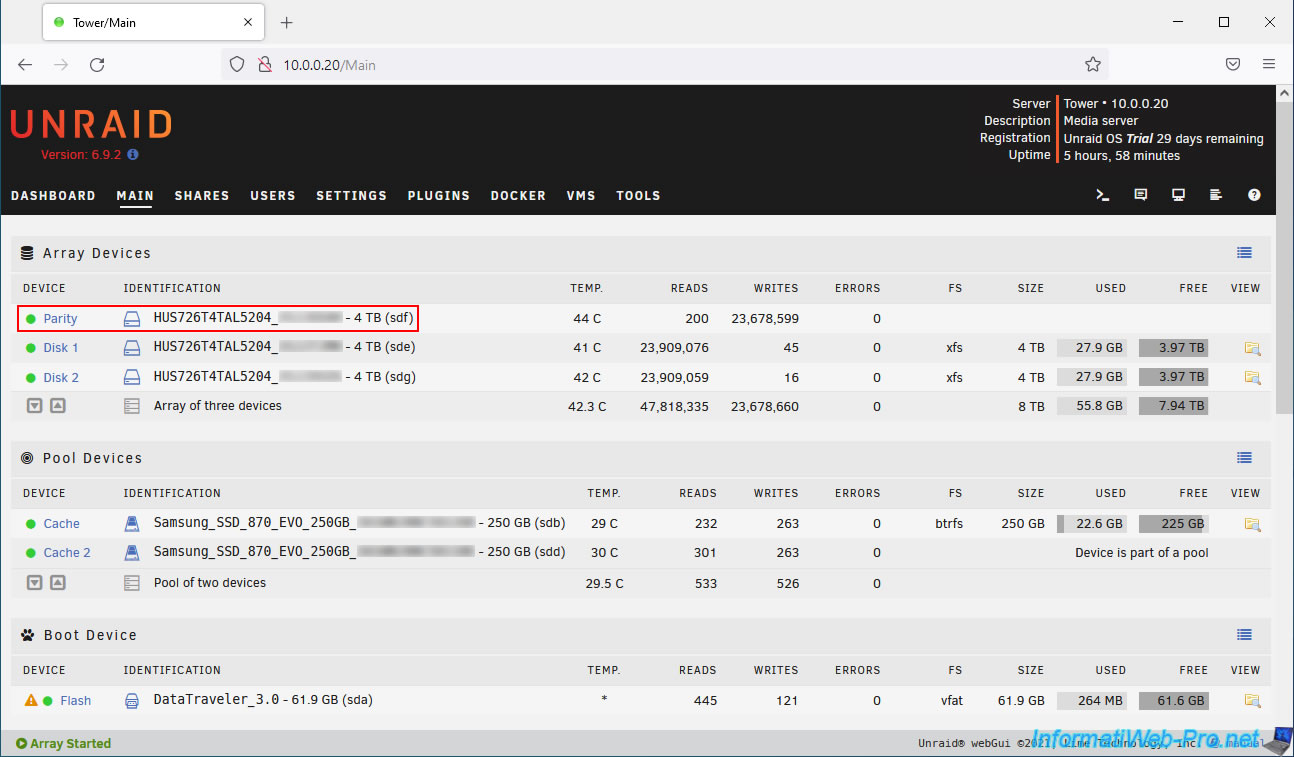
- Array Devices: your array, consisting of one or more parity disks (Parity) and storage disks (Disk 1, ...).
- Pool Devices: your cache pool (default).
- Boot Device: the USB key where Unraid is installed and its configuration files are stored.
- Unassigned Devices: unassigned disks if you haven't assigned them all to your array or pools. In our case, these disks are used for other purposes.
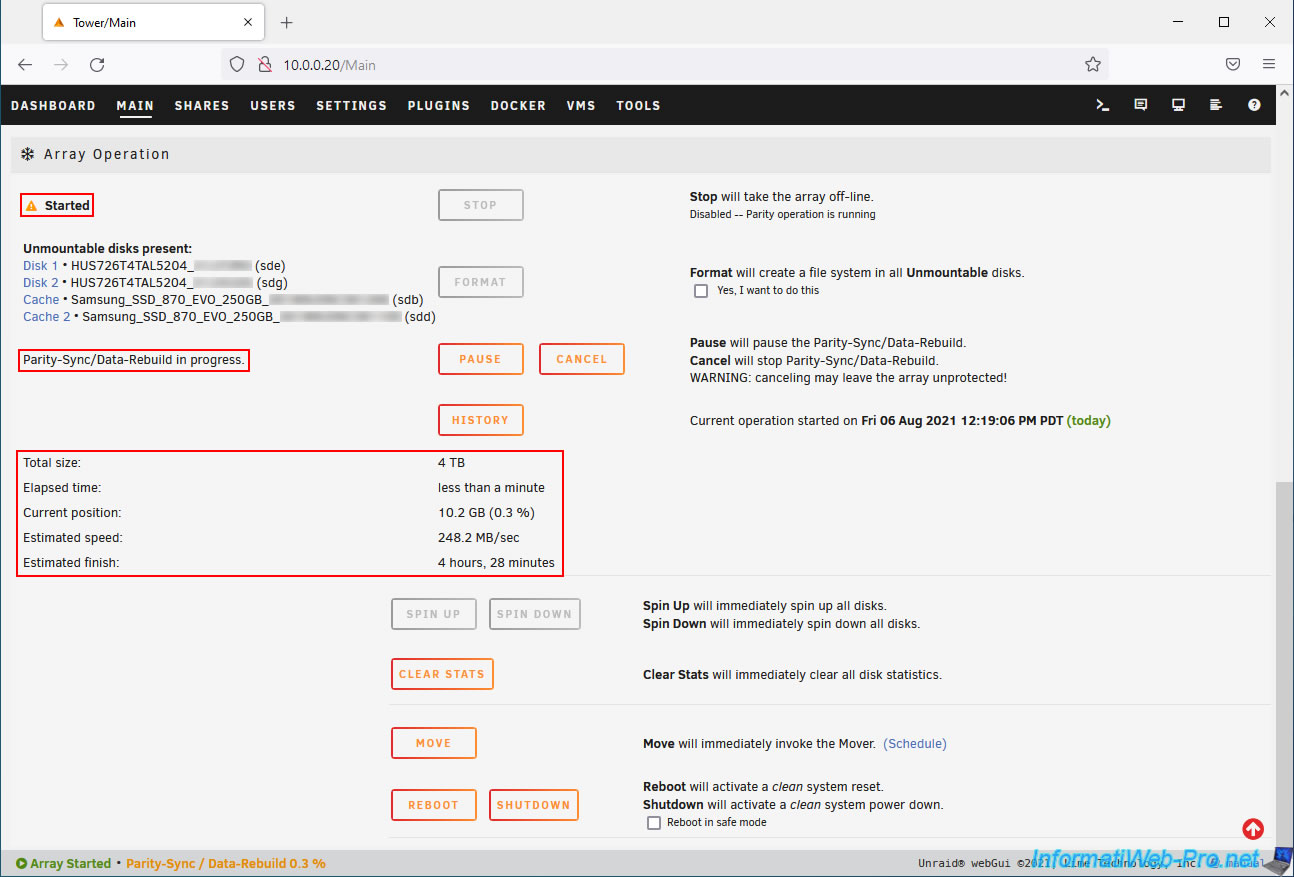
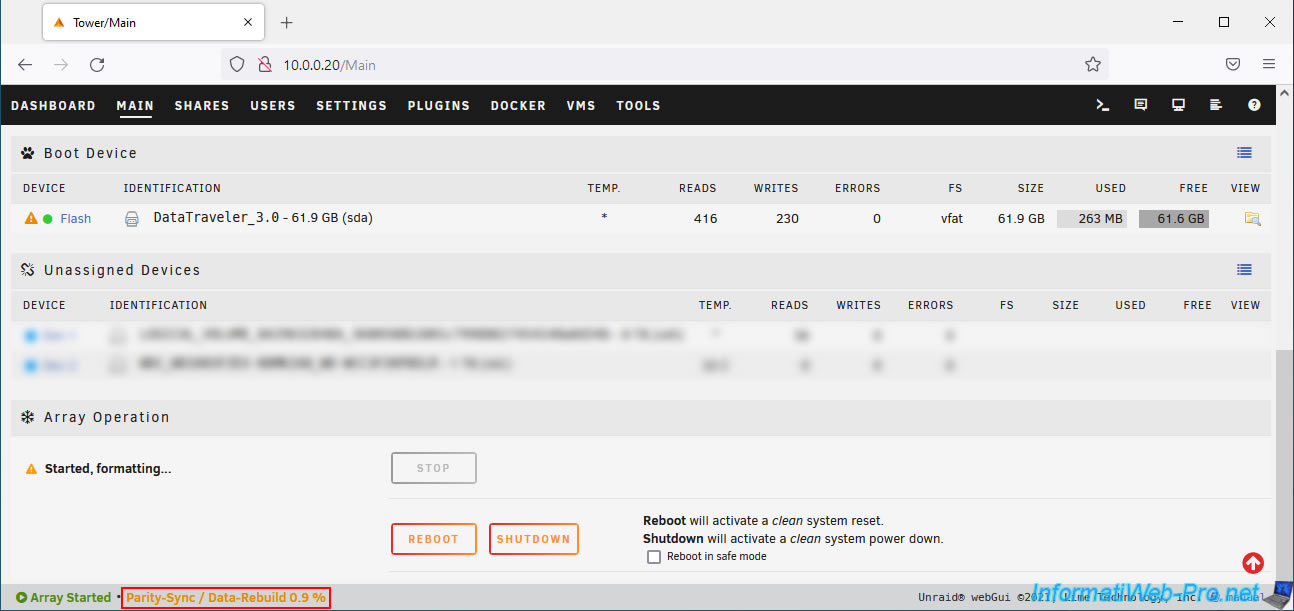
As you can see, Unraid displays a warning (orange triangle) for the parity disk.
This is because it hasn't been built yet.
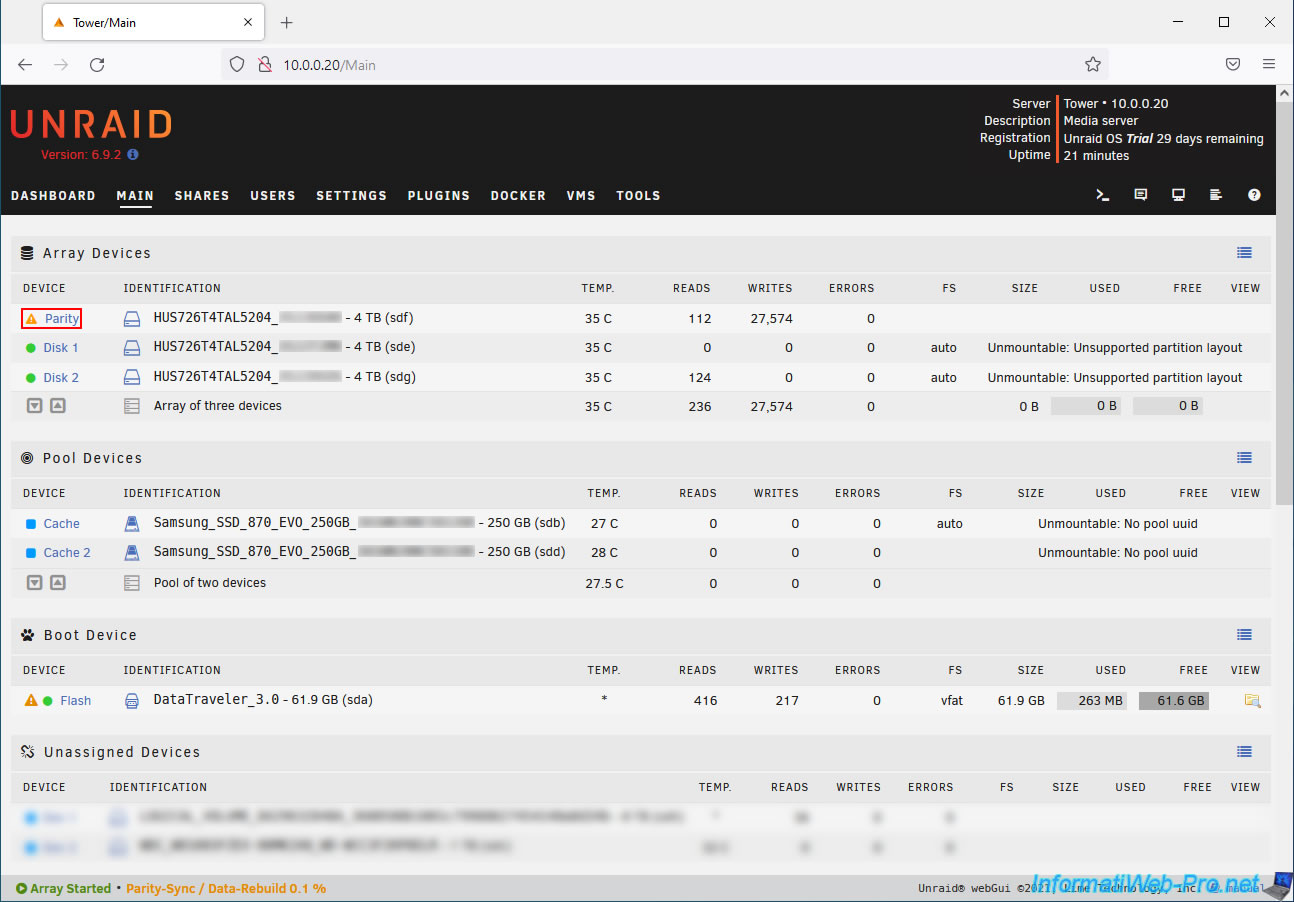
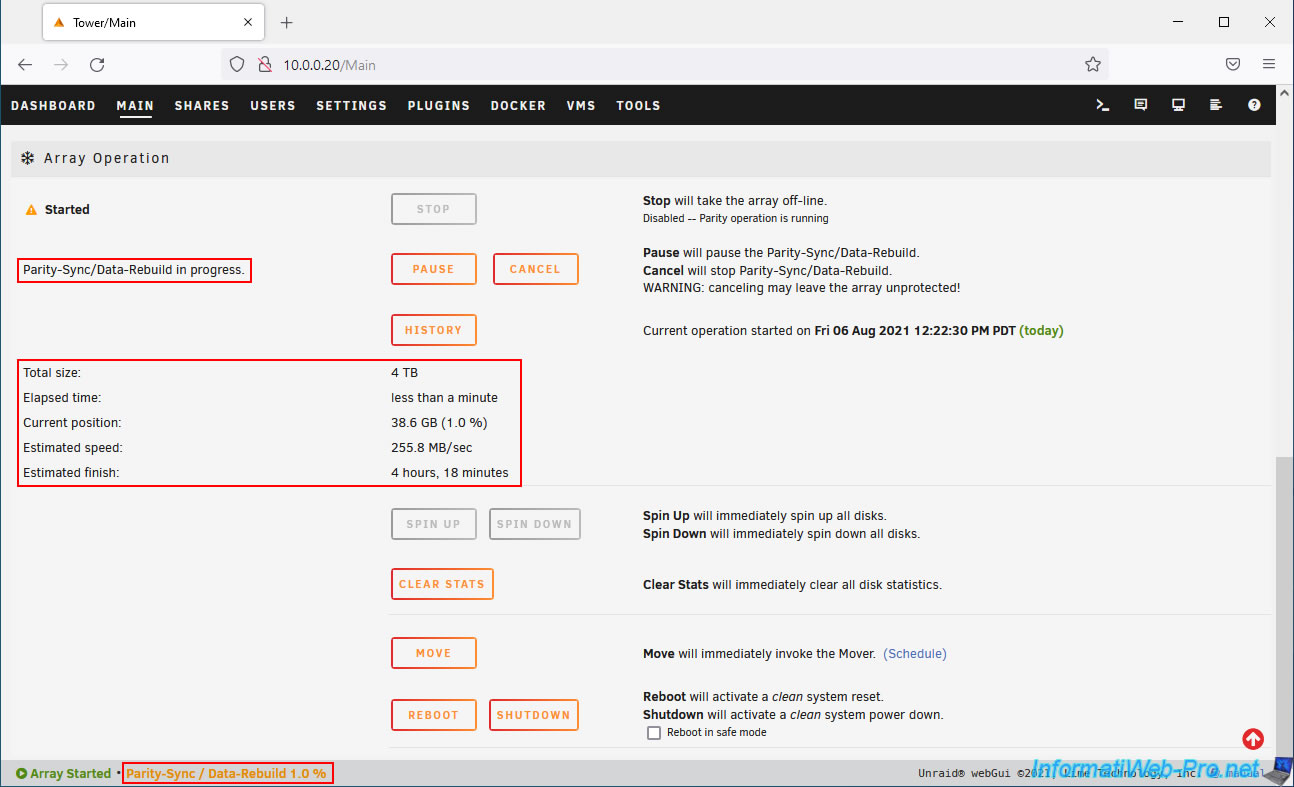
If you look at the bottom of this page, you'll see that the parity disk build (Parity-Sync/Data-Rebuild in progress) has started automatically.
As you can see, Unraid estimates that it will take us 4 hours and 28 minutes to create our 4TB parity disk.
Notifications will then appear to warn you that the parity disk is being created on your hard drive (in our case, the hard drive: HUS726T4TAL5204_...).
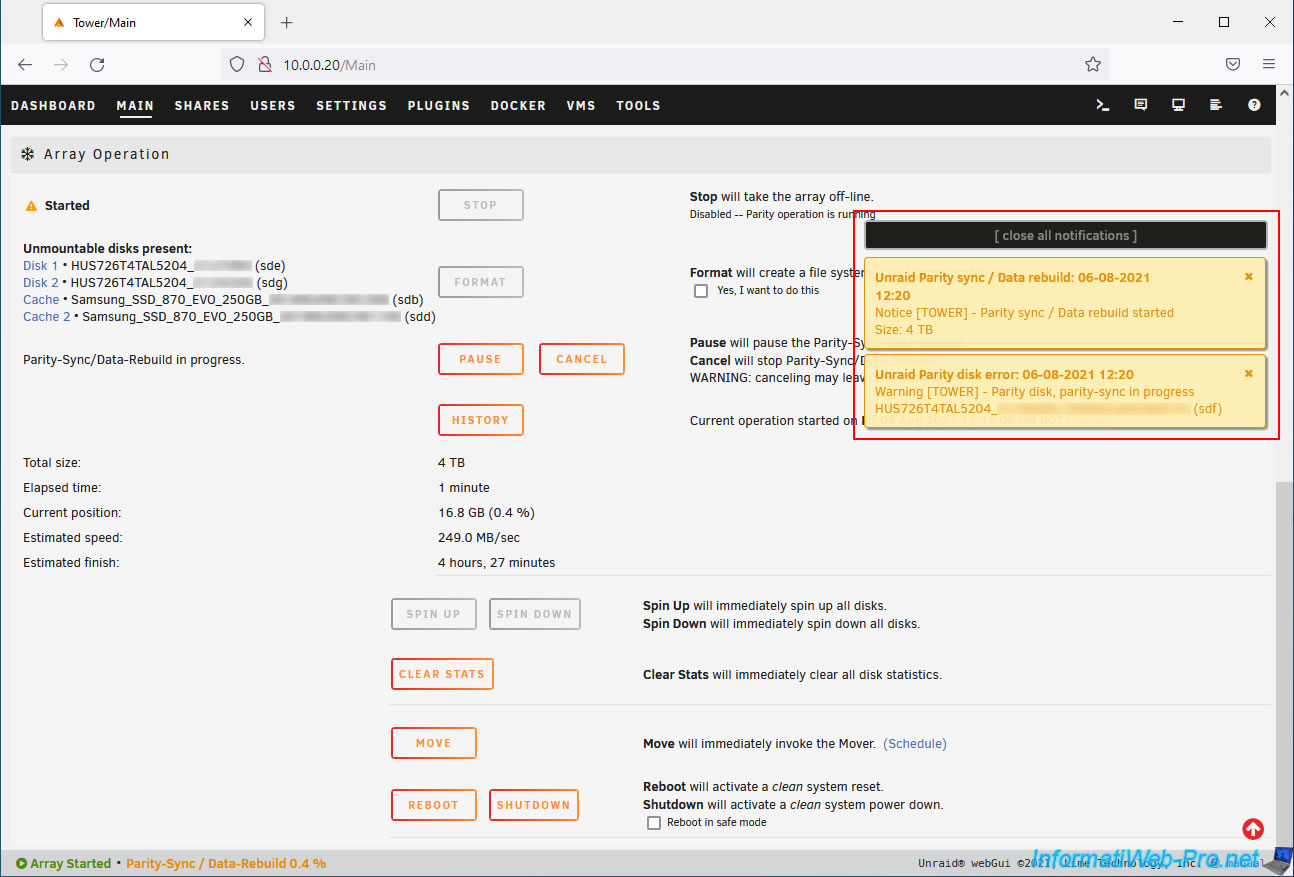
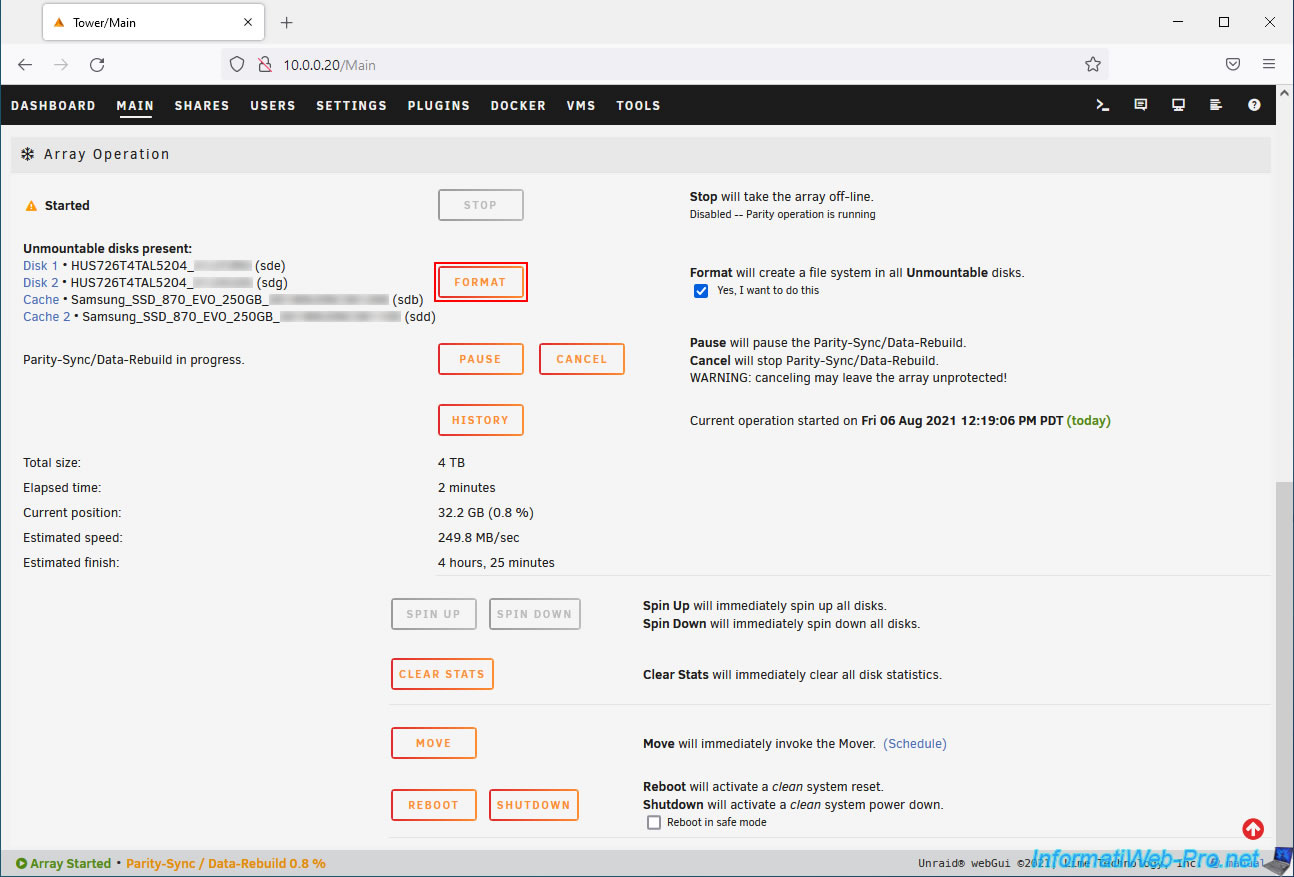
If you have new hard drives, you probably won't have a problem.
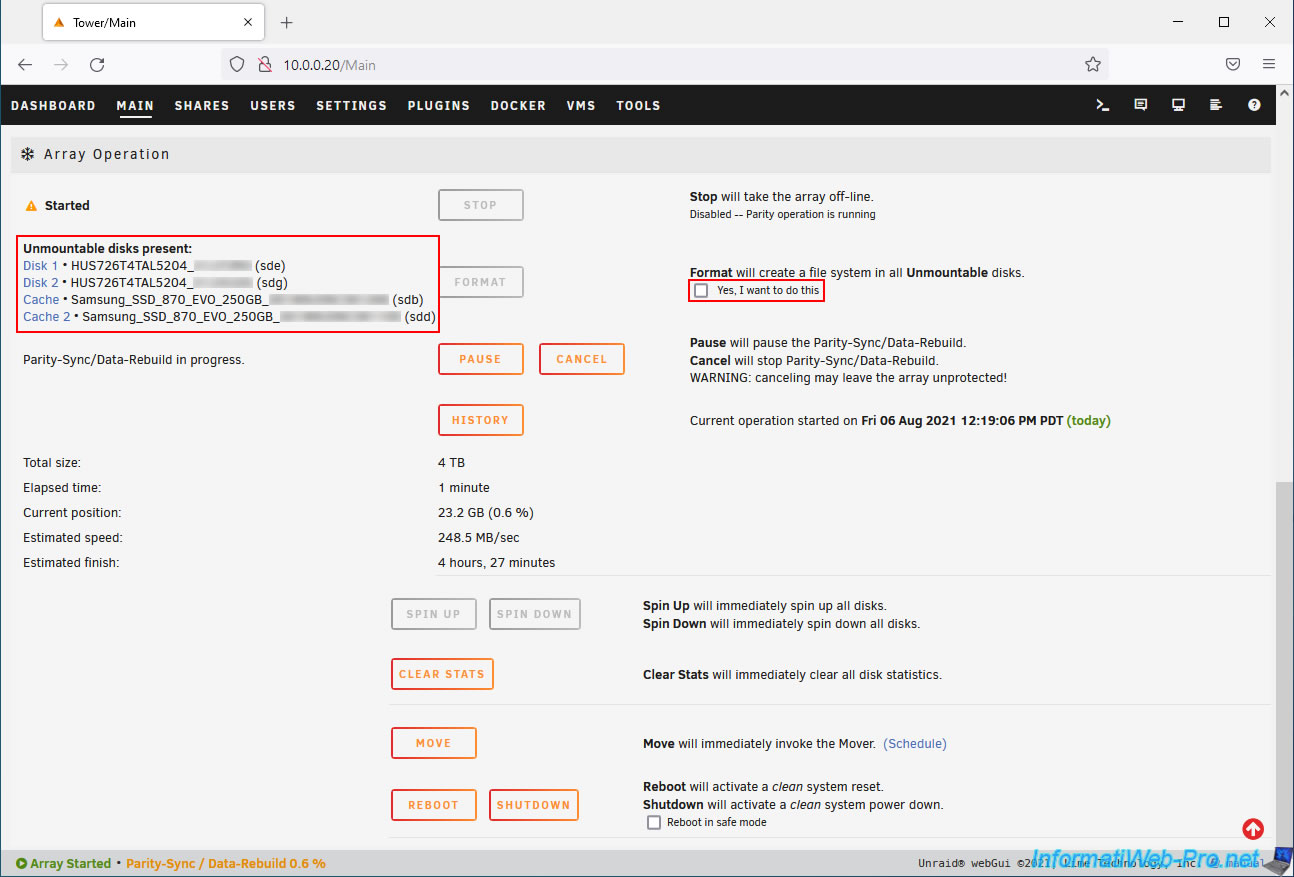
However, if you're recovering drives you've used before, they may appear as "Unmountable disks".
In this case, check the "Yes, I want to do this" box to erase them and create a new file system on them.
There's no need to wait for the parity calculation to finish. This calculation process will be paused while these drives are formatted, and it only takes 30 seconds.
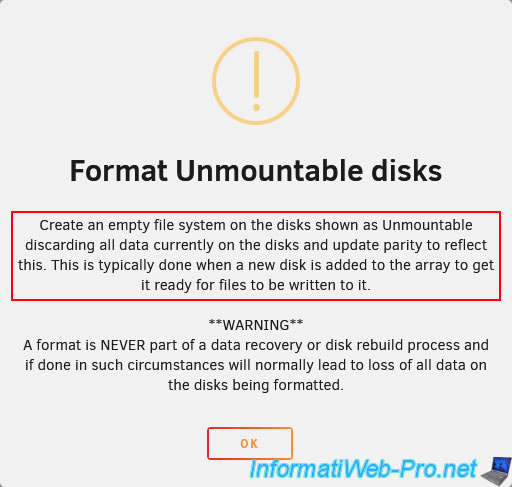
A warning will appear warning you that this will create an empty file system on all disks listed as "Unmountable."
This will erase any data on them.
Click OK.
Then, click "Format" to format these drives.
This will erase the data on them and create an empty file system on them to prepare them for storing data from Unraid shares.
Please wait for a few seconds.
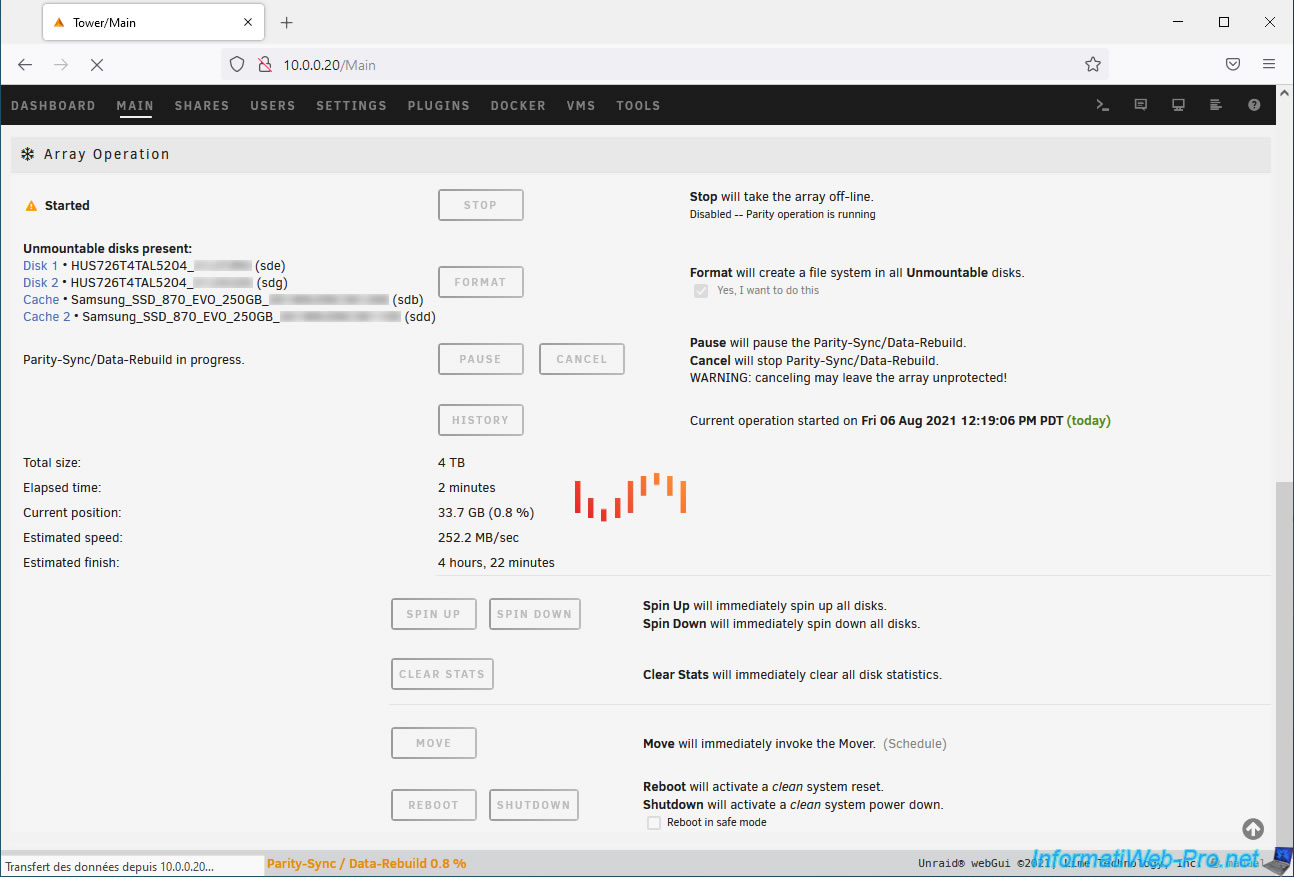
The page will refresh and you will see the message "Formatting device(s)" appear in orange at the bottom of the page.
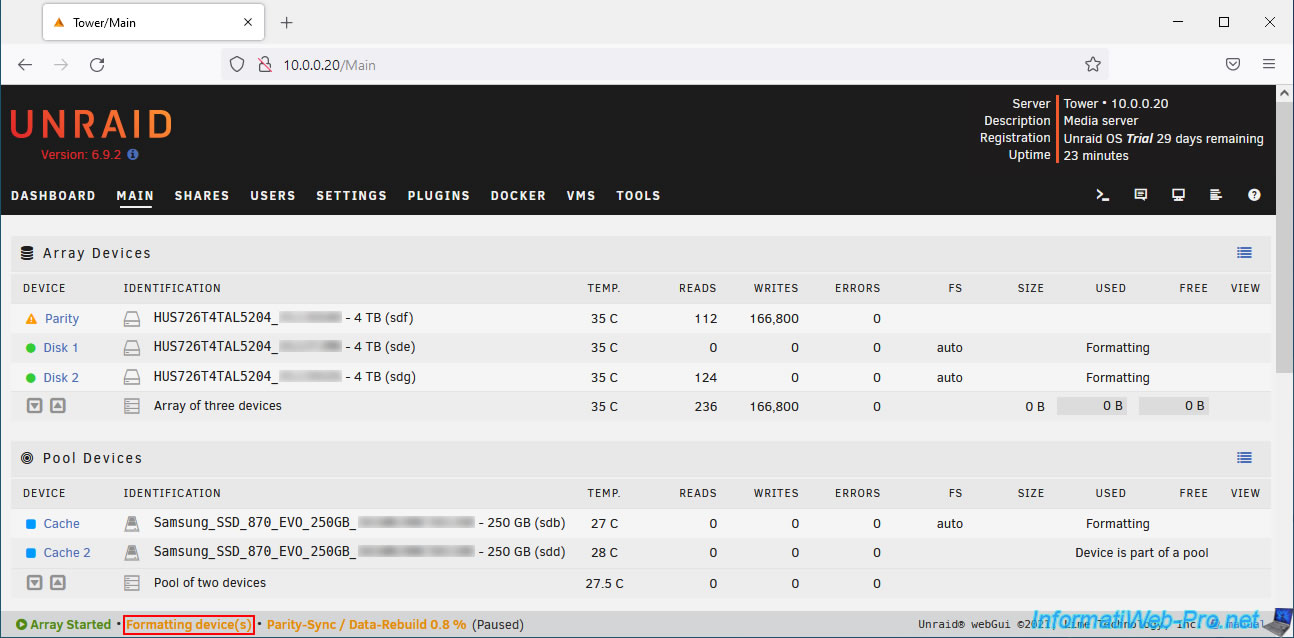
At the bottom of the page, you'll see that the formatting of these disks has started.
Note that the parity disk creation process has been temporarily paused: Parity-Sync / Data-Rebuild x.x% (Paused).

Once the formatting is complete, the message "Starting services" will appear in blue at the bottom of the page for a brief moment.
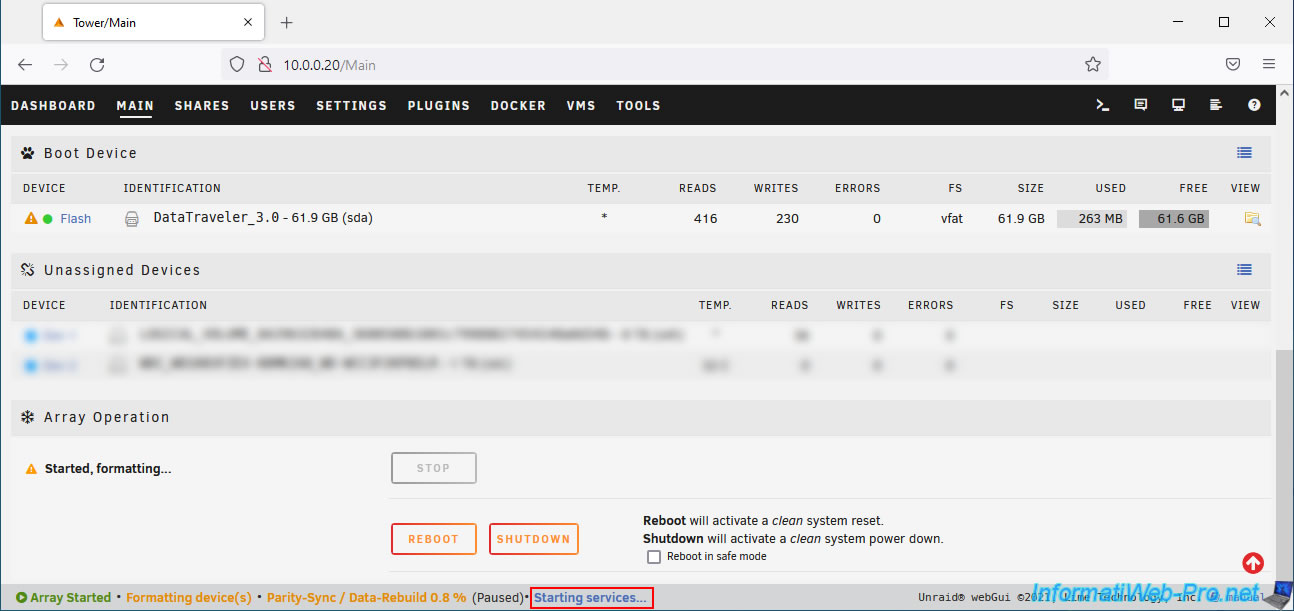
The parity disk creation process will continue where it was paused.
And the page will refresh again.
The parity disk is still in a warning state because its creation is not complete.
If you look at the disks (SSDs) selected for the "cache" pool, you will see that the first disk (SSD) in the pool can be used to store data.
However, the other disks in the pool will be copies of the first disk (SSD) synchronized in real time thanks to the RAID 1 system supported by btrfs. Hence the mention "Device is part of a pool".
At the bottom of the page, you will see that the parity disk creation continues and the warning about "Unmountable disks" has disappeared.
Once the parity disk construction is complete, green notifications will appear:
Plain Text
Unraid Parity sync / Data rebuild.
Parity sync / Data rebuild finished ...
Plain Text
Parity disk returned to normal operation [hard disk model selected as parity disk] ...
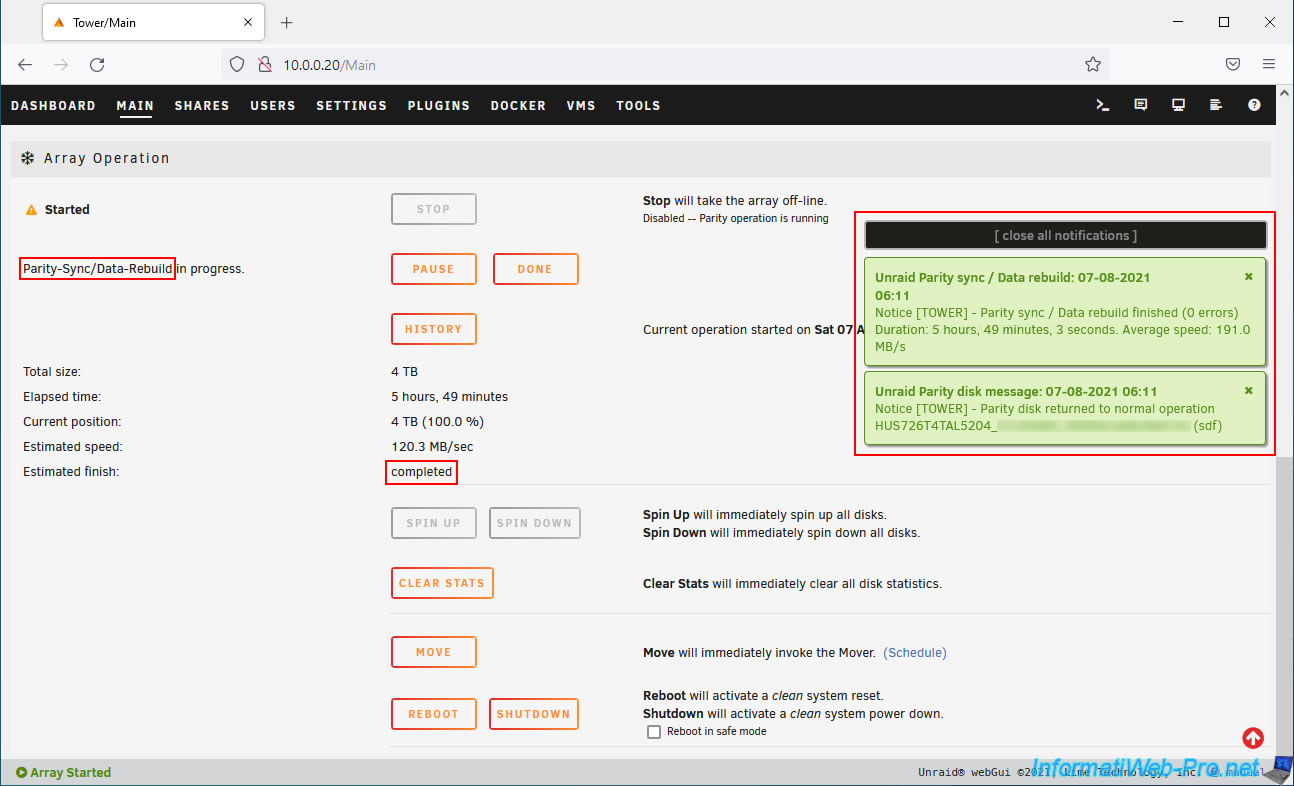
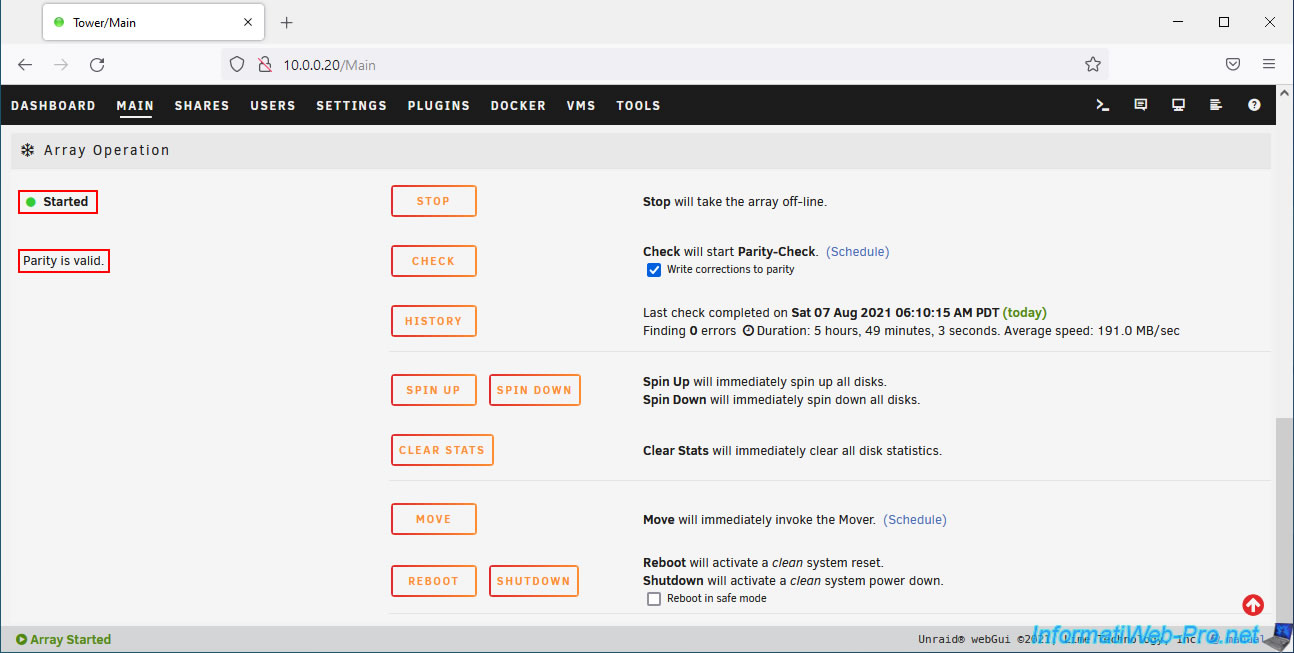
For the estimated remaining time, you will see the status "completed" displayed.

Now that the parity disk has been built, a green circle is displayed instead of the orange triangle.
This means that this disk is good.
At the bottom of the page, you will see that the array is started and that the parity is valid.
Share this tutorial
To see also
-
NAS 4/8/2026
Unraid 6.9.2 - Docker - Install a media server (Jellyfin)
-
NAS 3/18/2026
Unraid 6.9.2 - Fixing common problems
-

NAS 6/17/2026
Unraid 6.9.2 - SWAG - Access Nextcloud via reverse proxy and personal domain
-
NAS 5/13/2026
Unraid 6.9.2 - SWAG - Locally access the reverse proxy (SWAG)
No comment